I want something cold, something sweet, and something that tastes like a campfire without actually having to build one. It’s July, it’s hot, and my oven is basically a weapon of self-destruction right now. I have graham crackers, I have marshmallows, and I have chocolate. The only thing I don’t have is the patience to turn on a single heat source. That’s how this No-Bake S’mores Icebox Cake happened—out of pure, sweaty necessity.
Honestly, I wasn’t even trying to make a recipe. I was just staring into my pantry, hoping a snack would materialize. But then I remembered the magic of an icebox cake—how layers of cookies or crackers soften into something that tastes like a real, honest-to-goodness cake after a few hours in the fridge. And I thought, why not do that with s’mores? So I grabbed a box of graham crackers, a tub of whipped topping, and a bag of chocolate chips, and I started stacking.
The first bite, about six hours later, was a revelation. The graham crackers had softened into a tender, almost cakelike layer, the chocolate had set into a fudgy ribbon, and the marshmallow fluff had melted into the cream to create a cloudlike filling. It wasn’t just good. It was better than a real s’more, because there was no burnt marshmallow and no melted chocolate running down my wrist. It was perfect, and it took maybe five minutes to put together. That’s the kind of recipe that sticks with you.
Why You’ll Love This Recipe
Let me tell you why this No-Bake S’mores Icebox Cake is going to be your new favorite summer dessert. It’s not just about the taste—it’s about the sheer, almost ridiculous ease of it. You don’t need a single kitchen appliance. No mixer, no oven, no stovetop. Just your hands, a dish, and a fridge.
- Quick & Easy: This comes together in about 5 minutes of active work. I’m not exaggerating. You layer, you chill, you eat. That’s it.
- Simple Ingredients: You probably have everything in your pantry right now. Graham crackers, chocolate, marshmallows, and something creamy. No fancy grocery trips required.
- Perfect for Summer: When it’s 95 degrees outside and the thought of turning on the oven makes you want to cry, this is your answer. It’s cold, it’s refreshing, and it’s completely no-bake.
- Crowd-Pleaser: I’ve brought this to three different cookouts this summer, and every single time, people ask for the recipe. Kids love it. Adults love it. It’s a universal win.
- Unbelievably Delicious: The texture is what gets me. The graham crackers soften into a tender, almost cake-like layer, while the chocolate and marshmallow create a creamy, fudgy filling. It’s comfort food, reimagined for hot weather.
What makes this recipe different from every other s’mores dessert out there? It’s the technique. Most s’mores desserts try to replicate the campfire experience with torches or broilers, which always ends in burnt sugar or melted chocolate disasters. This one uses the magic of refrigeration to create a texture that’s actually better than the original. The layers meld together into a cohesive, sliceable cake that tastes like a s’more but feels like a cloud. It’s the best version of a s’more, and I’ll die on that hill.
Ingredients You Will Need
This recipe uses simple, pantry-friendly ingredients to deliver that classic s’mores flavor without any fuss. The magic is in the layering and the chilling, not in complicated components.
- Graham Crackers: About 1 full box (14-16 full sheets). You’ll need them for the base and the layers. I prefer the classic honey-flavored ones, but cinnamon or chocolate work great too. Break them into squares as needed.
- Chocolate Chips: 1 cup (about 6 ounces) of semi-sweet or milk chocolate chips. I use Ghirardelli semi-sweet chips because they melt into a rich, not-too-sweet fudge layer. Dark chocolate works if you want a more intense flavor.
- Marshmallow Fluff: 1 jar (7 ounces). This is the secret to the creamy, cloudlike filling. You can use homemade marshmallow cream if you’re feeling ambitious, but the store-bought stuff works perfectly. Jet-Puffed is my go-to brand.
- Heavy Cream: 1 cup (240 ml). This gets whipped into a soft, billowy cream that lightens the whole cake. Make sure it’s cold for the best results.
- Powdered Sugar: 2 tablespoons. Just a little sweetness to stabilize the whipped cream. You can skip it if you prefer a less sweet dessert.
- Vanilla Extract: 1 teaspoon. Pure vanilla adds warmth and depth to the cream layer. Imitation works in a pinch, but pure is better.
- Butter: 2 tablespoons (unsalted). This gets melted with the chocolate to create a smooth, pourable fudge layer. It also helps the chocolate set up nicely in the fridge.
- Salt: A pinch of flaky sea salt. This is optional, but it really makes the chocolate pop. I love Maldon for this.
Substitution Tips:
- For a gluten-free version, use gluten-free graham crackers. They work exactly the same way.
- If you don’t have marshmallow fluff, you can use mini marshmallows. They’ll soften as the cake chills, but the texture will be slightly different—more marshmallowy, less creamy.
- Use coconut cream instead of heavy cream for a dairy-free option. Just refrigerate the can overnight and scoop out the solid part.
- If you’re not a fan of semi-sweet chocolate, use milk chocolate for a sweeter cake or dark chocolate for a more sophisticated flavor.
Equipment Needed
You don’t need much for this recipe, which is part of the beauty of it. Here’s what you’ll need:
- 8×8 or 9×9 Baking Dish: A square dish works best for layering. A glass dish is ideal because you can see the layers as they set, but metal or ceramic work fine too.
- Electric Mixer or Whisk: For whipping the cream. An electric mixer makes it fast and easy, but you can absolutely do it by hand with a whisk. It’ll just take a few minutes of elbow grease.
- Small Saucepan: For melting the chocolate and butter together. A double boiler works too, but a saucepan on low heat is perfectly fine.
- Spatula: For spreading the cream and fudge layers evenly. A rubber spatula is ideal.
- Measuring Cups and Spoons: For accurate measurements. I’m usually a “by eye” kind of cook, but for this recipe, precision helps with the layering.
I’ve made this cake in a pie dish before, and it worked—just be aware that the layers will be thicker and the cake might need a little more time to set. An 8×8 dish is really the sweet spot for even layers and clean slices.
Preparation Method
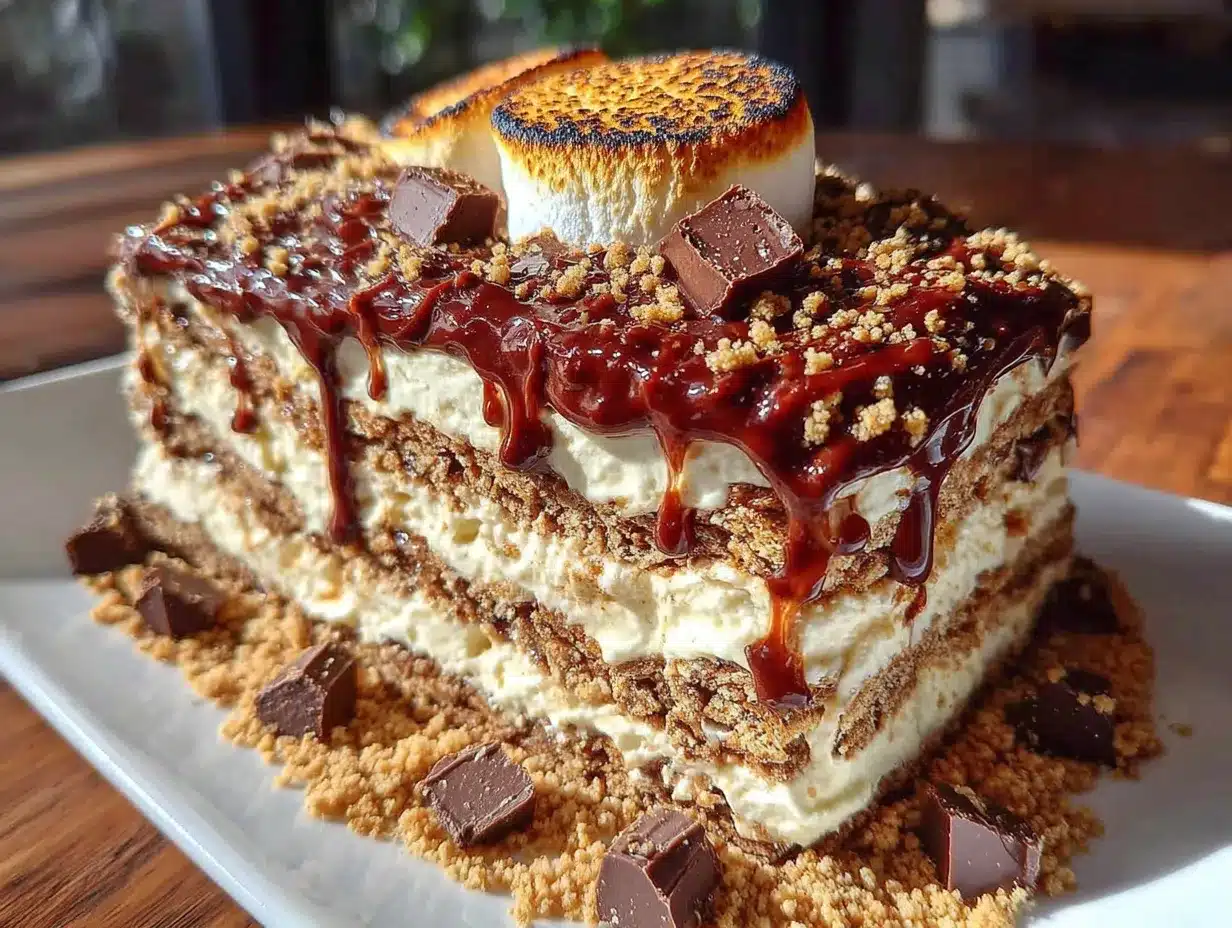
Alright, let’s get to the fun part. The whole process takes about 5 minutes of active work, plus at least 4 hours of chilling. Trust me, the waiting is the hardest part.
- Prepare the Chocolate Fudge Layer: In a small saucepan over low heat, combine 1 cup of chocolate chips and 2 tablespoons of unsalted butter. Stir constantly until everything is melted and smooth. This should take about 2-3 minutes. Don’t rush it—if the heat is too high, the chocolate will seize up. Once it’s smooth, set it aside to cool slightly while you work on the cream.
- Whip the Cream: In a large bowl, pour 1 cup of cold heavy cream. Add 2 tablespoons of powdered sugar and 1 teaspoon of vanilla extract. Using an electric mixer on medium-high speed, whip the cream until soft peaks form. This means when you lift the beaters, the cream holds a gentle shape that flops over. Don’t over-whip it, or you’ll end up with butter. If you’re doing it by hand, it’ll take about 5-7 minutes of steady whisking.
- Fold in the Marshmallow Fluff: Gently fold the entire jar of marshmallow fluff into the whipped cream. Use a rubber spatula and a light hand. You want to combine them until there are no more white streaks, but you don’t want to deflate the cream. The result should be a light, airy, cloudlike mixture that smells like a campfire.
- Layer the Graham Crackers: Arrange a single layer of graham cracker squares in the bottom of your 8×8 dish. Break them as needed to fit snugly. Don’t leave big gaps—you want a solid base. I usually fit about 4 full sheets, broken into 8 squares, in a single layer.
- Add the First Cream Layer: Spread about one-third of the marshmallow cream mixture evenly over the graham crackers. Use a spatula to smooth it out to the edges. Don’t press too hard, or you’ll break the crackers.
- Drizzle the Chocolate: Drizzle about one-third of the melted chocolate over the cream layer. Use a spoon or a piping bag if you want to be fancy. I just drizzle it in zigzags and let it spread naturally.
- Repeat the Layers: Add another layer of graham crackers, then another third of the cream, then another third of the chocolate. Repeat one more time, ending with a final layer of graham crackers on top. You should have three layers of graham crackers, three layers of cream, and three layers of chocolate.
- Top with Final Chocolate Drizzle: Pour the remaining chocolate over the top graham cracker layer. Use a spatula to spread it evenly. If you want, you can sprinkle a pinch of flaky sea salt on top now.
- Chill: Cover the dish with plastic wrap or a lid and refrigerate for at least 4 hours, but overnight is better. The graham crackers need time to soften and absorb the moisture from the cream. After 4 hours, the cake will be sliceable but still a little firm. After 8 hours, it’s perfection.
- Serve: Cut into squares and serve cold. The cake should be firm enough to hold its shape but soft and creamy on the inside. If it’s too soft, let it chill for another hour.
Sensory Cues: When you’re whipping the cream, listen for the change in sound—it goes from sloshing to a soft, muffled thump as it thickens. When you fold in the marshmallow fluff, the mixture should feel light and billowy, like a cloud in a bowl. When you slice the finished cake, the knife should glide through the layers without resistance, and the graham crackers should feel tender, not crunchy.
Cooking Tips & Techniques
I’ve made this cake about a dozen times now, and I’ve learned a few things the hard way. Here are my best tips for success:
- Don’t Skip the Butter: The butter in the chocolate layer is non-negotiable. It keeps the chocolate from hardening into a rock-solid layer in the fridge. Without it, you’ll end up with a chocolate disc that’s impossible to cut through.
- Let the Chocolate Cool: If you pour hot chocolate directly onto the cream, it will melt it. Let the chocolate cool for about 5 minutes after melting. It should be warm but not hot—think bathwater temperature.
- Use a Sharp Knife: When you’re ready to serve, use a sharp chef’s knife to cut through the layers. A dull knife will squish the cake and make a mess. Wipe the blade clean between cuts for neat slices.
- Patience is Key: I know it’s tempting to dig in after an hour, but the cake needs at least 4 hours to set. The graham crackers need time to soften, and the cream needs time to firm up. Trust the process.
- Room Temperature Ingredients: Make sure your heavy cream is cold, but your marshmallow fluff should be at room temperature. Cold fluff is stiff and hard to fold in evenly.
One time, I tried to speed things up by using a food processor to crush the graham crackers into crumbs and pressing them into a crust. It was a disaster. The crumbs never softened properly, and the cake fell apart when I tried to slice it. Stick with whole crackers—they layer better and create that iconic s’mores texture.
Variations & Adaptations
This recipe is incredibly versatile. Here are a few ways to make it your own:
- Peanut Butter S’mores Cake: Add a layer of peanut butter between the graham crackers and the cream. Just warm 1/2 cup of peanut butter in the microwave for 15 seconds and drizzle it over the crackers. The combination of chocolate, marshmallow, and peanut butter is next-level.
- Berry S’mores Cake: Add a layer of fresh berries between the cream layers. Sliced strawberries, raspberries, or blueberries all work beautifully. The tartness of the berries cuts through the sweetness of the marshmallow and chocolate.
- Mint Chocolate S’mores Cake: Use mint-flavored chocolate chips instead of semi-sweet, or add a few drops of peppermint extract to the cream. It’s like a Thin Mint crossed with a s’more, and it’s incredible.
- Vegan Version: Use vegan graham crackers, coconut cream (refrigerated and whipped), and dairy-free chocolate chips. The texture will be slightly different, but it’s still delicious.
- Gluten-Free Version: Swap the graham crackers for gluten-free graham crackers or gluten-free vanilla wafers. Everything else is naturally gluten-free.
My personal favorite variation is the peanut butter one. I made it for a Fourth of July party, and it was gone in 20 minutes. People were standing around the dish with forks, which is the highest compliment a dessert can get.
Serving & Storage Suggestions
This cake is best served cold, straight from the fridge. The texture is perfect when it’s chilled—firm enough to hold its shape but soft and creamy on the inside. I like to let it sit at room temperature for about 5 minutes after slicing, just to take the chill off.
Serving Suggestions:
- Serve with a dollop of fresh whipped cream and a sprinkle of crushed graham crackers on top.
- Pair with a cold glass of milk or a hot cup of coffee. The bitterness of the coffee is a great contrast to the sweetness of the cake.
- For a fun presentation, serve in individual mason jars. Layer the ingredients in the jars and chill overnight. They’re perfect for picnics or parties.
Storage:
- Store leftovers in the refrigerator, covered, for up to 5 days. The cake will continue to soften over time, so it’s best within the first 3 days.
- This cake freezes beautifully. Wrap the entire dish in plastic wrap and then foil, and freeze for up to 3 months. Thaw in the refrigerator overnight before serving. The texture will be slightly different—a little more ice-cream-like—but it’s still delicious.
- Don’t leave the cake at room temperature for more than 2 hours, especially in warm weather. The cream and marshmallow can spoil.
One thing I love about this cake is how the flavors develop over time. The first day, it’s good. The second day, it’s great. The third day, it’s transcendent. The graham crackers have fully softened, the chocolate has set into a fudgy ribbon, and the cream has melded with everything into one cohesive, delicious whole. It’s the kind of dessert that gets better with age.
Nutritional Information & Benefits
Let’s be real—this is a dessert, and it’s not trying to be a health food. But there are a few nutritional bright spots worth mentioning.
- Estimated Nutritional Values (per serving, based on 9 servings): Calories: 380, Fat: 22g, Carbohydrates: 44g, Protein: 4g, Sugar: 30g.
- Calcium from Cream: The heavy cream and milk chocolate provide a decent amount of calcium, which is good for bone health.
- Antioxidants from Dark Chocolate: If you use dark chocolate, you’ll get a dose of flavonoids, which are antioxidants that support heart health.
- Protein from Marshmallow: Okay, this is a stretch, but marshmallow fluff does contain a small amount of egg whites, which provide a tiny bit of protein. Every little bit counts, right?
Dietary Considerations: This recipe is vegetarian. For a vegan version, use the substitutions listed above. It contains gluten (from graham crackers), dairy (from cream and chocolate), and eggs (from marshmallow fluff).
From a wellness perspective, I think it’s important to enjoy treats like this in moderation. This cake is a celebration dessert, not an everyday snack. And honestly, a slice of this with a cup of coffee on a hot summer evening is one of life’s simple pleasures. It’s worth every calorie.
Conclusion
This No-Bake S’mores Icebox Cake is the kind of recipe that makes you look like a hero with almost no effort. It’s cold, creamy, chocolatey, and marshmallowy—everything you want in a summer dessert. And it takes about 5 minutes to put together. Five minutes!
I love this recipe because it reminds me of summer campfires and lazy evenings, but without the smoke smell and the burnt fingers. It’s nostalgia in a dish, made easy. And honestly, I think it tastes better than the real thing. The texture is just so perfect—soft, creamy, and a little bit fudgy.
I hope you give this recipe a try. Customize it however you like—add peanut butter, throw in some berries, or keep it classic. And when you do, I’d love to hear about it. Leave a comment below and let me know how it turned out, or share your own twist on the recipe. Happy summer, and happy no-bake cooking!
Frequently Asked Questions
Can I use Cool Whip instead of whipped cream?
Yes, you can substitute 2 cups of Cool Whip for the homemade whipped cream. Just fold in the marshmallow fluff directly. The texture will be slightly lighter and less rich, but it still works beautifully.
How long does this cake need to set?
At least 4 hours, but overnight is best. The graham crackers need time to soften and absorb the moisture from the cream. After 4 hours, the cake will be sliceable but still a little firm. After 8 hours, it’s perfect.
Can I make this in a different size dish?
Absolutely. A 9×13 dish will give you thinner layers and more servings. A pie dish or round cake pan works too—just adjust the number of layers as needed. Keep in mind that a smaller dish will require thicker layers and more chilling time.
Why did my chocolate seize up?
Chocolate can seize if it comes into contact with even a tiny amount of water, or if the heat is too high. Make sure your saucepan is completely dry, and melt the chocolate over low heat, stirring constantly. If it does seize, add a tablespoon of warm cream or butter and whisk vigorously to bring it back.
Can I freeze this cake?
Yes! Wrap the entire dish in plastic wrap and then foil, and freeze for up to 3 months. Thaw in the refrigerator overnight before serving. The texture will be slightly more ice-cream-like, but it’s still delicious.
Pin This Recipe!
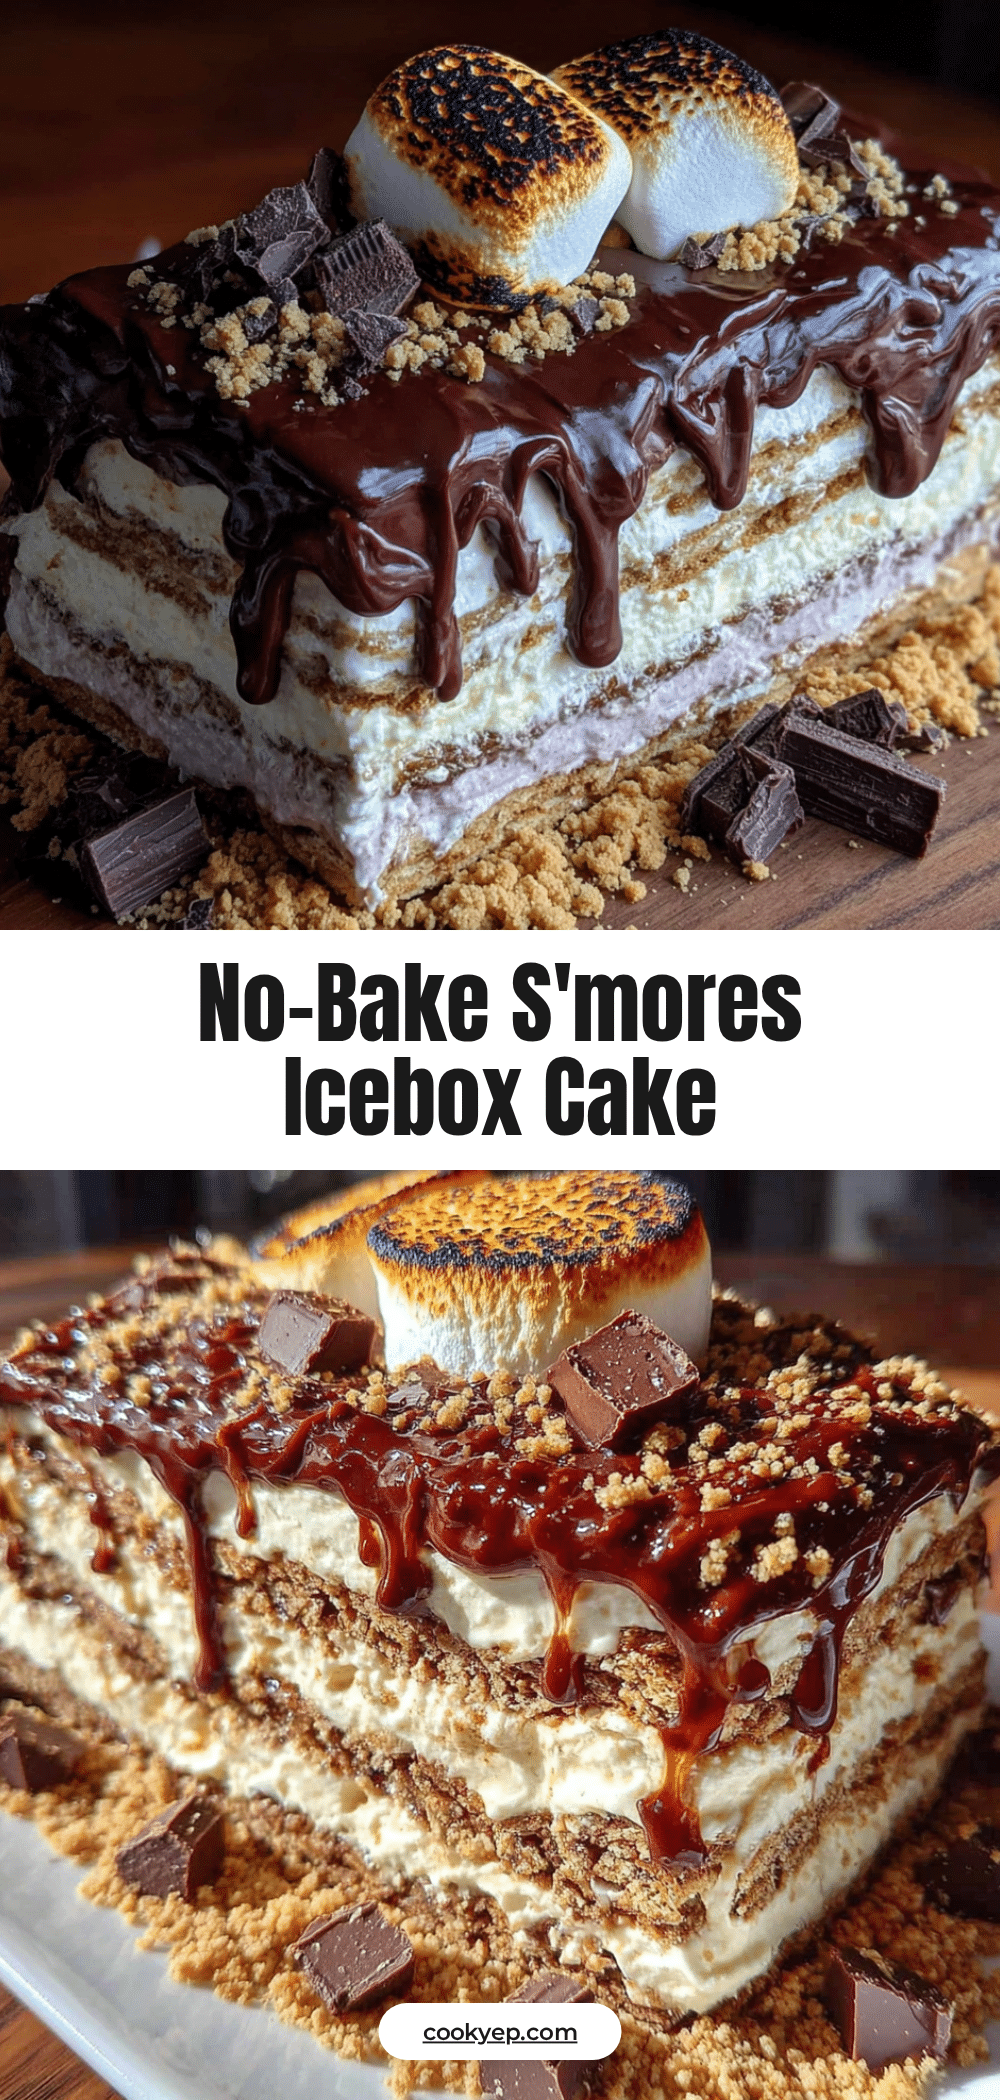
No-Bake S’mores Icebox Cake: Easy 5-Minute Summer Dessert
This No-Bake S’mores Icebox Cake is a cold, creamy, and chocolatey summer dessert that comes together in just 5 minutes of active work. Layers of graham crackers, marshmallow cream, and chocolate fudge soften in the fridge to create a tender, sliceable cake that tastes like a campfire without the heat.
- Prep Time: 5 minutes
- Cook Time: 0 minutes
- Total Time: 4 hours 5 minutes (includes chilling)
- Yield: 9 servings 1x
- Category: Dessert
- Cuisine: American
Ingredients
- 1 box (14-16 full sheets) graham crackers
- 1 cup (6 oz) semi-sweet or milk chocolate chips
- 1 jar (7 oz) marshmallow fluff
- 1 cup (240 ml) heavy cream, cold
- 2 tablespoons powdered sugar
- 1 teaspoon vanilla extract
- 2 tablespoons unsalted butter
- Pinch of flaky sea salt (optional)
Instructions
- Prepare the Chocolate Fudge Layer: In a small saucepan over low heat, combine 1 cup of chocolate chips and 2 tablespoons of unsalted butter. Stir constantly until melted and smooth, about 2-3 minutes. Set aside to cool slightly.
- Whip the Cream: In a large bowl, pour 1 cup of cold heavy cream. Add 2 tablespoons of powdered sugar and 1 teaspoon of vanilla extract. Using an electric mixer on medium-high speed, whip until soft peaks form.
- Fold in the Marshmallow Fluff: Gently fold the entire jar of marshmallow fluff into the whipped cream until no white streaks remain. The mixture should be light and airy.
- Layer the Graham Crackers: Arrange a single layer of graham cracker squares in the bottom of an 8×8 dish, breaking them to fit snugly.
- Add the First Cream Layer: Spread about one-third of the marshmallow cream mixture evenly over the graham crackers.
- Drizzle the Chocolate: Drizzle about one-third of the melted chocolate over the cream layer.
- Repeat the Layers: Add another layer of graham crackers, then another third of the cream, then another third of the chocolate. Repeat one more time, ending with a final layer of graham crackers on top.
- Top with Final Chocolate Drizzle: Pour the remaining chocolate over the top graham cracker layer and spread evenly. Sprinkle with flaky sea salt if desired.
- Chill: Cover the dish and refrigerate for at least 4 hours, preferably overnight.
- Serve: Cut into squares and serve cold.
Notes
For best results, chill overnight. The cake will continue to soften over time and is best within the first 3 days. Can be frozen for up to 3 months.
Nutrition
- Serving Size: 1 square
- Calories: 380
- Sugar: 30
- Sodium: 180
- Fat: 22
- Saturated Fat: 13
- Carbohydrates: 44
- Fiber: 2
- Protein: 4
Keywords: no-bake, s'mores, icebox cake, summer dessert, easy dessert, graham crackers, marshmallow, chocolate


