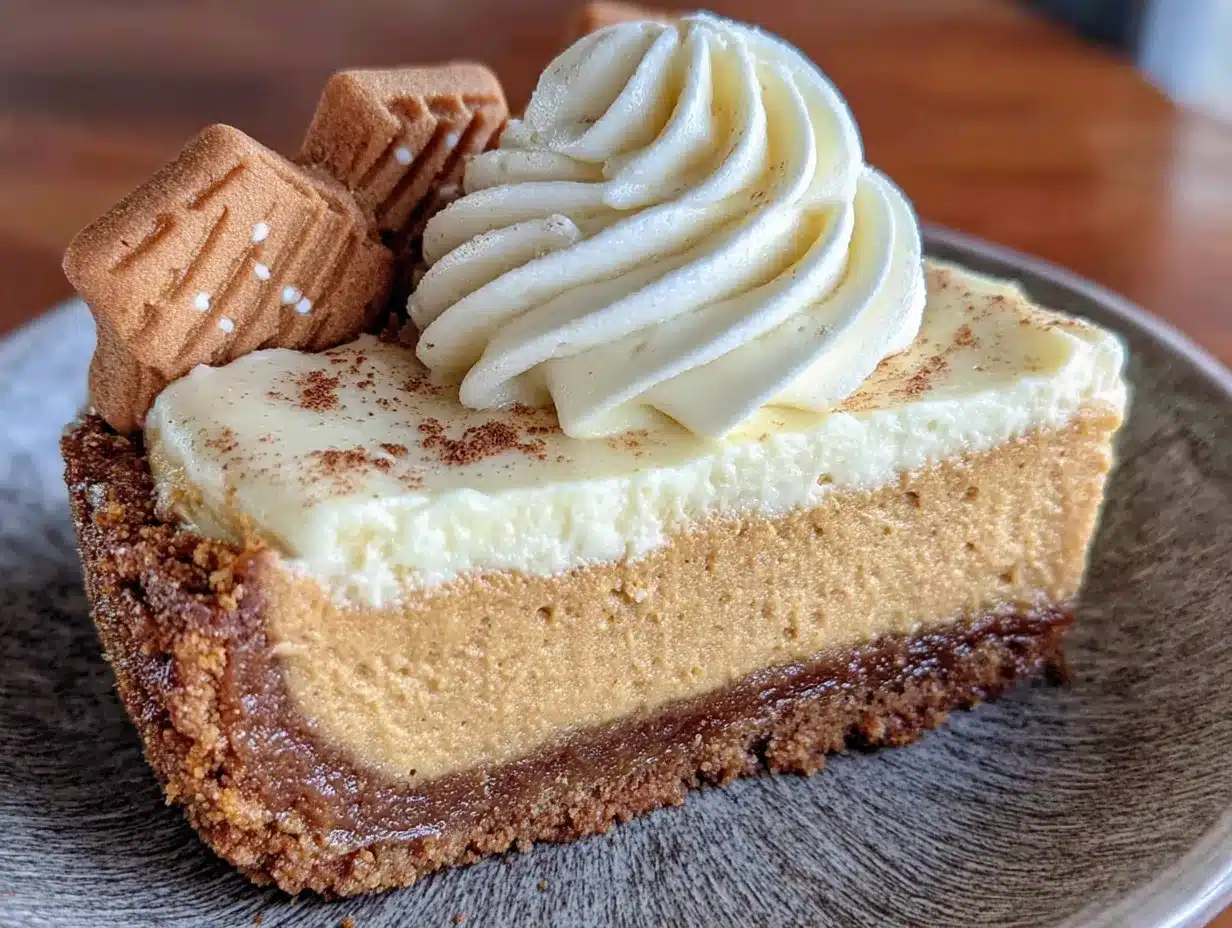
Sixth time in three weeks, and I finally stopped holding my breath when I pulled the springform pan ring away. The gingersnap crust held firm—no crumbling, no sliding—and the filling sat tall and smooth, a perfect pale orange disc that didn’t quiver too much. That sixth slice was the one where I actually sat down instead of hovering over the counter with a fork, analyzing. It made me laugh, honestly, because this isn’t some complicated layered dessert that demands a pastry degree. It’s a no-bake cheesecake pie. But something about the combination—the spicy snap of the crust, the creamy tang of the pumpkin filling, the way it sets up just firm enough to slice but stays luscious on your tongue—had me in a loop I couldn’t explain.
The first attempt was fine. Edible, even. But the crust was too thick on the bottom and the filling had a faint graininess I couldn’t ignore. The second time, I swapped brands of cream cheese and noticed a difference. By the fourth, I was taking notes on chilling times like a mad scientist, testing whether 4 hours was truly enough (spoiler: it’s not, but 6 is the sweet spot). By that sixth pie, I’d stopped treating it like a recipe and started treating it like a conversation—listening to what the ingredients wanted to do, not just what I wanted them to be. That’s when the best no-bake pumpkin cheesecake pie with gingersnap crust finally showed up, unannounced, like a guest who’d been standing on the porch the whole time waiting for me to open the door.
There’s a quiet satisfaction in a dessert that doesn’t need the oven. It feels almost rebellious, like you’re getting away with something. And when the flavors come together the way they do here—earthy pumpkin, warm spices, tangy cream cheese, and that dark, molasses-y crunch of gingersnaps—you realize you don’t need heat to create something that feels like a hug. This is that pie. The one you’ll make for Thanksgiving, sure, but also for a random Tuesday in October when the air turns cool and you just need something to look forward to after dinner.
Why You’ll Love This Recipe
I’ve tested this recipe more times than I care to admit, and each round taught me something new about how these simple ingredients work together. Here’s why this version stands out from the dozens of pumpkin cheesecake recipes floating around the internet.
- No oven required. This is a true no-bake dessert, which means no water baths, no cracked tops, no hovering by the oven door. Your oven stays cold, and you stay calm.
- Simple, real ingredients. No boxed pudding mixes, no gelatin packets, no weird stabilizers. Just cream cheese, pumpkin puree, heavy cream, and spices you probably already have in your cabinet.
- Perfect for make-ahead entertaining. This pie needs at least 6 hours to set, which means you can make it the night before and forget about it until dessert time. That’s my kind of dinner party strategy.
- Crowd-pleasing texture. It slices cleanly—no soupy middle, no icy crystals—but melts in your mouth like a cloud. Kids love it, adults ask for seconds, and nobody guesses it’s no-bake unless you tell them.
- The gingersnap crust is a game-changer. Graham cracker crusts are fine, but gingersnaps bring a deep, molasses-warmth that makes the pumpkin filling sing. It’s the kind of pairing that feels intentional, not accidental.
What makes this recipe different from others I’ve tried is the technique. Most no-bake pumpkin cheesecakes rely on whipped cream alone for structure, which gives you a light but sometimes fragile texture. This version uses a clever combination of whipped cream and a small amount of melted white chocolate, which stabilizes the filling without making it heavy. The result is a cheesecake that holds its shape beautifully but still feels airy and indulgent. It’s the best no-bake pumpkin cheesecake pie with gingersnap crust I’ve ever made, and I say that without hesitation because I’ve eaten my way through the failures to get here.
This is the kind of dessert that makes you close your eyes after the first bite. It’s comfort food reimagined—faster, easier, but with the same soul-soothing satisfaction as a classic baked cheesecake. Perfect for impressing guests without the stress, or turning a simple fall evening into something memorable.
What Ingredients You Will Need
This recipe uses straightforward, pantry-friendly ingredients to deliver bold flavor and a silky-smooth texture. Nothing fancy, just smart choices that work together beautifully.
For the Gingersnap Crust
- 2 cups (220g) gingersnap cookie crumbs (about 30-35 cookies, crushed finely—I recommend Nabisco or Mi-Del for consistent texture)
- 6 tablespoons (85g) unsalted butter, melted (salted butter works too, just reduce the added salt elsewhere)
- 2 tablespoons (25g) granulated sugar (optional, but I find it helps the crust bind better since gingersnaps can be dry)
- Pinch of salt (skip if your butter is salted)
For the Pumpkin Cheesecake Filling
- 16 ounces (452g) full-fat cream cheese, softened to room temperature (Philadelphia is my go-to—it gives the creamiest, most reliable texture; low-fat will make the filling less stable)
- 1 cup (200g) packed light brown sugar (dark brown sugar adds deeper molasses notes if you prefer; both work)
- 1 cup (245g) pumpkin puree (not pumpkin pie filling—make sure you grab 100% pure pumpkin; Libby’s is consistently good)
- 1 teaspoon vanilla extract (pure, not imitation, for the cleanest flavor)
- 1 ½ teaspoons pumpkin pie spice (or make your own: ½ tsp cinnamon, ¼ tsp ginger, ¼ tsp nutmeg, ⅛ tsp cloves, ⅛ tsp allspice)
- ½ teaspoon ground cinnamon (I add extra because I’m a cinnamon obsessive—adjust to taste)
- Pinch of salt (to balance sweetness and brighten the pumpkin flavor)
- 4 ounces (113g) white chocolate, melted and slightly cooled (this is the secret stabilizer; use good quality like Ghirardelli or Guittard—chips work fine but chop them first for even melting)
- 1 ½ cups (360ml) heavy cream, cold (heavy whipping cream with at least 36% milk fat; do not substitute half-and-half or milk)
For Topping (Optional but Recommended)
- ½ cup (120ml) heavy cream, cold
- 2 tablespoons (15g) powdered sugar
- ½ teaspoon vanilla extract
- Crushed gingersnap cookies and/or candied pecans for garnish
I recommend splurging on good-quality white chocolate here—it makes a real difference in texture. Cheap white chocolate can seize or turn grainy when melted, which defeats the purpose. If you’re dairy-free, use a high-quality dairy-free white chocolate and a plant-based heavy cream alternative, but know that the texture will be slightly less firm.
Equipment Needed
You don’t need a professional pastry kitchen for this recipe, but a few key tools make the process smoother and the results more reliable.
- 9-inch springform pan. This is non-negotiable for easy release. A regular pie dish works in a pinch, but you’ll struggle to get clean slices. I use a non-stick springform and have never had sticking issues.
- Food processor or zip-top bag and rolling pin. For crushing the gingersnaps into fine crumbs. The food processor is faster and gives more uniform crumbs, but the bag-and-rolling-pin method works if you don’t mind a little arm work.
- Electric hand mixer or stand mixer. You need to whip the cream separately and beat the cream cheese until fluffy. A whisk and strong arm could theoretically work, but I wouldn’t recommend it—you’ll be mixing for a long time.
- Large mixing bowls. At least two: one for the cream cheese mixture and one for whipping the cream.
- Rubber spatula. For folding the whipped cream into the cream cheese mixture gently. A metal spoon will deflate the air you’ve worked to create.
- Measuring cups and spoons. Precise measurements matter in no-bake desserts—eyeballing can lead to texture issues.
- Plastic wrap or aluminum foil. For covering the pie while it chills.
If you don’t have a springform pan, a 9-inch deep-dish pie plate with a removable bottom works. I’ve also used a regular 9-inch pie plate and just served slices directly from it—not as pretty, but equally delicious. Budget tip: thrift stores almost always have springform pans for a few dollars.
Preparation Method
Take your time with each step—rushing is the fastest way to a cracked or grainy cheesecake. Here’s exactly how I do it.
Step 1: Make the Gingersnap Crust
- Preheat your oven to 350°F (175°C). Yes, I know this is a “no-bake” recipe, but we’re toasting the crust for 8 minutes to help it hold together. Trust me on this.
- Pulse the gingersnap cookies in a food processor until you have fine, uniform crumbs. You should have about 2 cups. If you’re using the bag method, seal the cookies in a zip-top bag and crush them with a rolling pin until no large pieces remain.
- Transfer the crumbs to a medium bowl. Add the melted butter, sugar (if using), and salt. Stir with a fork until every crumb is moistened—it should look like wet sand.
- Press the mixture firmly into the bottom and about 1 inch up the sides of your springform pan. Use the bottom of a measuring cup or a flat glass to press it down evenly. Don’t skimp on this—a loosely packed crust will crumble when you slice.
- Bake for 8 minutes. Let it cool completely on a wire rack while you prepare the filling. Don’t skip the cooling step, or the heat will start melting your filling when you pour it in.
Step 2: Prepare the Filling Base
- In a large mixing bowl, beat the softened cream cheese with an electric mixer on medium speed until completely smooth and fluffy—about 2 minutes. Scrape down the sides and bottom of the bowl with a spatula halfway through. There should be zero lumps.
- Add the brown sugar and beat on medium speed for another 2 minutes until the mixture is light and well-combined. The sugar should be fully dissolved into the cream cheese—rub a tiny bit between your fingers to check for grittiness.
- Add the pumpkin puree, vanilla extract, pumpkin pie spice, cinnamon, and salt. Beat on low speed until just combined. Don’t overmix here, or you’ll incorporate too much air, which can cause the filling to crack as it sets.
- Melt the white chocolate in a heatproof bowl in the microwave in 20-second bursts, stirring between each, until smooth. Let it cool for 2-3 minutes—it should be warm but not hot. Slowly drizzle it into the pumpkin-cream cheese mixture while beating on low speed until fully incorporated. The mixture should look thick, glossy, and uniform.
Step 3: Whip the Cream
- In a separate, clean bowl (chill it in the freezer for 5 minutes if you have time—it helps), pour the cold heavy cream.
- Beat on medium-high speed until soft peaks form—the cream should hold its shape when you lift the beaters but still look slightly soft and billowy. This takes about 3-4 minutes with a hand mixer. Don’t over-whip, or you’ll end up with butter.
- You’re looking for peaks that gently flop over at the tips, not stiff, upright peaks. Soft peaks fold into the cream cheese mixture more easily and keep the filling velvety.
Step 4: Fold Everything Together
- Take about one-third of the whipped cream and stir it into the pumpkin-cream cheese mixture with a spatula. This lightens the base and makes it easier to fold in the rest without deflating everything.
- Add the remaining whipped cream and fold gently but thoroughly. Use a cutting motion through the center, then scrape around the edges. Repeat until no white streaks remain. The final mixture should be uniform in color and texture—pale orange, thick, and mousse-like.
- Pour the filling into the cooled crust. Spread it evenly with a spatula, giving the pan a few gentle taps on the counter to release any air bubbles.
Step 5: Chill and Set
- Cover the pan loosely with plastic wrap—don’t press it against the surface of the filling, or it will stick and ruin your smooth top.
- Refrigerate for at least 6 hours, but overnight (10-12 hours) is better. The filling needs time to firm up completely. I’ve cut into it at 4 hours, and while it’s edible, the slices are messy and the texture is more like a mousse than a sliceable cheesecake.
- When you’re ready to serve, run a thin knife around the edge of the pan before releasing the springform ring. This prevents the crust from tearing.
Step 6: Make the Whipped Cream Topping (Optional)
- Just before serving, whip the remaining ½ cup heavy cream with powdered sugar and vanilla until soft peaks form.
- Pipe or dollop onto the chilled cheesecake. Sprinkle with crushed gingersnaps or candied pecans if you’re feeling fancy.
Cooking Tips & Techniques
Over the course of those six test pies, I learned a few things the hard way so you don’t have to. Here are the most important ones.
Room temperature cream cheese is non-negotiable. Cold cream cheese creates lumps that no amount of beating will fully smooth out. Leave it on the counter for at least an hour before you start. If you’re in a hurry, cut it into cubes and microwave on low power in 10-second bursts, flipping the pieces between each, until it’s soft but not warm.
Don’t skip the white chocolate. I tried a version without it, thinking the cream cheese and whipped cream would be enough structure. It wasn’t. The pie was delicious but too soft to slice cleanly—more of a pumpkin mousse in a crust. The white chocolate adds just enough stability without changing the flavor profile. Melt it gently and let it cool slightly before adding it to the cream cheese mixture. If it’s too hot, it can break the emulsion and leave you with a greasy texture.
Fold, don’t stir. When you add the whipped cream to the pumpkin mixture, use a gentle folding motion. Stirring vigorously deflates all the air you’ve worked to incorporate, resulting in a dense, heavy cheesecake. I learned this lesson on attempt number three, when my pie came out more like a brick than a cloud. Use a rubber spatula and take your time.
Patience with chilling is the secret to success. I know it’s tempting to rush, but this pie really needs a full night in the fridge. The filling sets through a combination of the cream cheese firming up, the white chocolate solidifying, and the whipped cream stabilizing. None of these processes happen quickly. If you’re serving it for a dinner party, make it the morning before or even two days ahead—it actually tastes better after 24 hours, as the flavors meld together.
Watch your humidity. This sounds weird, but I’ve noticed that the crust can get soggy on humid days if you don’t bake it long enough. If you live in a humid climate, bake the crust for 10 minutes instead of 8, and let it cool completely before adding the filling. Also, make sure your pumpkin puree isn’t watery—blot it with a paper towel if it looks loose.
Variations & Adaptations
One of the best things about this recipe is how easily it adapts to different diets, seasons, and cravings. Here are a few variations I’ve tried and loved.
Gluten-free version: Use gluten-free gingersnap cookies for the crust. Many brands are available now—Mi-Del makes a good one. The rest of the ingredients are naturally gluten-free, so you’re just swapping the crust. I tested this with a friend who has celiac disease, and she couldn’t tell the difference.
Dairy-free adaptation: Use dairy-free cream cheese (Kite Hill or Miyoko’s work well), dairy-free white chocolate, and a plant-based heavy cream alternative like coconut cream (chilled and whipped). The texture will be slightly softer, so add an extra hour of chilling time. I made this for a dairy-free friend’s birthday, and it was a hit—though I recommend using coconut cream from a can (chilled overnight) for the best whip.
Maple pecan twist: Replace the brown sugar with maple syrup (use ¾ cup since maple syrup is sweeter) and add ½ cup finely chopped toasted pecans to the crust. Top with candied pecans instead of gingersnaps. This version leans into fall flavors even harder and pairs beautifully with a cup of spiced chai.
Pumpkin chai variation: Add 1 teaspoon chai spice blend (or a pinch each of cardamom, black pepper, and fennel) to the filling along with the pumpkin pie spice. The warmth of the chai spices complements the pumpkin beautifully and makes the pie feel extra cozy.
Individual serving cups: Instead of a full pie, layer the crust and filling in small mason jars or dessert cups. This is perfect for parties or portion control. You won’t need to bake the crust for these—just press the crumbs into the bottom of each cup. They set in about 4 hours since they’re smaller.
I’ve also tried swapping the gingersnap crust for a chocolate wafer crust, and while it’s delicious, it changes the character of the dessert entirely. The chocolate competes with the pumpkin instead of complementing it. Stick with gingersnaps—they really are the perfect partner here.
Serving & Storage Suggestions
This pie is at its best when served cold, straight from the refrigerator. Let it sit at room temperature for about 5-10 minutes before slicing—just enough to take the chill off but not long enough to soften the filling. Use a sharp, thin-bladed knife dipped in hot water and wiped dry between slices for the cleanest cuts.
For presentation, I like to pipe rosettes of whipped cream around the edge of the pie and sprinkle crushed gingersnaps in the center. A drizzle of caramel sauce over each slice is also spectacular, especially if you’re serving it for a holiday gathering. If you want to get really fancy, add a few sugared cranberries or a sprig of fresh rosemary for color.
This pie pairs beautifully with a cup of strong coffee, spiced chai latte, or even a glass of cold milk. For a dessert spread, serve it alongside our decadent triple chocolate mousse cups for a chocolate-pumpkin combo that guests will rave about. If you’re planning a full fall menu, start with our creamy stuffed mushroom caps as an appetizer—the garlic herb cheese filling sets the stage perfectly.
Storage: Cover the pie tightly with plastic wrap or store it in an airtight cake carrier in the refrigerator for up to 5 days. The crust may soften slightly after day 3, but the flavor actually improves. I do not recommend freezing this pie—the texture becomes icy and grainy upon thawing due to the high dairy content. If you absolutely must freeze it, freeze individual slices on a baking sheet, then wrap them tightly in plastic wrap and foil. Thaw in the refrigerator overnight and eat within 1 month.
For make-ahead convenience, you can prepare the crust and filling separately up to 2 days in advance. Keep the crust in the pan at room temperature (covered) and the filling in a sealed bowl in the fridge. When you’re ready, give the filling a gentle stir to loosen it, pour it into the crust, and chill as directed. This is my go-to strategy for Thanksgiving—it saves so much time on the day itself.
Nutritional Information & Benefits
Here’s the honest truth: this is an indulgent dessert, and I’m not going to pretend otherwise. But it does have some redeeming qualities worth noting. Each slice (based on 12 servings) contains approximately:
- Calories: 410
- Fat: 28g
- Saturated Fat: 17g
- Carbohydrates: 37g
- Sugar: 26g
- Fiber: 2g
- Protein: 6g
- Vitamin A: 120% of the Daily Value (from the pumpkin)
- Calcium: 10% of the Daily Value
- Iron: 8% of the Daily Value
Pumpkin is genuinely good for you—it’s packed with vitamin A for eye health, fiber for digestion, and antioxidants like beta-carotene. The cream cheese and heavy cream add calcium and protein, though they also bring the fat content up. If you’re looking for a lighter option, you can use reduced-fat cream cheese and replace half the heavy cream with Greek yogurt (though the texture will be tangier and less stable).
This recipe contains dairy and gluten (from the gingersnaps). For allergen-friendly versions, see the variations section above. As always, I believe dessert should be enjoyed in moderation—this isn’t a health food, but it is a soul food, and sometimes that’s exactly what you need.
Conclusion
This best no-bake pumpkin cheesecake pie with gingersnap crust has earned a permanent spot in my fall dessert rotation. It’s the kind of recipe that proves you don’t need an oven, a pastry degree, or a whole lot of time to create something that tastes like you spent all day in the kitchen. The gingersnap crust provides that warm, spicy crunch, the filling is impossibly creamy and rich, and the whole thing comes together with minimal stress and maximum payoff.
What I love most about this recipe is how forgiving it is. You can tweak the spices, swap the crust, or adjust the sweetness to your liking, and it still works. It’s a canvas for your own fall flavor preferences, and that flexibility makes it feel personal rather than prescriptive. Whether you’re making it for Thanksgiving, a potluck, or just because it’s Tuesday and you deserve pie, I hope it brings you the same quiet joy it brought me during those six test runs.
If you try this recipe, I’d love to hear how it turns out. Leave a comment below with your variations or questions—I read every single one. And if you’re looking for more fall dessert inspiration, don’t miss our triple chocolate mousse cups for when only chocolate will do, or our sparkling citrus ginger mojito mocktail for a refreshing drink to balance all that richness. Happy baking—or rather, happy no-baking!
Frequently Asked Questions
Can I use pumpkin pie filling instead of pumpkin puree?
No, please don’t. Pumpkin pie filling is pre-sweetened and spiced, which will throw off the sugar and spice balance completely. Always use 100% pure pumpkin puree for this recipe. The texture and flavor will be much better.
Why did my cheesecake filling turn out grainy?
Graininess usually comes from one of two issues: either the cream cheese wasn’t fully softened before mixing, or the white chocolate seized when you added it. Make sure your cream cheese is at room temperature and your melted white chocolate is slightly cooled but still liquid. If the chocolate is too cold, it can solidify into tiny bits when it hits the cream cheese mixture.
Can I make this recipe without a springform pan?
Yes, but it’s trickier. Use a 9-inch deep-dish pie plate and line it with parchment paper strips hanging over the edges for easy removal. The slices won’t be as clean, and the crust may crumble more, but the flavor will be the same. Alternatively, make individual servings in mason jars or small cups—no pan needed at all.
How far in advance can I make this pie?
You can make the entire pie up to 2 days ahead of serving. In fact, I recommend it—the flavors meld together beautifully overnight. Just keep it covered in the refrigerator and add the whipped cream topping right before serving. Do not freeze the assembled pie, as the texture will suffer.
Can I use a different cookie for the crust?
Absolutely, but the flavor will change. Graham crackers work well for a milder, sweeter crust. Shortbread cookies make a buttery, delicate base. Chocolate wafers create a richer, more decadent crust that pairs well with the pumpkin. I personally love the gingersnap version best for its warm spice and molasses notes, but feel free to experiment—just adjust the butter amount if your cookie of choice is more or less dry than gingersnaps.
Pin This Recipe!
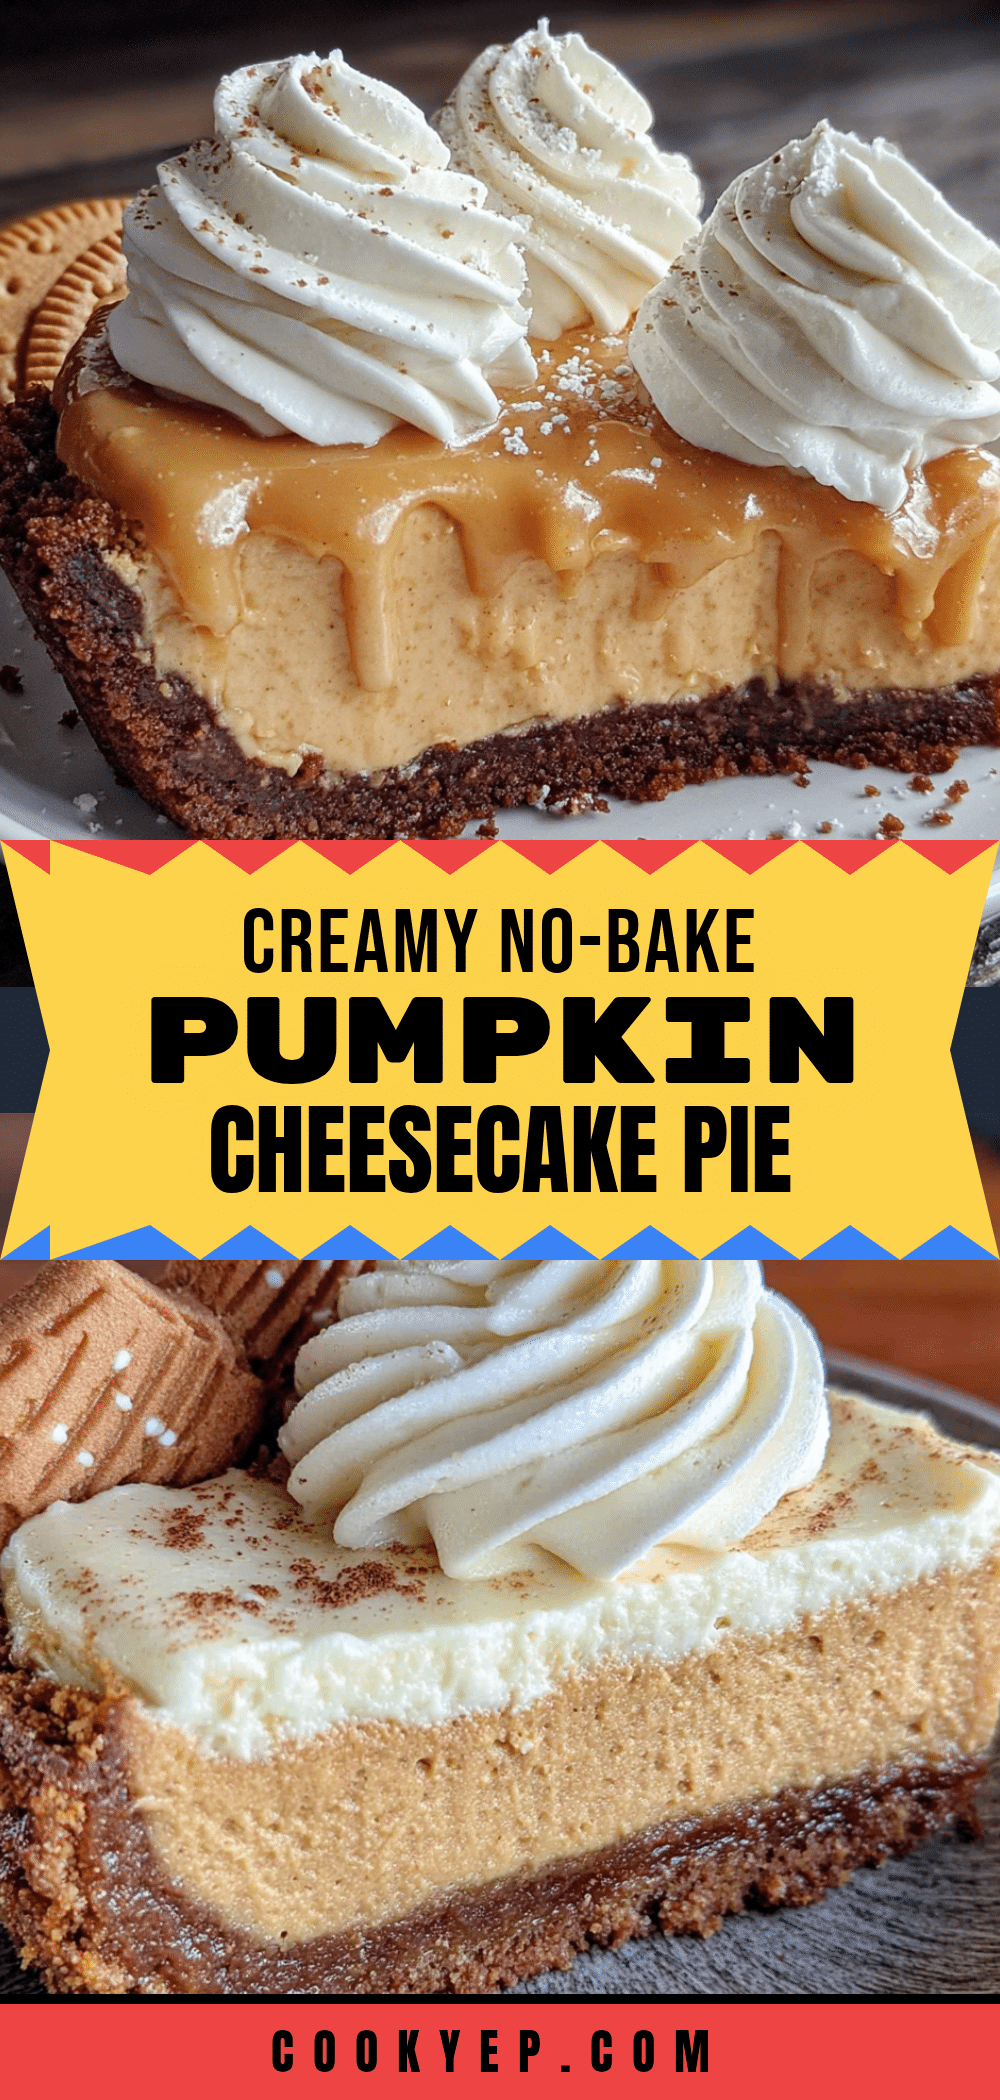
Best No-Bake Pumpkin Cheesecake Pie with Gingersnap Crust
A creamy, no-bake pumpkin cheesecake pie with a spicy gingersnap crust. This easy dessert is perfect for fall entertaining, with a silky filling stabilized with white chocolate for clean slices and a luscious texture.
- Prep Time: 30 minutes
- Cook Time: 8 minutes
- Total Time: 6 hours 38 minutes (includes chilling)
- Yield: 12 servings 1x
- Category: Dessert
- Cuisine: American
Ingredients
- 2 cups (220g) gingersnap cookie crumbs (about 30–35 cookies)
- 6 tablespoons (85g) unsalted butter, melted
- 2 tablespoons (25g) granulated sugar (optional)
- Pinch of salt
- 16 ounces (452g) full-fat cream cheese, softened to room temperature
- 1 cup (200g) packed light brown sugar
- 1 cup (245g) pumpkin puree (not pumpkin pie filling)
- 1 teaspoon vanilla extract
- 1 ½ teaspoons pumpkin pie spice
- ½ teaspoon ground cinnamon
- Pinch of salt
- 4 ounces (113g) white chocolate, melted and slightly cooled
- 1 ½ cups (360ml) heavy cream, cold
- ½ cup (120ml) heavy cream, cold (for topping)
- 2 tablespoons (15g) powdered sugar (for topping)
- ½ teaspoon vanilla extract (for topping)
- Crushed gingersnap cookies and/or candied pecans for garnish (optional)
Instructions
- Preheat oven to 350°F (175°C). Pulse gingersnap cookies in a food processor until fine crumbs form. Transfer to a bowl and mix with melted butter, sugar (if using), and salt until moistened. Press firmly into bottom and 1 inch up sides of a 9-inch springform pan. Bake for 8 minutes. Cool completely on a wire rack.
- In a large bowl, beat softened cream cheese with an electric mixer on medium speed until smooth and fluffy, about 2 minutes. Add brown sugar and beat for another 2 minutes until light and combined.
- Add pumpkin puree, vanilla extract, pumpkin pie spice, cinnamon, and salt. Beat on low speed until just combined.
- Melt white chocolate in a microwave in 20-second bursts, stirring between each, until smooth. Let cool 2-3 minutes. Slowly drizzle into pumpkin-cream cheese mixture while beating on low until fully incorporated.
- In a separate chilled bowl, beat 1 ½ cups cold heavy cream on medium-high speed until soft peaks form, about 3-4 minutes.
- Fold one-third of the whipped cream into the pumpkin mixture to lighten it. Then gently fold in the remaining whipped cream until no white streaks remain. Pour filling into cooled crust and spread evenly. Tap pan gently to release air bubbles.
- Cover loosely with plastic wrap and refrigerate for at least 6 hours, preferably overnight (10-12 hours).
- Before serving, run a thin knife around the edge of the pan and release the springform ring. For topping, whip remaining ½ cup heavy cream with powdered sugar and vanilla until soft peaks form. Pipe or dollop onto cheesecake and garnish with crushed gingersnaps or candied pecans if desired.
Notes
Room temperature cream cheese is essential for a smooth filling. Do not skip the white chocolate—it stabilizes the filling for clean slices. Chill for at least 6 hours, but overnight is better. For a gluten-free version, use gluten-free gingersnap cookies. For dairy-free, use dairy-free cream cheese, white chocolate, and plant-based heavy cream. The crust can be baked up to 2 days ahead; store covered at room temperature. The assembled pie keeps in the refrigerator for up to 5 days. Freezing is not recommended.
Nutrition
- Serving Size: 1 slice
- Calories: 410
- Sugar: 26
- Fat: 28
- Saturated Fat: 17
- Carbohydrates: 37
- Fiber: 2
- Protein: 6
Keywords: no-bake pumpkin cheesecake, gingersnap crust, pumpkin pie, fall dessert, Thanksgiving dessert, no-bake cheesecake, pumpkin cheesecake pie


