The pan came back to the kitchen with nothing but a few sticky smears of caramel and a single, lonely crumb clinging to the edge. My sister-in-law, who had claimed she was “too full” for dessert, was already texting me from the living room, asking if I had the recipe written down somewhere. I just stood there, holding the empty 9×13 pan, feeling a little stunned. It was the first time I’d made this slab pie for a crowd, and honestly, I was half-expecting it to be a soggy, disappointing mess. Instead, it had vanished in under twenty minutes.
I’d been wrestling with the idea of a classic apple pie for weeks. I love the idea of it—the flaky crust, the spiced filling, the whole nostalgic scene. But I always hit the same wall. By the time you peel, slice, and arrange the apples in a deep-dish pie plate, you’re left with this towering, precarious dome that either burns on top or stays raw in the middle. And then you have to serve it in these tiny, sad wedges that never feel like enough. I wanted something different. Something that fed a crowd without the fuss of a double crust and a lattice top.
So, I turned to the slab pie. It’s everything a good apple dessert should be, but with a better crust-to-filling ratio and way more surface area for that glorious, sticky caramel to cling to. The first time I made it, I used a standard pastry crust. It was good. But it wasn’t great. The second time, I swapped in a buttery, cream cheese pastry that you can actually press into the pan with your fingers. No rolling, no chilling for hours, no stress. I layered in thinly sliced Honeycrisp apples, a secret sprinkle of lemon zest to cut the sweetness, and a homemade salted caramel sauce that I practically have to hide from myself. It was the first time a dessert I’d made for a party actually felt like the star of the show, not just a polite afterthought. And honestly, that feeling is what keeps me coming back to this pan.
Why You’ll Love This Recipe
This isn’t just another apple pie recipe. It’s a solution to the biggest problem with fall baking: feeding a crowd without spending your entire day in the kitchen. This slab pie delivers all the cozy, spiced, apple-cinnamon flavor you crave, but in a fraction of the time and with way less fuss.
- Feeds a Crowd with Ease: Forget the tiny pie wedges. This recipe bakes in a standard 9×13 pan, giving you generous, satisfying squares that are perfect for potlucks, Thanksgiving, or any fall gathering.
- No-Roll, No-Stress Crust: The cream cheese pastry is a game-changer. You press it into the pan with your hands. No rolling pin, no counter-flouring, no pastry cutter to clean. It’s flaky, tender, and incredibly forgiving.
- Simple, Real Ingredients: You don’t need a specialty grocery store. Apples, butter, flour, sugar, cream cheese—these are the building blocks of a truly great dessert, and you probably already have them.
- Perfectly Balanced Flavor: The tartness of the apples and a hint of lemon zest cut through the richness of the buttery crust and the sweet, salty caramel. Every bite hits that perfect sweet-tart-salty note.
- Make-Ahead Magic: You can assemble the entire pie a day in advance and bake it just before serving. Or, bake it completely and reheat it. The caramel gets even gooier and more delicious the next day.
This is the kind of dessert that makes people close their eyes after the first bite. It’s the recipe you’ll pull out year after year, the one that gets requested before the leaves even start to change. It’s comfort food that actually works for a real-life gathering—no stress, no drama, just pure, unapologetic deliciousness.
What Ingredients You Will Need
This recipe relies on a handful of high-quality, everyday ingredients. Each one plays a specific role in building that perfect, unforgettable flavor and texture. Let’s break down what you’ll need and why it matters.
For the Cream Cheese Pastry Crust
- 2 ½ cups (315g) all-purpose flour: Use a good, unbleached flour like King Arthur for the most reliable structure. Spoon and level it into your measuring cup—don’t scoop directly from the bag or you’ll pack in too much flour, making the crust tough.
- 1 teaspoon (6g) fine sea salt: Salt isn’t just for flavor; it strengthens the gluten structure and balances the sweetness of the filling and caramel.
- 1 tablespoon (12g) granulated sugar: Just a touch of sugar in the crust adds a hint of sweetness and helps with browning.
- 1 cup (2 sticks, 226g) unsalted butter, cold and cut into small cubes: This is non-negotiable. The butter must be very cold. I pop my cubed butter in the freezer for 15 minutes before I start. This creates those beautiful, flaky layers as the butter melts in the oven.
- 4 oz (113g) full-fat cream cheese, cold and cut into cubes: This is my secret ingredient. The cream cheese adds a subtle tang, a tender, almost shortbread-like texture, and makes the dough incredibly easy to work with. Don’t use low-fat cream cheese; the fat content is essential for the texture.
- ¼ cup (60ml) ice water: You might not need all of it. Start with 3 tablespoons and add more a teaspoon at a time until the dough just holds together when pinched.
For the Apple Filling
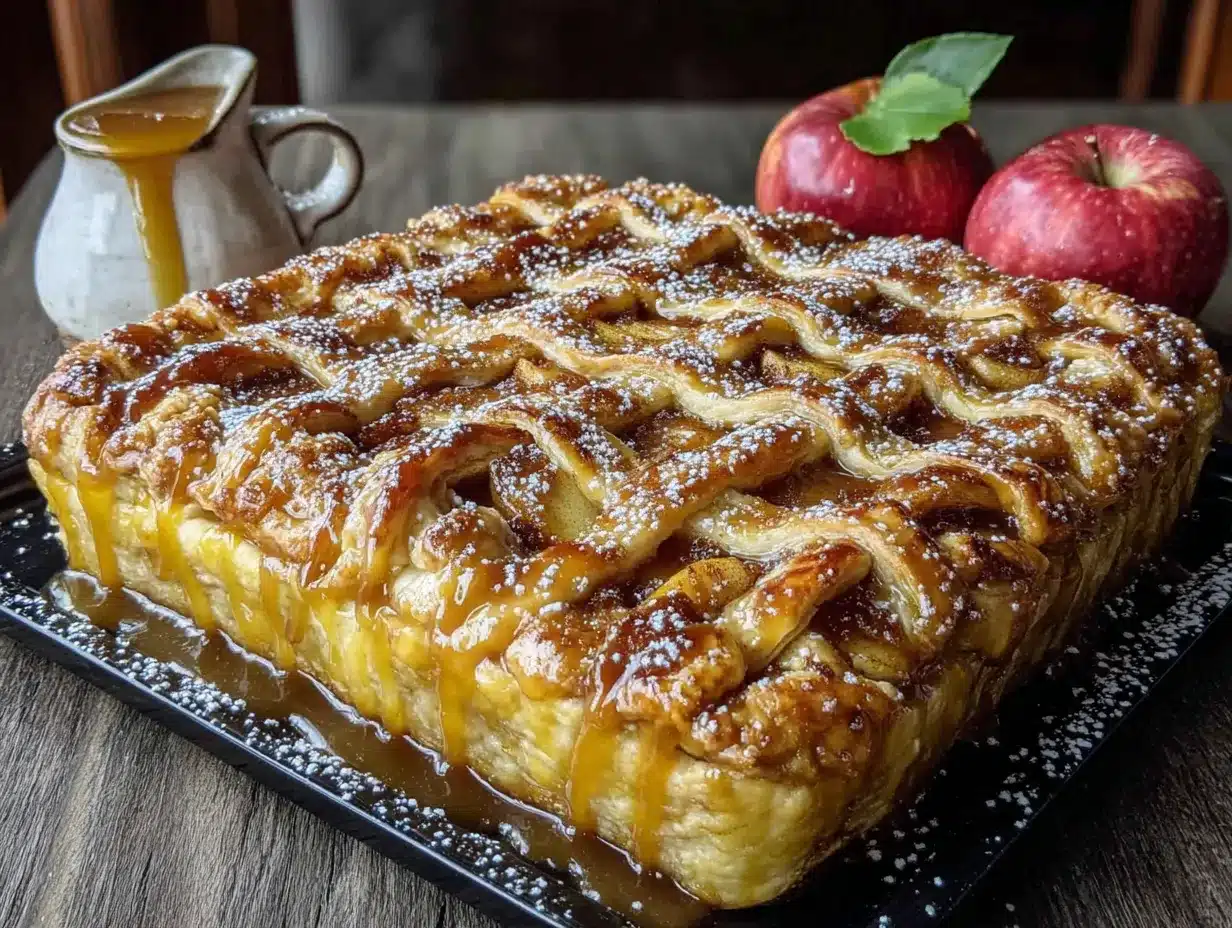
- 6 cups (about 3 lbs) peeled, cored, and thinly sliced apples: I use a mix of Honeycrisp and Granny Smith. Honeycrisp provides sweetness and a firm texture that holds up well to baking, while Granny Smith adds the necessary tartness to balance the caramel. Slice them about ¼-inch thick—too thin and they’ll turn to mush, too thick and they won’t cook through.
- ½ cup (100g) packed light brown sugar: Brown sugar adds moisture and a deep, molasses-like flavor that pairs perfectly with the apples and caramel.
- ¼ cup (50g) granulated sugar: For a clean, pure sweetness.
- 2 tablespoons (16g) all-purpose flour: This helps thicken the juices released by the apples as they bake, preventing a soggy bottom crust.
- 1 teaspoon (3g) ground cinnamon: The heart of apple pie spice. Use a fresh, aromatic cinnamon like Ceylon if you can.
- ½ teaspoon (1g) ground nutmeg: Freshly grated is best, but pre-ground works in a pinch.
- ¼ teaspoon (0.5g) ground allspice: A warm, complex spice that adds depth.
- 1 tablespoon (15ml) fresh lemon juice: This brightens the flavor of the apples and prevents them from browning too quickly.
- 1 teaspoon (2g) lemon zest: A tiny but mighty ingredient. The zest adds a fragrant, citrusy note that cuts through the richness and makes the apple flavor pop.
For the Salted Caramel Sauce
- 1 cup (200g) granulated sugar: You’ll be making a dry caramel, so you need a clean, white sugar.
- 6 tablespoons (85g) unsalted butter, cut into small pieces: The butter should be at room temperature to prevent the hot caramel from seizing up.
- ½ cup (120ml) heavy cream, at room temperature: This is crucial. If the cream is cold, it can cause the caramel to bubble up violently and possibly seize. Let it sit out for 20 minutes before you start.
- 1 teaspoon (5ml) pure vanilla extract: Use the real stuff. It makes a difference.
- 1 teaspoon (6g) flaky sea salt (like Maldon), plus more for sprinkling: The salt is what makes this caramel so addictive. It balances the sweetness and enhances the buttery flavor.
Equipment Needed
You don’t need a professional pastry kitchen to pull this off. Most of this equipment is standard, and I’ve included a few budget-friendly alternatives for the specialty items. Here’s what you’ll need:
- 13×9-inch Metal Baking Pan: A metal pan conducts heat more efficiently than glass or ceramic, giving you a crispier bottom crust. Avoid dark, non-stick pans as they can cause the crust to brown too quickly. A simple, light-colored aluminum pan is perfect.
- Food Processor (Optional, but Highly Recommended): This makes the cream cheese pastry come together in under a minute. If you don’t have one, you can use a pastry cutter or two forks to cut the butter and cream cheese into the flour.
- Medium, Heavy-Bottomed Saucepan: For the caramel. A light-colored pan is best because it allows you to see the color of the sugar as it melts. A heavy bottom prevents hot spots that can burn the sugar.
- Sharp Chef’s Knife or Mandoline: For slicing the apples evenly. A mandoline (like a Benriner) is a game-changer for getting perfectly thin, uniform slices, but a sharp knife and a steady hand work just fine.
- Parchment Paper: Lining your pan with parchment paper with an overhang on two sides creates “handles” that make it easy to lift the entire slab pie out for cutting.
- Rolling Pin (or a Wine Bottle): I’ve used a clean wine bottle in a pinch. It works! You’re just pressing the dough into the pan, not rolling it out, so anything cylindrical will do.
- Instant-Read Thermometer: Not strictly necessary, but it’s the most reliable way to know when your caramel is done (around 350°F / 177°C).
Preparation Method
Let’s get to the fun part. This recipe is broken down into manageable steps. Don’t rush—especially with the caramel—and you’ll be rewarded with a show-stopping dessert.
Step 1: Make the Cream Cheese Pastry
In the bowl of a food processor, combine the flour, salt, and sugar. Pulse a few times to mix. Scatter the cold cubes of butter and cream cheese over the flour mixture. Pulse about 10-12 times, until the butter is broken down into pea-sized pieces and the mixture looks like coarse meal. Don’t over-process.
Sprinkle 3 tablespoons of the ice water over the mixture. Pulse again about 5-6 times. The dough should look shaggy and just start to clump together when you squeeze a bit in your hand. If it’s too dry, add the remaining tablespoon of water, one teaspoon at a time, pulsing after each addition.
Dump the shaggy dough out onto a clean work surface. Use your hands to gently gather it into a ball, then flatten it into a 1-inch thick rectangle. Wrap it in plastic wrap and refrigerate for at least 30 minutes, or up to 3 days. This rest is crucial—it relaxes the gluten and lets the butter firm up again.
Step 2: Make the Apple Filling
While the dough chills, prepare the apples. In a very large bowl, whisk together the brown sugar, granulated sugar, flour, cinnamon, nutmeg, and allspice. Add the sliced apples, lemon juice, and lemon zest. Use your hands to toss everything together until the apples are evenly coated.
Let the mixture sit at room temperature for about 20 minutes. This allows the apples to release some of their juices, which will mix with the sugars and spices to create a beautiful, syrupy filling. Don’t skip this step—it’s key to avoiding a watery pie.
Step 3: Press the Crust into the Pan
Preheat your oven to 400°F (200°C). Line your 9×13 baking pan with a large sheet of parchment paper, leaving a 2-inch overhang on the two long sides. This will be your sling for lifting the pie out later.
Remove the chilled dough from the fridge. It will be firm but pliable. Place it in the center of the prepared pan. Using your fingertips, press the dough evenly across the bottom and about 1-inch up the sides of the pan. Don’t worry about perfection—a rustic, uneven edge is part of the charm. Prick the bottom of the crust all over with a fork to prevent it from bubbling up.
Place the pan in the freezer for 10 minutes. This firms up the butter one last time before it hits the hot oven, guaranteeing a flaky crust. While it’s chilling, you can start the caramel.
Step 4: Make the Salted Caramel Sauce
This is the most important step, so pay close attention. Place the 1 cup of granulated sugar in a single, even layer in your heavy-bottomed saucepan. Set the pan over medium heat. Do not stir. Just let it sit. As the sugar begins to melt around the edges, you can gently swirl the pan to help it melt evenly.
Watch the color carefully. It will go from clear to a light amber to a deep, rich copper color. You want a deep amber, like the color of an old penny. This takes about 6-8 minutes. The second it reaches that color, remove the pan from the heat.
Immediately add the room-temperature butter pieces. The mixture will bubble up vigorously—this is normal. Whisk constantly until the butter is completely melted and incorporated. The caramel will look smooth and glossy.
Slowly drizzle in the room-temperature heavy cream while whisking constantly. The caramel will bubble up again. Keep whisking until it’s smooth. Whisk in the vanilla extract and the flaky sea salt. Set the pan aside to cool for about 10 minutes. It will thicken as it cools.
Step 5: Assemble and Bake
Remove the chilled crust from the freezer. Pour the apple filling (including all those lovely juices) into the crust and spread it into an even layer. It will mound up slightly—that’s okay.
Drizzle about ¾ of the warm salted caramel sauce evenly over the apples. Reserve the rest for serving. Don’t drown it; you want pockets of caramel, not a swimming pool.
Place the pan on the middle rack of your preheated oven. Bake for 45-55 minutes, rotating the pan halfway through. The pie is done when the crust is golden brown and the filling is bubbling thickly around the edges. If the edges of the crust are browning too quickly, tent the pan loosely with aluminum foil for the last 15 minutes of baking.
Remove the pie from the oven and place it on a wire rack. Let it cool in the pan for at least 1 hour. This is essential for the filling to set up so you can cut clean squares. Drizzle the remaining caramel over the top and sprinkle with an extra pinch of flaky sea salt.
Cooking Tips & Techniques
I’ve made this pie more times than I can count, and I’ve learned a few things the hard way. Here are my best tips to ensure your slab pie is perfect every single time.
- The Cold Fat Rule: The single most important rule for a flaky pastry is to keep the butter and cream cheese cold. If at any point during the pressing process the dough feels sticky or greasy, pop it back in the fridge for 10 minutes. I once tried to rush this step on a hot summer day, and my crust turned into a dense, greasy mess. Never again.
- Don’t Overwork the Dough: When pressing the dough into the pan, use your fingertips and work gently. The more you handle it, the tougher it gets. You want those little visible specks of butter in the dough—that’s what creates the flaky layers. Think of it like you’re building a sandcastle, not kneading bread.
- The Caramel Color is Everything: The biggest mistake people make with caramel is taking it off the heat too early or too late. Too light, and it’s just sweet syrup. Too dark, and it’s burnt and bitter. You’re aiming for a deep, rich amber, like the color of a new penny or a good maple syrup. Swirl the pan, don’t stir, and trust your eyes.
- Room Temperature Cream and Butter for Caramel: This is a non-negotiable tip. If you add cold cream or cold butter to the hot caramel, the temperature shock can cause it to seize up into a hard, grainy lump. If you forget to take them out of the fridge, microwave the cream for 15 seconds and cut the butter into small pieces and let it sit for 10 minutes.
- Let it Cool Completely: I know it’s tempting to cut into that warm, gooey pie right away. But if you do, you’ll end up with a delicious, soupy mess. The filling needs at least an hour to set up. If you can wait even longer, the flavors meld together even more beautifully. I often make this the night before and just reheat it gently the next day.
Variations & Adaptations
This recipe is a fantastic base for experimentation. Here are a few of my favorite ways to change it up, depending on the season or my mood.
- Spiced Apple Cider Caramel: For an even deeper fall flavor, replace 2 tablespoons of the heavy cream in the caramel sauce with an equal amount of good-quality apple cider. Add a pinch of ground ginger and a star anise pod while the sugar is melting. Remove the star anise before adding the butter. The result is a complex, almost floral caramel that’s incredible.
- Nutty Crumble Topping: If you’re not a fan of a top crust (or just want extra texture), skip drizzling all the caramel on top before baking. Instead, make a simple streusel: combine ½ cup flour, ½ cup rolled oats, ½ cup brown sugar, and ½ cup chopped pecans or walnuts. Cut in 6 tablespoons of cold butter until crumbly. Sprinkle this over the apples before baking. It creates a crunchy, buttery topping that’s absolutely divine.
- Gluten-Free Adaptation: You can make a delicious gluten-free version of this pie. For the crust, substitute the all-purpose flour with a high-quality 1-to-1 gluten-free baking flour blend (like Bob’s Red Mill). The texture will be slightly more delicate and crumbly, but still incredibly tasty. For the filling, simply use a gluten-free all-purpose flour to thicken the apple juices. The caramel is naturally gluten-free.
- Pear and Apple Combo: Swap out half of the apples for firm, ripe Bosc or Anjou pears. Pears have a delicate sweetness and a soft, buttery texture that pairs beautifully with the apples. Don’t use overly ripe pears, or they’ll turn to mush. This is a lovely, sophisticated twist for a holiday brunch.
Serving & Storage Suggestions
This slab pie is a superstar when it comes to serving and storing. It’s designed to be easy, after all.
Serving: This pie is best served warm, not hot. Let it cool for at least an hour after baking. Then, use the parchment paper sling to lift the entire pie out of the pan and onto a cutting board. Cut it into squares or rectangles. For the ultimate experience, serve each square with a scoop of high-quality vanilla bean ice cream and an extra drizzle of the reserved salted caramel sauce. A dollop of lightly sweetened whipped cream is a fantastic alternative. It also pairs beautifully with a hot cup of spiced apple cider or a cozy sparkling citrus ginger mojito mocktail for a non-alcoholic option that cuts the richness.
Storage: Cover the pan tightly with aluminum foil or plastic wrap. The pie will keep at room temperature for up to 2 days. For longer storage, refrigerate it for up to 5 days. The flavors actually deepen and meld together beautifully overnight.
Reheating: The best way to reheat a slice is in a 350°F (175°C) oven for 10-15 minutes, or until warmed through. This will re-crisp the crust. You can use the microwave in a pinch, but the crust will become soft. If reheating the whole pie, cover it with foil and warm it in a 325°F (160°C) oven for 20-25 minutes.
Freezing: This pie freezes beautifully! Bake it completely, let it cool to room temperature, then wrap the entire pan (or individual slices) tightly in a layer of plastic wrap, followed by a layer of aluminum foil. Freeze for up to 3 months. To serve, thaw overnight in the refrigerator and reheat in the oven as directed above. The caramel might look a little separated after thawing, but a gentle reheat will bring it right back together.
Nutritional Information & Benefits
Let’s be honest—this is a dessert, not a health food. But that doesn’t mean it can’t be part of a balanced, joyful life. Here’s a quick look at what you’re getting in each generous square.
Estimated Nutritional Values (per square, assuming 12 servings):
| Nutrient | Amount |
|---|---|
| Calories | ~480 |
| Total Fat | ~24g |
| Saturated Fat | ~15g |
| Cholesterol | ~70mg |
| Sodium | ~320mg |
| Total Carbohydrates | ~65g |
| Dietary Fiber | ~3g |
| Total Sugars | ~45g |
| Protein | ~4g |
Health Benefits: The apples provide a good source of dietary fiber and vitamin C, especially if you leave the peels on (though I peel mine for a smoother texture in this recipe). The cinnamon is a powerful antioxidant with anti-inflammatory properties. And here’s a little secret: the cream cheese in the crust adds a small amount of protein and calcium. It’s not a salad, but it’s a dessert made with real, whole ingredients. I believe in enjoying treats like this without guilt—it’s about the experience, the gathering, and the pure, simple joy of a really good piece of pie.
Dietary Considerations: This recipe contains gluten (from the flour), dairy (from the butter, cream cheese, and heavy cream), and eggs (none in this version, making it naturally egg-free!). For a gluten-free option, see the variations section above. For a dairy-free version, you would need to substitute the butter with a high-quality vegan butter, the cream cheese with a vegan cream cheese alternative, and the heavy cream with full-fat coconut cream. The flavor and texture will change, but it’s still a delicious option.
Conclusion
This Caramel Apple Slab Pie is more than just a recipe—it’s a solution to the age-old problem of feeding a crowd a truly memorable dessert without the stress. It’s the pie you bring to the Friendsgiving potluck that everyone asks about. It’s the dessert that turns a simple Sunday dinner into a celebration. It’s the recipe that makes you look like a pastry pro, even if you’re just a home cook who loves good food.
I love this pie because it’s forgiving. It doesn’t demand perfection. It just asks for good ingredients, a little patience with the caramel, and the willingness to share. Don’t be afraid to make it your own. Swap the apples for pears, add a handful of toasted pecans, or double the caramel sauce (I won’t tell). The best recipes are the ones that adapt to your kitchen and your people.
So, go ahead. Grab that 9×13 pan, crank up the oven, and make a pie that’s meant to be shared. When you see that empty pan come back to the kitchen, you’ll know exactly what I mean. I’d love to hear how it turns out for you! Leave a comment below and tell me about your fall gathering, or tag me in your photos. And if you’re looking for another crowd-pleasing dessert for your next party, you absolutely have to try my decadent triple chocolate mousse cups—they’re the perfect elegant finish to any meal. Happy baking!
Frequently Asked Questions
Can I use a store-bought pie crust for this recipe?
You absolutely can, and it will still be delicious! However, the flavor and texture won’t be quite the same as the homemade cream cheese pastry. If you’re short on time, buy two refrigerated pie crusts and press them into the pan, overlapping them in the center and sealing the seams. You won’t need to pre-bake them.
My caramel turned out grainy. What did I do wrong?
Grainy caramel is usually a sign of crystallization. This can happen if you stir the sugar while it’s melting, or if a grain of undissolved sugar gets splashed onto the side of the pan. The best way to prevent this is to use a clean, wet pastry brush to brush down the sides of the pan before you start, and to swirl the pan gently instead of stirring. If your caramel does crystallize, you can try to save it by adding a tablespoon of water and gently reheating it, but sometimes it’s easier to just start over.
Can I make this pie ahead of time?
Yes, this is a fantastic make-ahead dessert. You can fully assemble the unbaked pie (crust, filling, and caramel drizzle) up to 24 hours in advance, cover it tightly, and store it in the refrigerator. When you’re ready to bake, you may need to add an extra 5-10 minutes to the baking time since you’re starting from a cold pan. Alternatively, you can bake the pie completely, let it cool, and reheat it gently in a low oven before serving.
How do I prevent the bottom crust from getting soggy?
The two most important steps are: 1) Don’t skip the step where you let the sliced apples sit with the sugar and spices for 20 minutes. This draws out the excess liquid, so it’s not all pooling at the bottom of the pan. 2) Use a metal baking pan. Metal conducts heat much better than glass or ceramic, which helps the bottom crust cook through and become crisp. Pre-freezing the crust for 10 minutes before adding the filling also helps.
Can I use this same recipe in a regular 9-inch pie plate?
You can, but you’ll need to adjust the baking time and the crust. A standard 9-inch pie plate holds less filling, so you’ll have a lot of leftover apple mixture. I would recommend halving all the ingredients. The crust recipe above makes enough for a standard single-crust pie. The baking time will also be shorter—start checking it at 35 minutes. For a classic, deep-dish pie experience, you might also enjoy my creamy stuffed mushroom caps as a savory appetizer to start your fall feast.
Pin This Recipe!
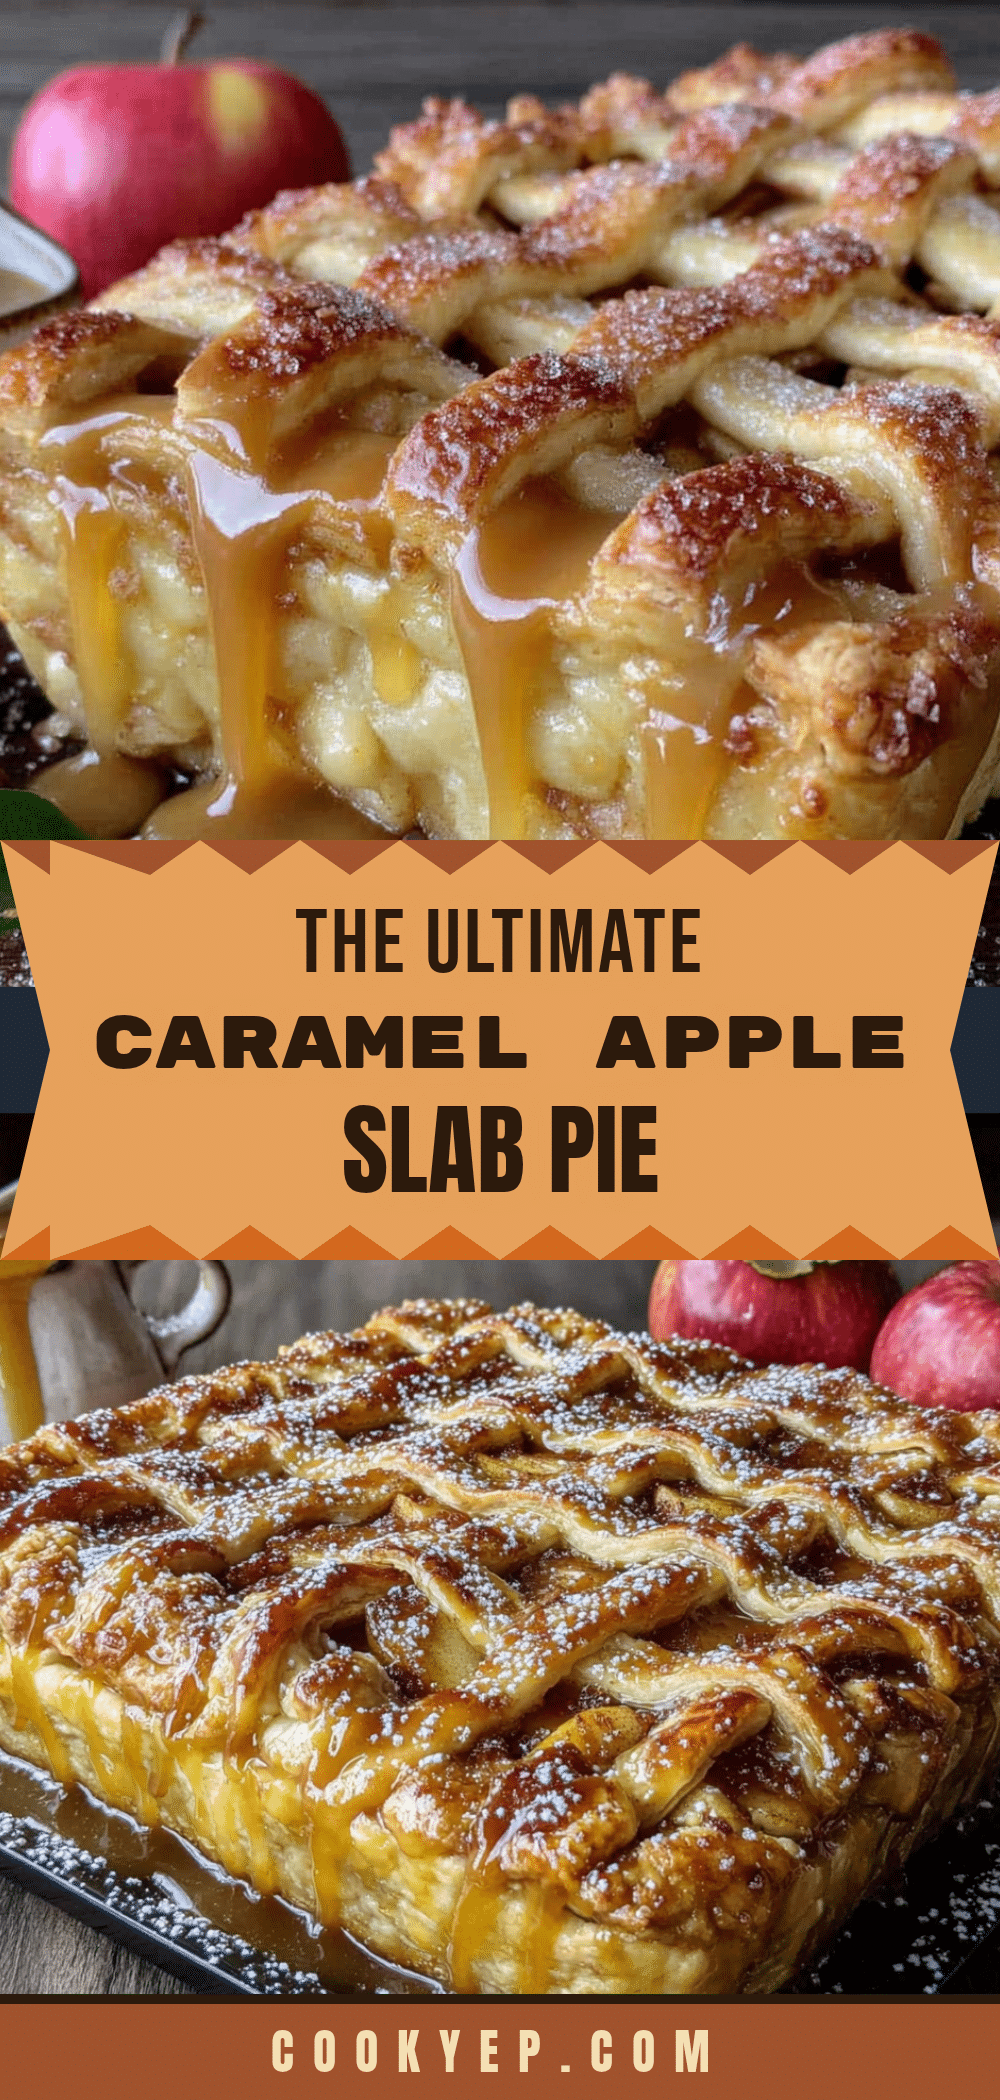
Best Caramel Apple Slab Pie Recipe for Easy Fall Desserts
This Caramel Apple Slab Pie is the perfect solution for feeding a crowd a memorable fall dessert without the stress. It features a no-roll cream cheese pastry crust, a spiced apple filling, and a homemade salted caramel sauce, all baked in a 9×13 pan for easy serving.
- Prep Time: 30 minutes
- Cook Time: 50 minutes
- Total Time: 1 hour 20 minutes
- Yield: 12 servings 1x
- Category: Dessert
- Cuisine: American
Ingredients
- 2 ½ cups (315g) all-purpose flour
- 1 teaspoon (6g) fine sea salt
- 1 tablespoon (12g) granulated sugar
- 1 cup (2 sticks, 226g) unsalted butter, cold and cut into small cubes
- 4 oz (113g) full-fat cream cheese, cold and cut into cubes
- ¼ cup (60ml) ice water
- 6 cups (about 3 lbs) peeled, cored, and thinly sliced apples (mix of Honeycrisp and Granny Smith)
- ½ cup (100g) packed light brown sugar
- ¼ cup (50g) granulated sugar
- 2 tablespoons (16g) all-purpose flour
- 1 teaspoon (3g) ground cinnamon
- ½ teaspoon (1g) ground nutmeg
- ¼ teaspoon (0.5g) ground allspice
- 1 tablespoon (15ml) fresh lemon juice
- 1 teaspoon (2g) lemon zest
- 1 cup (200g) granulated sugar (for caramel)
- 6 tablespoons (85g) unsalted butter, cut into small pieces (for caramel)
- ½ cup (120ml) heavy cream, at room temperature (for caramel)
- 1 teaspoon (5ml) pure vanilla extract (for caramel)
- 1 teaspoon (6g) flaky sea salt (like Maldon), plus more for sprinkling (for caramel)
Instructions
- Make the Cream Cheese Pastry: In a food processor, combine flour, salt, and sugar. Pulse to mix. Add cold butter and cream cheese cubes; pulse until pea-sized pieces form and mixture looks like coarse meal. Add 3 tablespoons ice water; pulse until dough is shaggy and clumps together. Add more water if needed. Gather dough into a ball, flatten into a 1-inch thick rectangle, wrap in plastic, and refrigerate for at least 30 minutes.
- Make the Apple Filling: In a large bowl, whisk together brown sugar, granulated sugar, flour, cinnamon, nutmeg, and allspice. Add sliced apples, lemon juice, and lemon zest. Toss to coat. Let sit at room temperature for 20 minutes.
- Press the Crust into the Pan: Preheat oven to 400°F (200°C). Line a 9×13 baking pan with parchment paper, leaving overhang on long sides. Remove chilled dough and press evenly into the bottom and 1 inch up the sides of the pan. Prick bottom with a fork. Freeze for 10 minutes.
- Make the Salted Caramel Sauce: Place 1 cup granulated sugar in a heavy-bottomed saucepan over medium heat. Do not stir; swirl pan as sugar melts. Cook until deep amber color (about 6-8 minutes). Remove from heat. Add room-temperature butter pieces; whisk until melted. Slowly drizzle in room-temperature heavy cream while whisking. Whisk in vanilla and flaky sea salt. Set aside to cool for 10 minutes.
- Assemble and Bake: Remove crust from freezer. Pour apple filling into crust and spread evenly. Drizzle about ¾ of the warm caramel over the apples. Bake for 45-55 minutes, rotating halfway, until crust is golden and filling is bubbling. If edges brown too quickly, tent with foil. Cool in pan for at least 1 hour. Drizzle remaining caramel and sprinkle with extra sea salt.
Notes
Keep butter and cream cheese cold for flaky crust. Don’t overwork the dough. For caramel, use room-temperature cream and butter to prevent seizing. Let pie cool completely before cutting to allow filling to set. Can be made ahead and reheated.
Nutrition
- Serving Size: 1 square
- Calories: 480
- Sugar: 45
- Sodium: 320
- Fat: 24
- Saturated Fat: 15
- Carbohydrates: 65
- Fiber: 3
- Protein: 4
Keywords: caramel apple slab pie, apple slab pie, fall dessert, easy apple pie, cream cheese pastry, salted caramel, crowd-pleasing dessert


