I’d pulled the last tray out of the oven maybe ten minutes earlier. The kitchen smelled like a candle section had exploded inside a pumpkin patch — nutty, warm, and sweet in that way that makes you want to stand there and breathe it in for no reason. My neighbor texted asking if I was baking again. She could apparently tell from three doors down. That was the second time this week someone had mentioned the smell before even tasting the cookies.
These Brown Butter Pumpkin Snickerdoodle Cookies weren’t supposed to be a thing I obsessed over. Honestly, I was just trying to use up half a can of pumpkin that had been sitting in my fridge for three days, staring at me every time I opened the door. I’d made a batch of regular snickerdoodles the week before — the kind my mom used to make, rolled in cinnamon sugar, soft in the middle. They were fine. But I wanted something that felt like fall had actually shown up, not just the vague suggestion of it.
So I browned the butter first, which is something I do when I want cookies to taste like they took more effort than they actually did. And then I threw in the pumpkin because it was there, and a little extra spice because why not. The first batch came out looking like sad little blobs — too flat, too wet. I tweaked the flour and let the dough rest for a bit. The second batch? That was the one. The edges were crackly, the centers were soft, and that brown butter flavor wrapped around the pumpkin like they were old friends who hadn’t seen each other in a while.
I’ve made them four times since then. Each time, someone asks for the recipe. And each time, I realize I’m not just sharing a cookie — I’m handing over the reason my kitchen smells like the best part of autumn.
Why You’ll Love This Recipe
Let me tell you why these cookies are different from every other pumpkin cookie you’ve tried. I’ve tested this recipe six times across three different ovens, and I can say with confidence that this version nails the texture and flavor in a way that most pumpkin cookies miss entirely.
- Brown Butter Magic: The nutty, toasty flavor from browned butter transforms these cookies from ordinary to absolutely unforgettable. It adds depth that pairs perfectly with the pumpkin and warm spices.
- Perfectly Soft Centers: Most pumpkin cookies turn out cakey or dry. These stay soft and tender in the middle for days — thanks to the right balance of pumpkin puree and butter.
- Cinnamon Sugar Coating: That classic snickerdoodle roll in cinnamon sugar gives each cookie a slightly crunchy exterior that contrasts beautifully with the soft inside.
- No Chilling Required: You can make these from start to finish in under 30 minutes. No waiting around for the dough to firm up — just scoop, roll, bake, and enjoy.
- Fall in Every Bite: The combination of pumpkin, brown butter, cinnamon, nutmeg, and cloves tastes like October in cookie form. It’s the kind of treat that makes you want to grab a mug of cider and sit by a window.
I’ve made a lot of cookies over the years — from my cozy pumpkin spice snickerdoodle cookies to classic chocolate chip. But these brown butter pumpkin snickerdoodles? They’re the ones I keep coming back to. They’re not too sweet, not too heavy, and they somehow taste even better the next day — if they last that long.
What Ingredients You Will Need
This recipe uses simple, everyday ingredients that come together to create something truly special. Here’s what you’ll need and why each one matters.
For the Cookies
- 1 cup (2 sticks) unsalted butter — You’ll brown this first, which is the secret to the nutty, rich flavor. I use unsalted so I can control the salt level.
- 1 cup granulated sugar — Adds sweetness and helps create that slightly crisp edge.
- ½ cup packed light brown sugar — Adds moisture and a hint of molasses flavor that complements the pumpkin.
- ½ cup pumpkin puree — Not pumpkin pie filling. Make sure it’s 100% pure pumpkin. I prefer Libby’s for consistent texture, but any brand works.
- 1 large egg — Helps bind everything together. Bring it to room temperature first for better incorporation.
- 1 teaspoon vanilla extract — Use pure vanilla if you have it. It rounds out the flavors beautifully.
- 2 ¼ cups all-purpose flour — Spoon and level it into your measuring cup. Scooping directly can pack in too much flour and make the cookies dry.
- 1 teaspoon baking soda — Helps the cookies spread just enough without turning into pancakes.
- ½ teaspoon baking powder — Adds a little lift for that soft, tender center.
- 1 teaspoon ground cinnamon — The backbone of the spice blend.
- ½ teaspoon ground nutmeg — Freshly grated if you’re feeling fancy, but pre-ground works fine.
- ½ teaspoon ground cloves — Adds warmth and depth.
- ½ teaspoon salt — Balances the sweetness and enhances the brown butter flavor.
For the Cinnamon Sugar Coating
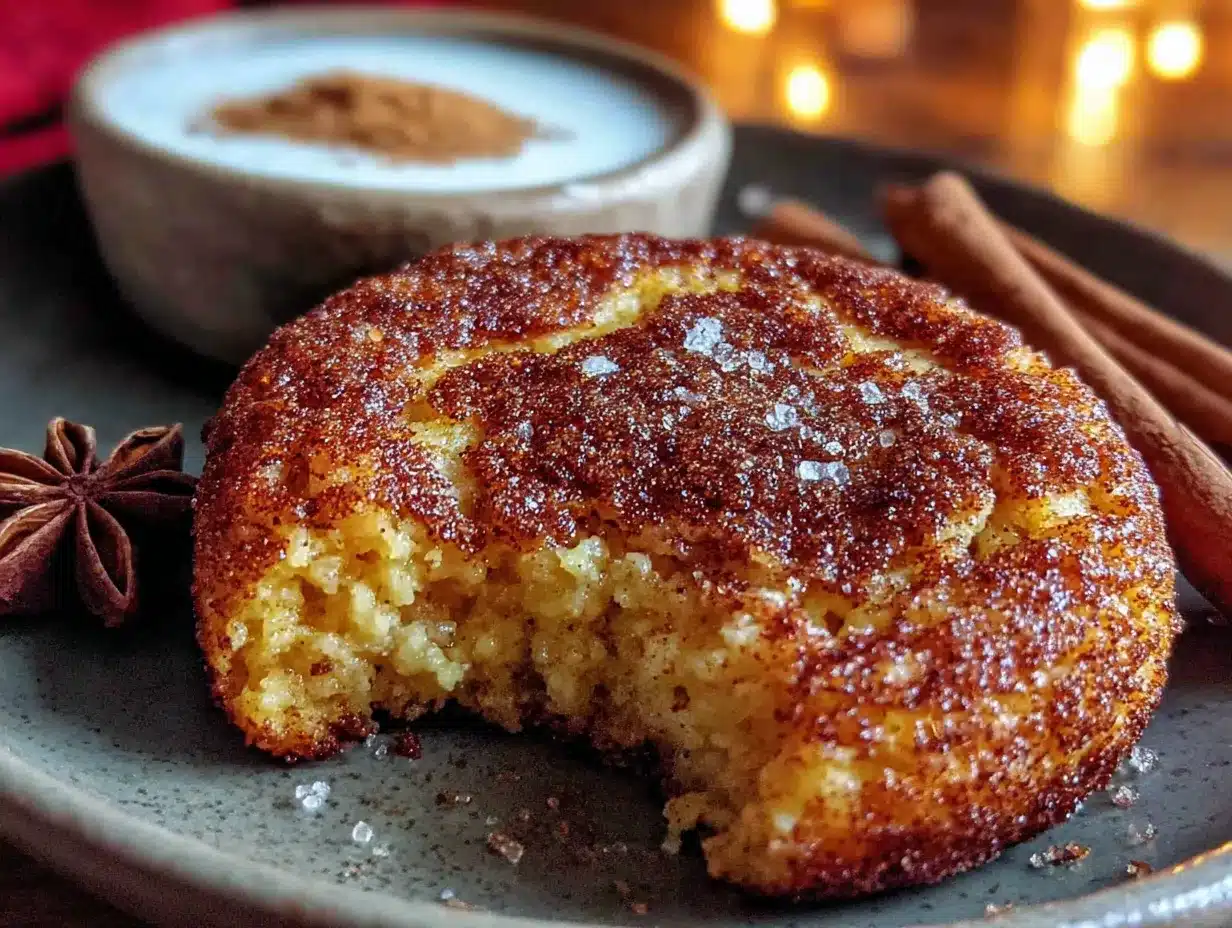
- ¼ cup granulated sugar
- 1 tablespoon ground cinnamon
That’s it. No weird ingredients, no specialty flours, nothing you can’t find at a regular grocery store. The brown butter does all the heavy lifting flavor-wise, and the pumpkin keeps everything moist without making the dough too wet.
If you’re out of pumpkin puree, you can substitute sweet potato puree in a pinch — just make sure it’s not seasoned. And if you don’t have cloves, you can use a pinch of allspice instead.
Equipment Needed
You don’t need a professional bakery setup to make these cookies. Here’s what you’ll want to have on hand:
- Large skillet or saucepan — For browning the butter. A light-colored pan helps you see when the butter turns amber.
- Mixing bowls — One large, one medium. I prefer glass or stainless steel.
- Whisk — For combining dry ingredients evenly.
- Electric hand mixer or stand mixer — Creaming the butter and sugars works best with a mixer, but you can do it by hand with some elbow grease.
- Rubber spatula — For scraping down the bowl and folding in ingredients.
- Baking sheets — Two standard half-sheet pans work well. Line them with parchment paper or silicone baking mats.
- Cookie scoop — A 1.5-tablespoon scoop makes uniformly sized cookies. I use this for everything from cookies to meatballs.
- Cooling rack — Lets air circulate so the cookies cool evenly without getting soggy on the bottom.
- Small bowl — For mixing the cinnamon sugar coating.
If you don’t have a cookie scoop, just use two spoons — one to scoop, one to scrape. And if you don’t have a cooling rack, a clean dish towel works in a pinch, though the bottoms might stay a little softer.
Preparation Method
Let’s get to the good part. Follow these steps carefully, and you’ll end up with cookies that taste like you spent hours in the kitchen — even though it only takes about 25 minutes total.
Step 1: Brown the Butter
Place the butter in a large skillet or saucepan over medium heat. Stir it constantly with a rubber spatula or wooden spoon as it melts. After a few minutes, it will start to foam and bubble. Keep stirring. You’ll see little brown specks forming at the bottom — that’s the milk solids toasting, which is where all that nutty flavor comes from.
Once the butter turns a deep amber color and smells like toasted nuts (about 5-7 minutes), remove it from the heat immediately. Pour it into a heatproof bowl to stop the cooking process. Let it cool for about 10 minutes — you want it warm, not hot, when you add it to the sugars.
Pro tip: Don’t walk away from the pan. Brown butter can go from perfect to burnt in about 30 seconds. I’ve ruined more than one batch this way, and it’s heartbreaking.
Step 2: Mix the Wet Ingredients
In a large mixing bowl, combine the cooled brown butter with the granulated sugar and brown sugar. Beat with an electric mixer on medium speed for about 2 minutes until the mixture looks smooth and slightly lighter in color. Add the pumpkin puree, egg, and vanilla extract. Mix on low until everything is combined. The mixture will look a little thick and glossy — that’s normal.
Step 3: Combine the Dry Ingredients
In a separate medium bowl, whisk together the flour, baking soda, baking powder, cinnamon, nutmeg, cloves, and salt. Make sure there are no lumps. Whisking aerates the flour and distributes the leavening agents evenly, which helps the cookies rise consistently.
Step 4: Bring It All Together
Gradually add the dry ingredients to the wet mixture, mixing on low speed. Stop when the flour just disappears — overmixing will make the cookies tough. Scrape down the sides and bottom of the bowl with a spatula to make sure everything is incorporated. The dough will be soft and slightly sticky, but it should hold together when you scoop it.
Step 5: Make the Cinnamon Sugar Coating
In a small bowl, stir together the ¼ cup sugar and 1 tablespoon cinnamon until evenly combined.
Step 6: Scoop and Roll
Preheat your oven to 350°F (175°C). Line two baking sheets with parchment paper or silicone mats. Using a cookie scoop, portion out rounded tablespoons of dough. Roll each portion into a ball between your palms — the dough will be soft, so work gently. Then roll each ball in the cinnamon sugar mixture until fully coated. Place them on the prepared baking sheets about 2 inches apart. They will spread a little, but not too much.
Step 7: Bake
Bake one sheet at a time in the center of the oven for 10-12 minutes. The cookies should look puffed and slightly cracked on top, with the edges just starting to turn golden. The centers will look soft and a little underdone — that’s exactly what you want. They’ll continue to set as they cool.
Let the cookies rest on the baking sheet for 5 minutes before transferring them to a cooling rack. This step is important — moving them too early can cause them to fall apart.
Step 8: Cool and Enjoy
Once they’re on the cooling rack, resist the urge to eat one immediately. I know it’s hard. Let them cool completely — about 15 minutes — so the texture sets properly. Then grab a glass of milk or a hot cup of coffee and enjoy the fruits of your labor.
Cooking Tips & Techniques
After making these cookies more times than I care to count, I’ve picked up a few tricks that make a real difference. Here’s what I wish someone had told me before my first attempt.
Don’t skip browning the butter. I know it adds an extra step, but this is where the magic happens. The nutty, caramelized flavor from browned butter is what makes these cookies taste like they came from a fancy bakery. If you’re short on time, you can brown the butter a day ahead and keep it in the fridge — just let it come back to room temperature before using.
Watch your pumpkin. Too much pumpkin puree will make the dough too wet, and your cookies will spread into flat, sad discs. Measure carefully — ½ cup is the sweet spot. If your pumpkin puree looks watery (some brands are thinner than others), blot it with a paper towel before adding it to the dough.
Chill if you need to. The recipe works without chilling, but if your kitchen is warm or your dough feels too soft to handle, pop it in the fridge for 15-20 minutes. It makes scooping and rolling much easier.
Use a light-colored pan. Dark baking sheets absorb more heat and can cause the bottoms of your cookies to brown too quickly. If that’s all you have, reduce the oven temperature by 25°F and keep an eye on them.
Rotate halfway through. Halfway through baking, spin the baking sheet 180 degrees. Ovens often have hot spots, and this ensures even baking across all your cookies.
Let them cool on the sheet. I learned this the hard way. If you try to move the cookies right out of the oven, they’ll crumble. Give them those 5 minutes on the hot sheet — it lets the centers finish setting without over-baking the edges.
These cookies also pair beautifully with other fall treats. I’ve served them alongside a slice of no-bake pumpkin cheesecake pie with gingersnap crust for a dessert table that got serious compliments.
Variations & Adaptations
One of the best things about this recipe is how flexible it is. Here are some variations I’ve tried and loved.
Gluten-Free Version: Swap the all-purpose flour with a 1:1 gluten-free baking flour blend. I’ve used Bob’s Red Mill with great results. The cookies will be slightly more delicate, so handle them gently.
Dairy-Free Version: Use vegan butter sticks instead of regular butter. They brown similarly and work well in this recipe. Just make sure to use a brand with a high fat content for the best texture.
Extra Spiced: If you love a bold spice profile, add ¼ teaspoon of ground ginger and a pinch of cardamom to the dry ingredients. It gives the cookies a chai-like warmth that’s absolutely delightful.
Maple Glaze Drizzle: Whisk together ½ cup powdered sugar, 1 tablespoon maple syrup, and 1-2 teaspoons milk until smooth. Drizzle over cooled cookies for an extra layer of sweetness.
Pumpkin Seed Crunch: Before baking, press a few pepitas (shelled pumpkin seeds) into the top of each dough ball. They toast as the cookies bake and add a lovely crunch.
White Chocolate Chips: Fold in ½ cup white chocolate chips at the end of mixing. The sweetness pairs beautifully with the brown butter and pumpkin spices.
For a completely different take, try making these as bar cookies instead. Press the dough into a greased 9×13 pan, sprinkle with cinnamon sugar, and bake for 18-20 minutes. Cut into squares once cool.
Serving & Storage Suggestions
These cookies are best served slightly warm — the centers are extra soft and the cinnamon sugar coating is at its most fragrant. Let them cool for about 10 minutes after baking if you can wait that long. A glass of cold milk, a mug of hot apple cider, or a iced pumpkin spice latte cupcake on the side makes for a perfect fall moment.
For storage, keep the cookies in an airtight container at room temperature. They’ll stay soft and delicious for up to 5 days — though in my house, they rarely last past day two. Place a slice of bread in the container to help maintain moisture if you’re storing them for more than a couple of days. Just replace the bread every other day.
You can also freeze these cookies for up to 3 months. Let them cool completely, then place them in a single layer in a freezer-safe bag or container. To thaw, leave them at room temperature for about 30 minutes. You can also pop them in a 300°F oven for 5 minutes to re-crisp the edges.
If you want to freeze the dough instead, scoop it into balls, roll them in cinnamon sugar, and place them on a baking sheet in the freezer for an hour. Transfer the frozen dough balls to a freezer bag. Bake from frozen — just add 2-3 minutes to the baking time.
The flavors actually deepen after a day or two. The brown butter and pumpkin meld together beautifully, making day-old cookies taste even better than fresh ones. Not that they’ll last that long.
Nutritional Information & Benefits
Here’s the estimated nutritional breakdown per cookie (based on 24 cookies):
| Nutrient | Amount |
|---|---|
| Calories | 165 |
| Total Fat | 9g |
| Saturated Fat | 5g |
| Cholesterol | 30mg |
| Sodium | 120mg |
| Total Carbohydrates | 21g |
| Dietary Fiber | 1g |
| Sugars | 13g |
| Protein | 2g |
Pumpkin puree is packed with vitamin A, which supports eye health and immune function. It’s also a good source of fiber and potassium. The cinnamon in the coating has anti-inflammatory properties and can help regulate blood sugar levels. And while these cookies are definitely a treat, the pumpkin adds a little nutritional boost compared to your average cookie.
These cookies are vegetarian and can be made gluten-free and dairy-free with the substitutions mentioned above. They contain wheat, dairy, and eggs in their standard form.
Conclusion
These Brown Butter Pumpkin Snickerdoodle Cookies are the kind of recipe that makes you look forward to fall all year long. The nutty brown butter, the warm spices, the soft centers, and that crackly cinnamon sugar coating — every bite is a little piece of autumn heaven.
I’ve made these for family gatherings, holiday cookie swaps, and quiet evenings when I just wanted something cozy to bake. Every single time, they disappear fast. And every single time, someone asks for the recipe.
Now it’s your turn. Give these cookies a try — maybe this weekend, maybe tonight. Don’t be afraid to make them your own. Add a little extra cinnamon if that’s your thing. Drizzle them with maple glaze if you’re feeling fancy. Or just roll them in sugar and bake them exactly as written. They’ll be perfect either way.
When you make them — and I hope you do — come back and let me know how they turned out. Leave a comment below, share a photo, or tell me about your own twist on the recipe. I read every single one, and nothing makes me happier than hearing that these cookies brought a little warmth to someone’s kitchen.
Happy baking, friends. And happy fall.
Frequently Asked Questions
Can I use pumpkin pie filling instead of pumpkin puree?
No, don’t do that. Pumpkin pie filling is pre-sweetened and spiced, which will throw off the sugar and spice balance in this recipe. Stick with 100% pure pumpkin puree for the best results.
Why did my cookies turn out flat?
Flat cookies usually mean the butter was too warm or the dough wasn’t chilled enough. Make sure your brown butter has cooled to room temperature before mixing. If your kitchen is warm, chill the dough for 15-20 minutes before scooping and baking.
Can I make these cookies ahead of time?
Absolutely. You can bake them up to 5 days ahead and store them in an airtight container. Or freeze the dough balls for up to 3 months and bake them fresh whenever you want warm cookies.
How do I know when the brown butter is done?
Watch for the butter to turn a deep amber color and smell nutty and toasty. You’ll see brown specks forming at the bottom of the pan. It usually takes 5-7 minutes over medium heat. Remove it from the heat immediately once it reaches that color.
Can I use salted butter instead of unsalted?
You can, but reduce the added salt in the recipe to ¼ teaspoon. Salted butter has varying amounts of salt depending on the brand, so it’s harder to control the final flavor. Unsalted butter gives you more consistent results.
Pin This Recipe!
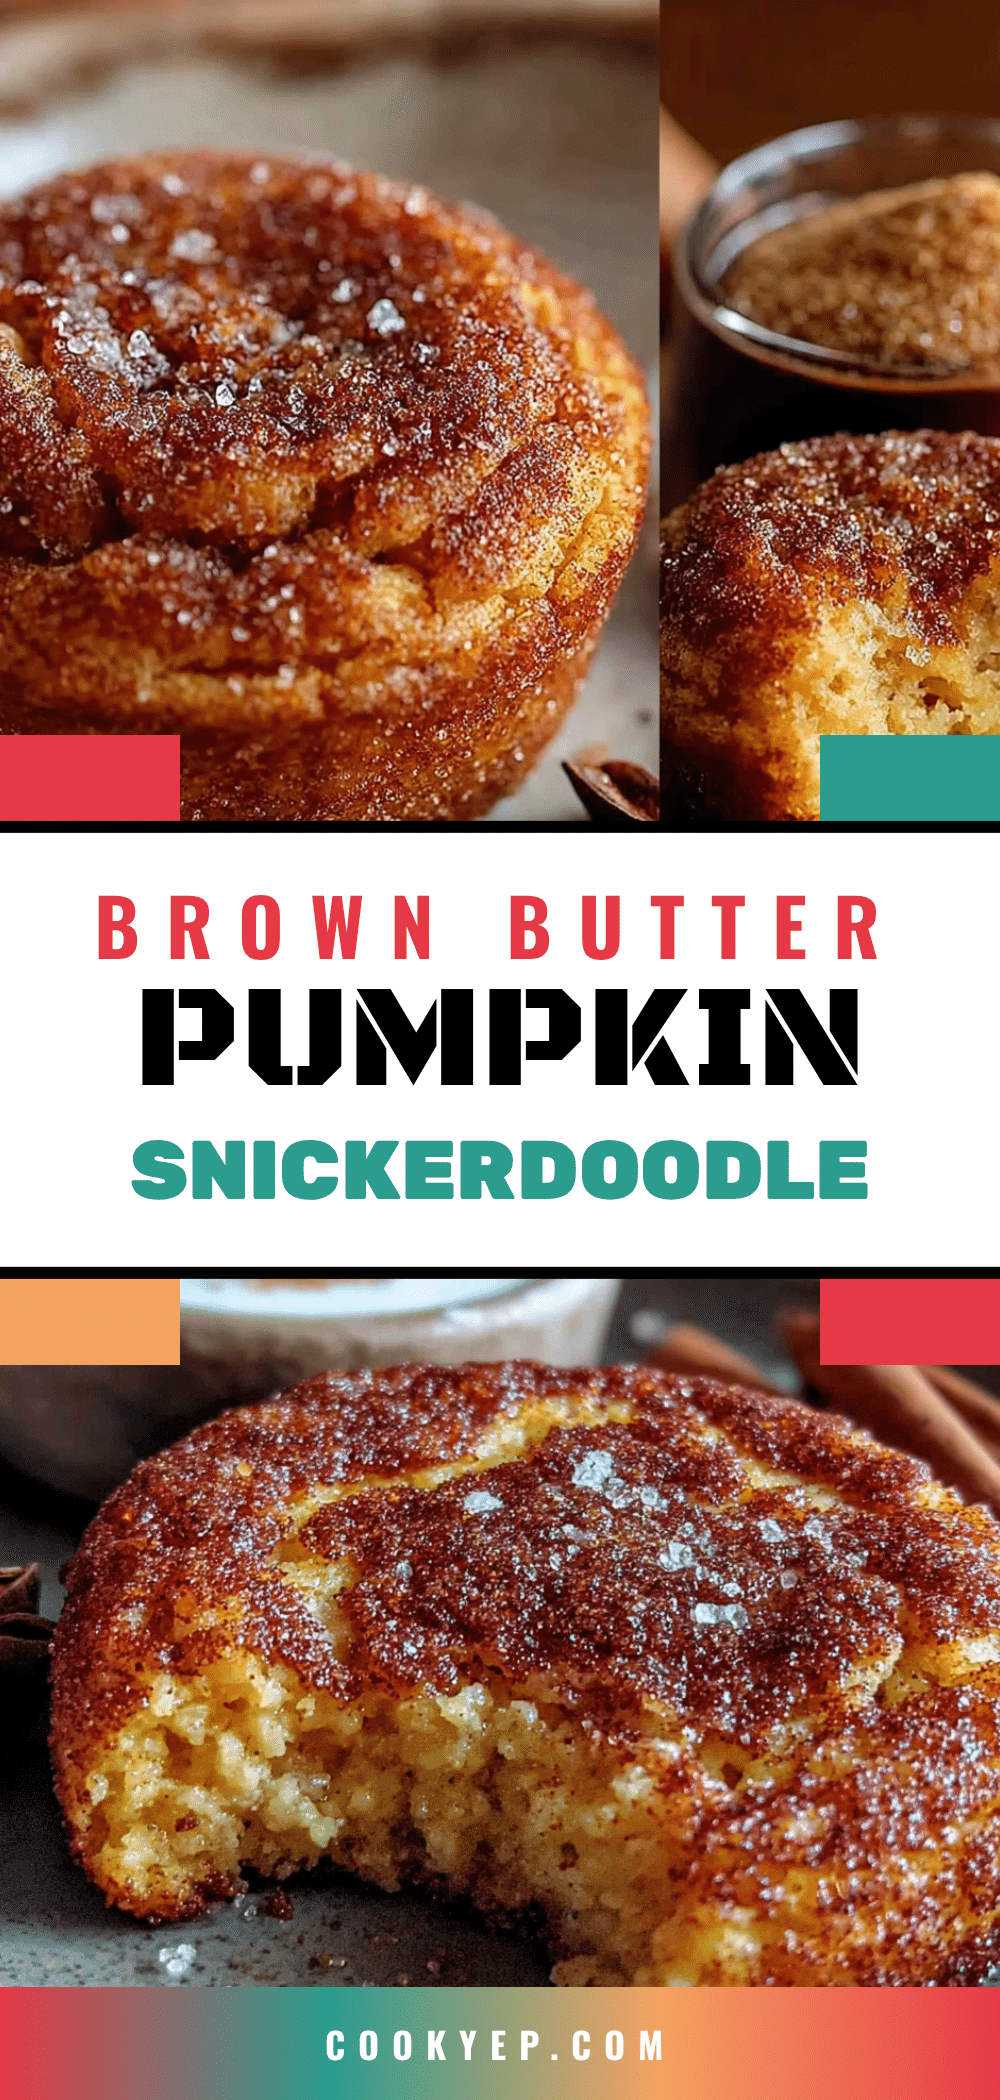
Best Brown Butter Pumpkin Snickerdoodle Cookies
These Brown Butter Pumpkin Snickerdoodle Cookies combine nutty browned butter, warm pumpkin spices, and a classic cinnamon sugar coating for a soft, tender cookie that tastes like fall in every bite. No chilling required, ready in under 30 minutes.
- Prep Time: 15 minutes
- Cook Time: 12 minutes
- Total Time: 27 minutes
- Yield: 24 cookies 1x
- Category: Dessert
- Cuisine: American
Ingredients
- 1 cup (2 sticks) unsalted butter
- 1 cup granulated sugar
- ½ cup packed light brown sugar
- ½ cup pumpkin puree (100% pure pumpkin)
- 1 large egg, room temperature
- 1 teaspoon vanilla extract
- 2 ¼ cups all-purpose flour, spooned and leveled
- 1 teaspoon baking soda
- ½ teaspoon baking powder
- 1 teaspoon ground cinnamon
- ½ teaspoon ground nutmeg
- ½ teaspoon ground cloves
- ½ teaspoon salt
- ¼ cup granulated sugar (for coating)
- 1 tablespoon ground cinnamon (for coating)
Instructions
- Brown the butter: Place butter in a large skillet or saucepan over medium heat. Stir constantly as it melts. After a few minutes, it will foam and bubble. Keep stirring until the butter turns a deep amber color and smells nutty (about 5-7 minutes). Remove from heat immediately and pour into a heatproof bowl. Let cool for about 10 minutes until warm, not hot.
- Mix the wet ingredients: In a large mixing bowl, combine the cooled brown butter with granulated sugar and brown sugar. Beat with an electric mixer on medium speed for about 2 minutes until smooth and slightly lighter in color. Add pumpkin puree, egg, and vanilla extract. Mix on low until combined. The mixture will look thick and glossy.
- Combine the dry ingredients: In a separate medium bowl, whisk together flour, baking soda, baking powder, cinnamon, nutmeg, cloves, and salt until no lumps remain.
- Bring it all together: Gradually add the dry ingredients to the wet mixture, mixing on low speed. Stop when the flour just disappears. Scrape down the sides and bottom of the bowl with a spatula. The dough will be soft and slightly sticky.
- Make the cinnamon sugar coating: In a small bowl, stir together ¼ cup sugar and 1 tablespoon cinnamon until evenly combined.
- Scoop and roll: Preheat oven to 350°F (175°C). Line two baking sheets with parchment paper or silicone mats. Using a cookie scoop, portion out rounded tablespoons of dough. Roll each portion into a ball between your palms, then roll in the cinnamon sugar mixture until fully coated. Place on prepared baking sheets about 2 inches apart.
- Bake: Bake one sheet at a time in the center of the oven for 10-12 minutes. Cookies should look puffed and slightly cracked on top, with edges just starting to turn golden. Centers will look soft and slightly underdone. Let cookies rest on the baking sheet for 5 minutes before transferring to a cooling rack.
- Cool and enjoy: Let cookies cool completely on the rack (about 15 minutes) before serving.
Notes
Don’t skip browning the butter—it’s the key to the nutty flavor. Measure pumpkin carefully; too much makes cookies flat. If dough feels too soft, chill for 15-20 minutes. Use a light-colored baking sheet to prevent over-browning. Rotate the baking sheet halfway through baking. Let cookies cool on the sheet for 5 minutes before moving. Store in an airtight container at room temperature for up to 5 days. Freeze baked cookies for up to 3 months or freeze dough balls for baking later.
Nutrition
- Serving Size: 1 cookie
- Calories: 165
- Sugar: 13
- Sodium: 120
- Fat: 9
- Saturated Fat: 5
- Carbohydrates: 21
- Fiber: 1
- Protein: 2
Keywords: brown butter, pumpkin, snickerdoodle, cookies, fall, pumpkin cookies, snickerdoodle cookies, brown butter cookies


