I did not trust a charcuterie board that looked effortless. Honestly, the first time a friend brought over a wooden board piled with cheese and cured meat for a casual hangout, I nodded along while secretly thinking, “You just bought stuff and put it on a plank.” It felt like a cheat—a way to look fancy without actually cooking. I was a baker, a person who needed precise measurements and oven timers. The idea of arranging ingredients without a recipe felt like walking into a room blindfolded. But then I hosted my first holiday gathering, the kind where you want everything to feel special without spending three days in the kitchen.
I had already planned to make a batch of cozy eggnog snickerdoodle cookies with nutmeg sugar for dessert, but I needed something for people to nibble on while they arrived. Something that didn’t require me to hover over a stove. So, I caved. I grabbed a board, some cheese, and a handful of olives. I arranged things until it looked less like a pile and more like a landscape. And you know what? People didn’t just eat it. They stood around it, talking, picking, laughing. It became the center of the room without any drama. That’s when I realized the magic wasn’t in the cooking—it was in the curating. This easy build-your-own charcuterie board for beginners is that same feeling, minus the anxiety. It’s the kind of spread that makes you look like you have it all together, even if you’re just figuring it out as you go.
Why You’ll Love This Recipe
Let’s be honest—most charcuterie guides online make it sound like you need a culinary degree and a second mortgage to afford the ingredients. Not this one. This easy build-your-own charcuterie board for beginners is designed for real people with real budgets and real kitchens. I’ve tested this approach with everything from a quiet night in to a full-blown holiday party, and it works every single time. Here’s why you’ll love it:
- No Cooking Required: Seriously. If you can open a package and arrange things on a surface, you can do this. It’s the ultimate no-stress entertaining option.
- Completely Customizable: You don’t need to hunt down obscure ingredients. Use what you love, what’s on sale, or what’s already in your fridge. This board bends to you, not the other way around.
- Budget-Friendly: You can build a beautiful board for under $30 by choosing a few quality items instead of a dozen mediocre ones. I’ll show you how.
- Perfect for Any Occasion: Game day, book club, holiday appetizer, or a fancy Friday night dinner for two. This board fits every vibe. It pairs beautifully with something like easy loaded football charcuterie board with pretzel bites for a game-day twist.
- Stress-Free Hosting: You can prep everything hours in advance. When guests arrive, you just pull the board out and relax. No last-minute scrambling.
What makes this board different from the rest? It’s the philosophy. Most people think a charcuterie board needs to be overflowing with twenty different items to impress. But honestly, a board with five well-chosen components—a great cheese, a good cured meat, a sweet element, something briny, and a crunchy carb—will always taste better than a board with fifteen random things. It’s about balance, not quantity. And when you take that first bite of creamy brie with a dab of fig jam on a crisp cracker? You’ll understand exactly what I mean.
What Ingredients You Will Need
This recipe uses simple, high-impact ingredients to deliver a board that feels thoughtful and satisfying without the fuss. The key is variety in texture and flavor—creamy, salty, sweet, crunchy, and tangy. Here’s what you’ll need:
The Cheeses (Choose 2-3)
- Soft Cheese: Brie or Camembert (adds richness and a creamy texture). Look for a wheel that gives slightly when pressed.
- Firm Cheese: Aged cheddar, gouda, or manchego (adds a sharp, nutty contrast). I recommend a good aged gouda for its caramel notes.
- Crumbly or Blue Cheese: Goat cheese or a mild blue like gorgonzola (adds tang and visual interest). For beginners, start with a honey goat cheese log—it’s a crowd-pleaser.
The Meats (Choose 2-3)
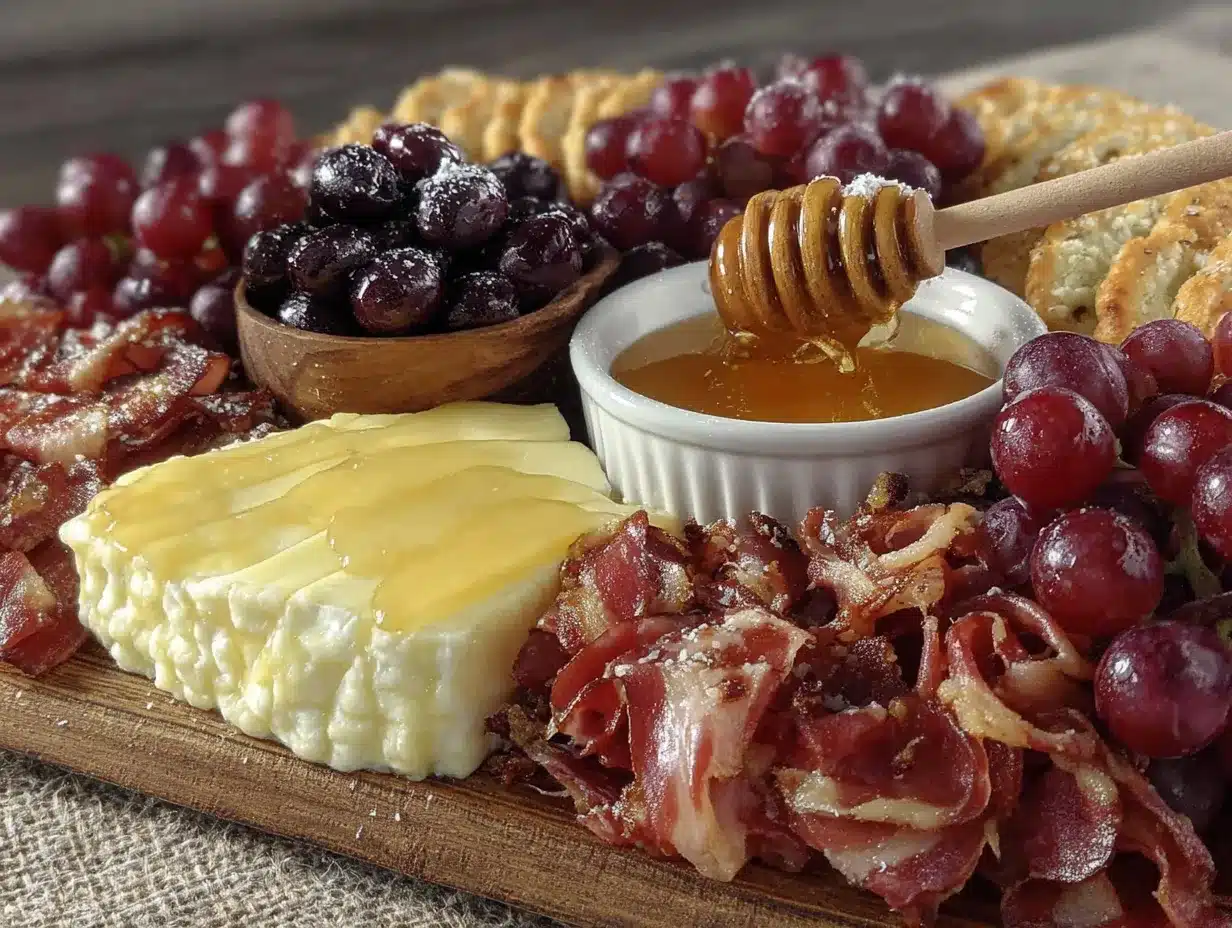
- Hard Salami: Genoa or soppressata. Slice it into thin rounds or leave a stick whole with a small knife for guests to cut.
- Prosciutto: Thinly sliced and draped in ribbons. It’s delicate and salty—a classic for a reason.
- Spicy Option: Chorizo or capicola (adds a little heat). Fold slices into loose ribbons for a rustic look.
The Accompaniments
- Sweet Element: Fig jam, honey, or a fruit preserve. A small bowl of honey with a drizzle spoon is both functional and beautiful.
- Briny Element: Cornichons, olives, or pickled onions. They cut through the richness of the cheese and meat. I love a mix of kalamata and castelvetrano olives.
- Crunchy Element: A variety of crackers, crostini, or sliced baguette. Go for a mix of textures—water crackers, seed crackers, and a gluten-free option if needed.
- Fresh Element: Grapes, apple slices, or dried figs. They add color and a fresh pop of sweetness.
- Nuts: Marcona almonds, candied pecans, or walnuts (adds crunch and a savory note). Toast them lightly for extra flavor.
Optional Add-Ons
- Dark chocolate squares (for a sweet and salty moment)
- Fresh herbs like rosemary or thyme sprigs for garnish
- Edible flowers for a stunning visual pop
- Mustard or a spicy honey for dipping
When it comes to sourcing, I’ve found that Trader Joe’s and Aldi are goldmines for affordable cheese and meat. For honey, look for local farmers’ market brands—they often have unique flavors like lavender or orange blossom. And if you’re feeling adventurous, try swapping the fig jam for a easy honey balsamic baked figs with goat cheese spread for an elevated twist.
Equipment Needed
You don’t need a fancy wooden board to make this work. Seriously. I’ve used a cutting board, a baking sheet, and even a large ceramic platter. Here’s what you’ll actually need:
- A Board or Platter: Wood, slate, marble, or ceramic—anything large and flat. If using wood, make sure it’s clean and dry. A baking sheet lined with parchment paper works in a pinch.
- Small Bowls: For jams, honey, olives, or nuts. Ramekins or small dipping bowls are perfect. I use a set of four mismatched ones for a casual look.
- Cheese Knives: One for soft cheese and one for hard cheese. If you don’t have dedicated cheese knives, a butter knife and a paring knife work fine.
- Serving Utensils: Small tongs for olives, a honey dipper or small spoon, and a spreader for soft cheese.
- Parchment Paper or Cheese Paper: To wrap leftover cheese. It breathes better than plastic wrap and keeps cheese fresher longer.
Pro tip: If you’re using a wooden board, rub it with a little mineral oil before the first use to prevent staining and cracking. I learned this the hard way after a red wine stain ruined my favorite board. Also, don’t stress about matching everything. A mismatched board with different bowls and knives looks more intentional and rustic than a perfectly coordinated set.
Preparation Method
This is where the magic happens. The goal is to create a board that looks abundant and inviting, not cluttered. Follow these steps, and you’ll have a board that feels effortless and professional.
- Plan Your Layout (5 minutes): Before you place anything, think about the flow. Place your small bowls first—they anchor the board. Then, arrange your cheeses, leaving space between them. Finally, fill in the gaps with meats, fruits, and crackers. I like to sketch a rough layout in my head or on a napkin if I’m feeling fancy.
- Set Out the Bowls: Place your small bowls for jam, honey, olives, and nuts around the board. Spread them out so there’s something to graze on in every quadrant. This prevents guests from having to reach across the board.
- Add the Cheeses: Place your cheeses at different points on the board. If using a soft cheese like brie, leave it whole or cut a small wedge out to show the inside. For hard cheeses like cheddar, cut a few slices and fan them out, leaving the rest of the block intact. This invites people to cut their own pieces. Always bring cheese to room temperature (about 30 minutes out of the fridge) for the best flavor and texture.
- Arrange the Meats: Fold prosciutto into loose ribbons or drape it in waves. For salami, fan out the slices in a line or roll them into small cylinders. Place meats near the cheeses they pair well with—like prosciutto near brie or salami near cheddar. Don’t overcrowd; leave space for picking.
- Add the Fruits and Vegetables: Scatter grapes, apple slices, or dried figs in the gaps. If using fresh fruit, toss apple slices in a little lemon juice to prevent browning. Cornichons and olives can go in their own small bowls or be scattered directly on the board for a more rustic look.
- Fill in with Crackers and Nuts: Arrange crackers in small clusters or lines around the board. Don’t layer them all in one pile—spread them out so every section has easy access. Add nuts in small piles or in a bowl. This adds texture and visual interest.
- Garnish and Final Touches: Add a few sprigs of fresh rosemary or thyme for color and aroma. Drizzle a little honey over the brie or goat cheese. Place a small spoon in the jam bowl. Step back and look at your board—if there are any empty spaces, fill them with a few extra crackers or a handful of berries.
- Serve Immediately or Refrigerate: If serving within an hour, leave the board at room temperature. If you need to prep ahead, cover the board loosely with plastic wrap and refrigerate. Take it out 30 minutes before serving to let the cheese come to room temperature. This is a game-changer for flavor.
One thing I learned the hard way—don’t put wet ingredients like olives directly on the board without a bowl. The brine can seep into the wood and ruin the board, plus it makes crackers soggy. Always use a small bowl for anything briny or saucy.
Cooking Tips & Techniques
After a few too many boards that looked like a toddler arranged them, I’ve picked up some tricks that make a real difference. Here are my best tips for a board that looks like it cost a hundred dollars but didn’t.
- The Rule of Three: Always have three textures on the board at any given point—creamy, crunchy, and chewy. This keeps the palate engaged and prevents flavor fatigue.
- Balance the Salt: If you’re using a salty meat like prosciutto, pair it with a sweet element like fig jam or honey. If your cheese is mild, add a briny olive or cornichon. The contrast makes every bite interesting.
- Don’t Overcrowd: It’s tempting to fill every inch of the board, but leave a little breathing room. A crowded board looks messy and makes it hard for guests to pick items without knocking things over. Think of it as a landscape, not a landfill.
- Prep in Stages: I like to prep the cheese and fruit first, then the meats, then the accompaniments. This way, if something goes wrong (like the apples brown or the crackers break), you can adjust without redoing everything.
- Use Color as a Guide: A board with all brown and beige items looks boring. Add pops of color with red grapes, green olives, yellow apples, or fresh herbs. It makes the board more visually appealing and appetizing.
- Mind the Temperature: Cheese should be served at room temperature for the best flavor. Take it out of the fridge 30-45 minutes before serving. Meats can be served cold or at room temperature, but I prefer them slightly chilled for texture.
- Keep It Accessible: Place items at the edges of the board so guests don’t have to reach over the center. If you have a large board, consider making two smaller boards for different sides of the table.
I once made the mistake of putting a block of cheddar on the board without cutting any slices. Guests were too polite to cut into it, and it sat there untouched for an hour. Now, I always pre-cut a few slices or wedges to encourage people to dig in. It’s a small gesture that makes a big difference.
Variations & Adaptations
This easy build-your-own charcuterie board for beginners is endlessly adaptable. Here are some of my favorite ways to change it up based on the season, dietary needs, or just my mood.
Seasonal Variations
- Fall Harvest Board: Swap grapes for sliced apples and pears. Add a small bowl of perfect brown sugar bourbon sweet potato casserole with pecans for a sweet, savory bite. Use sharp cheddar and a spiced goat cheese.
- Summer Board: Add fresh berries, peach slices, and a dollop of burrata. Pair with a perfect grilled peach burrata salad with honey balsamic for a light, refreshing spread.
- Winter Board: Use dried figs, dates, and candied nuts. Add a dark chocolate bar broken into pieces for a cozy, indulgent touch.
Dietary Adaptations
- Vegetarian: Skip the meat and double up on cheese. Add marinated artichoke hearts, roasted red peppers, and a hummus dip.
- Gluten-Free: Use gluten-free crackers, rice cakes, or sliced cucumber and bell pepper strips as dippers. Most cheese and meat are naturally gluten-free.
- Dairy-Free: Use vegan cheese options like cashew-based brie or almond milk cheddar. Add extra nuts, olives, and a dairy-free chocolate bar.
- Low-Carb/Keto: Focus on cheese, meat, olives, and nuts. Skip the crackers and fruit, and add pickled vegetables and pork rinds for crunch.
Flavor Twists
- Spicy Board: Add pepper jack cheese, spicy chorizo, jalapeño-stuffed olives, and a drizzle of hot honey.
- Mediterranean Board: Use feta cheese, kalamata olives, hummus, pita chips, and roasted red peppers. Add a sprinkle of za’atar for extra flavor.
- Sweet and Savory Board: Pair blue cheese with dark chocolate, dried cherries, and candied walnuts. It’s an unexpected combo that works beautifully.
I once tried a “breakfast charcuterie board” with mini pancakes, bacon, and maple syrup. It was a hit, but honestly, the classic version is still my favorite. There’s something about the combination of salty meat, creamy cheese, and sweet jam that never gets old.
Serving & Storage Suggestions
This board is best served at room temperature, so plan to take it out of the fridge about 30 minutes before guests arrive. Here’s how to serve and store it like a pro.
Serving: Place the board in the center of the table or on a coffee table. Make sure there are small plates and napkins nearby. I like to put out a few small knives for spreading cheese and a small spoon for the jam. If you’re serving a crowd, consider making two smaller boards instead of one giant one—it’s easier for guests to access and looks more intentional.
Pairing Suggestions: This board pairs beautifully with a crisp white wine like Sauvignon Blanc or a light red like Pinot Noir. For a non-alcoholic option, try sparkling water with a splash of cranberry juice. If you’re serving it as an appetizer before a meal, it goes great with a cozy tomato basil soup with perfect grilled cheese dippers or a simple green salad.
Storage: Leftovers can be stored separately. Wrap cheese in cheese paper or parchment paper, not plastic wrap—it allows the cheese to breathe and prevents it from getting slimy. Store meats in an airtight container in the fridge. Crackers and nuts should be kept in a sealed container at room temperature. Fruit and vegetables should be stored in the fridge. Most items will keep for 3-5 days.
Reheating: There’s no reheating needed for a charcuterie board, but if you have leftover baked items like the honey balsamic figs, you can warm them in a 350°F oven for 5 minutes. Cheese is best served cold or at room temperature, so don’t microwave it.
One thing I’ve noticed is that the flavors actually get better after a day or two. The cheese absorbs the aromas of the other ingredients, and the jam and honey meld together. It’s like the board keeps developing even after it’s been assembled. Just make sure to separate any wet ingredients (like olives) from the crackers to prevent sogginess.
Nutritional Information & Benefits
While charcuterie boards aren’t exactly health food, they can be part of a balanced diet when enjoyed in moderation. Here’s a rough estimate for a typical serving (about 4-6 ounces of cheese and meat, plus accompaniments):
Estimated Nutritional Values (per serving):
- Calories: 400-600
- Protein: 20-30g
- Fat: 30-45g (mostly from cheese and meat)
- Carbohydrates: 20-30g (from crackers, fruit, and jam)
- Fiber: 2-4g
- Sugar: 10-15g (natural from fruit and jam)
- Sodium: 800-1200mg
Health Benefits:
- Cheese: A good source of calcium, protein, and vitamin B12. It also contains probiotics if you choose aged or fermented varieties.
- Meat: Provides high-quality protein, iron, and zinc. Opt for nitrate-free options when possible.
- Nuts: Rich in healthy fats, vitamin E, and magnesium. They’re great for heart health and satiety.
- Fruit: Adds fiber, vitamins, and antioxidants. Grapes and apples are particularly high in polyphenols.
- Olives: Packed with monounsaturated fats and antioxidants. They’re also a good source of vitamin E and iron.
Dietary Considerations:
- Gluten-Free: Most cheese and meat are naturally gluten-free. Just check the labels on crackers and any processed meats.
- Low-Carb: This board can easily be made low-carb by skipping crackers and fruit and focusing on cheese, meat, and nuts.
- Allergens: Common allergens include dairy (cheese), tree nuts, and gluten (crackers). Always check labels and consider providing alternatives for guests with allergies.
Personally, I see a charcuterie board as a treat, not a daily meal. It’s perfect for special occasions or when you want to feel a little indulgent. And honestly, the mental health benefits of sharing a beautiful board with friends? That’s priceless.
Conclusion
This easy build-your-own charcuterie board for beginners is proof that you don’t need to be a chef to host like one. It’s flexible, forgiving, and always impressive. Whether you’re throwing a party, having a quiet night in, or just want to feel a little fancy, this board delivers. The best part? You can make it your own. Swap in your favorite cheese, try a new jam, or add a quirky element like pickled eggs or chocolate-covered almonds. There are no rules, only delicious possibilities.
I love this recipe because it reminds me that cooking—or in this case, assembling—doesn’t have to be stressful. It’s about sharing good food with people you care about. And when you see everyone gathered around the board, laughing and reaching for another slice of brie, you’ll know you did something right. So go ahead, grab a board, and start building. I promise, you’ve got this.
Now I want to hear from you! What’s your favorite cheese to put on a charcuterie board? Do you have a go-to jam or honey? Drop a comment below and share your board-building tips. And if you try this recipe, tag me in your photos—I’d love to see your creations. Happy snacking!
Frequently Asked Questions
How far in advance can I assemble a charcuterie board?
You can assemble the board up to 4 hours in advance. Cover it loosely with plastic wrap and refrigerate. Take it out 30 minutes before serving to let the cheese come to room temperature. If you’re using fresh fruit like apples or pears, add them just before serving to prevent browning.
How much food do I need per person for a charcuterie board?
A good rule of thumb is about 2-3 ounces of cheese and 2-3 ounces of meat per person for an appetizer. For a main course, double that amount. For accompaniments, plan on about 1/2 cup of crackers, 1/4 cup of nuts, and 1/4 cup of fruit per person. It’s better to have a little extra than not enough.
Can I make a charcuterie board without meat?
Absolutely! A vegetarian charcuterie board is easy and delicious. Double up on the cheese, add marinated vegetables like artichoke hearts and roasted red peppers, include a hummus or baba ganoush dip, and add extra nuts and fruit. You can also add hard-boiled eggs or stuffed grape leaves for protein.
What’s the best way to arrange a charcuterie board?
Start with the bowls for jams and olives, then place the cheeses at different points around the board. Add the meats in folds or ribbons, then fill in the gaps with fruit, crackers, and nuts. Use color and texture to create visual interest. Leave a little space between items so guests can pick things up easily.
How do I store leftover cheese and meat?
Wrap cheese in cheese paper or parchment paper, not plastic wrap. This allows the cheese to breathe and prevents it from getting slimy. Store meats in an airtight container in the fridge. Crackers and nuts should be kept in a sealed container at room temperature. Most items will keep for 3-5 days. If the cheese gets moldy, just cut off the moldy part—it’s still safe to eat.
Pin This Recipe!
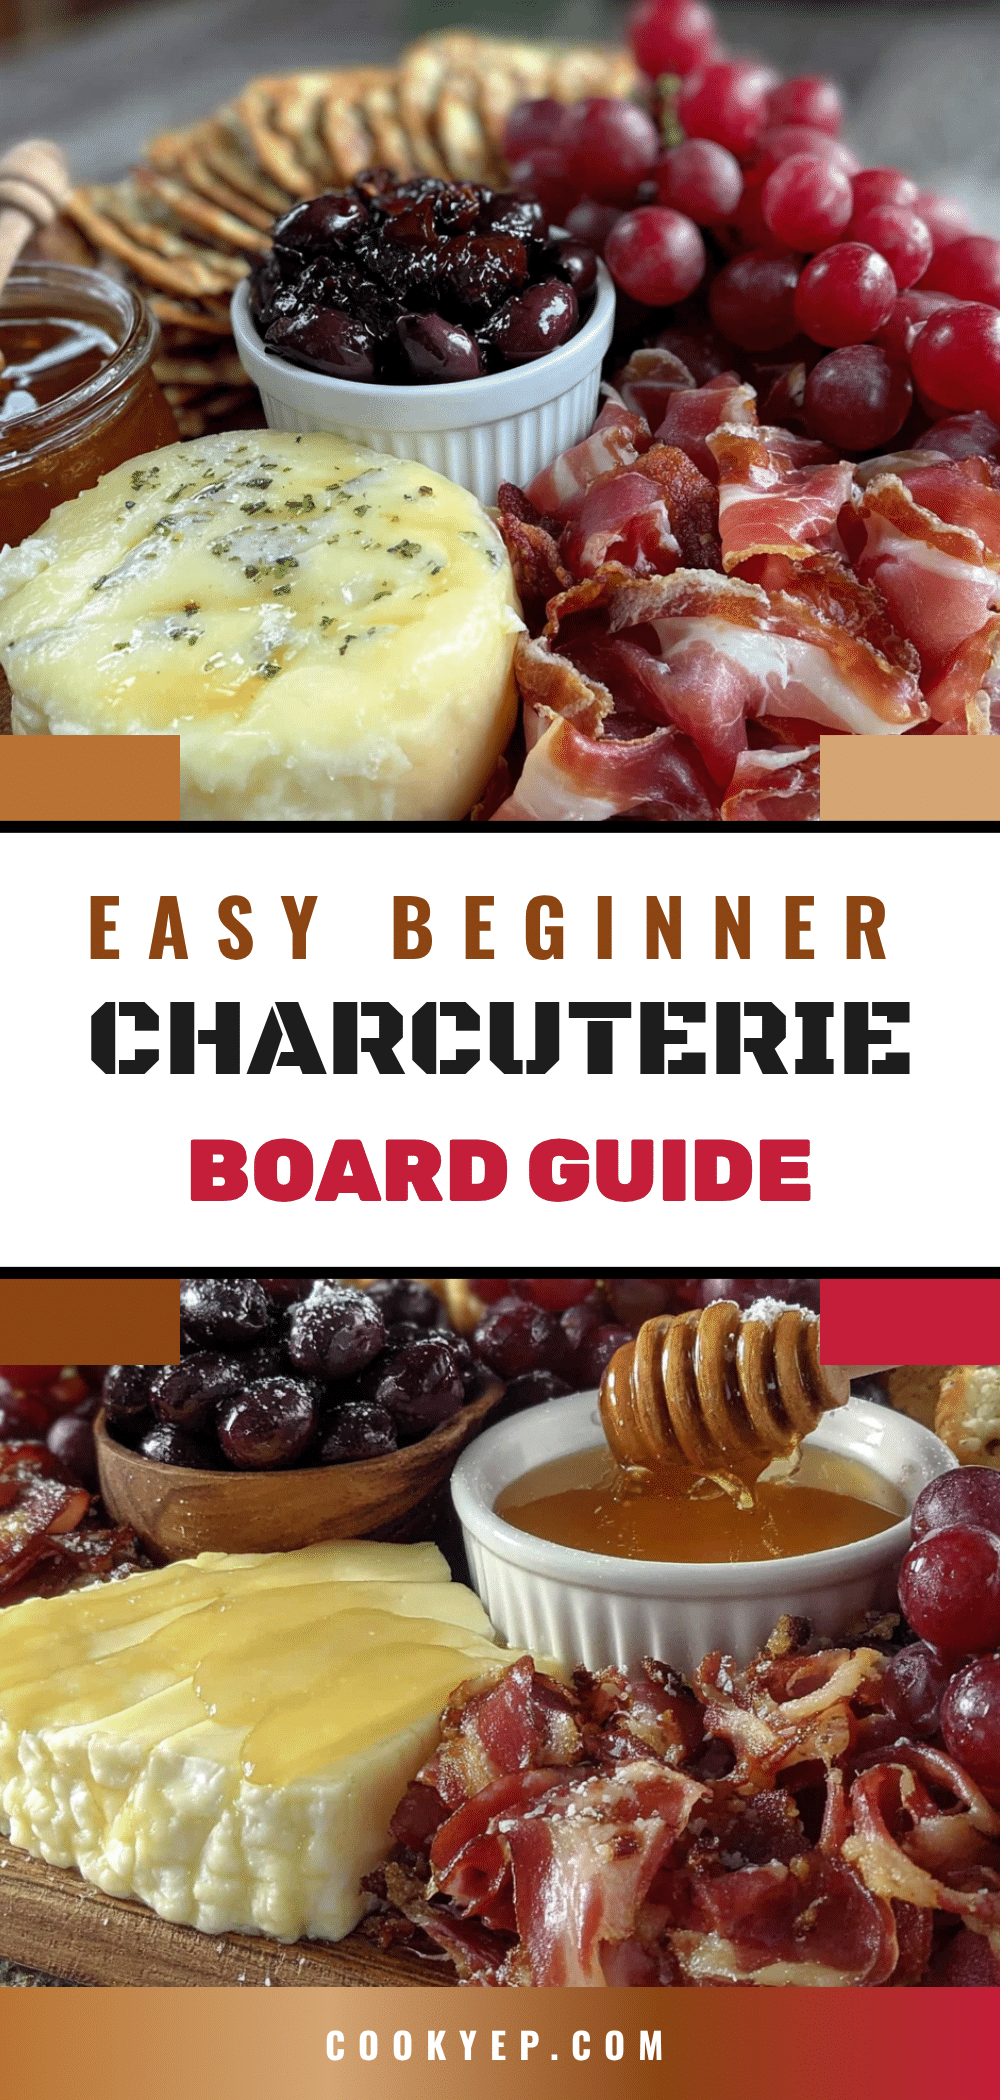
Easy Build Your Own Charcuterie Board for Beginners
This easy build-your-own charcuterie board for beginners is designed for real people with real budgets and real kitchens. It’s the ultimate no-stress entertaining option that’s completely customizable and budget-friendly.
- Prep Time: 15 minutes
- Cook Time: 0 minutes
- Total Time: 15 minutes
- Yield: 8 servings
- Category: Appetizer
- Cuisine: French
Ingredients
- Soft cheese: Brie or Camembert (1 wheel)
- Firm cheese: Aged cheddar, gouda, or manchego (8 oz)
- Crumbly or blue cheese: Goat cheese or mild blue like gorgonzola (4 oz)
- Hard salami: Genoa or soppressata (6 oz)
- Prosciutto: Thinly sliced (4 oz)
- Spicy option: Chorizo or capicola (4 oz)
- Sweet element: Fig jam, honey, or fruit preserve (1/2 cup)
- Briny element: Cornichons, olives, or pickled onions (1/2 cup)
- Crunchy element: Crackers, crostini, or sliced baguette (8 oz)
- Fresh element: Grapes, apple slices, or dried figs (1 cup)
- Nuts: Marcona almonds, candied pecans, or walnuts (1/2 cup)
- Optional: Dark chocolate squares (2 oz)
- Optional: Fresh herbs like rosemary or thyme sprigs
- Optional: Edible flowers
- Optional: Mustard or spicy honey (1/4 cup)
Instructions
- Plan your layout: Before placing anything, think about the flow. Place small bowls first to anchor the board, then arrange cheeses leaving space between them, and finally fill gaps with meats, fruits, and crackers.
- Set out the bowls: Place small bowls for jam, honey, olives, and nuts around the board, spreading them out so there’s something to graze on in every quadrant.
- Add the cheeses: Place cheeses at different points on the board. For soft cheese like brie, leave it whole or cut a small wedge to show the inside. For hard cheeses, cut a few slices and fan them out, leaving the rest of the block intact. Bring cheese to room temperature (about 30 minutes out of the fridge) for best flavor.
- Arrange the meats: Fold prosciutto into loose ribbons or drape in waves. For salami, fan out slices in a line or roll into small cylinders. Place meats near cheeses they pair well with, like prosciutto near brie or salami near cheddar.
- Add the fruits and vegetables: Scatter grapes, apple slices, or dried figs in the gaps. Toss apple slices in lemon juice to prevent browning. Cornichons and olives can go in small bowls or be scattered directly on the board for a rustic look.
- Fill in with crackers and nuts: Arrange crackers in small clusters or lines around the board, spreading them out so every section has easy access. Add nuts in small piles or in a bowl.
- Garnish and final touches: Add fresh rosemary or thyme sprigs for color and aroma. Drizzle honey over brie or goat cheese. Place a small spoon in the jam bowl. Step back and fill any empty spaces with extra crackers or berries.
- Serve immediately or refrigerate: If serving within an hour, leave at room temperature. If prepping ahead, cover loosely with plastic wrap and refrigerate. Take out 30 minutes before serving to let cheese come to room temperature.
Notes
Don’t put wet ingredients like olives directly on the board without a bowl to prevent sogginess. Pre-cut a few slices of hard cheese to encourage guests to dig in. Use color as a guide to make the board visually appealing. The rule of three: always have three textures (creamy, crunchy, chewy) at any point on the board.
Nutrition
- Serving Size: 1 serving (about 4-6
- Calories: 500
- Sugar: 12
- Sodium: 1000
- Fat: 37
- Saturated Fat: 15
- Carbohydrates: 25
- Fiber: 3
- Protein: 25
Keywords: charcuterie board, easy charcuterie, beginner charcuterie, no-cook appetizer, party platter, cheese board, meat and cheese board


