My husband did not trust a no-bake dessert for a Labor Day cookout. He stood there, arms crossed, watching me press peanut butter crumbs into a pan. “It’s going to fall apart,” he said. “You can’t just skip the oven and expect it to hold.” I wanted to argue, but honestly, I had the same fear the first time I made these. No-bake bars feel like a gamble, right? You mix, you press, you chill, and you hope the thing slices clean instead of crumbling into a sad pile of butter and oats.
But here’s the thing—I had already tested this recipe three times before I brought it to that Labor Day party. The first batch was too soft. The second one was too crumbly. The third one? It was the kind of bar that makes you close your eyes after the first bite. The peanut butter flavor hits you right away, smooth and rich, and then the chocolate layer on top gives you that little snap before everything melts together. I brought the whole pan to the cookout and watched people go back for seconds. My husband ate three. Three!
That moment changed how I think about summer desserts. You don’t need to turn on the oven when it’s ninety degrees outside. You don’t need fancy equipment or complicated techniques. You just need a good recipe and a little patience while the fridge does the work. These Easy No-Bake Peanut Butter Labor Day Bars turned a skeptic into a believer, and honestly, that’s the kind of recipe worth sharing.
Why You’ll Love This Recipe
I have made this recipe more times than I can count, and every single time, someone asks for the recipe. That is not me bragging—that is just what happens when you bring a pan of these to any gathering. They disappear fast, and people always look surprised when I tell them there is no baking involved.
- No oven required. This is the biggest win, especially during those late summer days when your kitchen feels like a sauna. You mix everything on the stovetop or in a bowl, press it into a pan, and let the fridge handle the rest.
- Simple ingredients you already have. Peanut butter, butter, powdered sugar, graham crackers, and chocolate chips. That is it. No weird specialty items or trips to three different stores.
- Perfect for Labor Day cookouts. These bars travel well, they slice clean, and they hold up at room temperature for a few hours. You can make them the night before and just grab the pan on your way out the door.
- Crowd-pleaser guaranteed. Kids love them. Adults love them. Even people who claim they don’t like peanut butter desserts end up reaching for a second piece. I have seen it happen.
- The texture is unreal. The base is soft and crumbly in the best way, and the chocolate layer on top sets firm but breaks easily when you bite into it. It is comfort food without the fuss.
What makes these different from every other no-bake bar out there? The ratio. I spent a lot of time tweaking the butter-to-peanut butter balance so the bars hold together without feeling greasy. The graham cracker crumbs give just enough structure, and the chocolate layer is thick enough to satisfy but not so thick that it overpowers the peanut butter. This is the version I keep coming back to, and I think you will too.
What Ingredients You Will Need
This recipe uses simple, pantry-friendly ingredients that come together to create something truly special. Nothing fancy here—just honest ingredients that do exactly what they are supposed to do.
For the Peanut Butter Layer
- 1 cup creamy peanut butter (I prefer Skippy or Jif for the right consistency—natural peanut butter can separate and make the bars greasy)
- ½ cup unsalted butter (softened to room temperature, adds richness and helps the bars hold together)
- 2 cups powdered sugar (sifted if you want to avoid lumps, but I honestly just whisk it in)
- 2 cups graham cracker crumbs (about 14 full sheets, crushed finely—you can use a food processor or a zip-top bag and a rolling pin)
- 1 teaspoon vanilla extract (pure vanilla adds warmth, but imitation works fine)
- Pinch of salt (skip this if your peanut butter is already salted)
For the Chocolate Topping
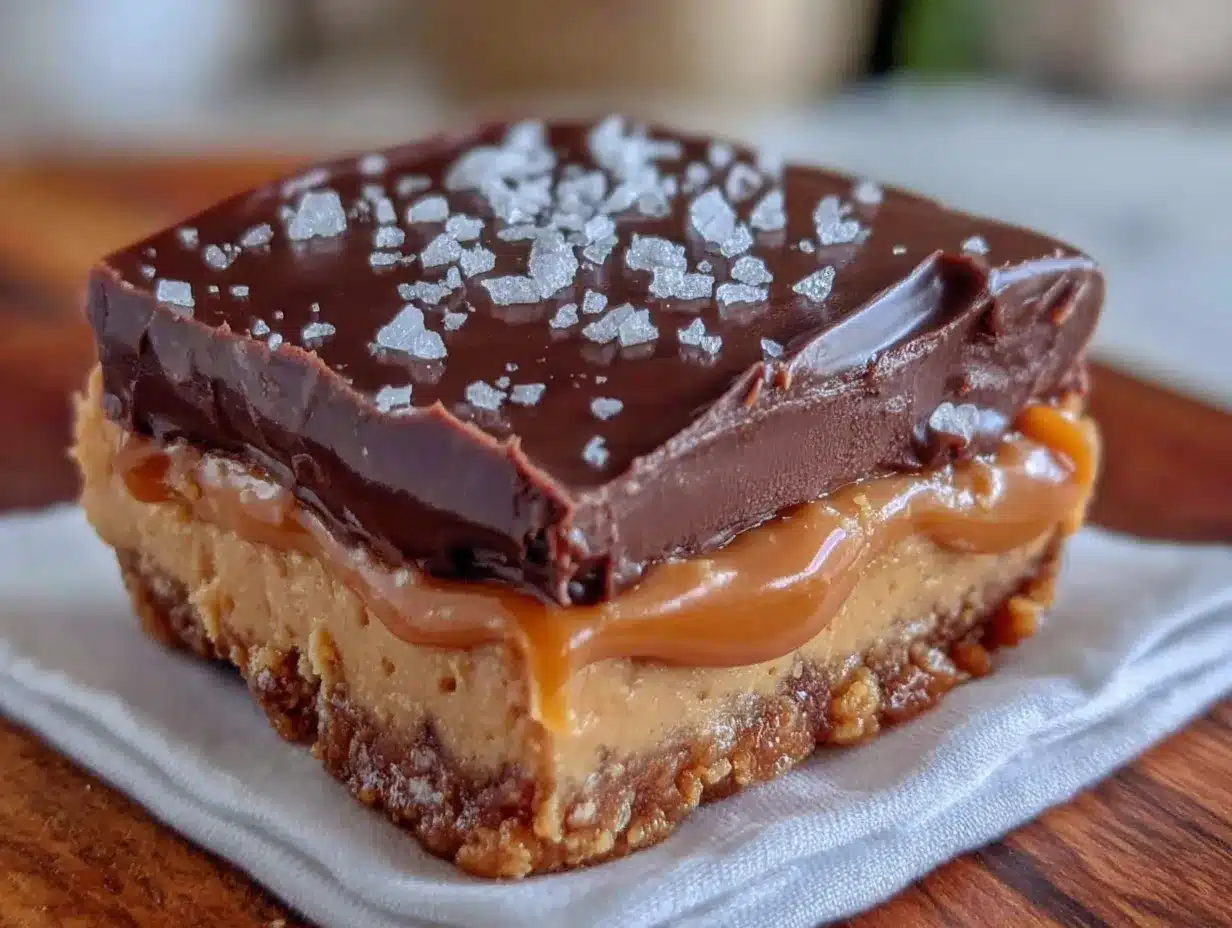
- 1 ½ cups semi-sweet chocolate chips (I like Ghirardelli for a smooth melt, but any brand works)
- 2 tablespoons creamy peanut butter (this helps the chocolate set with a little shine and makes it easier to cut)
You might notice there is no sweetened condensed milk or corn syrup in this recipe. A lot of no-bake bars rely on those ingredients to hold everything together, but I found they make the bars too sticky and sweet. The butter and peanut butter combination does the job perfectly, and the powdered sugar gives you just the right amount of sweetness without going overboard.
If you want to switch things up, you can use crunchy peanut butter for a little texture in the base. I have done that before, and it adds a nice crunch. Just keep in mind that crunchy peanut butter sometimes has less sugar than creamy versions, so you might need an extra tablespoon of powdered sugar to balance it out.
For the graham crackers, I recommend using the honey kind for a subtle sweetness. Cinnamon graham crackers work too if you want a warm spice note, but that changes the flavor profile a bit. Stick with honey graham crackers for the classic version.
Equipment Needed
You do not need much for this recipe, which is part of the beauty. Here is what you will need:
- 9×9-inch baking pan (an 8×8 works too, but the bars will be slightly thicker)
- Parchment paper (for lining the pan so the bars lift out cleanly)
- Medium mixing bowl (for the peanut butter mixture)
- Small saucepan (for melting the chocolate, or you can use the microwave)
- Spatula (a rubber spatula works best for pressing the mixture evenly)
- Measuring cups and spoons
- Food processor or zip-top bag (for crushing graham crackers)
- Sharp knife (for clean slices—trust me, a dull knife will mess up the chocolate layer)
If you do not have a 9×9 pan, you can use a loaf pan and make thicker bars. Just adjust the chilling time since thicker bars take a little longer to set. I have also used a disposable aluminum pan for cookouts when I did not want to worry about getting my good pan back. Works perfectly.
One tip I learned the hard way—line your pan with parchment paper and leave a little overhang on two sides. That makes lifting the whole block of bars out so much easier. Without it, you will be digging around with a spatula and probably messing up the edges.
Preparation Method
Let me walk you through this step by step. The whole process takes about 20 minutes of active work, and then the fridge does the rest.
- Line your pan. Cut a piece of parchment paper to fit the bottom of your 9×9 pan, leaving about 2 inches of overhang on two opposite sides. This creates little handles that make lifting the bars out so much easier later. Set the pan aside.
- Crush the graham crackers. You need 2 cups of fine crumbs. The easiest way is to toss the crackers in a food processor and pulse until they look like sand. If you do not have a food processor, put them in a zip-top bag, squeeze out the air, and go to town with a rolling pin. It is a little therapeutic, honestly. Just make sure there are no big chunks left—those will make the bars crumbly.
- Cream the peanut butter and butter. In a medium mixing bowl, combine 1 cup creamy peanut butter and ½ cup softened unsalted butter. Use a spatula to mix them together until they are completely smooth and well combined. This takes about a minute. The mixture should look glossy and smell amazing.
- Add the powdered sugar. Add 2 cups powdered sugar to the bowl. Stir it in slowly at first so it does not puff up everywhere. Keep mixing until the sugar is fully incorporated and the mixture looks thick and a little bit like cookie dough. If it seems too dry, that is okay—the graham crackers will add moisture.
- Mix in the graham cracker crumbs and vanilla. Add the 2 cups of graham cracker crumbs, 1 teaspoon vanilla extract, and a pinch of salt. Stir everything together until the crumbs are evenly distributed. The mixture should be thick and slightly crumbly but hold together when you press it between your fingers. If it feels too dry, add a tablespoon of softened butter. If it feels too wet, add another tablespoon of graham cracker crumbs.
- Press into the pan. Transfer the mixture to your lined pan. Use your hands or the back of a spatula to press it down firmly and evenly. This step matters more than you think. If you do not press hard enough, the bars will fall apart when you cut them. I usually use the bottom of a measuring cup to really pack it in. Make sure the surface is as flat as possible.
- Melt the chocolate topping. In a small saucepan over low heat, combine 1 ½ cups semi-sweet chocolate chips and 2 tablespoons creamy peanut butter. Stir constantly until everything is melted and smooth. You can also do this in the microwave—just heat in 30-second bursts, stirring between each, until smooth. Be careful not to overheat, or the chocolate will seize up and get grainy.
- Pour the chocolate over the base. Pour the melted chocolate over the pressed peanut butter layer. Use a spatula to spread it evenly to the edges. Tilt the pan a little if you need to help it reach the corners. Try to get an even layer so every bar gets the same amount of chocolate.
- Chill until firm. Place the pan in the refrigerator for at least 2 hours, but 3 to 4 hours is better. The bars need time to set completely. If you are in a hurry, you can pop them in the freezer for about 45 minutes, but keep an eye on them so the chocolate does not get too hard.
- Slice and serve. Once the bars are fully set, lift them out of the pan using the parchment paper overhang. Place the block on a cutting board. Use a sharp knife to cut into squares. I usually go for 16 bars (4 rows by 4 rows), but you can make them bigger or smaller depending on your crowd. Wipe the knife clean between cuts for the neatest edges.
Cooking Tips & Techniques
I have made these bars more times than I can count, and I have definitely made my share of mistakes along the way. Here are the things I wish someone had told me the first time.
Press the base firmly. This is the number one mistake people make. If you press the peanut butter mixture too lightly, the bars will crumble when you try to cut them. You want it packed tight, like you are making a cheesecake crust. Use the bottom of a glass or a measuring cup to really press it down. I have even used a flat-bottomed coffee mug in a pinch.
Let the bars chill long enough. I know it is tempting to rush this step, especially if you are hungry or in a hurry. But cutting these bars too early is a recipe for disaster. The chocolate layer needs time to set completely, and the peanut butter base needs to firm up so it holds together. Give them at least 3 hours in the fridge. Overnight is even better.
Use a sharp knife for clean cuts. A dull knife will drag through the chocolate layer and leave you with messy edges. Run your knife under hot water, dry it off, and then cut. Wipe the blade clean between each cut. This takes an extra minute but makes a huge difference in presentation.
Room temperature ingredients matter. I learned this the hard way when I used cold butter straight from the fridge. The mixture did not come together smoothly, and I ended up with little butter lumps in the base. Let your butter soften on the counter for about 30 minutes before you start. The peanut butter should be at room temperature too.
Do not overheat the chocolate. Chocolate burns easily, and once it seizes, there is no going back. Melt it slowly over low heat or in short microwave bursts. If you see it starting to look thick or grainy, stop immediately and stir in a teaspoon of coconut oil or vegetable oil to smooth it out.
Make ahead for best results. These bars actually taste better the next day. The flavors meld together, and the texture gets even better. I usually make them the night before a cookout and just pull the pan out of the fridge when I am ready to go.
Variations & Adaptations
One of the best things about this recipe is how easy it is to tweak. Here are some variations I have tried and loved.
Chocolate peanut butter swap. Use milk chocolate chips instead of semi-sweet for a sweeter topping. Or go dark chocolate for a more grown-up flavor. I have even used white chocolate chips mixed with a little peanut butter for a totally different look and taste.
Add some crunch. Stir in ½ cup of chopped peanuts, pretzel pieces, or even crispy rice cereal into the peanut butter base before pressing it into the pan. The extra texture is wonderful, especially if you are serving these at a cookout where people expect a little something extra.
Make them gluten-free. Swap the graham crackers for gluten-free graham crackers or crushed gluten-free cookies. I have used gluten-free vanilla wafers before, and they worked great. Just make sure you crush them finely enough so the bars hold together.
Add a layer of something sweet. Spread a thin layer of marshmallow fluff or caramel sauce over the peanut butter base before adding the chocolate. This makes the bars even more decadent and perfect for a special occasion. Just keep in mind that the bars will be a little messier to cut.
Peanut butter alternatives. If you have a peanut allergy in the house, you can use sunflower seed butter or almond butter instead. The texture will be slightly different, and the flavor will change, but the bars will still hold together. Just make sure you use a creamy version, not natural, for the best results.
I once made a batch with crushed fall Chex mix mixed into the base for a sweet and salty twist. It was a hit at the tailgate, and people kept asking what the secret ingredient was.
Serving & Storage Suggestions
These bars are incredibly versatile when it comes to serving. Here is what works best.
Serve cold or at room temperature. I prefer them straight from the fridge because the chocolate layer is firmer and the bars hold their shape better. But they are also delicious at room temperature, especially if you are serving them at a cookout where they will sit out for a while. Just keep in mind that they soften a bit as they warm up.
Pair with a cold drink. A glass of cold milk is the classic choice, but these bars also go great with slow cooker apple cider cocktail or a hot cup of coffee. The richness of the peanut butter and chocolate balances beautifully with something crisp or warm.
Presentation tips. Arrange the bars on a platter and sprinkle a little flaky sea salt on top for a fancy touch. You can also drizzle a little melted peanut butter over the chocolate before it sets for a beautiful marbled effect. If you are bringing them to a party, stack them in a container with parchment paper between the layers so they do not stick together.
Storage instructions. Store the bars in an airtight container in the refrigerator for up to a week. They will stay fresh and delicious the whole time. If you want to keep them longer, you can freeze them for up to 3 months. Just wrap each bar individually in plastic wrap and then place them in a freezer-safe bag. Thaw in the refrigerator overnight before serving.
How flavors develop over time. Honestly, these bars taste even better on day two or three. The peanut butter flavor deepens, and the texture becomes more uniform. If you can resist eating them all in one sitting, you will be rewarded with an even better experience later.
Nutritional Information & Benefits
Let us be real—these are not health food. But they are made with real ingredients, and that counts for something. Here is a rough estimate of the nutritional breakdown per bar (based on 16 servings).
| Nutrient | Amount per Bar |
|---|---|
| Calories | 285 |
| Total Fat | 17g |
| Saturated Fat | 7g |
| Carbohydrates | 30g |
| Sugar | 22g |
| Protein | 6g |
| Fiber | 2g |
Peanut butter brings some good things to the table—protein, healthy fats, and a little bit of fiber. The dark chocolate in the topping contains antioxidants, and the graham crackers add a bit of whole grain depending on the brand you use. Is this a daily snack? Probably not. But for a holiday dessert or a special treat, it is a solid choice.
If you are watching your sugar intake, you can use sugar-free chocolate chips and reduce the powdered sugar by a quarter cup. The texture will be slightly different, but the bars will still be delicious. For a lower-fat option, use reduced-fat peanut butter, but keep in mind that the bars may not hold together as well.
These bars contain peanuts, dairy (butter and chocolate), and gluten (graham crackers). If you have allergies, check the labels on your ingredients carefully and use the substitutions I mentioned earlier.
Conclusion
These Easy No-Bake Peanut Butter Labor Day Bars have become my go-to dessert for every summer gathering, and I do not see that changing anytime soon. They are simple enough to throw together on a whim but impressive enough to get compliments from everyone who tries them. The combination of creamy peanut butter, buttery graham cracker crumbs, and rich chocolate is just unstoppable.
I love that this recipe does not require any special skills or equipment. Anyone can make these bars, and they turn out perfectly every single time. Whether you are a seasoned baker or someone who rarely steps foot in the kitchen, this recipe is for you.
I would love to hear how these turn out for you. Did you add any fun variations? Did your family love them as much as mine does? Drop a comment below and let me know. And if you are looking for another no-bake dessert to add to your rotation, you might want to try my creamy caramel apple cheesecake dip—it is another one that disappears fast at parties.
Go ahead and make a batch this weekend. Your Labor Day cookout will thank you.
Frequently Asked Questions
Can I use natural peanut butter for this recipe?
You can, but the bars may turn out a little greasy because natural peanut butter has more oil that can separate. If you use natural peanut butter, stir it really well before measuring, and consider adding an extra tablespoon of graham cracker crumbs to help absorb the extra moisture. I recommend using a processed creamy peanut butter like Jif or Skippy for the best texture.
How long do these bars need to chill?
At least 2 hours in the refrigerator, but 3 to 4 hours is better for clean slices. If you are in a hurry, you can chill them in the freezer for about 45 minutes. Just keep an eye on them so the chocolate does not get too hard. Overnight chilling gives the best results.
Can I freeze these bars?
Absolutely. Wrap each bar individually in plastic wrap, then place them in a freezer-safe bag or container. They will keep for up to 3 months. To thaw, just move them to the refrigerator overnight. They taste just as good after freezing.
Why did my bars fall apart when I cut them?
This usually happens for one of two reasons. Either you did not press the base firmly enough into the pan, or you cut them before they were fully chilled. Make sure you press the mixture down really hard and let the bars chill for at least 3 hours. Using a sharp knife and wiping it clean between cuts also helps.
Can I make these bars without graham crackers?
Yes. You can substitute crushed vanilla wafers, digestive biscuits, or even crushed pretzels for a salty twist. If you use pretzels, reduce the salt in the recipe since pretzels are already salty. Gluten-free cookies work well too if you need a gluten-free option.
Pin This Recipe!
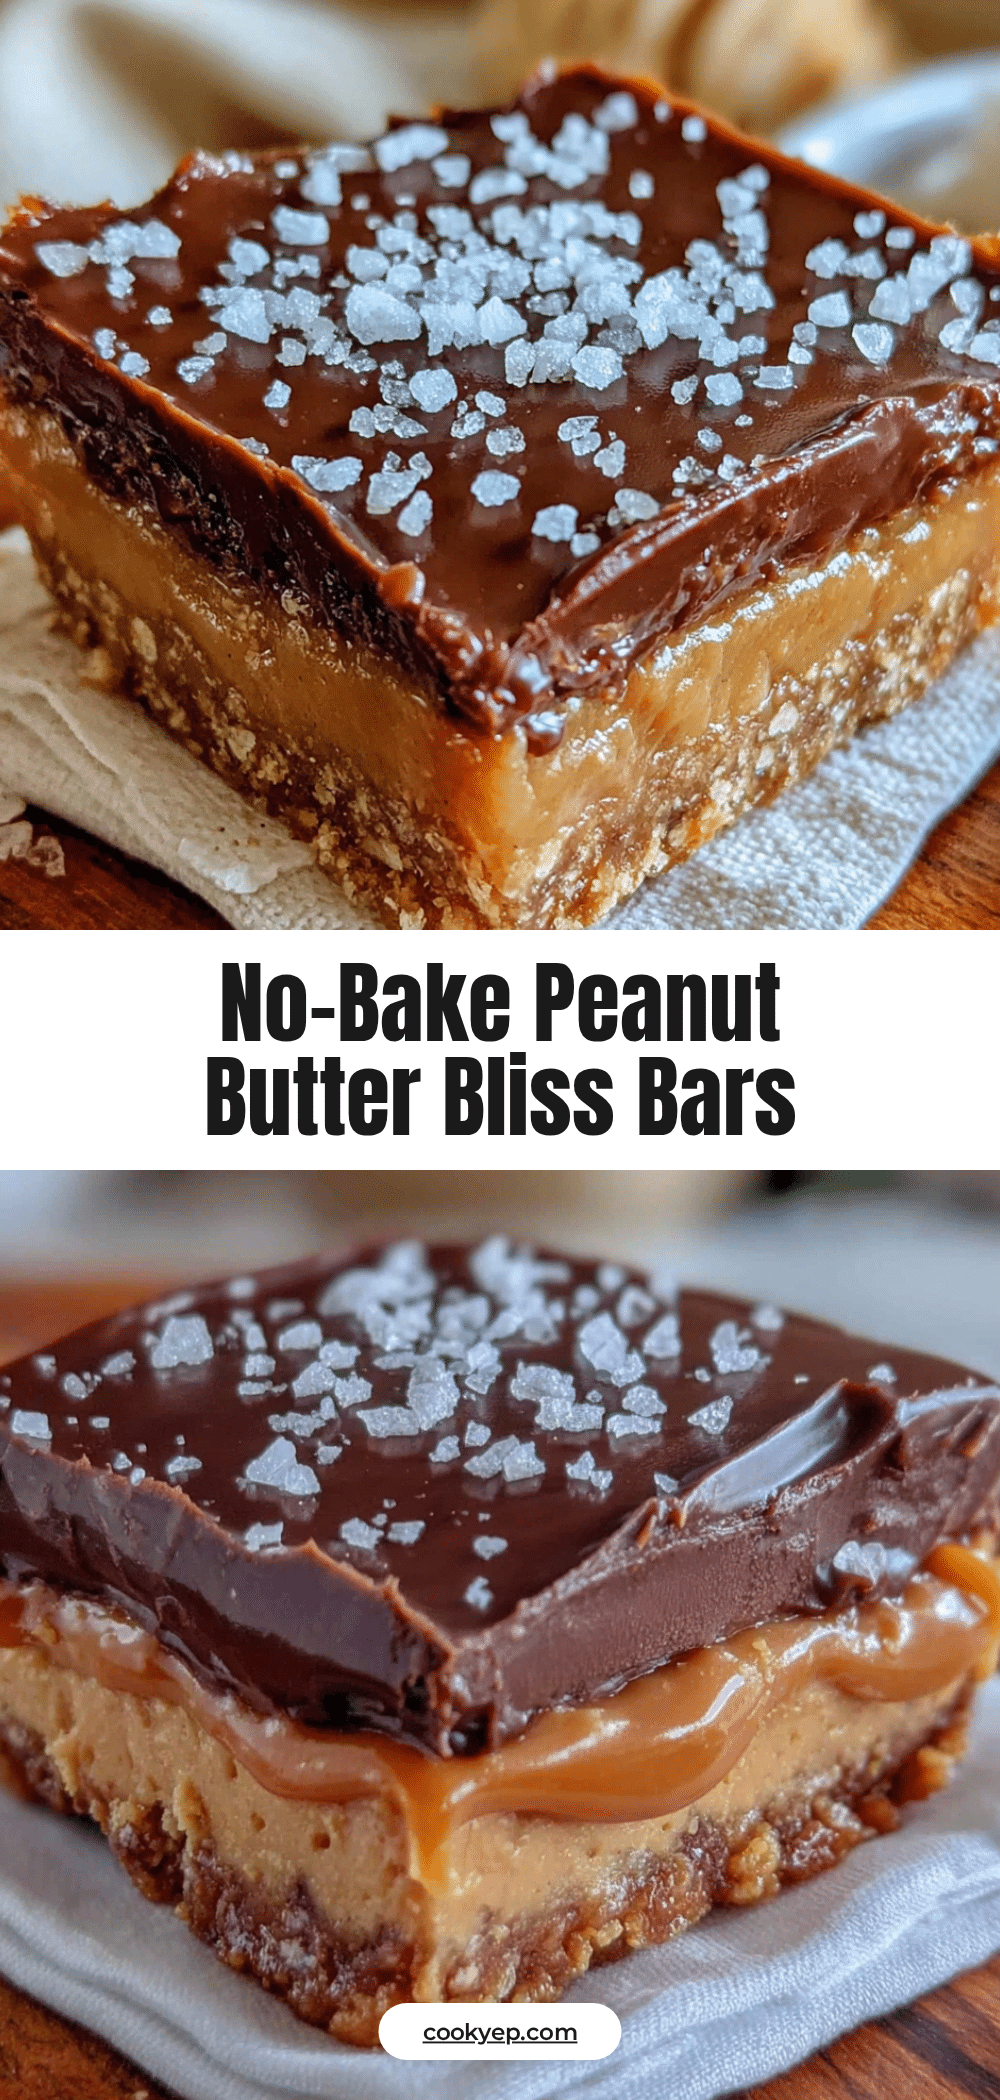
Easy No-Bake Peanut Butter Bars: Perfect Labor Day Dessert
These no-bake peanut butter bars are the perfect Labor Day dessert. With a creamy peanut butter and graham cracker base topped with a smooth chocolate layer, they are easy to make and require no oven time.
- Prep Time: 20 minutes
- Cook Time: 0 minutes
- Total Time: 3 hours 20 minutes (includes chilling)
- Yield: 16 bars 1x
- Category: Dessert
- Cuisine: American
Ingredients
- 1 cup creamy peanut butter (e.g., Skippy or Jif)
- ½ cup unsalted butter, softened
- 2 cups powdered sugar, sifted if desired
- 2 cups graham cracker crumbs (about 14 full sheets)
- 1 teaspoon vanilla extract
- Pinch of salt (omit if peanut butter is salted)
- 1 ½ cups semi-sweet chocolate chips
- 2 tablespoons creamy peanut butter
Instructions
- Line a 9×9-inch baking pan with parchment paper, leaving overhang on two sides.
- Crush graham crackers into fine crumbs using a food processor or a zip-top bag and rolling pin.
- In a medium bowl, cream together 1 cup peanut butter and softened butter until smooth.
- Add powdered sugar and mix until thick and dough-like.
- Stir in graham cracker crumbs, vanilla, and salt until evenly distributed. Mixture should hold together when pressed.
- Press mixture firmly and evenly into the prepared pan using hands or the bottom of a measuring cup.
- In a small saucepan over low heat, melt chocolate chips and 2 tablespoons peanut butter, stirring constantly until smooth. Alternatively, microwave in 30-second bursts.
- Pour melted chocolate over the base and spread evenly to the edges.
- Refrigerate for at least 2 hours, preferably 3-4 hours, until firm. For quicker set, freeze for 45 minutes.
- Lift bars out using parchment overhang, place on cutting board, and cut into 16 squares with a sharp knife, wiping blade clean between cuts.
Notes
Press the base firmly to prevent crumbling. Chill for at least 3 hours for clean slices. Use a sharp knife and wipe between cuts. Bars taste even better the next day. Store in refrigerator for up to a week or freeze for up to 3 months.
Nutrition
- Serving Size: 1 bar
- Calories: 285
- Sugar: 22
- Fat: 17
- Saturated Fat: 7
- Carbohydrates: 30
- Fiber: 2
- Protein: 6
Keywords: no-bake peanut butter bars, Labor Day dessert, easy peanut butter bars, no-bake dessert, peanut butter chocolate bars


