My brother-in-law Mark is a burger snob. I mean that in the nicest possible way. The man has strong opinions about bun-to-patty ratios, the correct cheese melt, and the precise level of smash required on a griddle. So when I told him I was working on a bacon-wrapped cheeseburger slider recipe, he just raised an eyebrow and said, “Sounds like a lot of work for something that might fall apart.” He wasn’t wrong to be skeptical. Wrapping bacon around a small slider patty sounds like a gimmick at first. You picture the bacon sliding off mid-bite, or the slider turning into a greasy mess before it even hits the table.
But here’s the thing—I had a specific moment where everything clicked. I was testing a batch for a game day gathering, and I decided to press the bacon into the meat while it was still raw, almost like weaving it into the patty itself. Then I seared them hard in a cast iron skillet. The bacon rendered down and fused right into the beef. No sliding. No gimmick. Just a crispy, smoky edge on every single bite of these Juicy Bacon-Wrapped Cheeseburger Sliders.
Mark took one bite at that party, stopped mid-conversation, and just nodded at me. That was his version of a standing ovation. These sliders have that effect on people. They’re not fancy, and they don’t pretend to be. But they are the kind of thing you make when you want everyone to stop talking and just eat. Let me show you how to get them right.
Why You’ll Love This Recipe
I have tested a lot of slider recipes over the years, and most of them share the same problem. The bacon never cooks evenly, or the patty dries out before the bacon crisps up. This recipe fixes all of that with a simple technique I landed on after a few failed batches. Trust me, the first time I made these, the bacon was floppy and sad. Not anymore.
- Quick & Easy : From start to finish, these sliders come together in about 30 minutes. Perfect for those nights when you want something satisfying without spending hours in the kitchen.
- Simple Ingredients : Ground beef, bacon, cheese, slider buns, and a few pantry staples. No fancy grocery store trips required. You probably have most of this stuff already.
- Perfect for Game Day : These are built for sharing. Whether you are hosting a Super Bowl party or just having a few friends over for the big game, these sliders disappear faster than anything else on the table. They pair beautifully with a crockpot buffalo chicken dip for a full spread.
- Crowd-Pleaser : Kids love them. Adults love them. Even my burger-snob brother-in-law loves them. That is a universal win.
- Unbelievably Delicious : The bacon crisps up right around the patty, creating a salty, smoky crust that locks in all the juices. The cheese melts into every crevice. It is next-level comfort food that actually works.
What makes this recipe different from the rest is the wrapping method. Instead of just laying bacon on top, you wrap it around the patty and press it in. Then you cook them in a hot skillet, not the oven. The direct heat renders the fat fast and gives you that crispy edge without overcooking the beef. It is a small change that makes a huge difference.
Honestly, this is the kind of recipe that makes you close your eyes after the first bite. It is comfort food reimagined—faster, juicier, and with the same soul-soothing satisfaction. Perfect for impressing guests without stressing yourself out.
What Ingredients You Will Need
This recipe uses simple, honest ingredients to deliver big flavor. Nothing complicated here, just good stuff that works together. Here is what you need and why each one matters.
- Ground Beef (80/20 blend) : I recommend an 80/20 blend for the best flavor and juiciness. Leaner beef will dry out before the bacon crisps. Look for fresh ground chuck if you can find it. (1 pound / 450 grams)
- Bacon (thin-cut) : Thin-cut bacon is key here. Thick-cut bacon takes too long to render and will overcook the patty. I prefer a standard supermarket brand like Wright Brand or Oscar Mayer for consistent results. (12 slices)
- Slider Buns : Soft, slightly sweet slider buns work best. Martin’s potato rolls are my go-to. They hold up to the juices without falling apart. (12 buns)
- American Cheese : American cheese melts like a dream. It gets that perfectly gooey, creamy texture that wraps around the patty. Use slices, not blocks. (6 slices, cut in half)
- Salt and Black Pepper : Keep it simple. Kosher salt and freshly cracked black pepper are all you need for seasoning the patties. (to taste)
- Garlic Powder : A light dusting of garlic powder in the meat adds depth without overpowering the bacon. (1 teaspoon)
- Onion Powder : Works with the garlic powder to build a savory base. (1/2 teaspoon)
- Worcestershire Sauce : Just a splash adds umami and a little tang that cuts through the richness. (1 tablespoon)
- Butter (unsalted) : For toasting the buns. It adds flavor and prevents them from getting soggy. (2 tablespoons, softened)
- Optional Toppings : Pickles, lettuce, tomato slices, ketchup, mustard, or your favorite burger sauce. I like dill pickle chips and a smear of spicy mayo.
If you want to swap things up, ground turkey works but you will need to add a little olive oil to keep it moist. For a gluten-free option, use gluten-free slider buns or lettuce wraps. The bacon wrapping technique stays the same no matter what.
Equipment Needed
You do not need a lot of fancy gear for this recipe. Here is what I use every time.
- Large Cast Iron Skillet or Heavy-Bottomed Pan : Cast iron holds heat better than anything else. It gives you that perfect sear on the bacon. If you do not have cast iron, a stainless steel skillet works fine. Just avoid non-stick for this one—you want high heat.
- Mixing Bowl : A medium-sized bowl for combining the beef and seasonings.
- Sharp Knife and Cutting Board : For prepping any toppings.
- Spatula : A thin metal spatula works best for flipping the sliders without breaking the bacon seal.
- Meat Thermometer (optional but helpful) : If you want to be precise, shoot for an internal temp of 160°F (71°C). I usually just go by feel after a few batches.
- Baking Sheet or Plate : To hold the wrapped patties before cooking.
I have made these in a regular non-stick pan before, and honestly, the bacon did not crisp up as well. If you are in the market for a cast iron skillet, Lodge makes a solid one that won’t break the bank. It lasts forever if you take care of it.
Preparation Method
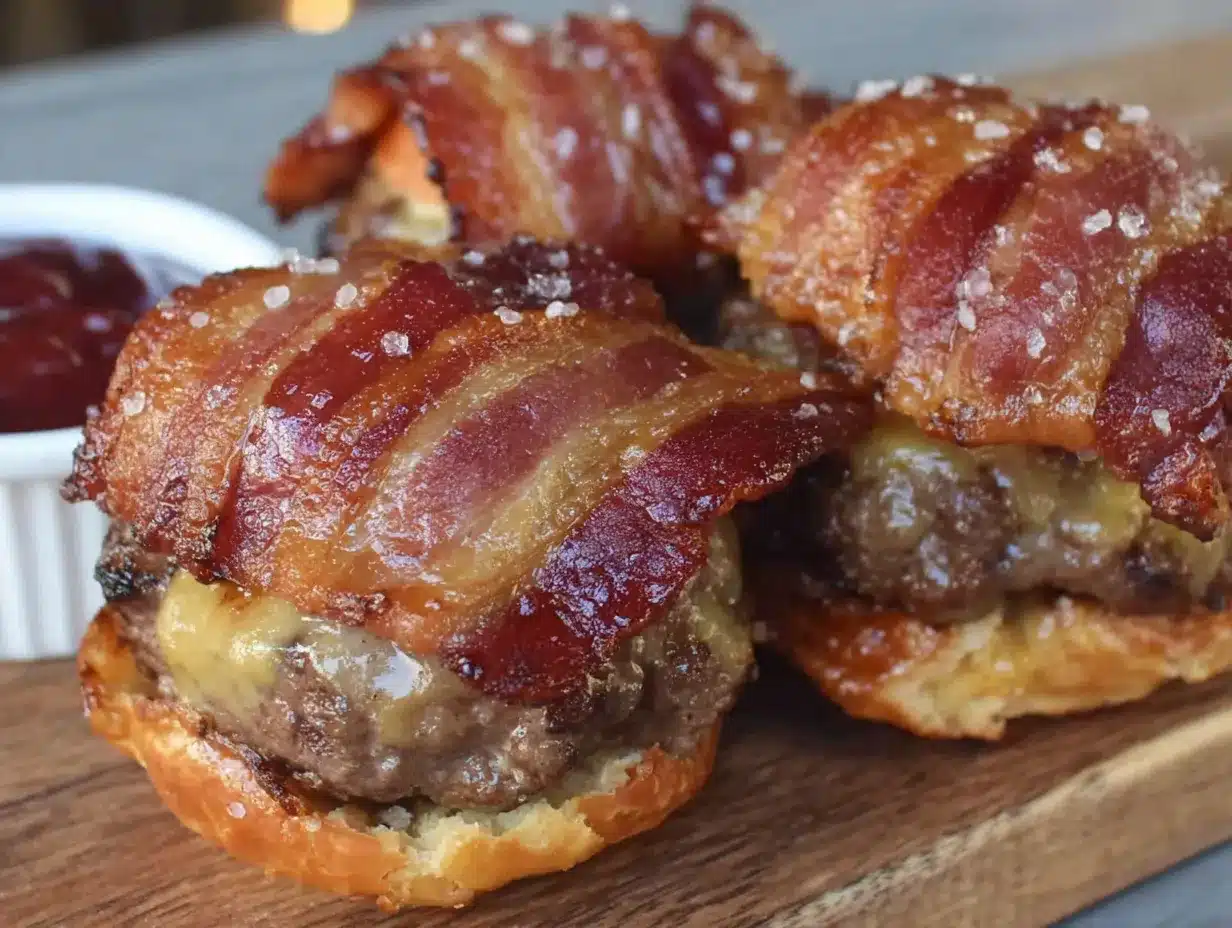
Alright, let’s get into it. This is the part where the magic happens. Follow these steps closely, and you will end up with sliders that are crispy, juicy, and absolutely irresistible.
- Prep the beef mixture. In a medium mixing bowl, combine 1 pound (450 grams) of ground beef with 1 teaspoon garlic powder, 1/2 teaspoon onion powder, 1 tablespoon Worcestershire sauce, 1/2 teaspoon kosher salt, and 1/4 teaspoon black pepper. Use your hands to mix gently. Do not overwork the meat or it will get tough. Just mix until the seasonings are evenly distributed.
- Form the patties. Divide the meat into 12 equal portions. Roll each portion into a ball, then flatten into a small patty about 2 inches wide and 1/2 inch thick. Make a small indent in the center of each patty with your thumb. This helps them cook flat instead of puffing up into little meatballs.
- Wrap with bacon. Take one slice of thin-cut bacon and wrap it around the edge of each patty. Press the ends of the bacon into the meat so they stick. The bacon should hug the patty like a little collar. Do not worry if it overlaps slightly—that is actually good because it creates a crispy ring. Place the wrapped patties on a baking sheet or plate.
- Heat the skillet. Place your cast iron skillet over medium-high heat. Let it get hot for a good 2-3 minutes. You want it sizzling when the patties hit the pan. Do not add oil—the bacon will render plenty of fat.
- Sear the patties. Carefully place 4-5 patties in the skillet, bacon-side down. Do not overcrowd the pan. Let them cook undisturbed for 4-5 minutes. The bacon should be getting crispy and brown. You will see the fat rendering out. Flip each patty carefully with a thin spatula. Cook for another 3-4 minutes on the second side.
- Add the cheese. In the last minute of cooking, place half a slice of American cheese on each patty. Cover the skillet with a lid or a piece of foil for about 30 seconds to help the cheese melt. The steam will soften the cheese perfectly without making it runny.
- Toast the buns. While the patties rest, split your slider buns and spread a thin layer of softened butter on the cut sides. Place them in a separate dry skillet or on a griddle over medium heat, cut-side down, for about 1-2 minutes until golden brown. This step is non-negotiable—toasted buns hold up to the juices and add texture.
- Assemble the sliders. Place each cheesy bacon patty on a toasted bun bottom. Add your favorite toppings—I like a couple of dill pickle chips and a small smear of spicy mayo. Top with the other half of the bun. Serve immediately while the cheese is still stretchy.
A quick note on timing: The first batch will always take a little longer as you get the feel for the heat. If the bacon is browning too fast, turn the heat down slightly. You want a steady sizzle, not a frantic one. The patties should feel firm but still have a little give when pressed.
Cooking Tips & Techniques
I have made these sliders more times than I can count, and I have definitely made my share of mistakes. Here is what I learned the hard way so you do not have to.
Don’t skip the indent. I know it sounds like a small thing, but pressing that thumbprint into the center of each patty is what keeps them flat. Without it, they puff up into little domes and the bacon slides right off. I learned this after my first batch turned into bacon-wrapped meatballs.
Thin bacon is your friend. I tried thick-cut bacon once because I thought it would be more impressive. It took forever to render, and by the time it crisped up, the patty was overcooked and dry. Stick with thin-cut. It cooks fast and gets perfectly crispy right alongside the beef.
Let the pan get hot. A cold pan will cause the bacon to steam instead of sear. You want that aggressive sizzle when the patty hits the surface. If you are using cast iron, give it a good 3 minutes to preheat over medium-high heat. Drop a tiny piece of bacon in the pan—if it sizzles immediately, you are ready.
Do not move the patties too early. Let them cook undisturbed for the full 4-5 minutes on the first side. If you try to flip them too soon, the bacon will stick and tear. You will know they are ready when the edges look browned and crispy. The spatula should slide under them easily.
Work in batches. Crowding the pan lowers the temperature and causes the bacon to steam. Cook 4-5 patties at a time, and keep the cooked ones warm on a baking sheet in a 200°F (93°C) oven while you finish the rest. This also gives you time to toast the buns.
Rest them briefly. Let the patties sit for about 2-3 minutes after cooking before you assemble the sliders. This lets the juices redistribute so they do not run all over the bun. I know it is tempting to eat them immediately, but that short rest makes a big difference.
Variations & Adaptations
One of the best things about this recipe is how easy it is to adapt. Here are a few ways I have changed it up depending on the occasion or what I have in the fridge.
Spicy Jalapeño Popper Sliders : Before wrapping the patties with bacon, stuff a small piece of cream cheese and a slice of pickled jalapeño into the center of each patty. Seal the meat around the filling, then wrap with bacon. The cream cheese gets all melty and the jalapeño adds a nice kick. This is my personal favorite variation for when I want something extra indulgent. If you love this flavor combo, you should also try my crispy bacon-wrapped jalapeno popper bites for a similar vibe in appetizer form.
Smoky BBQ Sliders : Brush a little of your favorite barbecue sauce on each patty right before you add the cheese. Use smoked gouda or cheddar instead of American cheese. The smoky flavor pairs beautifully with the bacon. Top with crispy fried onions for extra crunch.
Turkey Bacon Sliders : Swap the ground beef for ground turkey (93/7 works best) and use turkey bacon. Add a tablespoon of olive oil to the turkey mixture to keep it moist. The cooking time stays about the same. This is a lighter option that still delivers on flavor.
Air Fryer Method : If you want to skip the stovetop, preheat your air fryer to 375°F (190°C). Place the wrapped patties in a single layer in the basket. Cook for 8-10 minutes, flipping halfway through. Add cheese in the last minute. The bacon gets incredibly crispy this way, though you miss out on the fond from the skillet.
Breakfast Sliders : Make the patties slightly smaller and serve them on mini brioche buns with a fried egg and a slice of cheddar. It is basically a bacon cheeseburger for breakfast, and it is amazing. I have made these for a lazy Sunday brunch and they were a huge hit.
Serving & Storage Suggestions
These sliders are best served hot, right off the skillet. The cheese should be stretchy and the bacon should have that audible crunch when you bite into it. I like to set them out on a big platter with a pile of pickle spears and some extra napkins—things are going to get messy.
What to serve with them : A simple side of sweet potato fries or a crunchy coleslaw balances out the richness. If you are hosting a game day party, these sliders pair perfectly with a 7-layer slow cooker football Sunday chili for a full spread that will keep everyone happy. For drinks, an ice-cold beer or a tangy apple cider margarita cuts through the fat beautifully.
Storage : If you have leftovers (unlikely, but possible), let the sliders cool completely before storing. Wrap each slider individually in foil or place them in an airtight container. They will keep in the refrigerator for up to 3 days. The bacon will lose some of its crispness, but the flavor is still great.
Reheating : The best way to reheat these is in a skillet over medium heat. Place the sliders in the pan, cover with a lid, and heat for about 4-5 minutes, flipping once. This re-crisps the bacon and warms the bun. Avoid the microwave—it makes the bacon rubbery and the bun soggy. If you are in a hurry, an air fryer at 350°F (175°C) for 3-4 minutes works well too.
Freezing : You can freeze the cooked patties (without buns) for up to 2 months. Wrap each patty in plastic wrap and then place them in a freezer bag. To serve, thaw in the refrigerator overnight, then reheat in a skillet and assemble with fresh buns and toppings. The bacon holds up surprisingly well.
Nutritional Information & Benefits
Let’s be real—these are indulgent sliders. They are not health food, and they do not pretend to be. But knowing what is in them helps you enjoy them mindfully. Here is an approximate breakdown per slider (based on 12 servings, using 80/20 beef, American cheese, and a standard slider bun).
| Nutrient | Amount per Slider |
|---|---|
| Calories | ~320 |
| Protein | 18g |
| Fat | 22g |
| Saturated Fat | 9g |
| Carbohydrates | 14g |
| Fiber | 1g |
| Sugar | 3g |
| Sodium | 620mg |
The beef provides a good amount of protein and iron, while the bacon adds a hit of B vitamins. If you are watching your sodium, you can use low-sodium bacon and skip the added salt. For a lower-carb option, serve the patties in lettuce wraps instead of buns. This recipe is not gluten-free as written, but it is easy to adapt with gluten-free buns. The main allergens are wheat (buns), dairy (cheese, butter), and potential sulfites in bacon.
I personally love that these sliders feel like a treat but are made from real, recognizable ingredients. No weird additives or processed fillers. Just good food that makes you happy.
Conclusion
These Juicy Bacon-Wrapped Cheeseburger Sliders are the kind of recipe that earns a permanent spot in your rotation. They are quick enough for a weeknight dinner, impressive enough for a party, and simple enough that you do not need to be a grill master to pull them off. The bacon wrapping technique is the secret weapon here—it locks in moisture, adds incredible flavor, and gives you that perfect crispy edge on every bite.
I love how forgiving this recipe is. You can tweak the toppings, swap the cheese, or change up the seasoning, and it still works. That is the mark of a good recipe in my book. It adapts to you, not the other way around. Whether you are feeding a crowd or just treating yourself, these sliders deliver every single time.
Now I want to hear from you. Have you tried wrapping bacon around your sliders before? What is your go-to topping combination? Drop a comment below and let me know how these turned out for you. And if you loved them, share this recipe with a friend who needs a little more bacon in their life. Happy cooking!
Frequently Asked Questions
Can I use thick-cut bacon for this recipe?
I do not recommend it. Thick-cut bacon takes longer to render, and by the time it crisps up, the beef patty will be overcooked and dry. Thin-cut bacon cooks fast and fuses perfectly with the meat. Stick with thin-cut for the best results.
How do I keep the bacon from sliding off the patty?
Press the ends of the bacon firmly into the raw meat. The natural stickiness of the ground beef holds it in place. Also, make sure your pan is hot enough when you add the patties. The high heat sears the bacon quickly, fusing it to the meat before it has a chance to shrink and slide off.
Can I make these sliders in the oven instead of a skillet?
Yes, you can. Place the wrapped patties on a wire rack set over a baking sheet and bake at 400°F (200°C) for about 15-18 minutes, flipping halfway through. Add the cheese in the last 2 minutes. The texture will be slightly different—less crispy on the outside—but they still taste great.
What is the best cheese for these sliders?
American cheese is the classic choice because it melts smoothly and has that nostalgic burger flavor. Cheddar, pepper jack, or smoked gouda also work well. Just make sure it is a good melting cheese. Avoid hard cheeses like parmesan—they will not melt properly.
Can I prepare these ahead of time for a party?
Absolutely. You can wrap the patties with bacon up to 24 hours in advance and store them in the refrigerator on a baking sheet covered with plastic wrap. When you are ready to cook, just pull them out and sear them as directed. You can also cook them fully and reheat in a skillet or air fryer right before serving.
Pin This Recipe!
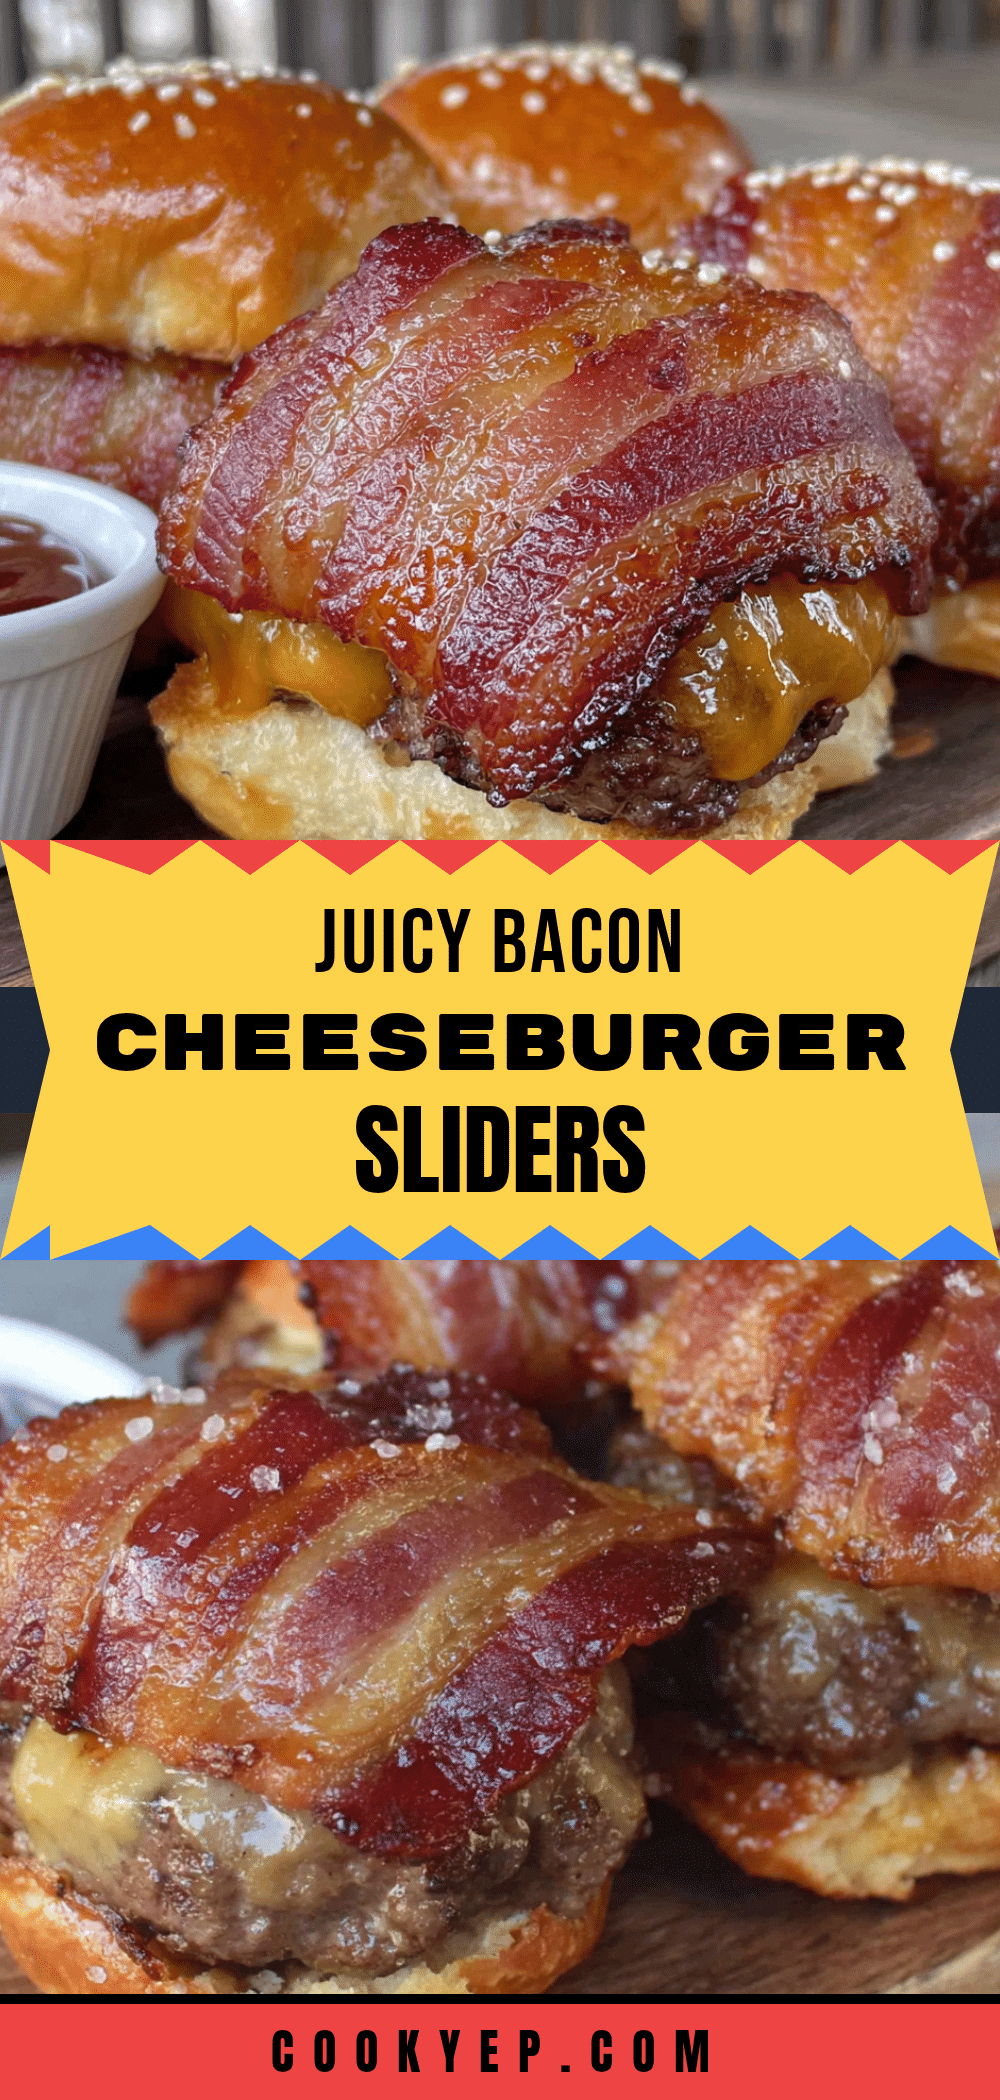
Best Juicy Bacon-Wrapped Cheeseburger Sliders Recipe
These Juicy Bacon-Wrapped Cheeseburger Sliders are quick, easy, and perfect for game day. Wrapped in thin-cut bacon and seared in a cast iron skillet, they deliver a crispy, smoky edge with every bite.
- Prep Time: 15 minutes
- Cook Time: 15 minutes
- Total Time: 30 minutes
- Yield: 12 sliders 1x
- Category: Main Course
- Cuisine: American
Ingredients
- 1 pound (450 grams) ground beef (80/20 blend)
- 12 slices thin-cut bacon
- 12 slider buns (e.g., Martin’s potato rolls)
- 6 slices American cheese, cut in half
- 1 teaspoon kosher salt
- 1/4 teaspoon black pepper
- 1 teaspoon garlic powder
- 1/2 teaspoon onion powder
- 1 tablespoon Worcestershire sauce
- 2 tablespoons unsalted butter, softened
- Optional toppings: pickles, lettuce, tomato slices, ketchup, mustard, spicy mayo
Instructions
- In a medium mixing bowl, combine ground beef with garlic powder, onion powder, Worcestershire sauce, salt, and pepper. Mix gently with your hands until evenly distributed.
- Divide the meat into 12 equal portions. Roll each into a ball, then flatten into a small patty about 2 inches wide and 1/2 inch thick. Press a small indent in the center of each patty with your thumb.
- Wrap one slice of thin-cut bacon around the edge of each patty, pressing the ends into the meat to secure. Place wrapped patties on a baking sheet or plate.
- Heat a large cast iron skillet over medium-high heat for 2-3 minutes until hot. Do not add oil.
- Place 4-5 patties in the skillet, bacon-side down. Cook undisturbed for 4-5 minutes until bacon is crispy and brown. Flip carefully with a thin spatula and cook for another 3-4 minutes.
- In the last minute of cooking, place half a slice of American cheese on each patty. Cover the skillet with a lid or foil for 30 seconds to melt the cheese.
- While patties rest, butter the cut sides of slider buns. Toast in a separate dry skillet or griddle over medium heat, cut-side down, for 1-2 minutes until golden brown.
- Assemble sliders: Place each cheesy bacon patty on a toasted bun bottom. Add desired toppings, then top with the other half of the bun. Serve immediately.
Notes
Don’t skip the indent in the patty to keep it flat. Use thin-cut bacon for best results. Let the pan get hot before adding patties. Work in batches to avoid overcrowding. Let patties rest 2-3 minutes before assembling.
Nutrition
- Serving Size: 1 slider
- Calories: 320
- Sugar: 3
- Sodium: 620
- Fat: 22
- Saturated Fat: 9
- Carbohydrates: 14
- Fiber: 1
- Protein: 18
Keywords: bacon-wrapped cheeseburger sliders, game day sliders, bacon cheeseburger sliders, easy slider recipe, juicy sliders


