I did not trust honeynut squash. Honestly, I thought it was just marketing—a smaller, pricier version of butternut squash that food bloggers hyped up for the aesthetic. The first time I saw one at the farmers market, I walked right past it. Too cute to be serious, I figured. Then my neighbor, a quiet guy who grows things in his backyard that he refuses to name, dropped three of them on my porch with a note that just said “roast these.” No recipe, no instructions, just a command. I stared at them for three days. They sat on my counter looking smug and miniature, daring me to do something. On the fourth day, I finally caved—not out of curiosity, but out of guilt. I sliced one open, and the color stopped me cold. That deep, almost neon orange flesh looked nothing like butternut squash. It looked like it had been soaking up sunlight for months. I roasted it simply at first—just oil and salt—and ate it straight off the sheet pan. That was the moment I realized I had been wrong about something I didn’t even know I was judging. This recipe for perfect maple glazed honeynut squash with brown butter is what came out of that conversion. It is the dish I now make when I want to prove to someone that simple things can actually be extraordinary.
Why You’ll Love This Recipe
Let me tell you why this one sticks. I have tested this perfect maple glazed honeynut squash with brown butter about seven times across three different ovens, and every single time it delivers the same reaction: quiet, impressed chewing. That is the highest compliment in my book.
- Quick & Easy : From knife to table in under 40 minutes. The active prep time is maybe 10 minutes, and the oven does the heavy lifting. This is weeknight-friendly without tasting like it.
- Simple Ingredients : Honeynut squash, butter, maple syrup, salt, and maybe some thyme if you are feeling fancy. Nothing in here requires a specialty grocery run.
- Perfect for Fall Gatherings : This dish shows up on my Thanksgiving table every year, but it works just as well for a Tuesday dinner alongside a simple roast chicken. It bridges casual and special effortlessly.
- Crowd-Pleaser : I have watched self-proclaimed squash skeptics go back for thirds. Something about the brown butter and maple combination disarms people.
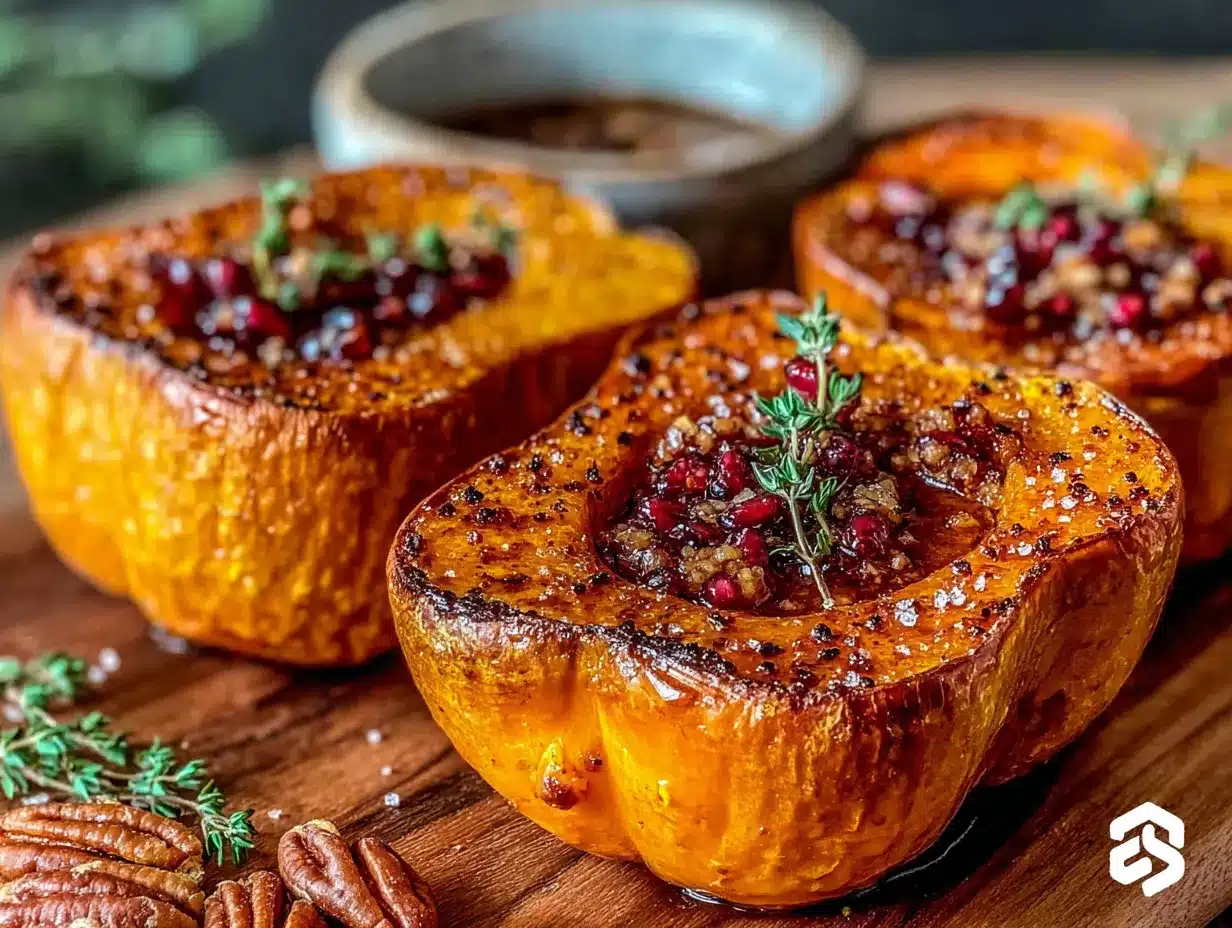
- Unbelievably Delicious : The edges caramelize into chewy, buttery candy while the inside turns custard-soft. The flavor is nutty, sweet, salty, and deeply savory all at once.
What makes this recipe different is the technique. Most roasted squash recipes skip the browning step for the butter, but that nutty brown butter is what transforms this from a side dish into the thing people remember. I also cut the squash into rounds instead of halves, which gives you more caramelized surface area and makes the maple glaze cling better. It is not complicated—it is just smarter.
This is the kind of recipe that makes you close your eyes after the first bite. It is comfort food that feels refined but requires no special skills. You can serve it to guests without stress, or eat it straight from the pan while standing at the counter. I have done both. No judgment either way.
What Ingredients You Will Need
This recipe relies on a short list of ingredients that work together to create something greater than the sum of their parts. Every component has a job, and none of them are filler.
- Honeynut Squash (3 to 4 medium) — Look for squash that feel heavy for their size and have firm, unblemished skin. The smaller ones tend to be sweeter. You can find them at most farmers markets or specialty grocery stores in the fall. They are about the size of a large avocado, so plan for one per person if serving as a side.
- Unsalted Butter (4 tablespoons, 56g) — Use unsalted so you control the salt level. The browning process is where the magic happens, so do not substitute margarine or oil here. I prefer Kerrygold for the higher butterfat content, but any good unsalted butter works.
- Pure Maple Syrup (3 tablespoons, 60ml) — Do not use pancake syrup. You want real maple syrup, preferably grade A dark amber for a stronger flavor. The syrup adds sweetness and helps create that glossy, sticky glaze on the squash edges.
- Kosher Salt (1 teaspoon) — Salt balances the sweetness and brings out the natural flavor of the squash. I use Diamond Crystal kosher salt; if you use Morton’s, reduce to ¾ teaspoon.
- Fresh Thyme (4 to 5 sprigs, plus more for garnish) — Optional but highly recommended. Thyme adds an earthy, slightly floral note that cuts through the richness of the brown butter. If you only have dried thyme, use ½ teaspoon.
- Black Pepper (¼ teaspoon, freshly ground) — A small amount adds warmth without overpowering. Freshly ground makes a difference here.
- Flaky Sea Salt (for finishing) — This is not optional in my kitchen. A sprinkle of flaky salt right before serving adds texture and a pop of salinity that makes the sweetness sing. Maldon is my go-to.
That is it. Seven ingredients, most of which you probably already have in your pantry. The honeynut squash is the only specialty item, and it is becoming easier to find as more people discover how good it is. If you cannot find honeynut squash, you can substitute butternut squash—just cut it into 1-inch thick rounds and increase roasting time by 5 to 10 minutes. The flavor will be slightly less sweet and concentrated, but still delicious.
Equipment Needed
You do not need a fancy kitchen to make this perfect maple glazed honeynut squash with brown butter. Here is what you will need:
- Sharp Chef’s Knife — Honeynut squash skin is thin enough that you can eat it, but the squash itself is dense. A sharp 8-inch chef’s knife makes cutting through it safe and easy. Dull knives are more dangerous than sharp ones—they slip.
- Cutting Board — A sturdy wooden or plastic board with a non-slip base. I prefer wooden boards for squash because they absorb less moisture.
- Large Sheet Pan — A half-sheet pan (18×13 inches) works perfectly. Line it with parchment paper for easy cleanup. Do not use a dark nonstick pan unless you want the bottoms to burn.
- Small Saucepan — For browning the butter. A light-colored pan helps you see the butter change color. Stainless steel or enameled cast iron works well.
- Measuring Spoons — For measuring maple syrup and salt.
- Pastry Brush or Spoon — For brushing the brown butter mixture over the squash. A silicone pastry brush works great, but a regular spoon does the job too.
- Metal Spatula — For flipping the squash rounds halfway through roasting. A thin metal spatula slides under the caramelized edges without breaking them.
If you do not have a pastry brush, just use the back of a spoon to drizzle and spread the butter mixture. It works fine, just takes a little more patience.
Preparation Method
Preheat your oven to 400°F (200°C). Position the rack in the middle of the oven. Line a large sheet pan with parchment paper.
- Prepare the squash. Wash the honeynut squash well—you are eating the skin, so give it a good scrub. Trim off the stem end and the very bottom tip. Cut each squash crosswise into 1-inch thick rounds. You should get about 4 to 5 rounds per squash. Scoop out the seeds and stringy bits from the center of each round using a small spoon. Do not worry about getting every single seed; a few left behind add texture. Place the rounds in a single layer on the prepared sheet pan. They should not overlap or touch too much—give them room to caramelize.
- Brown the butter. Place the small saucepan over medium heat. Add the 4 tablespoons of unsalted butter. Let it melt completely, then swirl the pan gently. The butter will start to foam and bubble—this is normal. Keep swirling occasionally. After about 3 to 4 minutes, the foam will subside and you will see brown specks forming at the bottom of the pan. The butter will smell nutty and toasty. As soon as it turns a deep golden brown (think the color of hazelnuts), remove it from the heat immediately. Do not walk away during this step—brown butter goes from perfect to burnt in about 15 seconds.
- Make the glaze. Whisk the 3 tablespoons of pure maple syrup and 1 teaspoon of kosher salt into the hot brown butter. The mixture will bubble up slightly—keep whisking until it is smooth and combined. Add the fresh thyme sprigs and let them steep in the warm mixture for about 2 minutes. This infuses the glaze with subtle herbal notes without making it taste like a potpourri.
- Glaze the squash. Using a pastry brush or the back of a spoon, brush the brown butter mixture generously over both sides of each squash round. Reserve about 2 tablespoons of the glaze for basting later. Arrange the thyme sprigs from the pan on top of the squash rounds or scatter them around the pan. Sprinkle the freshly ground black pepper evenly over the squash.
- Roast the squash. Place the sheet pan in the preheated oven. Roast for 15 minutes. Remove the pan from the oven and carefully flip each squash round using a metal spatula. Brush the reserved glaze over the flipped side. Return the pan to the oven and roast for another 10 to 15 minutes. The squash is done when the edges are deeply caramelized and the flesh is tender enough that a fork slides in with almost no resistance. The centers should feel soft but not mushy.
- Finish and serve. Remove the sheet pan from the oven. Let the squash rest on the pan for 2 to 3 minutes—this helps the glaze set slightly. Transfer the squash rounds to a serving platter. Sprinkle flaky sea salt over the top. Garnish with fresh thyme leaves if you have them. Serve warm or at room temperature.
A few notes from my trials: if your squash rounds are browning too quickly on the bottom but the centers are still firm, reduce the oven temperature to 375°F (190°C) and roast for an additional 5 to 7 minutes. Every oven runs differently—mine runs hot, so I usually check at the 20-minute mark. Also, do not skip the flipping step. The first time I made this, I left the squash untouched for the full roasting time, and the bottoms burned while the tops stayed pale. Flip them. Trust me.
Cooking Tips & Techniques
I have made this perfect maple glazed honeynut squash with brown butter enough times to collect a few hard-earned lessons. Here is what I wish someone had told me:
Do not crowd the pan. This is the number one mistake I made in my early attempts. If the squash rounds are too close together, they steam instead of caramelizing. You want those edges to get sticky and browned, not pale and soggy. Use two sheet pans if you need to, and rotate them halfway through.
Watch the brown butter like a hawk. The first time I tried browning butter, I got distracted by a text message and ended up with black, acrid butter that smelled like burnt popcorn. Brown butter goes from perfect to ruined in seconds. The visual cue you want is a deep amber color with tiny brown specks settled at the bottom. The smell shifts from milky to nutty. Once you hit that moment, pull it off the heat immediately. Pour it into a heatproof bowl if you need to stop the cooking process.
Cut uniform rounds. I know it is tempting to just hack through the squash quickly, but uneven thickness leads to uneven cooking. Aim for 1-inch thick rounds, and if some end up thinner, keep an eye on them during roasting—they will cook faster. I use my knuckles as a guide: if the round is about as thick as my thumb from knuckle to tip, it is close enough.
Use parchment paper. The maple glaze gets sticky and sugary as it roasts, and it will glue your squash to the pan if you do not line it. Parchment paper makes cleanup effortless and prevents the bottoms from burning. I tried foil once and regretted it—the glaze seeped through and stuck to the pan anyway.
Season in layers. Salt the squash before roasting, then add the flaky salt at the end. This double-salting technique ensures every bite is seasoned properly without being overpowering. The flaky salt at the end adds texture and a burst of salinity that cuts through the sweetness.
Let it rest. I know you want to eat it immediately, but letting the squash rest for a few minutes allows the glaze to set and thicken slightly. If you serve it straight from the oven, the glaze runs off and pools on the plate. Patience pays off here.
Variations & Adaptations
This recipe is flexible, and I have tried several variations depending on what I have in the kitchen or who I am cooking for.
Spiced Maple Glaze — Add ½ teaspoon of ground cinnamon, ¼ teaspoon of ground nutmeg, and a pinch of cayenne pepper to the brown butter mixture before brushing. The warmth of the spices complements the sweetness of the maple and the nuttiness of the brown butter. I made this version for a Friendsgiving dinner and it disappeared in minutes.
Savory Herb Version — Swap the maple syrup for honey and add 2 minced garlic cloves and 1 tablespoon of fresh rosemary (finely chopped) to the brown butter. The result is less sweet and more savory, perfect alongside roasted meats. This version works well if you are serving the squash with something already sweet, like glazed ham.
Vegan Adaptation — Substitute the butter with a high-quality vegan butter (I like Miyoko’s for its browning capabilities) and use agave syrup instead of maple syrup if you prefer a different flavor profile. The browning process works similarly with vegan butter, though you may need to watch it more closely as it can burn faster. The texture will be slightly less rich but still very good.
Air Fryer Method — If you are short on time or want extra crispy edges, cook the glazed squash rounds in an air fryer at 375°F (190°C) for 12 to 15 minutes, flipping halfway through. Work in batches to avoid overcrowding. The air fryer version produces more concentrated caramelization in less time, but the texture is slightly firmer than oven-roasted.
Add Some Heat — A drizzle of hot honey or a sprinkle of red pepper flakes at the end adds a pleasant kick that balances the sweetness. I tried this on a whim one night and now I do it almost every time. Start with a light hand—you can always add more.
Serving & Storage Suggestions
This perfect maple glazed honeynut squash with brown butter is best served warm, right after the flaky salt goes on. The contrast between the warm, soft squash and the cool, crunchy salt is part of the experience. If you are serving it as part of a larger meal, it pairs beautifully with roasted chicken, pork chops, or a simple grilled steak. I have also served it alongside a crispy fall harvest chopped salad with easy maple vinaigrette for a vegetarian dinner that felt complete and satisfying.
For presentation, arrange the squash rounds on a large platter in a single layer, slightly overlapping if needed. Drizzle any remaining glaze from the pan over the top. Garnish with fresh thyme sprigs and a final sprinkle of flaky salt. It looks impressive without requiring any plating skills.
Leftovers store well in an airtight container in the refrigerator for up to 4 days. The squash will soften slightly upon reheating, but the flavor deepens overnight—the maple and brown butter meld together even more. To reheat, place the squash in a 350°F (175°C) oven for 5 to 7 minutes, or until warmed through. You can also microwave individual servings for 30 to 45 seconds, but the edges will lose their crispness. I prefer the oven method for the best texture.
If you want to make this ahead for a holiday meal, you can prepare the squash rounds and the brown butter glaze separately up to 24 hours in advance. Store the cut squash in the refrigerator in a sealed bag, and keep the brown butter glaze in a jar at room temperature. When you are ready to serve, assemble and roast as directed. The glaze will need to be gently rewarmed to become brushable again—just microwave it for 10 to 15 seconds.
This squash does not freeze well in its roasted form—the texture becomes watery upon thawing. If you want to freeze it, roast the squash without the glaze, let it cool completely, and freeze in a single layer on a sheet pan. Transfer to a freezer bag and store for up to 3 months. When ready to use, thaw in the refrigerator, then reheat and glaze fresh. It is an extra step, but worth it for the texture.
Nutritional Information & Benefits
Here is the approximate nutritional breakdown for one serving (about 4 to 5 squash rounds, assuming 4 servings total):
| Nutrient | Amount per Serving |
|---|---|
| Calories | 195 |
| Total Fat | 12g |
| Saturated Fat | 7g |
| Cholesterol | 30mg |
| Sodium | 480mg |
| Total Carbohydrates | 23g |
| Dietary Fiber | 4g |
| Sugars | 12g |
| Protein | 2g |
| Vitamin A | 180% DV |
| Vitamin C | 25% DV |
| Potassium | 15% DV |
Honeynut squash is a nutritional powerhouse. It is packed with beta-carotene, which your body converts into vitamin A for healthy vision and immune function. It also provides a good amount of vitamin C, fiber, and potassium. The brown butter adds healthy fats that help your body absorb the fat-soluble vitamins in the squash. This dish is naturally gluten-free and can be made vegan with the substitutions mentioned above. If you have nut allergies, this recipe is safe as written.
One note: the maple syrup does add sugar, but the amount per serving is modest compared to most dessert-like side dishes. If you are watching your sugar intake, you can reduce the maple syrup to 2 tablespoons—the squash is sweet enough on its own to carry the dish.
Conclusion
This perfect maple glazed honeynut squash with brown butter is the recipe that changed my mind about a vegetable I did not think I needed to care about. It is proof that sometimes the best dishes come from being wrong about something and being willing to try anyway. The combination of nutty brown butter, sweet maple syrup, and tender, caramelized squash is simple enough for a Tuesday night but special enough for a holiday table.
I encourage you to make this recipe your own. Add the spices, skip the thyme, double the brown butter—whatever feels right. Cooking should be about trusting your instincts and adjusting as you go. If you make this, I would love to hear how it turned out. Leave a comment below and let me know what variations you tried, or tag me in your photos if you share them online. And if you are looking for more cozy fall recipes, try this cozy brown butter butternut squash soup or these soft baked pumpkin snickerdoodle cookies for dessert.
Go ahead and preheat that oven. You have a squash to roast and a conversion story to tell.
Frequently Asked Questions
Can I use butternut squash instead of honeynut squash?
Yes, absolutely. Butternut squash is a great substitute, though the flavor will be slightly less sweet and concentrated. Cut it into 1-inch thick rounds and increase the roasting time by 5 to 10 minutes. The skin on butternut squash is tougher, so you may want to peel it before cutting if you prefer not to eat the skin.
Do I have to eat the skin on honeynut squash?
No, but you can. The skin on honeynut squash is thin and tender enough to eat after roasting, and it adds a nice texture contrast. If you prefer not to eat it, the flesh will separate easily from the skin once cooked. Just scoop it out with a spoon after roasting.
Can I make this recipe ahead of time for a holiday dinner?
Yes, with some planning. You can cut the squash and make the brown butter glaze up to 24 hours in advance. Store the squash in the refrigerator and the glaze at room temperature. Assemble and roast just before serving for the best texture. If you need to reheat leftovers, use a 350°F oven for 5 to 7 minutes.
Why did my brown butter burn?
Brown butter burns when it is left on the heat too long after the milk solids have turned dark brown. The key is to watch it closely and remove it from the heat as soon as it turns a deep amber color and smells nutty. Use a light-colored pan so you can see the color change clearly. If it burns, start over—burnt brown butter tastes bitter and acrid.
Can I double this recipe?
Yes, but do not overcrowd the pan. Use two sheet pans and rotate them halfway through roasting. You may need to increase the roasting time by a few minutes if the pans are crowded. For the brown butter glaze, you can easily double or triple the ingredients—just use a larger saucepan to accommodate the extra volume.
Pin This Recipe!
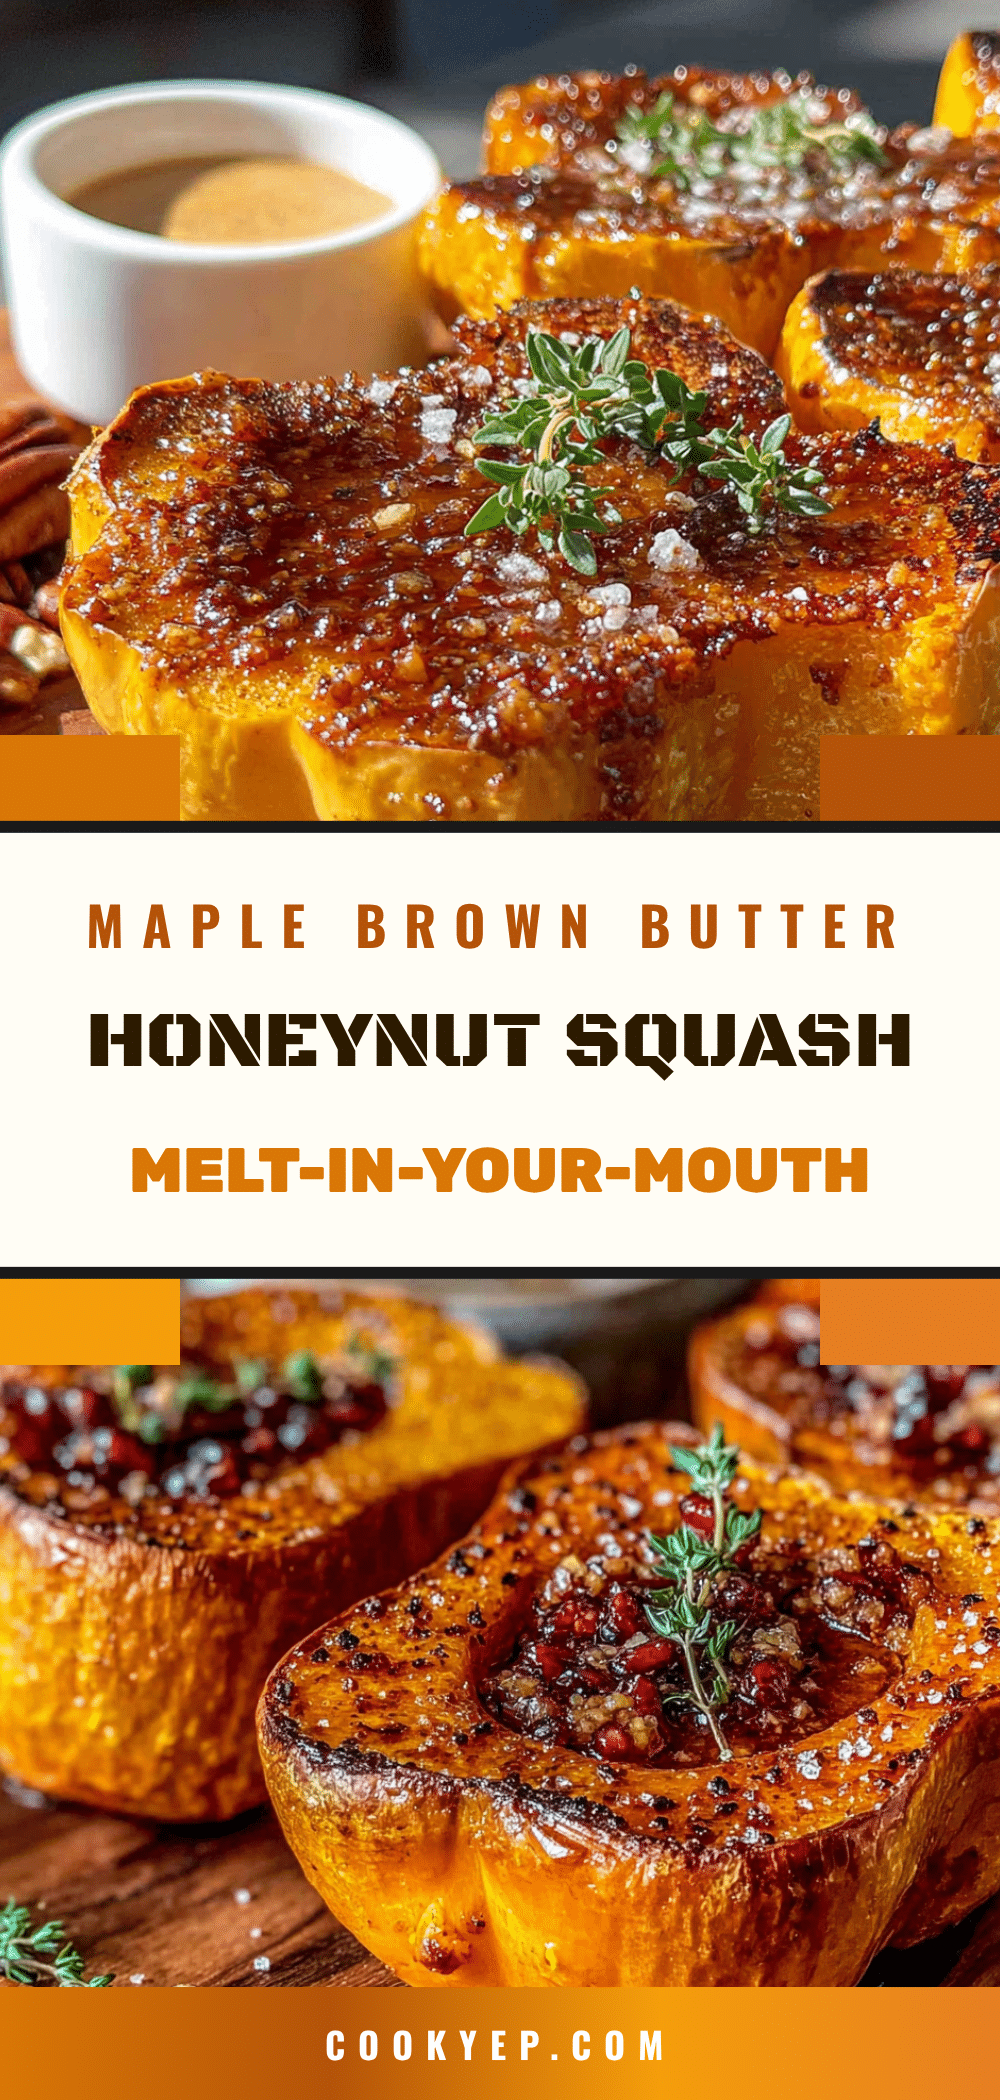
Perfect Maple Glazed Honeynut Squash with Brown Butter
This recipe transforms humble honeynut squash into a caramelized, nutty, and sweet side dish with a brown butter maple glaze. It’s quick, easy, and perfect for fall gatherings or weeknight dinners.
- Prep Time: 10 minutes
- Cook Time: 25 to 30 minutes
- Total Time: 35 to 40 minutes
- Yield: 4 servings 1x
- Category: Side Dish
- Cuisine: American
Ingredients
- 3 to 4 medium honeynut squash (about 1 per person)
- 4 tablespoons (56g) unsalted butter
- 3 tablespoons (60ml) pure maple syrup (grade A dark amber preferred)
- 1 teaspoon kosher salt (Diamond Crystal; use ¾ teaspoon if Morton’s)
- 4 to 5 sprigs fresh thyme (plus more for garnish)
- ¼ teaspoon freshly ground black pepper
- Flaky sea salt (e.g., Maldon) for finishing
Instructions
- Preheat oven to 400°F (200°C). Position rack in the middle. Line a large sheet pan with parchment paper.
- Wash honeynut squash well. Trim off stem end and bottom tip. Cut each squash crosswise into 1-inch thick rounds (about 4 to 5 rounds per squash). Scoop out seeds and stringy bits with a small spoon. Place rounds in a single layer on the prepared sheet pan, not touching.
- In a small saucepan over medium heat, melt 4 tablespoons unsalted butter. Swirl occasionally. After 3 to 4 minutes, butter will foam, then subside, and brown specks will form at the bottom. When butter turns deep golden brown and smells nutty, remove from heat immediately.
- Whisk 3 tablespoons maple syrup and 1 teaspoon kosher salt into the hot brown butter until smooth. Add fresh thyme sprigs and let steep for 2 minutes.
- Brush the brown butter mixture generously over both sides of each squash round. Reserve about 2 tablespoons for basting later. Arrange thyme sprigs from the pan on top of squash or scatter around. Sprinkle with ¼ teaspoon black pepper.
- Roast for 15 minutes. Remove pan from oven, carefully flip each round with a metal spatula, and brush with reserved glaze. Return to oven and roast for another 10 to 15 minutes, until edges are deeply caramelized and flesh is tender (fork slides in easily).
- Let squash rest on pan for 2 to 3 minutes. Transfer to a serving platter, sprinkle with flaky sea salt, and garnish with fresh thyme leaves. Serve warm or at room temperature.
Notes
Do not crowd the pan—squash steams instead of caramelizing. Watch brown butter closely; it burns in seconds. Cut uniform 1-inch rounds for even cooking. Use parchment paper to prevent sticking. Season in layers: salt before roasting and flaky salt at the end. Let squash rest a few minutes before serving so glaze sets. If browning too quickly, reduce oven to 375°F and roast longer. For butternut squash substitute, cut into 1-inch rounds and increase roasting time by 5 to 10 minutes.
Nutrition
- Serving Size: 4 to 5 squash rounds
- Calories: 195
- Sugar: 12
- Sodium: 480
- Fat: 12
- Saturated Fat: 7
- Carbohydrates: 23
- Fiber: 4
- Protein: 2
Keywords: honeynut squash, maple glazed, brown butter, roasted squash, fall side dish, easy recipe, vegetarian, gluten-free


