The neighborhood potluck was in six hours and I’d completely forgotten. Everyone else would be bringing their signature dishes—Karen’s famous three-layer lasagna, Mark’s slow-cooked brisket that he’d probably been marinating since Tuesday. I had a rotisserie chicken from the grocery store, a box of frozen puff pastry that I’d bought on a whim, and about forty-five minutes before I needed to leave. Honestly, I was panicking. I mean, you know that feeling when you’re staring into your fridge like it’s going to magically produce a gourmet meal? That was me, except the fridge was just blinking back at me with its single sad lightbulb.
So I did what any reasonable person would do—I started throwing things together. I grabbed the chicken, some frozen vegetables I found buried in the freezer, and that puff pastry. I figured if I made a quick gravy and topped it with the pastry, it would at least look like I tried. The whole thing came together in a blur of butter and flour, and I honestly didn’t even taste it before I walked out the door. I just crossed my fingers and hoped for the best.
Well, let me tell you what happened. That potluck turned into a full-on competition. People were circling the table, taking photos, asking for the recipe. And my little chicken pot pie—the one I’d thrown together in a panic—was the first dish to disappear. Karen’s lasagna sat half-eaten. Mark’s brisket got a polite nod. But my pot pie? People were scraping the dish clean. I stood there with my plastic fork, completely stunned. Maybe you’ve been there—when something you made under pressure turns out to be the best thing you’ve ever made. That’s this recipe. It’s not fancy, it’s not complicated, but it’s the kind of cozy, flaky, soul-warming dish that makes people close their eyes when they take that first bite. And that’s why I keep making it, even when there’s no potluck in sight.
Why You’ll Love This Recipe
Let’s be honest—there are a million chicken pot pie recipes out there. But this one? It’s different. I’ve tested this recipe at least a dozen times, tweaking the gravy, adjusting the bake time, figuring out exactly how to get that puff pastry to puff just right without getting soggy on the bottom. It’s chef-tested, family-approved, and honestly, it’s the one recipe I turn to when I need comfort food that actually works.
- Quick & Easy: Comes together in under an hour, perfect for those weeknights when you need something warm and satisfying but don’t have hours to spend in the kitchen.
- Simple Ingredients: No fancy grocery trips needed. You probably have most of these ingredients in your pantry and fridge right now.
- Perfect for Cozy Nights: Great for cold weather, rainy days, or any time you need a hug in food form.
- Crowd-Pleaser: Always gets rave reviews from kids and adults alike. I’ve never met anyone who didn’t go back for seconds.
- Unbelievably Delicious: The combination of creamy, savory filling and flaky, buttery puff pastry is next-level comfort food.
What makes this recipe different from the rest? It’s the technique. Instead of a double crust that can get heavy and soggy, we’re using a single layer of puff pastry on top. This means you get that incredible flaky texture without the filling getting weighed down. The gravy is perfectly seasoned—not too thick, not too thin—and it coats every single piece of chicken and vegetable just right. It’s comfort food reimagined: faster, easier, but with the same soul-soothing satisfaction that makes you want to curl up on the couch with a bowl.
What Ingredients You Will Need
This recipe uses simple, wholesome ingredients to deliver bold flavor and satisfying texture without the fuss. Most of these are pantry staples, which makes this dish perfect for those nights when you need dinner on the table without a trip to the store.
For the Filling
- 3 tablespoons unsalted butter (I use Kerrygold for the best flavor, but any good butter works)
- 1 medium yellow onion, diced (about 1 cup)
- 2 large carrots, peeled and diced
- 2 celery stalks, diced
- 3 cloves garlic, minced
- 1/3 cup all-purpose flour
- 2 cups chicken broth (low-sodium preferred, so you can control the salt)
- 1 cup whole milk (or half-and-half for extra richness)
- 3 cups cooked chicken, shredded or cubed (rotisserie chicken is perfect here)
- 1 cup frozen peas
- 1/2 cup frozen corn kernels
- 1 teaspoon dried thyme
- 1/2 teaspoon dried rosemary
- Salt and black pepper to taste
For the Topping
- 1 sheet frozen puff pastry, thawed (I recommend Pepperidge Farm—it’s reliable and widely available)
- 1 large egg, beaten (for the egg wash)
- Flaky sea salt for sprinkling (optional, but adds a nice touch)
A few notes on ingredients: For the chicken, rotisserie chicken is my go-to because it’s already cooked and seasoned. But if you have leftover roasted chicken or even turkey, that works beautifully too. For the vegetables, feel free to swap in what you have—green beans, mushrooms, or diced potatoes all make great additions. And if you’re dairy-free, you can substitute the butter with a good plant-based butter and use unsweetened oat milk instead of whole milk. Just know the filling won’t be quite as rich.
When it comes to the puff pastry, make sure it’s fully thawed but still cold. If it gets too warm, it won’t puff up as nicely in the oven. I usually take it out of the freezer and let it sit in the fridge overnight, or on the counter for about 30 minutes before I start cooking.
Equipment Needed
You don’t need a fancy kitchen to make this recipe work. Here’s what you’ll need:
- Large oven-safe skillet or Dutch oven (10-12 inches, preferably with a lid)
- Cutting board and sharp knife
- Wooden spoon or silicone spatula
- Measuring cups and spoons
- Small bowl for the egg wash
- Pastry brush (or just use a spoon if you don’t have one)
- Pizza cutter or sharp knife (for cutting the puff pastry)
If you don’t have an oven-safe skillet, you can transfer the filling to a 9×13-inch baking dish before adding the pastry. I’ve done it both ways, and honestly, the baking dish version is a little easier because you can see the puff pastry puff up more clearly. Just make sure whatever dish you use is deep enough to hold the filling without overflowing.
As for the puff pastry, I’ve tried a few different brands over the years. Pepperidge Farm is my go-to because it’s consistent and easy to find. But if you have a good bakery near you that sells fresh puff pastry, that’s even better. Just avoid the store-brand versions that are too thin—they tend to get soggy instead of flaky.
Preparation Method
Alright, let’s get cooking. This recipe comes together in about 45 minutes, and most of that is hands-off baking time.
- Preheat your oven to 400°F (200°C). Position a rack in the center of the oven. While the oven heats up, take your puff pastry out of the fridge and let it sit on the counter for about 10 minutes—just enough to make it pliable without getting too warm.
- Melt the butter in your large oven-safe skillet over medium heat. Once it’s bubbling, add the diced onion, carrots, and celery. Cook for about 5-7 minutes, stirring occasionally, until the vegetables have softened and the onions are translucent. You’ll know they’re ready when the kitchen starts smelling like a cozy dinner.
- Add the minced garlic and cook for another minute, stirring constantly so it doesn’t burn. The garlic should be fragrant but not brown.
- Sprinkle the flour over the vegetables and stir to coat everything evenly. Cook for about 2 minutes, stirring constantly. This step is important—it cooks the raw flour taste out and helps thicken the gravy. The mixture will look dry and pasty, and that’s exactly what you want.
- Slowly pour in the chicken broth while whisking continuously to prevent lumps. I use a whisk for this step, but a wooden spoon works too—just make sure you’re breaking up any flour clumps as you go. Once the broth is fully incorporated, pour in the milk and keep stirring until the mixture is smooth.
- Bring the mixture to a gentle simmer and let it cook for about 3-4 minutes, stirring occasionally. You’ll see it start to thicken. It should be thick enough to coat the back of a spoon but still pourable. If it seems too thick, add a splash more broth. If it’s too thin, let it simmer a little longer.
- Stir in the cooked chicken, frozen peas, frozen corn, dried thyme, and dried rosemary. Season with salt and pepper to taste. I usually start with about 1/2 teaspoon of salt and 1/4 teaspoon of pepper, then adjust from there. Let everything heat through for about 2 minutes, then remove the skillet from the heat.
- On a lightly floured surface, roll out your puff pastry sheet just slightly—about 1/8 inch thick. You don’t want to roll it too thin or it won’t puff properly. Using a pizza cutter or sharp knife, cut the pastry into a shape that’s slightly larger than your skillet or baking dish. I like to cut it into a circle that overhangs the edges by about an inch.
- Carefully lay the puff pastry over the filling in the skillet. Tuck the edges down around the filling, but don’t press too hard—you want the pastry to puff up, not stick to the filling. Cut a few small slits in the top of the pastry to let steam escape. This prevents the pastry from getting soggy.
- Brush the top of the pastry with the beaten egg using your pastry brush. Make sure you get the edges too—this is what gives you that gorgeous golden-brown color. Sprinkle with flaky sea salt if you’re using it.
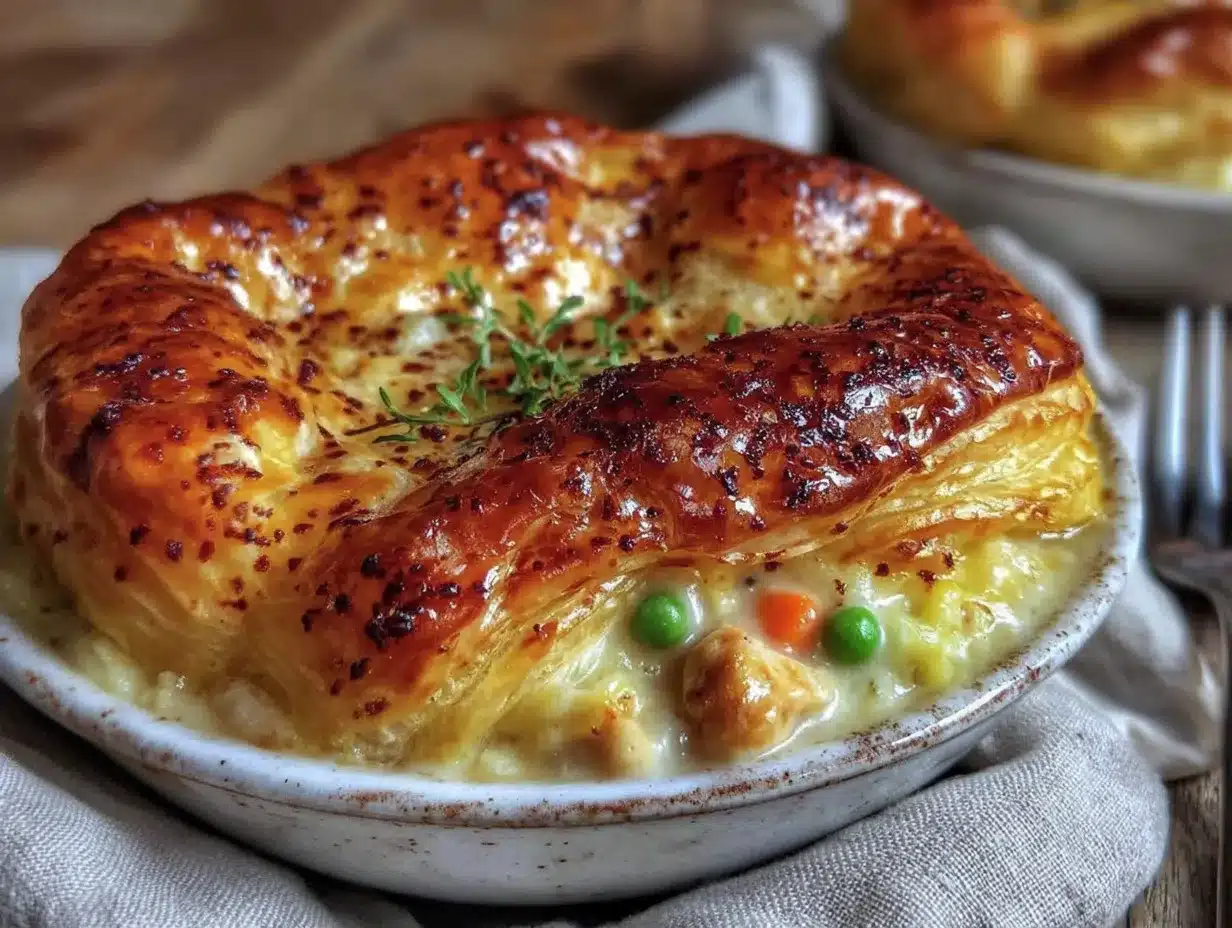
- Bake for 20-25 minutes, until the puff pastry is golden brown and puffed up beautifully. The filling should be bubbling around the edges. Let it cool for about 5-10 minutes before serving—this lets the filling set up so it doesn’t run all over your plate.
Cooking Tips & Techniques
I’ve made this recipe more times than I can count, and I’ve learned a few things along the way. Here are my best tips for getting it perfect every time:
Don’t skip the flour cooking step. I know it seems fussy, but cooking the flour for those two minutes is what keeps your gravy from tasting like raw flour. I learned this the hard way when I was in a hurry and skipped it. The filling was grainy and weird, and I had to start over. Trust me on this one.
Keep your puff pastry cold. Warm puff pastry won’t puff—it’ll just melt into a sad, greasy puddle. If your kitchen is warm, pop the pastry back in the fridge for 10 minutes after you’ve cut it to size. I’ve done this on hot summer days, and it makes a huge difference.
Watch your liquid ratio. The filling should be thick enough that it doesn’t pool when you spoon it onto a plate, but not so thick that it’s pasty. If you’re unsure, err on the side of slightly thinner—it’ll thicken more as it bakes. I’ve had a few batches that were too thick, and they ended up more like chicken paste than pot pie.
Let it rest before serving. I know it’s hard to wait when your kitchen smells this good, but those 5-10 minutes of resting time are crucial. The filling sets up, the pastry finishes crisping, and everything comes together perfectly. If you cut into it too soon, it’ll be a soupy mess.
Multitask like a pro. While the vegetables are cooking, you can shred your chicken and measure out your other ingredients. And while the pot pie is baking, you can make a quick side salad or set the table. This recipe is great for practicing your kitchen timing.
Variations & Adaptations
One of the best things about this recipe is how adaptable it is. Here are some of my favorite variations:
Vegetarian Version: Swap the chicken for 2 cups of mixed mushrooms (cremini, shiitake, or oyster) and add an extra cup of vegetables like diced potatoes or green beans. Use vegetable broth instead of chicken broth. It’s hearty and satisfying, even without the meat.
Gluten-Free Adaptation: Use a gluten-free all-purpose flour blend for the roux (I like King Arthur’s Measure for Measure), and make sure your puff pastry is gluten-free. There are a few good brands out there now, like Schär, that work really well. The texture will be slightly different, but still delicious.
Herb Swap: If you don’t have thyme and rosemary on hand, try using 1 teaspoon of dried sage or 1 tablespoon of fresh parsley. I’ve even used a pinch of dried tarragon in a pinch, and it added a lovely subtle anise flavor that worked surprisingly well.
Cheesy Twist: Stir in 1/2 cup of shredded cheddar or Gruyère cheese right before you add the puff pastry. It melts into the filling and adds a whole new layer of richness. I tried this one night when I had extra cheese in the fridge, and it was a game-changer.
Individual Pot Pies: Instead of one large pie, divide the filling among 4-6 ramekins and top each with a small round of puff pastry. Reduce the baking time to 15-18 minutes. These are perfect for dinner parties or when you want to make everyone feel special.
Serving & Storage Suggestions
This pot pie is best served warm, right out of the oven. The contrast between the hot, creamy filling and the flaky, buttery pastry is pure magic. I like to serve it in shallow bowls with a big spoon, so you can get every last bit of gravy.
For sides, a simple green salad with a lemon vinaigrette is perfect—it cuts through the richness of the pot pie. Or try roasted asparagus or steamed green beans for something warm and veggie-forward. If you’re feeling indulgent, mashed potatoes on the side are never a bad idea.
As for drinks, a crisp white wine like Sauvignon Blanc or a light Pinot Noir works beautifully. For non-alcoholic options, a sparkling apple cider or a warm cup of tea are cozy choices.
Storage is straightforward. Let any leftovers cool completely, then cover the dish tightly with plastic wrap or transfer individual portions to airtight containers. It will keep in the refrigerator for up to 3 days. The puff pastry will soften slightly, but it’s still delicious.
To reheat, place individual portions in a 350°F oven for about 10-15 minutes, or until heated through. The microwave works in a pinch, but the pastry won’t be as crisp. For the best results, I recommend reheating in a toaster oven or air fryer at 350°F for about 5-7 minutes.
You can also freeze this pot pie for up to 3 months. Assemble it completely but don’t bake it. Wrap the dish tightly in plastic wrap and then aluminum foil. When you’re ready to bake, thaw it in the fridge overnight, then bake as directed, adding about 10 minutes to the baking time.
Nutritional Information & Benefits
Here’s the approximate nutritional breakdown for one serving (based on 6 servings):
| Nutrient | Amount |
|---|---|
| Calories | 485 |
| Protein | 28g |
| Fat | 28g |
| Carbohydrates | 32g |
| Fiber | 4g |
| Sugar | 6g |
| Sodium | 680mg |
This recipe is a good source of protein from the chicken, which helps keep you full and satisfied. The carrots and peas provide vitamin A and fiber, while the celery adds a nice dose of vitamin K. The butter and milk contribute calcium and healthy fats, though you can lighten it up by using low-fat milk or a plant-based alternative.
If you’re watching your sodium, use low-sodium broth and go easy on the added salt. The rotisserie chicken will already have some salt, so taste the filling before you season it. For a lower-carb option, skip the puff pastry and serve the filling over mashed cauliflower or roasted vegetables.
This recipe contains dairy (butter, milk) and gluten (flour, puff pastry). For dairy-free, use plant-based butter and unsweetened oat milk. For gluten-free, use a gluten-free flour blend and gluten-free puff pastry as mentioned above.
Conclusion
This cozy flaky puff pastry chicken pot pie is more than just a recipe—it’s a little piece of comfort that you can make any night of the week. It’s the kind of dish that makes you slow down, take a deep breath, and enjoy the moment. Whether you’re making it for a potluck, a family dinner, or just because you need something warm and satisfying, it never disappoints.
I love this recipe because it’s forgiving. You can swap ingredients, adjust the seasonings, make it your own. And no matter what you do, it always comes out delicious. That’s the beauty of good comfort food—it doesn’t need to be perfect. It just needs to be made with care.
So go ahead, give it a try. And when you do, I’d love to hear about it. Leave a comment below and let me know how it turned out—did you add any twists? Did your family love it? Share your photos and tag me on social media. I can’t wait to see what you create!
Until next time, happy cooking, and may your kitchen always smell like comfort.
Frequently Asked Questions
Can I use homemade puff pastry instead of store-bought?
Absolutely! Homemade puff pastry will work beautifully if you have the time and patience. Just make sure it’s rolled to about 1/8 inch thickness and kept cold before baking. Store-bought is a great shortcut, but homemade adds an extra layer of flakiness that’s hard to beat.
Can I make this recipe ahead of time?
Yes! You can assemble the entire pot pie (without baking) up to 24 hours in advance. Cover it tightly and refrigerate. When you’re ready to bake, add about 5-10 minutes to the baking time since you’re starting from cold. The puff pastry might not puff quite as high, but it’ll still be delicious.
Can I use leftover turkey instead of chicken?
Definitely! This is a fantastic way to use up leftover Thanksgiving or holiday turkey. Just shred or cube the turkey and use it exactly as you would the chicken. The flavors work perfectly together, and it’s a great way to give leftovers new life.
Why is my puff pastry soggy on the bottom?
Soggy puff pastry usually happens when the filling is too thin or when the pastry sits on the filling for too long before baking. Make sure your filling is thick enough (it should coat the back of a spoon) and that you bake the pot pie as soon as the pastry is on top. Cutting slits in the pastry also helps steam escape, which keeps it crisp.
Can I add other vegetables to the filling?
Absolutely! This recipe is very flexible. Try adding diced potatoes (parboil them first so they cook through), sliced mushrooms, green beans, or even a handful of spinach stirred in at the end. Just keep the total vegetable volume similar to what’s called for so the filling doesn’t get too watery.
Pin This Recipe!

Cozy Flaky Puff Pastry Chicken Pot Pie Recipe

A quick and easy chicken pot pie with a flaky puff pastry topping, perfect for weeknights or potlucks. This comforting dish features a creamy, savory filling with rotisserie chicken and frozen vegetables, all topped with golden, buttery puff pastry.
- Prep Time: 15 minutes
- Cook Time: 30 minutes
- Total Time: 45 minutes
- Yield: 6 servings 1x
- Category: Main Course
- Cuisine: American
Ingredients
- 3 tablespoons unsalted butter
- 1 medium yellow onion, diced (about 1 cup)
- 2 large carrots, peeled and diced
- 2 celery stalks, diced
- 3 cloves garlic, minced
- 1/3 cup all-purpose flour
- 2 cups chicken broth (low-sodium preferred)
- 1 cup whole milk (or half-and-half for extra richness)
- 3 cups cooked chicken, shredded or cubed (rotisserie chicken is perfect)
- 1 cup frozen peas
- 1/2 cup frozen corn kernels
- 1 teaspoon dried thyme
- 1/2 teaspoon dried rosemary
- Salt and black pepper to taste
- 1 sheet frozen puff pastry, thawed (e.g., Pepperidge Farm)
- 1 large egg, beaten (for egg wash)
- Flaky sea salt for sprinkling (optional)
Instructions
- Preheat your oven to 400°F (200°C). Position a rack in the center of the oven. Take puff pastry out of the fridge and let it sit on the counter for about 10 minutes to become pliable.
- Melt the butter in a large oven-safe skillet over medium heat. Add diced onion, carrots, and celery. Cook for 5-7 minutes, stirring occasionally, until softened and onions are translucent.
- Add minced garlic and cook for another minute, stirring constantly, until fragrant.
- Sprinkle flour over the vegetables and stir to coat evenly. Cook for 2 minutes, stirring constantly, until the mixture looks dry and pasty.
- Slowly pour in chicken broth while whisking continuously to prevent lumps. Once incorporated, pour in milk and keep stirring until smooth.
- Bring the mixture to a gentle simmer and cook for 3-4 minutes, stirring occasionally, until it thickens enough to coat the back of a spoon.
- Stir in cooked chicken, frozen peas, frozen corn, dried thyme, and dried rosemary. Season with salt and pepper to taste. Heat through for about 2 minutes, then remove from heat.
- On a lightly floured surface, roll out puff pastry sheet to about 1/8 inch thick. Cut into a shape slightly larger than your skillet or baking dish (e.g., a circle that overhangs by about 1 inch).
- Carefully lay the puff pastry over the filling in the skillet. Tuck edges down around the filling without pressing too hard. Cut a few small slits in the top to let steam escape.
- Brush the top of the pastry with beaten egg, including the edges. Sprinkle with flaky sea salt if desired.
- Bake for 20-25 minutes, until puff pastry is golden brown and puffed, and filling is bubbling around the edges. Let cool for 5-10 minutes before serving.
Notes
For best results, keep puff pastry cold until ready to use. Don’t skip cooking the flour for 2 minutes to avoid a raw flour taste. Let the pot pie rest before serving to allow the filling to set. For a vegetarian version, swap chicken for mushrooms and use vegetable broth. For gluten-free, use gluten-free flour and puff pastry. Leftovers can be refrigerated for up to 3 days or frozen for up to 3 months.
Nutrition
- Serving Size: 1 serving (1/6 of re
- Calories: 485
- Sugar: 6
- Sodium: 680
- Fat: 28
- Saturated Fat: 12
- Carbohydrates: 32
- Fiber: 4
- Protein: 28
Keywords: chicken pot pie, puff pastry, comfort food, easy dinner, potluck recipe, rotisserie chicken, quick meal