This was supposed to be a batch of classic chocolate chip cookies. You know, the kind that are crisp around the edges with a soft, chewy middle—the kind everyone expects. I had the butter softening on the counter, the sugars measured out, and I was feeling pretty good about myself. Then I got distracted. My neighbor knocked on the door with a question about the weekend block party, and when I came back to the kitchen, I grabbed the wrong saucepan and melted the butter completely. I mean, completely liquid. Hot, golden, and utterly useless for the creaming method I had planned.
I stood there staring at the pool of melted butter, honestly ready to scrap the whole thing. It was a Tuesday evening, I was tired, and the last thing I wanted was to start over. But I had already promised cookies to a friend who was having a rough week, and backing out felt worse than salvaging a mistake. So I threw the butter back on the stove, let it bubble and foam until it turned nutty and brown, and figured I’d just go with it. Worst case, I’d have flat, greasy cookies. Best case, I’d learn something.
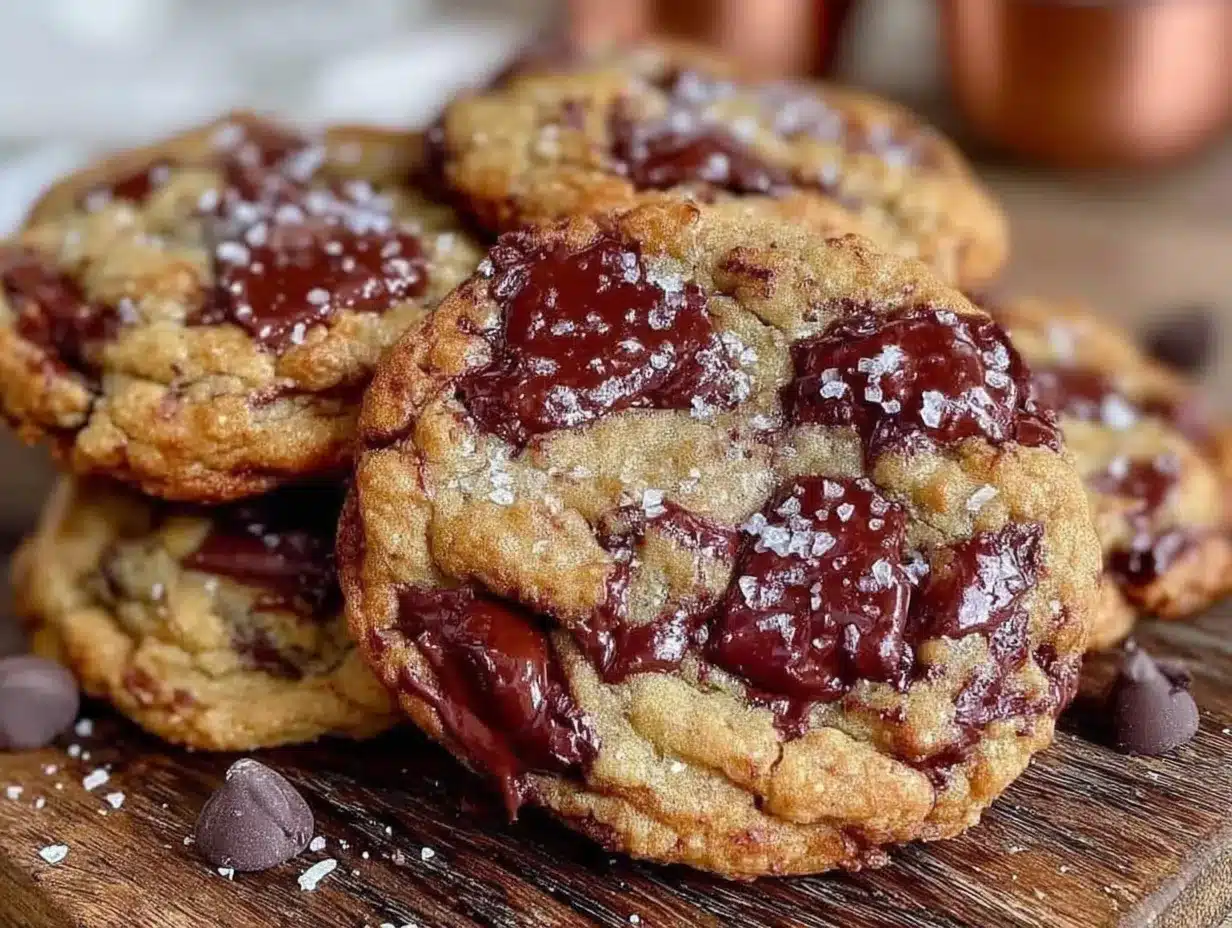
What came out of that oven was nothing like the plan. These cookies were tender—almost pillowy—with a deep, toasty flavor from the brown butter that I had never tasted in a cookie before. The edges were barely crisp, the centers were soft and almost cake-like, and the chocolate chips melted into little pools of richness. I actually laughed when I took the first bite. Maybe you’ve been there—when a kitchen disaster turns into something you didn’t know you needed. That’s this cookie. It’s the happy accident that became my go-to recipe, and I honestly don’t think I’ll ever go back to the old way.
Why You’ll Love This Recipe
These Tender Brown Butter Chocolate Chip Cookies are different from any other cookie recipe you’ve tried. I’ve tested this version at least eight times to get the texture just right, and I can tell you with confidence—this is the one. Here’s why you’ll fall for them:
- Quick & Easy: From start to finish, these cookies come together in about 30 minutes. The brown butter takes an extra five, but it’s worth every second.
- Simple Ingredients: No weird flours or hard-to-find extracts. You probably have everything in your pantry right now, except maybe the butter—and you’ve got that, right?
- Perfect for Everyday Indulgence: These cookies feel special enough for a weekend treat but are simple enough for a Tuesday afternoon snack. They’re balanced—not too sweet, not too rich.
- Crowd-Pleaser: I’ve brought these to potlucks, family dinners, and casual hangouts. They disappear fast. Kids love them, adults love them, and people always ask for the recipe.
- Unbelievably Tender: The brown butter does something magical here. It adds moisture and a nutty depth that makes the texture soft and almost melt-in-your-mouth. You won’t get that from regular melted butter.
What makes this recipe stand out is the technique. Instead of just browning the butter and calling it a day, I let it cool to the perfect temperature before mixing. This keeps the cookies from spreading too thin while still giving you that tender crumb. Plus, I use a slightly higher ratio of brown sugar to white sugar, which adds moisture and that chewy-soft texture without making the cookies greasy. It’s not just another chocolate chip cookie—it’s the best version I’ve ever made.
Honestly, this recipe is comfort food reimagined. It’s healthier than a bakery cookie because you control the ingredients, faster than you’d expect, and satisfying in that soul-soothing way that only a really good cookie can be. Perfect for impressing guests without stress, or turning a simple evening into something memorable.
What Ingredients You Will Need
This recipe uses simple, wholesome ingredients to deliver bold flavor and a tender texture without any fuss. Most of these are pantry staples, but I’ll walk you through a few key choices that make a real difference.
For the Cookies
- Unsalted butter, 1 cup (2 sticks or 226 grams) — I use unsalted so I can control the salt level. If you only have salted, reduce the added salt by ¼ teaspoon.
- All-purpose flour, 2 ¼ cups (280 grams) — Spoon and level your flour. Scooping directly from the bag packs in too much and makes cookies dry.
- Baking soda, 1 teaspoon — This helps the cookies spread just a little and gives them a soft, airy texture.
- Salt, 1 teaspoon — I prefer fine sea salt. It balances the sweetness and brings out the nutty flavor of the brown butter.
- Light brown sugar, 1 cup (200 grams), packed — Brown sugar adds moisture and a hint of molasses that pairs beautifully with the browned butter. I recommend Domino or C&H for consistent results.
- Granulated sugar, ½ cup (100 grams) — White sugar gives the cookies a slight crispness on the edges while keeping the centers soft.
- Large egg, 1, plus 1 egg yolk — The extra yolk adds richness and tenderness without making the dough too wet. Let them come to room temperature for 15 minutes before using.
- Vanilla extract, 2 teaspoons — Pure vanilla extract makes a difference here. I like Nielsen-Massey, but any good brand works. Avoid imitation vanilla if you can.
- Semi-sweet chocolate chips, 2 cups (340 grams) — I use Guittard or Ghirardelli for a smooth, not-too-sweet flavor. You can also chop a dark chocolate bar for bigger, melty pools.
Ingredient Tips & Substitutions
- Whole wheat pastry flour can replace up to half the all-purpose flour for a slightly nuttier flavor and more fiber.
- Coconut sugar works as a 1:1 swap for brown sugar, though the cookies will be slightly less moist.
- Dairy-free butter like Miyoko’s or Earth Balance can replace the unsalted butter. Brown it the same way, but watch it closely—dairy-free butter browns faster.
- Milk chocolate chips make a sweeter cookie. Dark chocolate chips (60-70%) balance the brown butter’s richness beautifully.
- Fresh berries like chopped strawberries or raspberries can replace up to ½ cup of chocolate chips in summer for a fruity twist.
Equipment Needed
You don’t need a fancy kitchen to make these cookies, but a few tools make the process smoother. Here’s what I use:
- Light-colored saucepan (preferably stainless steel) — A dark pan makes it hard to see when the butter is browning. I use a 2-quart stainless steel saucepan from Cuisinart.
- Large mixing bowl — A glass or ceramic bowl works best. Metal bowls can react with the butter and affect the flavor.
- Whisk — For mixing the wet ingredients. A silicone whisk is gentle on bowls.
- Rubber spatula — For folding in the chocolate chips. I prefer a heat-resistant one.
- Baking sheets — Two half-sheet pans (18×13 inches) allow you to bake multiple batches. Avoid dark non-stick pans—they cause cookies to brown too quickly.
- Parchment paper — Lining the sheets prevents sticking and makes cleanup a breeze. Silicone baking mats also work.
- Cookie scoop (about 1.5 tablespoons) — For evenly sized cookies. A #40 scoop is perfect. If you don’t have one, use two spoons.
- Wire cooling rack — Essential for letting cookies cool evenly without getting soggy bottoms.
If you’re on a budget, skip the cookie scoop and use a measuring tablespoon instead. The rest of the equipment is probably already in your kitchen. A tip from experience: wash your saucepan immediately after browning the butter. Burnt butter residue is a pain to scrub off later.
Preparation Method
Let’s get baking. Follow these steps carefully, and you’ll have perfectly tender brown butter cookies every time. The total time is about 30 minutes, plus 10 minutes of cooling.
- Brown the butter (5 minutes): Place the 1 cup of unsalted butter in a light-colored saucepan over medium heat. Stir occasionally with a whisk or rubber spatula. After 3-4 minutes, the butter will start to foam and turn golden. Watch closely—small brown specks will appear at the bottom. Once the butter smells nutty and is a deep amber color (not dark brown), remove it from the heat immediately. Pour it into a heat-safe bowl to stop the cooking process. Let it cool for 10 minutes until it’s warm but not hot to the touch. If it’s too hot, it will cook the egg later.
- Preheat the oven (2 minutes): Set your oven to 350°F (175°C). Line two baking sheets with parchment paper or silicone mats.
- Mix dry ingredients (2 minutes): In a medium bowl, whisk together 2 ¼ cups all-purpose flour, 1 teaspoon baking soda, and 1 teaspoon salt. Set aside.
- Combine sugars and brown butter (3 minutes): In a large mixing bowl, add the cooled brown butter, 1 cup packed light brown sugar, and ½ cup granulated sugar. Whisk vigorously for about 2 minutes until the mixture looks smooth and slightly thickened. It won’t be fluffy like creamed butter, but it should be well combined. If you see any separation, keep whisking.
- Add egg, yolk, and vanilla (2 minutes): Crack the large egg and the extra yolk into the butter-sugar mixture. Add 2 teaspoons vanilla extract. Whisk until everything is fully incorporated and the mixture looks glossy—about 1 minute. The dough will look a bit thin at this point, and that’s okay.
- Fold in dry ingredients (2 minutes): Pour the flour mixture into the wet ingredients. Use a rubber spatula to fold gently. Stir just until no streaks of flour remain. Overmixing will make the cookies tough. The dough will be soft and slightly sticky—that’s the texture you want.
- Add chocolate chips (1 minute): Fold in 2 cups semi-sweet chocolate chips with the spatula. Make sure they’re evenly distributed. If the dough feels too sticky to handle, chill it for 15 minutes in the fridge. But usually, it’s ready to go.
- Scoop the cookies (3 minutes): Use a 1.5-tablespoon cookie scoop to portion the dough. Place the dough balls 2 inches apart on the prepared baking sheets. You should get about 24 cookies. If you want bakery-style cookies, scoop larger portions (about 2 tablespoons) for 18 cookies.
- Bake (10-12 minutes): Bake one sheet at a time on the middle rack. Bake for 10 minutes for soft, tender centers, or 12 minutes for slightly more set cookies. The edges should be golden brown, but the centers will look pale and slightly puffed. They will continue to set as they cool.
- Cool (10 minutes): Let the cookies rest on the baking sheet for 5 minutes. Then transfer them to a wire cooling rack to cool completely. If you try to move them too soon, they will fall apart—trust me, I’ve learned this the hard way.
Cooking Tips & Techniques
Over the years, I’ve made plenty of cookie mistakes, and these tips come straight from those failures. Here’s how to nail these tender brown butter chocolate chip cookies every time.
Don’t skip cooling the brown butter. I once added the brown butter to the sugars while it was still hot, and the mixture turned into a greasy mess. The cookies spread into flat, oily puddles. Let the butter cool until it’s warm but not hot—about 100°F (38°C) if you have a thermometer, or until the bowl feels warm to the touch but not burning.
Use a light-colored pan for browning. Dark non-stick pans make it nearly impossible to see the color change. You’ll end up with burnt butter that tastes bitter instead of nutty. Stainless steel or enameled cast iron works best.
Watch the butter like a hawk. The transition from brown to burnt happens in about 30 seconds. Once you see those brown specks and smell that nutty aroma, pull it off the heat. If you’re unsure, err on the side of lighter rather than darker. You can always brown it a bit more, but you can’t un-burn it.
Chill the dough if needed. If your kitchen is warm (above 75°F) or your butter was a little too warm when mixing, the dough might be too soft. Pop the bowl in the fridge for 20 minutes before scooping. This prevents excessive spreading and gives you thicker cookies.
Bake one sheet at a time. I know it’s tempting to save time, but baking two sheets at once leads to uneven browning. The top sheet will bake faster, and the bottom sheet will be underdone. Just bake one batch at a time on the middle rack.
Underbake slightly. The biggest mistake people make is overbaking. Cookies continue to cook on the hot baking sheet after you pull them out of the oven. If the centers look fully set in the oven, they’ll be dry by the time they cool. Take them out when the edges are golden and the centers are still pale and soft.
Variations & Adaptations
One of the best things about this recipe is how adaptable it is. I’ve tried several variations, and each one brings something new to the table. Here are a few of my favorites:
- Gluten-Free Version: Swap the all-purpose flour for a 1:1 gluten-free baking flour blend (I like Bob’s Red Mill). Add ¼ teaspoon xanthan gum if your blend doesn’t include it. The cookies will be slightly more delicate but just as tender.
- Vegan Adaptation: Use 1 cup of vegan butter (brown it the same way), replace the egg with a flax egg (1 tablespoon ground flaxseed + 3 tablespoons water, let sit for 5 minutes), and skip the extra yolk. The cookies will be a bit denser but still delicious.
- Double Chocolate: Replace ¼ cup of the all-purpose flour with ¼ cup unsweetened cocoa powder. Use white chocolate chips or dark chocolate chunks for a rich, fudgy twist.
- Nutty Brown Butter: Add ½ cup toasted pecans or walnuts along with the chocolate chips. Toast the nuts in a dry pan for 3-4 minutes until fragrant, then chop them roughly.
- Sea Salt Finish: Sprinkle a pinch of flaky sea salt (like Maldon) on top of each cookie right after they come out of the oven. The salt contrasts beautifully with the sweet, nutty brown butter.
I once tried a version with browned butter and chopped dark chocolate from a fancy bar I got as a gift. The chocolate melted into these elegant, irregular pools, and the cookies looked like they came from a high-end bakery. It’s a small change, but it makes a big visual difference.
Serving & Storage Suggestions
These tender brown butter chocolate chip cookies are best served slightly warm, when the chocolate is still a little melty and the texture is at its softest. Let them cool on the baking sheet for 5 minutes, then transfer to a plate and serve within 15 minutes for the ultimate experience.
For a cozy presentation, stack a few cookies on a small plate with a glass of cold milk or a cup of hot coffee. They also pair beautifully with a scoop of vanilla ice cream for an easy dessert. If you’re serving them at a party, arrange them on a wooden board with fresh berries and a drizzle of melted chocolate.
Storage instructions: Keep leftover cookies in an airtight container at room temperature for up to 5 days. Place a slice of bread in the container to keep them soft—the cookies will absorb the moisture from the bread. Replace the bread every 2 days if needed.
Freezing instructions: You can freeze the baked cookies for up to 3 months. Wrap them individually in plastic wrap, then place them in a freezer-safe bag. To thaw, let them sit at room temperature for 15 minutes, or warm them in a 300°F oven for 5 minutes. You can also freeze the raw dough balls. Scoop them onto a baking sheet, freeze until solid, then transfer to a freezer bag. Bake from frozen, adding 2-3 minutes to the baking time.
The flavors actually develop over time. Day-old cookies are often even better because the brown butter flavor has had time to mellow and meld with the chocolate. So don’t worry if you have leftovers—they’ll still be delicious.
Nutritional Information & Benefits
Here’s the estimated nutritional breakdown for one cookie (based on 24 cookies per batch):
| Nutrient | Amount per Cookie |
|---|---|
| Calories | 185 |
| Total Fat | 10g |
| Saturated Fat | 6g |
| Cholesterol | 30mg |
| Sodium | 115mg |
| Total Carbohydrates | 23g |
| Dietary Fiber | 1g |
| Sugars | 14g |
| Protein | 2g |
These cookies aren’t health food, but they’re made with real ingredients—butter, eggs, flour, and chocolate. The brown butter adds a small amount of vitamin A and healthy fats. Using dark chocolate chips (70% cocoa or higher) boosts antioxidant content. If you’re watching your sugar intake, you can reduce the granulated sugar to ¼ cup without affecting the texture too much.
From a wellness perspective, I love that this recipe uses simple, recognizable ingredients. There are no preservatives or artificial flavors. It’s a treat you can feel good about enjoying in moderation—perfect for those days when you need a little comfort without guilt.
Conclusion
These Tender Brown Butter Chocolate Chip Cookies are proof that sometimes the best recipes come from the biggest mistakes. What started as a ruined batch of butter turned into my most-requested cookie recipe, and I honestly can’t imagine going back to the old way. The nutty depth of the brown butter, the soft, pillowy texture, and the pools of melted chocolate make every bite feel special.
I hope you give this recipe a try, even if you’re skeptical about the brown butter step. It takes just five extra minutes, and the payoff is huge. And don’t be afraid to make it your own—swap in dark chocolate, add nuts, or sprinkle on some sea salt. That’s the beauty of baking: you get to tweak and experiment until it feels like yours.
If you make these cookies, I’d love to hear about it. Leave a comment below and let me know how they turned out, or share your own twist on the recipe. Happy baking, friends—here’s to happy accidents that become new favorites.
Frequently Asked Questions
Can I use salted butter instead of unsalted?
Yes, you can. Just reduce the added salt in the recipe to ½ teaspoon. The brown butter will still work the same way, but the final cookies will be slightly saltier.
Why did my cookies turn out flat?
Flat cookies usually mean the butter was too warm when mixed, or the dough wasn’t chilled. Let the brown butter cool completely before adding the sugars, and chill the dough for 20-30 minutes if your kitchen is warm.
Can I make the dough ahead of time?
Absolutely. You can refrigerate the dough for up to 48 hours. Cover the bowl tightly with plastic wrap. Let the dough sit at room temperature for 15 minutes before scooping and baking.
How do I know when the butter is properly browned?
Look for three signs: the butter will smell nutty and toasty, you’ll see small brown specks forming at the bottom of the pan, and the color will be a deep amber. It should not be dark brown or smoking.
Can I use milk chocolate chips instead of semi-sweet?
Yes, but the cookies will be sweeter. Milk chocolate chips have more sugar and less cocoa, so they melt faster and can make the cookies slightly softer. If you prefer a sweeter cookie, go for it.
Pin This Recipe!
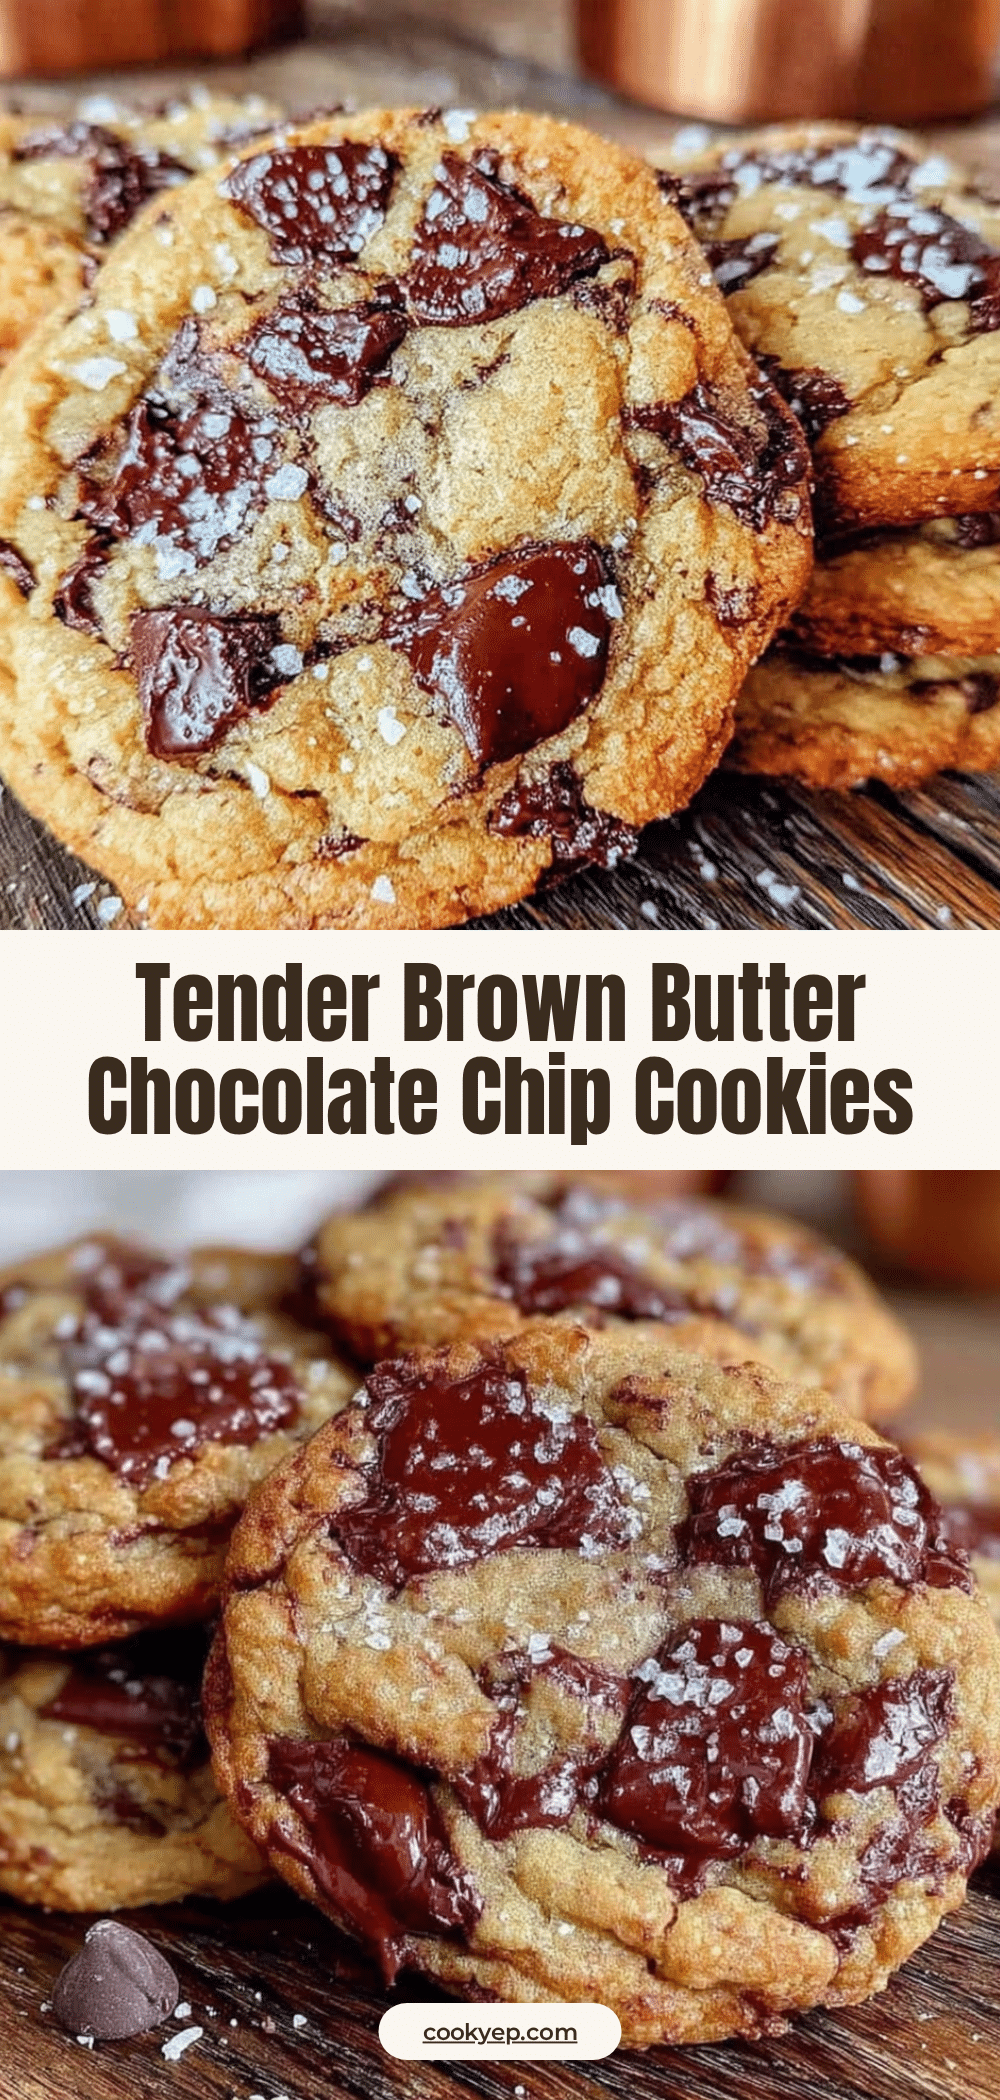
Tender Brown Butter Chocolate Chip Cookies: Best Easy Recipe

These tender brown butter chocolate chip cookies are soft, pillowy, and packed with nutty, toasty flavor from browned butter. A happy accident turned into the best easy cookie recipe you’ll ever make.
- Prep Time: 15 minutes
- Cook Time: 12 minutes
- Total Time: 27 minutes
- Yield: 24 cookies 1x
- Category: Dessert
- Cuisine: American
Ingredients
- 1 cup (2 sticks or 226 grams) unsalted butter
- 2 ¼ cups (280 grams) all-purpose flour
- 1 teaspoon baking soda
- 1 teaspoon fine sea salt
- 1 cup (200 grams) packed light brown sugar
- ½ cup (100 grams) granulated sugar
- 1 large egg plus 1 egg yolk, at room temperature
- 2 teaspoons pure vanilla extract
- 2 cups (340 grams) semi-sweet chocolate chips
Instructions
- Brown the butter: Place 1 cup unsalted butter in a light-colored saucepan over medium heat. Stir occasionally. After 3-4 minutes, the butter will foam and turn golden. When small brown specks appear and it smells nutty, remove from heat immediately. Pour into a heat-safe bowl and let cool for 10 minutes until warm but not hot.
- Preheat oven to 350°F (175°C). Line two baking sheets with parchment paper or silicone mats.
- Mix dry ingredients: In a medium bowl, whisk together 2 ¼ cups all-purpose flour, 1 teaspoon baking soda, and 1 teaspoon salt. Set aside.
- Combine sugars and brown butter: In a large mixing bowl, add the cooled brown butter, 1 cup packed light brown sugar, and ½ cup granulated sugar. Whisk vigorously for about 2 minutes until smooth and slightly thickened.
- Add egg, yolk, and vanilla: Crack the large egg and extra yolk into the butter-sugar mixture. Add 2 teaspoons vanilla extract. Whisk until fully incorporated and glossy, about 1 minute.
- Fold in dry ingredients: Pour the flour mixture into the wet ingredients. Use a rubber spatula to fold gently until no streaks of flour remain. Do not overmix.
- Add chocolate chips: Fold in 2 cups semi-sweet chocolate chips until evenly distributed.
- Scoop the cookies: Use a 1.5-tablespoon cookie scoop to portion the dough. Place dough balls 2 inches apart on prepared baking sheets. You should get about 24 cookies.
- Bake: Bake one sheet at a time on the middle rack for 10-12 minutes. Edges should be golden brown, centers pale and slightly puffed.
- Cool: Let cookies rest on the baking sheet for 5 minutes, then transfer to a wire cooling rack to cool completely.
Notes
Let brown butter cool to about 100°F (38°C) before mixing to prevent greasy cookies. Chill dough for 20 minutes if kitchen is warm. Underbake slightly for soft centers. Store in an airtight container at room temperature for up to 5 days; add a slice of bread to keep cookies soft. Freeze baked cookies for up to 3 months or freeze raw dough balls.
Nutrition
- Serving Size: 1 cookie
- Calories: 185
- Sugar: 14
- Sodium: 115
- Fat: 10
- Saturated Fat: 6
- Carbohydrates: 23
- Fiber: 1
- Protein: 2
Keywords: brown butter chocolate chip cookies, tender cookies, easy cookie recipe, soft chocolate chip cookies, homemade cookies