I made a batch of elderberry syrup that tasted like dirt water for three straight years before I figured out what I was doing wrong. Not exaggerating — I kept stubbornly simmering the berries for an hour like some recipes said, thinking I was doing it right, and wondering why the final syrup had that flat, overcooked flavor that made my kids screw up their faces. It wasn’t until a friend who actually studied herbalism gently pointed out that I was basically boiling the life out of the berries that everything clicked.
Here’s the thing — I’m not a natural homesteader or a herbal enthusiast who grows everything in a pristine garden. I’m a regular person who got tired of my family catching every single cold that went through the school system. I started making this homemade elderberry syrup because I was desperate, not because I was trendy. And honestly, the first few batches were rough. But I kept tweaking, kept tasting, and eventually landed on a version that actually works — and actually tastes good.
The recipe I’m sharing today came from a place of frustration and necessity. I wanted something that would help us get through winter without passing the same bug around for weeks. What I didn’t expect was how much I’d come to love the process — the way the kitchen smells like warm honey and spices, the satisfaction of filling a jar with something that genuinely helps. This isn’t a complicated recipe, but it’s one that took me years to get right. And now, I can’t imagine cold season without it.
Why You’ll Love This Elderberry Syrup
This isn’t just another wellness trend recipe that sits in your fridge until you forget about it. This is the real deal — a syrup you’ll actually want to take because it tastes good and you’ll notice the difference.
- Actually Works : After years of trial and error, I can honestly say this syrup makes a difference. When we take it consistently through winter, we get sick less often and recover faster when we do catch something.
- Simple Ingredients : You need dried elderberries, honey, and a few common spices. No weird extracts, no expensive supplements, nothing you can’t find at a regular grocery store or online.
- Kid-Approved Taste : The first time I made a good batch, my seven-year-old asked for seconds. That’s when I knew I’d cracked the code. It’s sweet, spiced, and actually pleasant to take.
- Cost-Effective : A single batch costs a fraction of what you’d pay for store-bought syrups, and you control exactly what goes into it. No preservatives, no artificial anything.
- Soothing Ritual : There’s something comforting about taking a spoonful of warm, spiced syrup when you feel a cold coming on. It feels like you’re doing something proactive for your health.
What makes this recipe different from the ones I tried and failed at? It’s the timing. I learned that elderberries don’t need to be boiled to death to release their benefits. A gentle simmer for 30 minutes is plenty — anything longer starts breaking down the good stuff and creating that bitter, flat flavor. I also figured out the right ratio of honey to syrup so it stays shelf-stable without being cloyingly sweet. This is the version I’ve settled on after years of making mistakes, and I’m confident it’ll work for you too.
What Ingredients You Will Need
This recipe uses simple, wholesome ingredients that work together to create a syrup that’s both effective and delicious. Most of these are pantry staples or easy to find at any grocery store.
- Dried elderberries, 1 cup (look for deep purple-black berries from a reputable source — I prefer Starwest Botanicals for consistent quality)
- Filtered water, 4 cups (tap water with chlorine can affect the taste, so filtered is better)
- Raw honey, 1 cup (use local honey if possible for added immune benefits, but any raw honey works)
- Fresh ginger root, 2 inches (peeled and sliced into thin rounds — adds warmth and anti-inflammatory properties)
- Cinnamon sticks, 2 whole (adds sweetness and antimicrobial benefits)
- Whole cloves, 1 teaspoon (a little goes a long way — don’t overdo it or it’ll taste like holiday potpourri)
- Orange peel, strips from 1 medium orange (use a vegetable peeler to avoid the white pith, which is bitter)
I want to talk about the elderberries specifically because this is where most people go wrong. You need dried elderberries, not fresh — fresh ones contain a compound that can cause stomach upset if eaten raw. Drying neutralizes this, and the dried berries are what you’ll find in most health food stores or online. Look for berries that are deep purple-black, not brownish or faded. If they smell musty or old, don’t use them.
The honey is another crucial ingredient. Raw honey contains natural enzymes and antimicrobial properties that get destroyed during pasteurization. I use a local wildflower honey from a farmer’s market, but any raw honey from a trusted source works. If you’re making this for someone under one year old, you can substitute maple syrup or agave nectar — but honestly, honey is what gives this syrup its magic.
For the ginger, fresh is non-negotiable. Powdered ginger won’t give you the same warming kick or the anti-inflammatory benefits. I peel it with the edge of a spoon (easier than a peeler) and slice it into thin rounds so the flavor infuses properly. The cinnamon sticks should be whole, not ground — ground cinnamon will make the syrup cloudy and gritty. Same goes for the cloves: whole cloves infuse gently, while ground cloves will overpower everything.
The orange peel adds a bright citrus note that balances the earthiness of the elderberries. Use a vegetable peeler to get strips of just the orange part, avoiding the white pith underneath. If you don’t have a fresh orange, you can use dried orange peel from the spice aisle, but fresh is better.
Equipment Needed
You don’t need fancy equipment for this recipe, which is one of the reasons I love it. Here’s what you’ll need:
- Medium saucepan with a lid (stainless steel or enameled — avoid aluminum, which can react with the berries)
- Fine-mesh strainer or cheesecloth (for straining out the berries and spices)
- Glass measuring cup (for measuring liquids accurately)
- Wooden spoon for stirring (metal can scratch your pan)
- Glass jars with tight-fitting lids (16-ounce mason jars work perfectly)
- Funnel (makes pouring into jars much less messy)
- Vegetable peeler for the ginger and orange peel
If you don’t have a fine-mesh strainer, you can use a colander lined with cheesecloth or even a clean, thin kitchen towel. I’ve done it both ways, and the cheesecloth method actually gives you a slightly clearer syrup. For the jars, make sure they’re thoroughly cleaned and dried before you pour in the syrup. I run mine through the dishwasher on the sanitize cycle, but hand-washing with hot soapy water works too.
One tip I learned the hard way: don’t use plastic containers for storing this syrup. The honey and spices can interact with plastic over time, and glass keeps the flavor pure. Plus, glass jars look beautiful lined up in your fridge — it’s like having your own little apothecary.
Preparation Method
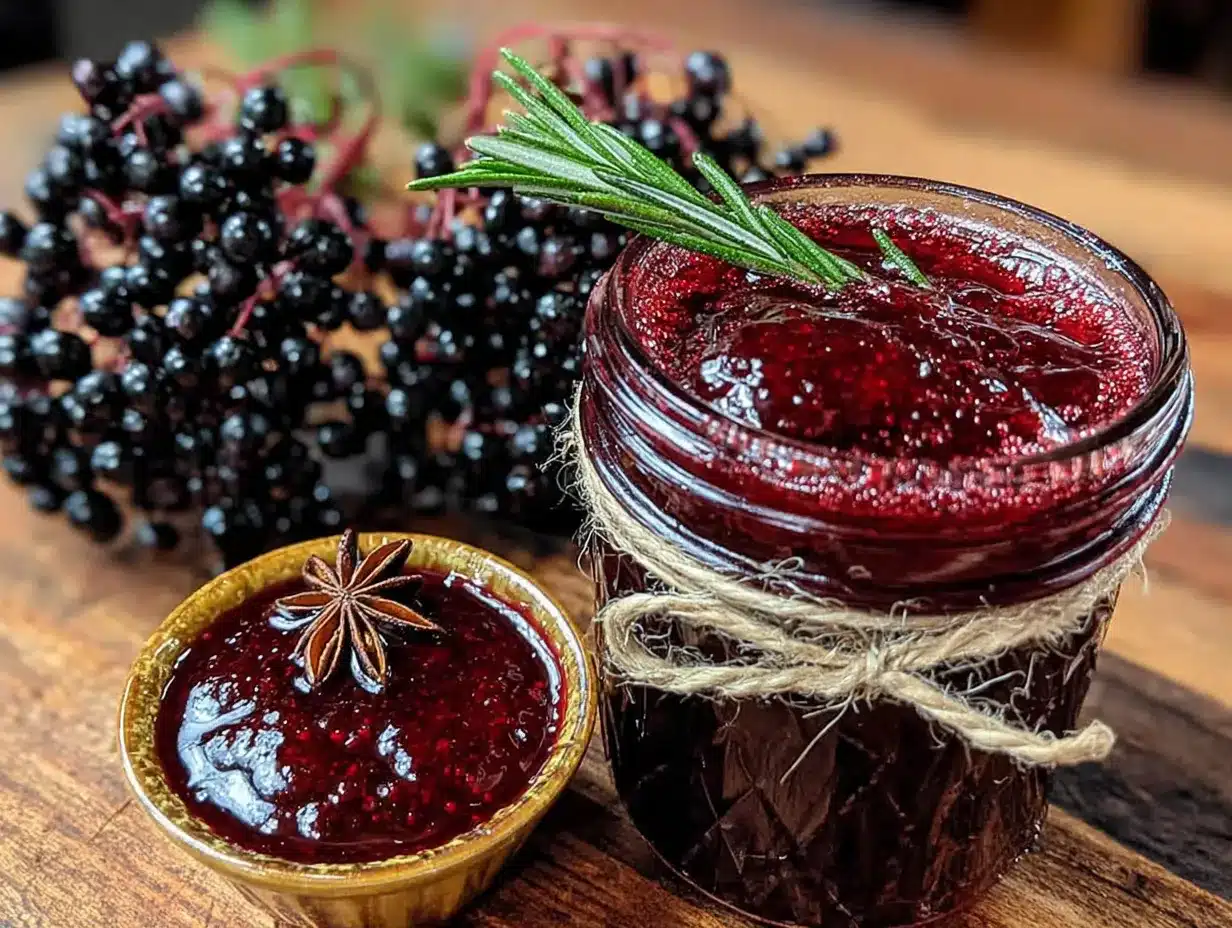
This is where the magic happens. The process is simple, but paying attention to timing and temperature makes all the difference between a syrup you’ll love and one you’ll secretly hope your family forgets about.
- Prepare your ingredients. Measure out 1 cup of dried elderberries and give them a quick rinse under cool water in a fine-mesh strainer. Peel and slice the ginger into thin rounds. Use a vegetable peeler to remove strips of orange peel, avoiding the white pith. Set everything aside.
- Combine berries, water, and spices. In your medium saucepan, add the rinsed elderberries, 4 cups of filtered water, the sliced ginger, cinnamon sticks, whole cloves, and orange peel strips. Give it a gentle stir with your wooden spoon.
- Bring to a gentle boil. Place the saucepan over medium-high heat and bring the mixture to a gentle boil. You’ll see small bubbles breaking the surface — not a rolling, violent boil. This should take about 5-7 minutes. Watch it carefully so it doesn’t boil over.
- Reduce to a simmer and cover. Once it reaches a gentle boil, reduce the heat to low and cover the saucepan with the lid. Let it simmer gently for 30 minutes. I set a timer because I’ve definitely gotten distracted and let it go for 45 minutes — the result was noticeably more bitter and less flavorful.
- Check the color and consistency. After 30 minutes, the liquid should be a deep, dark purple-black color, and the berries should look plumped and slightly softened. The liquid should have reduced by about a third. If it looks too thin, let it simmer uncovered for another 5-10 minutes.
- Strain the mixture. Place your fine-mesh strainer or cheesecloth-lined colander over a large glass measuring cup or bowl. Carefully pour the mixture through the strainer. Use the back of a spoon to gently press on the berries to extract as much liquid as possible — but don’t press too hard, or you’ll push through bitter compounds from the seeds.
- Let the liquid cool slightly. Let the strained liquid sit for about 10-15 minutes until it’s warm but not hot. This is important — if you add honey to boiling-hot liquid, you’ll destroy the beneficial enzymes in the raw honey.
- Stir in the honey. Once the liquid has cooled to warm (think comfortable bath temperature), add 1 cup of raw honey. Stir gently with your wooden spoon until the honey is completely dissolved. The mixture will become slightly thicker and take on a beautiful amber-golden hue.
- Pour into jars. Using your funnel, pour the syrup into clean glass jars, leaving about half an inch of headspace at the top. Wipe the rims clean with a damp cloth and screw on the lids tightly.
- Cool completely before refrigerating. Let the jars cool to room temperature on the counter — this usually takes about an hour. Once cool, transfer them to the refrigerator. The syrup will thicken slightly as it chills.
A few things I’ve learned through trial and error: Don’t skip the straining step, even if you’re tempted to leave the berries in for “extra benefits.” The berries and spices have done their job infusing the liquid, and leaving them in will make the syrup bitter over time. Also, if your honey is particularly thick or crystallized, you can warm the jar slightly in a bowl of warm water before adding it to the syrup — just don’t microwave it, which can damage the beneficial compounds.
The color of your syrup should be a deep, rich purple-black with a beautiful translucency when held up to the light. It should smell warm and spiced — like a cozy kitchen on a cold winter day. If it smells overly medicinal or bitter, you might have simmered it too long or pressed too hard when straining.
Cooking Tips & Techniques
After years of making this syrup, I’ve collected a few tricks that make the process smoother and the final product better. Here’s what I wish someone had told me from the start.
Don’t rush the simmer. I know 30 minutes feels like forever when you’re standing in the kitchen, but this isn’t a recipe you can speed through. The elderberries need time to release their beneficial compounds into the water, and the spices need gentle heat to infuse properly. I’ve tried cranking the heat to speed things up, and the result was a syrup that tasted harsh and flat. Low and slow is the way to go.
Watch the temperature when adding honey. This is probably the most important tip I can give you. Raw honey contains natural enzymes, antioxidants, and antimicrobial properties that are heat-sensitive. If you add honey to liquid that’s above 120°F, you start destroying those beneficial compounds. I learned this the hard way after making several batches that were technically fine but lacked the immune-boosting punch I was looking for. Let the liquid cool to warm — around 100-110°F — before stirring in the honey.
Use a timer, not your memory. I can’t tell you how many times I’ve started a batch, gotten distracted by laundry or kids or work, and come back to find the liquid had reduced too much. The result is a syrup that’s overly concentrated, bitter, and darker than it should be. Set a timer on your phone or stove, and don’t wander too far from the kitchen.
Sterilize your jars properly. This syrup is meant to last in your fridge for several weeks, so you want to make sure your jars are clean. I run mine through the dishwasher on the sanitize cycle, but you can also boil them in water for 10 minutes. Let them air dry completely before filling. Any moisture inside the jar can encourage mold growth over time.
Label your jars. This sounds silly, but I’ve definitely pulled a jar of what I thought was elderberry syrup out of the fridge only to realize it was something else entirely. Write the date on the lid or use a label maker. This syrup keeps for about 2-3 months in the refrigerator, but it’s good to know when you made it so you can track freshness.
Variations & Adaptations
One of the best things about this recipe is how adaptable it is. Over the years, I’ve experimented with different variations depending on what I have on hand or what my family needs at the moment.
For a stronger immune boost: Add 1 tablespoon of dried echinacea root or 1 tablespoon of dried astragalus root along with the elderberries. Both herbs are known for their immune-supporting properties and blend well with the elderberry flavor. I do this during peak cold season when everyone around us is getting sick.
For a kid-friendly version: Reduce the ginger to 1 inch and skip the cloves entirely. Some kids find the clove flavor too strong, and a milder version is more likely to get actually consumed rather than secretly poured down the sink. My youngest prefers this version, and I’ve found it still works well for everyday immune support.
For a sugar-free option: Substitute the honey with monk fruit sweetener or stevia to taste. You’ll lose some of the antimicrobial benefits of raw honey, but you’ll still get the immune support from the elderberries. I’ve made this version for a friend with diabetes, and she reported it worked just as well for her family’s winter wellness routine.
For a spicier version: Add a pinch of cayenne pepper or a small dried chili pepper along with the other spices. The heat helps clear sinuses and adds an extra layer of warming comfort. I reach for this version when I feel a cold settling into my chest.
For a faster version: If you’re short on time, you can use a pressure cooker or Instant Pot. Combine all ingredients except the honey, cook on high pressure for 15 minutes, then do a natural release for 10 minutes. Strain and proceed with the recipe as written. The flavor is slightly different — less nuanced — but it works in a pinch.
I’ve tried all of these variations at one point or another, and my personal favorite is the version with extra ginger and a touch of cayenne. It’s the one I reach for when I feel that telltale scratch in my throat that means a cold is coming on. There’s something about the warmth of the ginger and the slight heat from the cayenne that feels like a hug from the inside out.
Serving & Storage Suggestions
This syrup is versatile enough to use in several ways, and how you serve it can make a difference in how well it works for you.
Standard dose: For adults, take 1 tablespoon daily during cold season for maintenance. If you feel a cold coming on, increase to 1 tablespoon three times daily. For children ages 1-12, give 1 teaspoon daily for maintenance and 1 teaspoon three times daily during illness. Always consult your pediatrician before giving any herbal remedy to children.
How to take it: You can take it straight off a spoon (my preferred method), mix it into a cup of warm water or tea, or stir it into oatmeal or yogurt. I’ve also been known to drizzle it over pancakes on a lazy Sunday morning. The warm spiced flavor pairs beautifully with breakfast foods.
Storage: Keep the syrup in a tightly sealed glass jar in the refrigerator. It will stay fresh for 2-3 months. If you see any mold, cloudiness, or off-smells, discard it immediately. I’ve never had a batch go bad, but it’s always better to be safe.
Freezing option: You can freeze the syrup in ice cube trays for individual portions. Once frozen, pop the cubes out and store them in a freezer bag. They’ll keep for up to 6 months. To use, thaw a cube in the refrigerator overnight or drop it into a warm drink. This is my go-to method for making a big batch at the beginning of winter and having it ready to go all season long.
How flavors develop: The syrup actually gets better after a day or two in the refrigerator. The flavors meld together, the spices become more integrated, and the honey’s sweetness balances out the earthiness of the elderberries. I always try to make a batch a few days before I plan to start using it regularly.
If you’re looking for other comforting recipes to get through cold season, I’ve found that a warm bowl of creamy stuffed mushroom caps makes a perfect appetizer when you’re craving something savory. And for a refreshing drink that supports wellness, this sparkling citrus ginger mojito mocktail is a great way to stay hydrated with immune-supporting ingredients.
Nutritional Information & Benefits
While this syrup is primarily used for its immune-supporting properties, it also offers some nutritional benefits worth noting.
Estimated per tablespoon serving:
- Calories: 45
- Carbohydrates: 12g
- Sugars: 11g (from honey)
- Vitamin C: 2mg
- Antioxidants: High (from elderberries and spices)
Key health benefits: Elderberries are rich in anthocyanins, which are powerful antioxidants that help support the immune system. The raw honey provides natural antimicrobial properties, while ginger offers anti-inflammatory benefits. Cinnamon has been shown to help regulate blood sugar, and cloves contain compounds that support digestive health.
Dietary considerations: This recipe is naturally gluten-free, dairy-free, and nut-free. It’s suitable for most dietary patterns, though it does contain honey, which is not vegan. For a vegan version, substitute maple syrup or agave nectar. The syrup is also suitable for paleo diets when made with honey.
Allergen information: This recipe contains no common allergens, but always check your individual ingredients for potential cross-contamination if allergies are a concern. Some dried elderberries may be processed in facilities that also handle nuts or soy.
From a personal perspective, I love that this syrup allows me to take a proactive approach to our family’s health without relying on over-the-counter medications. It’s not a replacement for medical care, but it’s a wonderful addition to a healthy lifestyle. I’ve noticed that when we take it consistently through winter, we have more energy and fewer sick days. That’s worth more to me than any number on a nutrition label.
Frequently Asked Questions
Can I use fresh elderberries instead of dried?
No, you should not use fresh elderberries for this recipe. Fresh elderberries contain a compound that can cause nausea, vomiting, and diarrhea if consumed raw. Drying neutralizes this compound, making the berries safe to use. Always use dried elderberries from a reputable source.
How long does homemade elderberry syrup last?
When stored properly in a sealed glass jar in the refrigerator, this syrup will stay fresh for 2-3 months. If you see any signs of mold, cloudiness, or an off smell, discard it immediately. For longer storage, you can freeze the syrup in ice cube trays for up to 6 months.
Can I give this syrup to my children?
Yes, but with precautions. For children over 1 year old, give 1 teaspoon daily for maintenance. Always consult your pediatrician before giving any herbal remedy to children. Do not give this syrup to infants under 1 year old because of the honey content, which carries a risk of botulism.
Why does my syrup taste bitter?
Bitterness usually comes from one of three things: simmering the berries too long (more than 30 minutes), pressing too hard when straining (which pushes bitter compounds from the seeds into the syrup), or using old, poor-quality elderberries. Try reducing your simmer time to exactly 30 minutes and being gentler when straining.
Can I take this syrup if I’m pregnant or nursing?
If you’re pregnant or nursing, please consult your healthcare provider before taking any herbal remedies, including elderberry syrup. While elderberries are generally considered safe in food amounts, there isn’t enough research on their safety in medicinal amounts during pregnancy and breastfeeding.
Conclusion
This homemade elderberry syrup has become a non-negotiable part of our cold-season routine, and I honestly can’t imagine winter without it now. It’s one of those recipes that started as a desperate experiment and turned into something I genuinely look forward to making — and taking.
What I love most about this recipe is how forgiving it is once you know the basic principles. You can adjust the spices to your liking, swap in different honeys, or experiment with added herbs. The foundation is solid, and the results are consistently good. It’s the kind of recipe that makes you feel capable and resourceful, like you’re taking care of your family in a real, tangible way.
I’d love to hear how your batch turns out. Did you add any spices I didn’t mention? Do you take it differently than I do? Drop a comment below and let me know — I’m always looking for new ideas to try. And if you found this helpful, share it with someone who could use a little extra immune support this season. We’re all in this together, and a good batch of elderberry syrup is something worth passing along.
Here’s to staying healthy, one spoonful at a time.
Happy simmering!
Pin This Recipe!
Best Homemade Elderberry Syrup for Immune Support
This homemade elderberry syrup is a simple, effective immune booster made with dried elderberries, raw honey, and warming spices. It’s kid-approved, cost-effective, and perfect for cold season.
- Prep Time: 15 minutes
- Cook Time: 30 minutes
- Total Time: 45 minutes
- Yield: 4 servings 1x
- Category: Condiment
- Cuisine: American
Ingredients
- 1 cup dried elderberries
- 4 cups filtered water
- 1 cup raw honey
- 2 inches fresh ginger root, peeled and sliced into thin rounds
- 2 whole cinnamon sticks
- 1 teaspoon whole cloves
- Strips from 1 medium orange peel (avoid white pith)
Instructions
- Prepare your ingredients. Measure out 1 cup of dried elderberries and give them a quick rinse under cool water in a fine-mesh strainer. Peel and slice the ginger into thin rounds. Use a vegetable peeler to remove strips of orange peel, avoiding the white pith. Set everything aside.
- Combine berries, water, and spices. In your medium saucepan, add the rinsed elderberries, 4 cups of filtered water, the sliced ginger, cinnamon sticks, whole cloves, and orange peel strips. Give it a gentle stir with your wooden spoon.
- Bring to a gentle boil. Place the saucepan over medium-high heat and bring the mixture to a gentle boil. You’ll see small bubbles breaking the surface — not a rolling, violent boil. This should take about 5-7 minutes. Watch it carefully so it doesn’t boil over.
- Reduce to a simmer and cover. Once it reaches a gentle boil, reduce the heat to low and cover the saucepan with the lid. Let it simmer gently for 30 minutes. I set a timer because I’ve definitely gotten distracted and let it go for 45 minutes — the result was noticeably more bitter and less flavorful.
- Check the color and consistency. After 30 minutes, the liquid should be a deep, dark purple-black color, and the berries should look plumped and slightly softened. The liquid should have reduced by about a third. If it looks too thin, let it simmer uncovered for another 5-10 minutes.
- Strain the mixture. Place your fine-mesh strainer or cheesecloth-lined colander over a large glass measuring cup or bowl. Carefully pour the mixture through the strainer. Use the back of a spoon to gently press on the berries to extract as much liquid as possible — but don’t press too hard, or you’ll push through bitter compounds from the seeds.
- Let the liquid cool slightly. Let the strained liquid sit for about 10-15 minutes until it’s warm but not hot. This is important — if you add honey to boiling-hot liquid, you’ll destroy the beneficial enzymes in the raw honey.
- Stir in the honey. Once the liquid has cooled to warm (think comfortable bath temperature), add 1 cup of raw honey. Stir gently with your wooden spoon until the honey is completely dissolved. The mixture will become slightly thicker and take on a beautiful amber-golden hue.
- Pour into jars. Using your funnel, pour the syrup into clean glass jars, leaving about half an inch of headspace at the top. Wipe the rims clean with a damp cloth and screw on the lids tightly.
- Cool completely before refrigerating. Let the jars cool to room temperature on the counter — this usually takes about an hour. Once cool, transfer them to the refrigerator. The syrup will thicken slightly as it chills.
Notes
Don’t rush the simmer; 30 minutes is ideal. Let the liquid cool to around 100-110°F before adding honey to preserve its beneficial enzymes. Use a timer to avoid over-simmering. Sterilize jars properly for longer storage. Label jars with the date. The syrup keeps for 2-3 months in the refrigerator or up to 6 months frozen in ice cube trays.
Nutrition
- Serving Size: 1 tablespoon
- Calories: 45
- Sugar: 11
- Carbohydrates: 12
Keywords: elderberry syrup, immune support, homemade syrup, elderberry recipe, natural remedy, cold season, honey syrup


