October dusk settles in early, the kitchen light pooling on the counter while I crush Oreos into fine, dark earth. The only thing I want to make is something ridiculous and wonderful—these Easy No-Bake Halloween Oreo Truffle Eyeballs. It started as a last-minute thing, honestly. I had a bag of candy eyes leftover from a cake I never decorated, a block of cream cheese, and a serious lack of patience for baking. So I stood there, mixing crumbs into frosting, rolling them into little spheres, and suddenly the whole counter looked like a mad scientist’s lab. And I loved it. There’s something about making food that looks slightly unhinged but tastes like pure chocolate indulgence that feels like a little secret. I’ve made these every year since, not because they’re fancy, but because they’re the kind of treat that makes people laugh before they even take a bite. And honestly, that’s the best part.
Why You’ll Love This Recipe
Let’s be real—Halloween treats can be a hassle. Between the complicated sugar work and the sticky caramel mess, sometimes you just want something that looks impressive without the stress. These truffle eyeballs deliver on both fronts.
- No Baking Required: No oven, no sweat. Just a bowl, a spoon, and a little patience. Perfect for hot October afternoons when you don’t want to heat up the kitchen.
- Simple Ingredients: You probably have most of this stuff already. Oreos, cream cheese, white chocolate—nothing weird or hard to find. I’ve made these with generic sandwich cookies before, and they work just fine.
- Perfect for Halloween Parties: Whether you’re hosting a spooky movie night or bringing treats to a school party, these eyeballs are guaranteed to get attention. They look creepy but in a fun, edible way.
- Crowd-Pleaser: I’ve watched grown adults giggle over these things. Kids love them, sure, but adults? They sneak them when no one’s looking. The combination of creamy filling and crunchy chocolate coating is just that good.
- Unbelievably Easy: If you can crush cookies and roll balls, you can make these. No special skills required. And they freeze beautifully, so you can make them ahead of time.
What makes these different from other truffle recipes? It’s the texture. Using full-fat cream cheese gives you that ultra-smooth, fudge-like center that doesn’t get too hard when chilled. And the white chocolate shell? It snaps just right when you bite into it. This isn’t just another Oreo ball recipe—it’s the version that actually works every single time.
I remember the first batch I made, I used low-fat cream cheese because I thought I was being smart. Big mistake. The filling was grainy and never set properly. So take it from me—use the good stuff. Your taste buds will thank you.
What Ingredients You Will Need
This recipe uses simple, everyday ingredients to create something that looks like it came from a fancy bakery. The magic is in the combination, not the complexity.
- 1 (14.3 oz) package Oreo cookies (regular, not Double Stuf—the filling ratio matters for texture)
- 8 oz cream cheese, softened (full-fat, block-style, not whipped—I prefer Philadelphia for consistent results)
- 12 oz white melting wafers or white chocolate chips (I use Ghirardelli white melting wafers—they melt smoother and don’t seize up as easily)
- 1 tbsp coconut oil or shortening (optional, but helps thin the chocolate for a smoother dip)
- Candy eyeballs (the kind with flat bottoms work best—about 30-40 pieces)
- Red food coloring gel (for the bloodshot veins—optional but highly recommended for maximum creep factor)
- Black food coloring gel (for dilating the pupils—makes them look extra unhinged)
Ingredient Tips & Substitutions:
- For a gluten-free version, use gluten-free sandwich cookies. The texture will be slightly different, but still delicious.
- If you can’t find white melting wafers, white chocolate chips work—just add a teaspoon of coconut oil to help them melt smoothly. White chocolate burns easily, so go low and slow.
- Vegan cream cheese works in a pinch, but the texture will be softer. Freeze the formed truffles for 30 minutes before dipping to help them hold their shape.
- Don’t skip the cream cheese softening step. Cold cream cheese creates lumps that never smooth out, and nobody wants a lumpy eyeball.
- For the candy eyes, I’ve found that the ones with flat bottoms (often labeled “edible candy eyes”) stick better and don’t roll off during dipping. The round dome ones are cute but frustrating to work with.
Equipment Needed
- Food processor (for crushing Oreos into fine crumbs—you can also use a zip-top bag and rolling pin, but it takes longer and you’ll have uneven crumbs)
- Large mixing bowl
- Hand mixer or stand mixer (for combining cream cheese and crumbs—a sturdy spatula works too, but your arm will get tired)
- Baking sheet lined with parchment paper
- Small microwave-safe bowl (for melting chocolate)
- Fork or dipping tool (I use a candy dipping fork, but a regular fork works fine)
- Toothpicks (for adding details like bloodshot veins)
- Piping bag or small zip-top bag (for the red and black food coloring details)
Budget-Friendly Alternatives: If you don’t have a food processor, place the Oreos in a large zip-top bag and crush them with a rolling pin or heavy pan. It’s a great way to release some frustration, honestly. And if you don’t have a hand mixer, just use a sturdy spatula and some elbow grease—the cream cheese will soften as you work it.
Preparation Method
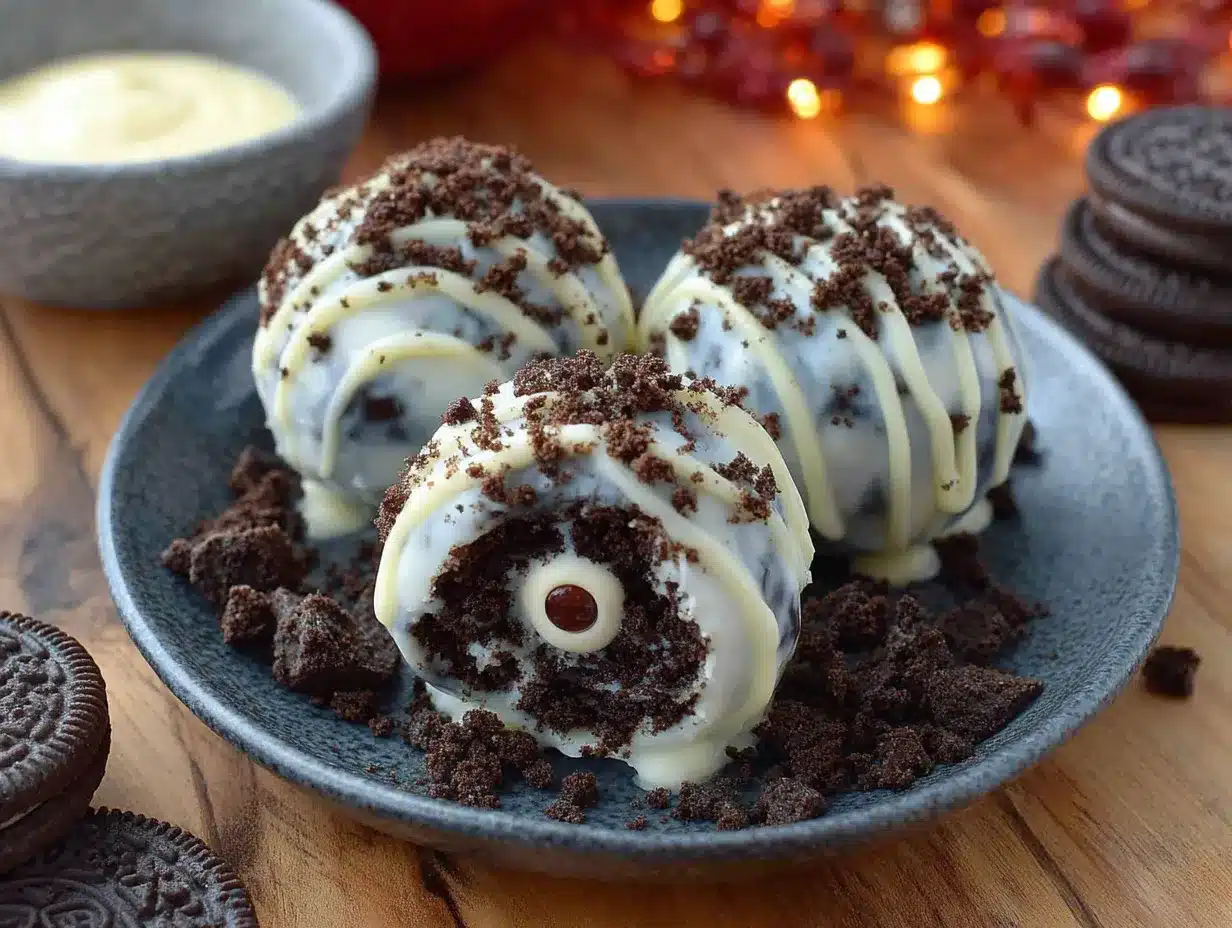
- Crush the Oreos: Place the entire package of Oreos (filling included) into your food processor. Pulse until you have fine, uniform crumbs. You want them to look like dark sand. If you’re using the bag method, make sure there are no large chunks—they’ll create texture issues later. This takes about 2 minutes with a food processor, or 10 minutes of determined rolling.
- Mix the filling: In a large mixing bowl, beat the softened cream cheese until smooth and fluffy—about 2 minutes. Add the Oreo crumbs and mix until fully combined. The mixture should look like dark, fudgy dough and hold together when pressed. If it seems too dry, add a tablespoon of milk. If too wet, add a few more crushed Oreos. I’ve had batches where the cream cheese was too soft and the mixture was sticky—just refrigerate it for 15 minutes and it firms right up.
- Form the truffles: Scoop out about 1 tablespoon of the mixture and roll it between your palms to form a smooth ball. Place each ball on the parchment-lined baking sheet. You should get about 30-35 truffles. Try to make them uniform in size so they dip evenly. I use a small cookie scoop for consistency, but eyeballing it works too.
- Chill the truffles: Place the baking sheet in the refrigerator for at least 30 minutes, or up to 2 hours. This step is crucial—cold truffles hold their shape when dipped in warm chocolate. If you skip this, you’ll end up with chocolate soup and crumb-filled chocolate. Ask me how I know.
- Melt the white chocolate: Place the white melting wafers in a microwave-safe bowl. Microwave in 30-second intervals, stirring between each, until completely smooth. Add the coconut oil if using, and stir until incorporated. The chocolate should be thin enough to coat the back of a spoon but not runny. If it’s too thick, add another teaspoon of oil.
- Dip the truffles: Remove the truffles from the fridge. Using a fork or dipping tool, lower one truffle into the melted white chocolate. Gently tap the fork against the bowl to remove excess chocolate. Place the coated truffle back on the parchment paper. Work quickly—the truffles warm up fast and can start to soften. I usually do 5 at a time, keeping the rest in the fridge.
- Add the candy eyes: While the chocolate is still wet, press a candy eyeball onto the top of each truffle. Press gently so it sticks but doesn’t sink. If the chocolate starts to set before you add the eyes, just dab a tiny bit of melted chocolate on the back of the eye to glue it on.
- Create the bloodshot details: Once all truffles are dipped and eyes are attached, let them set completely—about 15 minutes at room temperature or 5 minutes in the fridge. Then, using a toothpick or small piping bag, add thin red lines radiating from the candy eye to look like bloodshot veins. Add a tiny black dot in the center of the eye to dilate the pupil. Let the details set for another 10 minutes.
- Final chill: Refrigerate the finished truffles for at least 30 minutes before serving. This allows the chocolate to fully harden and the flavors to meld. They’re best served cold.
Cooking Tips & Techniques
Don’t Overmix the Filling: I learned this the hard way. Overmixing the cream cheese and Oreo crumbs can make the mixture too soft and greasy. Mix just until combined—you should still see small specks of Oreo crumb throughout. It gives the truffles a better texture.
Troubleshooting Chocolate Seizing: White chocolate is notoriously finicky. If it starts to get thick and grainy, you’ve overheated it. Add a teaspoon of coconut oil and stir gently—sometimes you can save it. But honestly, if it seizes completely, toss it and start over. It’s cheaper than ruining a whole batch of truffles.
Work in Batches: Keep the undipped truffles in the fridge while you work. If they get too warm, they’ll fall apart in the chocolate. I keep a small bowl of ice water nearby to cool my hands if they get too warm from rolling.
Make Them Ahead: These truffles freeze beautifully. Place them in a single layer on a baking sheet and freeze until solid, then transfer to a zip-top bag. They’ll keep for up to 3 months. Thaw in the fridge overnight before serving.
Getting That Perfect Dip: For a smooth, even coating, make sure your chocolate is at the right temperature—warm but not hot. If it’s too thick, add a little more oil. If it’s too thin, let it cool for a minute. The perfect consistency is like warm honey.
Variations & Adaptations
- Spooky Spider Truffles: Instead of eyeballs, press pretzel sticks into the sides of the truffles before the chocolate sets to create spider legs. Add a small candy for the body. It’s a fun twist that kids love helping with.
- Dark Chocolate Coating: Swap the white chocolate for dark or milk chocolate. The contrast between dark chocolate and white candy eyes looks super dramatic. I’ve done this for adult Halloween parties and it’s always a hit.
- Mint Chocolate Version: Add 1/2 teaspoon of peppermint extract to the cream cheese mixture. The mint and chocolate combination is incredibly refreshing and feels more sophisticated. Just be careful—a little peppermint goes a long way.
- Peanut Butter Eyeballs: Replace 2 ounces of cream cheese with creamy peanut butter. The nutty flavor pairs beautifully with the chocolate coating. Make sure to use processed peanut butter, not natural—the oil separation in natural peanut butter can make the filling greasy.
- Gluten-Free Adaptation: Use gluten-free sandwich cookies. I’ve tested this with several brands, and they all work. The texture is slightly crumblier, so chill the truffles for an extra 15 minutes before dipping.
- Vegan Version: Use vegan cream cheese and dairy-free white chocolate. The filling will be softer, so freeze the truffles for 30 minutes before dipping. I’ve made these for vegan friends and they disappeared before the regular ones.
Serving & Storage Suggestions
Serving: Serve these truffles cold, straight from the fridge. Arrange them on a black or dark-colored platter for maximum Halloween drama. I like to place them on a bed of crushed black Oreos to look like dirt or a spooky graveyard. For extra effect, add some fake spider webs or plastic spiders around the platter.
Complementary Dishes: These truffles pair beautifully with a sparkling citrus ginger mocktail for a non-alcoholic option, or a glass of cold milk if you’re keeping it classic. For a full Halloween dessert spread, try them alongside some triple chocolate mousse cups for a truly decadent night.
Storage: Store the truffles in an airtight container in the refrigerator for up to 2 weeks. Layer them between sheets of parchment paper to prevent sticking. If you’re stacking them, make sure the chocolate is fully set first.
Freezing: These freeze exceptionally well. Place the truffles in a single layer on a baking sheet and freeze until solid (about 2 hours). Transfer to a freezer-safe zip-top bag, removing as much air as possible. They’ll keep for up to 3 months. Thaw in the refrigerator overnight before serving. Don’t thaw at room temperature—the condensation can make the chocolate coating look spotted.
Reheating: These are served cold, so no reheating needed. But if you want a slightly softer center, let them sit at room temperature for 5-10 minutes before serving.
Flavor Development: Like many no-bake treats, these truffles actually taste better after a day or two in the fridge. The flavors meld together, and the texture becomes more fudge-like. So don’t be afraid to make them ahead of time.
Nutritional Information & Benefits
Estimated per truffle (based on 30 truffles):
- Calories: 165
- Fat: 10g
- Carbohydrates: 18g
- Protein: 2g
- Sugar: 13g
- Sodium: 95mg
Health Considerations: Let’s be honest—these are a treat, not a health food. But there are a few redeeming qualities. Oreos contain a small amount of iron and calcium from the enriched flour. Cream cheese provides some calcium and protein. And white chocolate? Well, it has a little calcium too. But mostly, these are about joy and indulgence, and that has its own kind of value.
Dietary Notes: This recipe contains dairy, gluten, and soy. For a gluten-free version, use gluten-free sandwich cookies. For a dairy-free version, use vegan cream cheese and dairy-free white chocolate. The texture will be slightly different, but still delicious.
Allergen Warning: These truffles contain wheat, dairy, and soy. If you’re serving them at a party, make sure to label them clearly for anyone with allergies. I always make a separate batch for my gluten-free friends using the adaptations above.
My Personal Take: I believe in balance. These truffles are rich and indulgent, but they’re also portion-controlled (one or two is usually enough) and made with real ingredients. They’re a far cry from the processed candy bars you’d grab at the store. So enjoy them without guilt—Halloween only comes once a year.
Conclusion
These Easy No-Bake Halloween Oreo Truffle Eyeballs are everything a Halloween treat should be—fun, spooky, and absolutely delicious. They come together in under 30 minutes of active time, use ingredients you probably already have, and look like something you’d see in a professional bakery window. But the best part? They taste like pure chocolate bliss with that perfect creamy center and crunchy shell.
I’ve made these for Halloween parties, school events, and even a few adult gatherings where everyone pretended to be too sophisticated for themed treats—and they disappeared every single time. There’s something about food that looks a little creepy but tastes amazing that brings out the kid in everyone.
So go ahead and get creative with them. Add more bloodshot veins. Make them extra creepy. Or keep them simple with just the candy eyes. The beauty of this recipe is how forgiving it is—you really can’t mess it up. And if you do? Well, crumbled truffle pieces over ice cream is never a bad backup plan.
I’d love to see how yours turn out! Drop a comment below with your spooky creations, or share your photos on social media and tag me. And if you’ve got a variation that blew your mind, I’m all ears—I’m always looking for new ways to make these little monsters even more terrifying (and delicious). Happy Halloween, and happy snacking!
Frequently Asked Questions
Can I use Double Stuf Oreos for this recipe?
You can, but the texture will be different. Double Stuf Oreos have more filling, which makes the truffle mixture softer and harder to roll. If you use them, reduce the cream cheese by about 2 tablespoons to compensate. Or just use regular Oreos—they’re perfect as is.
How far in advance can I make these truffles?
You can make them up to 2 weeks ahead and store them in the refrigerator in an airtight container. They also freeze beautifully for up to 3 months. Just make sure they’re fully set before stacking or freezing. I usually make mine 2-3 days before a party—they taste even better after the flavors meld.
Why did my white chocolate seize up?
White chocolate is sensitive to heat and moisture. If it gets too hot (above 110°F) or if any water gets into the bowl, it will seize into a thick, grainy mess. To prevent this, use dry bowls and utensils, microwave in short bursts, and stir frequently. If it does seize, try adding a teaspoon of coconut oil and stirring gently—sometimes you can save it.
Can I make these without a food processor?
Absolutely! Place the Oreos in a large zip-top bag and crush them with a rolling pin, heavy pan, or even your fists. It takes a little longer and requires some elbow grease, but it works perfectly. Just make sure the crumbs are fine and uniform—no large chunks allowed.
How do I transport these truffles without them getting damaged?
Place the truffles in a single layer in an airtight container, with parchment paper between layers if you need to stack them. Keep them refrigerated until you’re ready to serve. If you’re traveling, use a cooler with ice packs. The cold temperature keeps the chocolate firm and prevents smudging or cracking.
Pin This Recipe!
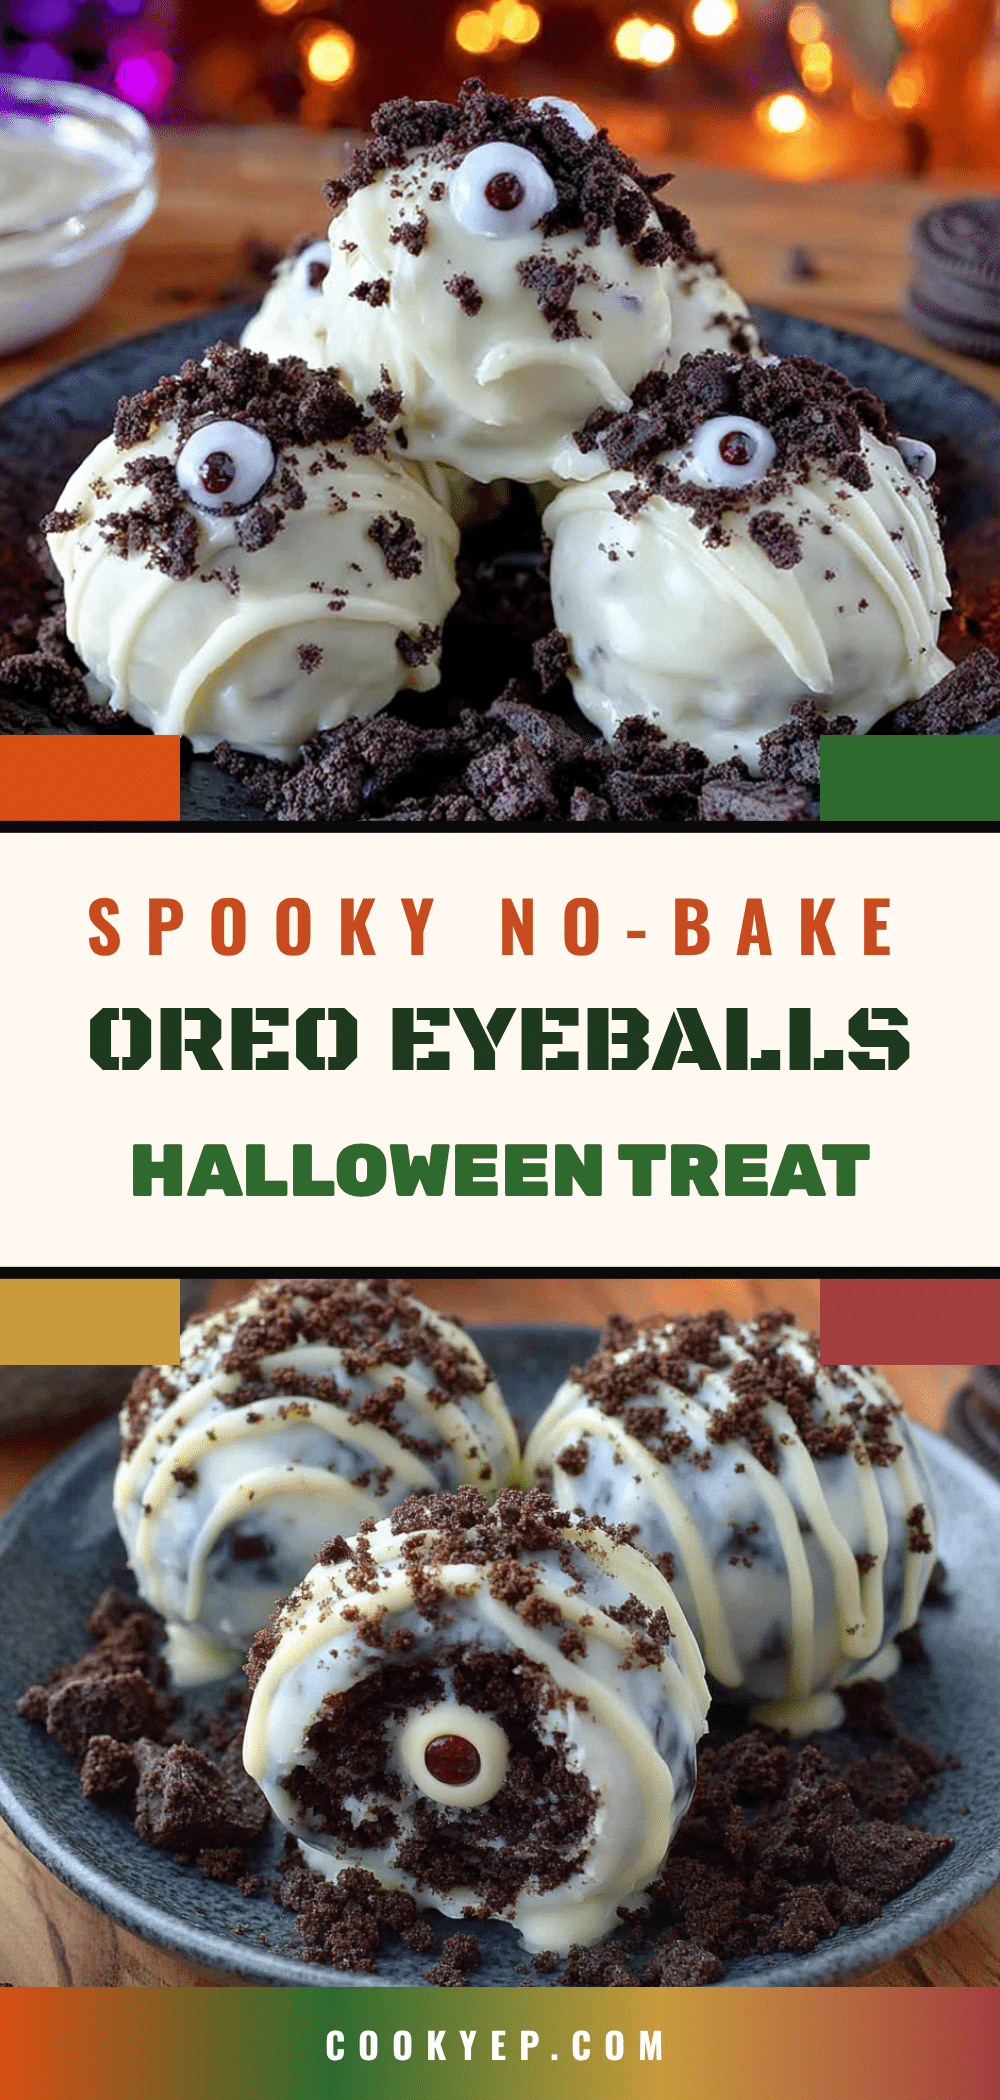
Easy No-Bake Halloween Oreo Truffle Eyeballs Recipe

These Easy No-Bake Halloween Oreo Truffle Eyeballs are a fun, spooky, and delicious treat that comes together in under 30 minutes of active time. With a creamy Oreo filling and a crunchy white chocolate shell, they’re perfect for Halloween parties and guaranteed to get attention.
- Prep Time: 20 minutes
- Cook Time: 0 minutes
- Total Time: 1 hour 20 minutes (including chilling)
- Yield: 30-35 truffles 1x
- Category: Dessert
- Cuisine: American
Ingredients
- 1 (14.3 oz) package Oreo cookies (regular, not Double Stuf)
- 8 oz cream cheese, softened (full-fat, block-style)
- 12 oz white melting wafers or white chocolate chips
- 1 tbsp coconut oil or shortening (optional)
- Candy eyeballs (flat-bottomed, about 30-40 pieces)
- Red food coloring gel (optional)
- Black food coloring gel (optional)
Instructions
- Crush the Oreos: Place the entire package of Oreos (filling included) into a food processor. Pulse until you have fine, uniform crumbs (like dark sand).
- Mix the filling: In a large mixing bowl, beat the softened cream cheese until smooth and fluffy (about 2 minutes). Add the Oreo crumbs and mix until fully combined. The mixture should look like dark, fudgy dough and hold together when pressed.
- Form the truffles: Scoop out about 1 tablespoon of the mixture and roll it between your palms to form a smooth ball. Place each ball on a parchment-lined baking sheet. You should get about 30-35 truffles.
- Chill the truffles: Place the baking sheet in the refrigerator for at least 30 minutes, or up to 2 hours.
- Melt the white chocolate: Place the white melting wafers in a microwave-safe bowl. Microwave in 30-second intervals, stirring between each, until completely smooth. Add the coconut oil if using, and stir until incorporated.
- Dip the truffles: Remove the truffles from the fridge. Using a fork or dipping tool, lower one truffle into the melted white chocolate. Gently tap the fork against the bowl to remove excess chocolate. Place the coated truffle back on the parchment paper. Work quickly, doing 5 at a time.
- Add the candy eyes: While the chocolate is still wet, press a candy eyeball onto the top of each truffle. Press gently so it sticks but doesn’t sink.
- Create the bloodshot details: Once all truffles are dipped and eyes are attached, let them set completely (about 15 minutes at room temperature or 5 minutes in the fridge). Using a toothpick or small piping bag, add thin red lines radiating from the candy eye to look like bloodshot veins. Add a tiny black dot in the center of the eye to dilate the pupil. Let the details set for another 10 minutes.
- Final chill: Refrigerate the finished truffles for at least 30 minutes before serving.
Notes
Use full-fat cream cheese for best texture. Keep undipped truffles in the fridge while working. White chocolate is sensitive to heat; microwave in short bursts. These truffles freeze well for up to 3 months. For gluten-free, use gluten-free sandwich cookies.
Nutrition
- Serving Size: 1 truffle
- Calories: 165
- Sugar: 13
- Sodium: 95
- Fat: 10
- Carbohydrates: 18
- Protein: 2
Keywords: Halloween, Oreo truffles, no-bake, eyeballs, spooky, easy, party treat


