I want a Starbucks pumpkin scone. Right now. And I have everything I need to make them at home except for one thing—the willpower to wait until the morning to bake them. It’s 9 PM on a Tuesday, and I’m staring at a can of pumpkin puree in my pantry like it’s a challenge. The thing is, I’ve been burned by copycat recipes before. They either taste nothing like the original or they’re so complicated you need a pastry degree just to get through the first step. But this one? This one is different.
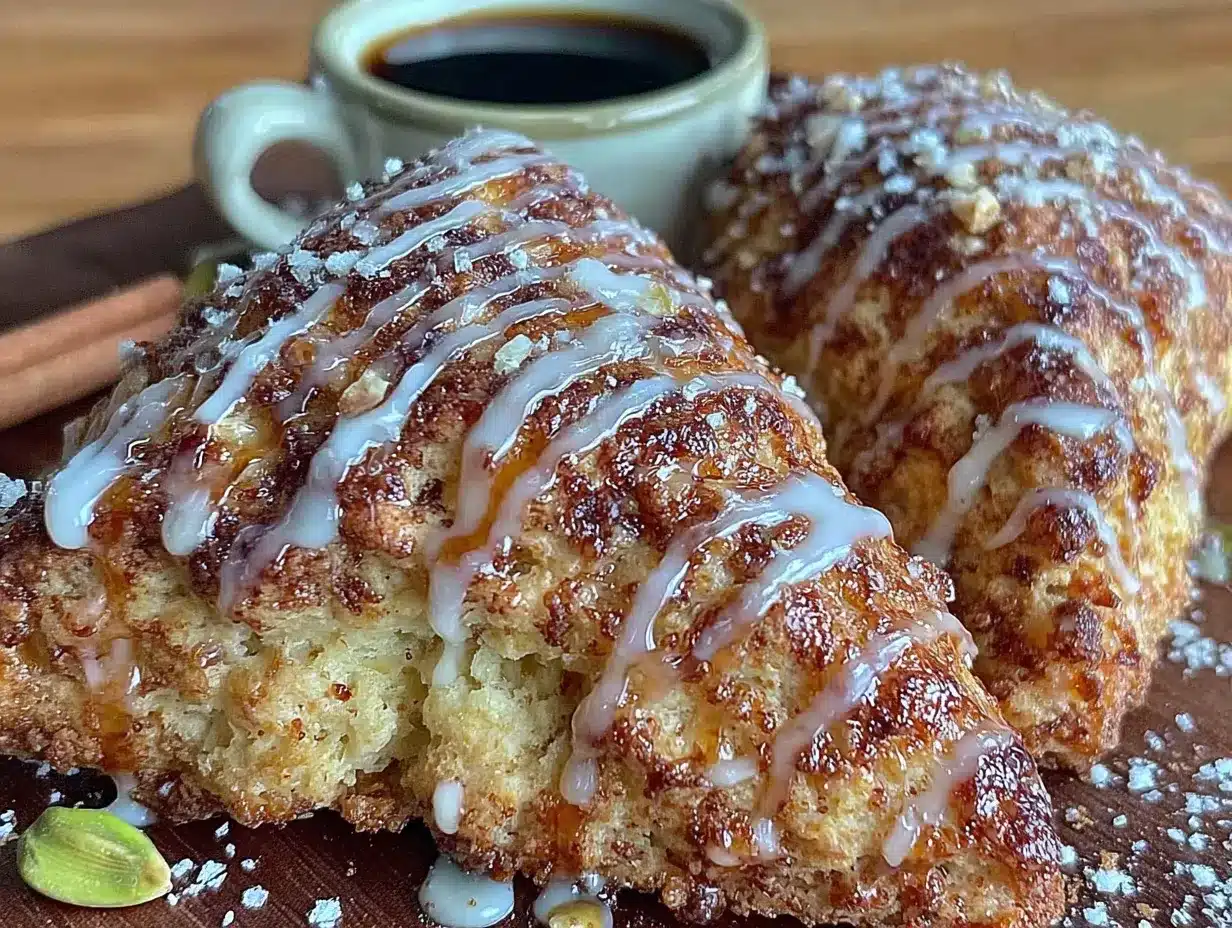
I’ve spent the last three autumns testing and tweaking this recipe until it hit that exact sweet-and-spicy balance that Starbucks nails. You know the one—where the scone itself is tender and almost biscuit-like, not too sweet, with just enough pumpkin flavor to remind you it’s fall. Then that spiced glaze on top? That’s the real magic. It’s thick and white and crackles when you bite into it, and underneath there’s a second layer of spiced glaze that seeps into the warm scone. Honestly, I’ve made so many batches that my family started hiding the pumpkin puree from me in October. But it was worth it.
These scones are the kind of thing you make on a Sunday afternoon and then find yourself eating for breakfast three days in a row (not that I’m speaking from experience or anything). They’re cozy without being heavy, fancy without being fussy, and they make your whole kitchen smell like a fall candle commercial. And the best part? You probably already have most of the ingredients in your pantry right now. So if you’re craving that Starbucks pumpkin scone experience but don’t want to leave the house—or spend five bucks on a single pastry—you’re in the right place.
Why You’ll Love This Recipe
Look, I’m not going to tell you these are exactly like Starbucks pumpkin scones because that would be a lie. They’re better. They’re fresher. They don’t sit under a heat lamp for hours. And honestly, once you make these at home, you’ll never look at that green Starbucks bag the same way again.
- Quick & Easy: From start to finish, you’re looking at about 35 minutes. That’s less time than it takes to drive to Starbucks and wait in the drive-thru line.
- Simple Ingredients: No weird stabilizers or preservatives here. Just butter, flour, sugar, pumpkin, and spices—things you probably already have in your kitchen.
- Perfect for Fall Mornings: These scones are made for crisp October mornings with a hot cup of coffee. Or tea. Or honestly, a cold glass of milk.
- Crowd-Pleaser: I brought these to a fall brunch and three people asked for the recipe before I even finished my first mimosa. They’re that good.
- Unbelievably Delicious: The texture is what gets me every time. The outside has this slight crispness, but the inside is so tender and soft. And that spiced glaze? It’s like the icing on a pumpkin cookie but better—thicker, creamier, and with just a hint of warmth from the cinnamon and nutmeg.
What makes this recipe different from all the other copycat versions out there? It’s the technique. I blend the butter into the flour mixture until it looks like coarse sand—that’s what gives these scones their signature flaky texture. Then I fold in the pumpkin mixture gently, barely mixing until it comes together. Overmixing is the enemy of tender scones, and I learned that the hard way after making a batch that could have doubled as hockey pucks. Trust me on this one.
These scones are the kind of treat that makes you close your eyes after the first bite. It’s comfort food reimagined—faster, easier, and with the same soul-soothing satisfaction as the original. Plus, you get to eat them warm from the oven, which is something no coffee shop can compete with.
What Ingredients You Will Need
This recipe uses simple, wholesome ingredients to deliver bold flavor and satisfying texture without any fuss. Most of these are pantry staples, which makes these scones perfect for spontaneous fall baking cravings.
For the Pumpkin Scones
- 2 cups all-purpose flour (I prefer King Arthur Flour for consistent results, but any brand works)
- 1/2 cup granulated sugar
- 1 tablespoon baking powder (make sure it’s fresh—old baking powder won’t give you those beautiful tall scones)
- 1 teaspoon pumpkin pie spice (store-bought is fine, but I’ll show you how to make your own blend below)
- 1/2 teaspoon ground cinnamon (for extra warmth)
- 1/2 teaspoon salt
- 6 tablespoons cold unsalted butter, cut into small cubes (the colder the better—pop it in the freezer for 10 minutes before cutting)
- 1/3 cup pumpkin puree (not pumpkin pie filling—make sure you grab the plain stuff)
- 1/3 cup heavy cream (plus extra for brushing the tops)
- 1 large egg
- 1 teaspoon vanilla extract
For the Spiced Glaze
- 1 1/2 cups powdered sugar
- 2-3 tablespoons milk or heavy cream (cream makes it richer, milk keeps it lighter)
- 1/2 teaspoon pumpkin pie spice
- 1/4 teaspoon ground cinnamon
- 1/4 teaspoon vanilla extract
Ingredient Tips and Substitutions
If you don’t have pumpkin pie spice on hand, you can make your own by mixing 1/2 teaspoon cinnamon, 1/4 teaspoon nutmeg, 1/4 teaspoon ginger, and a pinch of cloves. I actually prefer this homemade blend because I can adjust the ratios to my taste—more cinnamon, less clove.
For the butter, I really recommend using unsalted butter so you can control the salt level. If all you have is salted butter, just reduce the added salt to 1/4 teaspoon. And please, please use cold butter. I cannot stress this enough. Warm butter will give you flat, greasy scones instead of tall, flaky ones.
If you’re dairy-free, you can substitute the heavy cream with full-fat coconut cream and use a plant-based butter that’s designed for baking. The texture will be slightly different, but still delicious. I’ve tested this with my friend who’s lactose intolerant, and she gave it two thumbs up.
For the pumpkin puree, I recommend Libby’s brand. It’s consistently thick and not watery, which means your scones won’t turn out soggy. If your pumpkin puree looks a little loose, pat it dry with a paper towel before using it.
Equipment Needed
You don’t need any fancy equipment for these scones, which is part of why I love this recipe so much. Here’s what you’ll need:
- Large mixing bowl (for combining dry ingredients)
- Medium mixing bowl (for whisking wet ingredients)
- Pastry cutter or two forks (for cutting butter into flour—I’ve used both, and honestly, two forks work just fine if you don’t have a pastry cutter)
- Baking sheet (lined with parchment paper—this is non-negotiable for easy cleanup)
- Parchment paper (trust me, you don’t want these sticking to the pan)
- Whisk
- Sharp knife or bench scraper (for cutting the scone dough into triangles)
- Pastry brush (for brushing cream on top—a silicone one works best)
- Cooling rack (for letting the glaze set properly)
- Small bowl (for mixing the glaze)
If you don’t have a pastry brush, you can use a paper towel dipped in cream to brush the tops. It’s not as precise, but it gets the job done. And if you don’t have a cooling rack, you can let the scones cool on a clean cutting board or even a plate—just make sure they’re not sitting in a puddle of glaze.
One thing I learned the hard way: use a baking sheet with edges, not a flat cookie sheet. The scones can spread a tiny bit, and you don’t want butter dripping onto the bottom of your oven. Ask me how I know.
Preparation Method
Alright, let’s get to the good part. Here’s how to make these copycat Starbucks pumpkin scones step by step.
Step 1: Preheat and Prep
Preheat your oven to 400°F (200°C). Line a baking sheet with parchment paper and set it aside. This is one of those recipes where the oven needs to be fully hot before the scones go in, so give it a good 15-20 minutes to preheat.
Step 2: Mix the Dry Ingredients
In a large mixing bowl, whisk together 2 cups all-purpose flour, 1/2 cup granulated sugar, 1 tablespoon baking powder, 1 teaspoon pumpkin pie spice, 1/2 teaspoon ground cinnamon, and 1/2 teaspoon salt. Make sure everything is evenly distributed—you don’t want one scone to get all the cinnamon while another gets none.
Step 3: Cut in the Butter
Add the 6 tablespoons of cold cubed butter to the flour mixture. Using a pastry cutter or two forks, cut the butter into the flour until the mixture looks like coarse sand with some pea-sized butter pieces remaining. This should take about 2-3 minutes. The little chunks of butter are what create those flaky layers, so don’t overdo it. You want some visible butter pieces.
Step 4: Mix the Wet Ingredients
In a separate medium bowl, whisk together 1/3 cup pumpkin puree, 1/3 cup heavy cream, 1 large egg, and 1 teaspoon vanilla extract until smooth. The mixture should be a uniform orange color with no streaks of egg white.
Step 5: Combine Wet and Dry
Pour the wet ingredients into the dry ingredients and stir with a fork or spatula until just combined. The dough will look shaggy and a little dry in spots—that’s exactly what you want. Do not overmix. I repeat: do not overmix. Overmixing develops the gluten and makes scones tough. Stop as soon as the flour is incorporated.
Step 6: Shape the Dough
Turn the dough out onto a lightly floured surface. Gently bring it together with your hands, kneading just 2-3 times until it holds together. Pat the dough into a circle about 3/4-inch thick and 8 inches in diameter. Don’t use a rolling pin—just use your hands. It’s more gentle on the dough.
Step 7: Cut the Scones
Using a sharp knife or bench scraper, cut the circle into 8 equal wedges like you’re cutting a pizza. Transfer the wedges to the prepared baking sheet, spacing them about 2 inches apart. They’ll spread a little, but not too much.
Step 8: Brush and Bake
Brush the tops of the scones with a little extra heavy cream. This helps them get that golden-brown color on top. Bake for 14-16 minutes, or until the scones are lightly golden on the edges and a toothpick inserted into the center comes out clean. The tops should look set and slightly cracked.
Step 9: Cool
Let the scones cool on the baking sheet for 5 minutes, then transfer them to a cooling rack to cool completely before glazing. If you glaze them while they’re still warm, the glaze will melt right off and pool on the rack. Trust me, I’ve done it.
Step 10: Make the Glaze
While the scones are cooling, make the spiced glaze. In a small bowl, whisk together 1 1/2 cups powdered sugar, 2 tablespoons milk or heavy cream, 1/2 teaspoon pumpkin pie spice, 1/4 teaspoon ground cinnamon, and 1/4 teaspoon vanilla extract. Add the remaining tablespoon of milk if needed to reach a thick but drizzle-able consistency. The glaze should be thick enough that it holds its shape for a second before slowly spreading.
Step 11: Glaze the Scones
Once the scones are completely cool, spoon the glaze over the tops. For that authentic Starbucks look, let the glaze drip down the sides. Let the glaze set for about 15-20 minutes before serving. If you want the double-glaze effect like Starbucks does, drizzle a second layer of plain powdered sugar glaze (just powdered sugar and milk) over the spiced glaze after it sets.
Cooking Tips & Techniques
I’ve made this recipe more times than I care to admit, and I’ve learned a few things along the way. Here are my best tips for perfect pumpkin scones every time.
The Cold Butter Rule
This is the most important tip I can give you: keep everything cold. Cold butter creates steam pockets as it melts in the oven, which gives you those flaky layers. If your butter warms up, you’ll get dense, flat scones. I like to cube my butter and then pop it in the freezer for 10 minutes before cutting it into the flour. On a hot day, I even chill my mixing bowl.
Don’t Overwork the Dough
I ruined my first batch of scones by kneading them like bread. Scone dough should be handled as little as possible. Mix until just combined, shape gently, and cut with a sharp knife. The less you handle it, the more tender the scones will be. Think of it like making biscuits—gentle hands are happy hands.
The Pumpkin Moisture Problem
Pumpkin puree has a lot of moisture, which can make scones dense and gummy instead of light and flaky. That’s why this recipe uses less pumpkin than you might expect—only 1/3 cup. If your pumpkin puree looks watery, pat it dry with a paper towel before using it. I learned this after making a batch that came out more like pumpkin hockey pucks than scones.
Timing the Glaze
Patience is key with the glaze. If you glaze the scones while they’re still warm, you’ll end up with a sticky mess. Wait until they’re completely cool—about 30 minutes. And if you’re making these ahead of time, glaze them right before serving so the glaze stays pretty and crackly instead of soaking into the scone.
Multitasking Strategy
Here’s how I make these efficiently: while the oven preheats, I measure out all my dry ingredients. While the butter is chilling in the freezer, I mix the wet ingredients. By the time the butter is cold, the oven is hot, and I can move through the steps without waiting. Total active time is about 15 minutes, plus 15 minutes of baking.
Variations & Adaptations
One of the best things about this recipe is how versatile it is. Here are some ways to make it your own.
Gluten-Free Version
Swap the all-purpose flour for a 1:1 gluten-free baking flour blend that contains xanthan gum. I’ve tested this with Bob’s Red Mill 1:1 Baking Flour, and it works beautifully. The texture is slightly more delicate, so handle the dough gently. Add an extra tablespoon of heavy cream if the dough seems too dry.
Vegan Adaptation
Use cold vegan butter (I like Miyoko’s or Earth Balance) and replace the heavy cream with full-fat coconut cream. Use a flax egg (1 tablespoon ground flaxseed mixed with 3 tablespoons water, let sit for 5 minutes) instead of the regular egg. The scones will be a little less flaky but still delicious. Brush the tops with coconut cream before baking.
Extra Spicy Version
If you like your pumpkin scones with a kick, add 1/4 teaspoon ground ginger and 1/8 teaspoon ground cloves to the dry ingredients. You can also add a pinch of black pepper—sounds weird, but it actually enhances the other spices. I make this version for my dad every fall, and he says it’s the only pumpkin scone worth eating.
Maple Glaze Variation
Replace the milk in the glaze with 2 tablespoons of pure maple syrup and reduce the powdered sugar to 1 cup. The maple flavor pairs beautifully with the pumpkin and spices. This is my personal favorite variation—it’s like fall in a bite.
Chocolate Chip Pumpkin Scones
Fold in 1/2 cup of white chocolate chips or semi-sweet chocolate chips after combining the wet and dry ingredients. The chocolate adds a nice richness that balances the spices. My kids go crazy for this version, and honestly, so do I.
Serving & Storage Suggestions
These scones are best served warm, but they’re pretty fantastic at room temperature too. Here’s how to enjoy them at their peak.
Serving Temperature and Presentation
Serve these scones slightly warm or at room temperature. If you want to reheat them, pop them in a 300°F oven for 5 minutes—this revives the flaky texture without drying them out. The microwave works in a pinch, but it can make the scones soft and chewy instead of crisp on the outside.
For a beautiful presentation, arrange the glazed scones on a wooden board or a pretty plate with a dusting of powdered sugar and a few cinnamon sticks. They look gorgeous on a fall brunch table next to a pot of coffee or mulled cider.
Complementary Dishes and Beverages
These scones are perfect with a hot cup of coffee, a chai latte, or a pumpkin spice latte. For a full fall brunch, serve them alongside a cozy fall harvest soup with roasted root veggies or some easy brown butter pumpkin bread with maple glaze for variety. They also pair beautifully with fresh fruit and yogurt for a lighter breakfast.
Storage Instructions
Store unglazed scones in an airtight container at room temperature for up to 3 days. If you’ve already glazed them, store them in a single layer in an airtight container—stacking them will smudge the glaze. For longer storage, freeze unglazed scones for up to 3 months. Wrap each scone individually in plastic wrap, then place them in a freezer bag. Thaw at room temperature and glaze before serving.
Reheating Methods
To reheat frozen scones, let them thaw at room temperature for about 30 minutes, then warm them in a 300°F oven for 5 minutes. If you’re reheating glazed scones, skip the oven and just let them come to room temperature—the glaze will get too melty in the oven. The flavors actually develop and deepen after a day or two, so these scones taste even better on day two.
Nutritional Information & Benefits
While these scones are definitely a treat, they do have some redeeming qualities. Here’s the estimated nutritional breakdown per scone (with glaze):
- Calories: Approximately 320
- Total Fat: 14g
- Saturated Fat: 8g
- Carbohydrates: 46g
- Sugar: 28g
- Protein: 5g
- Fiber: 2g
- Vitamin A: 45% of the Daily Value (from the pumpkin)
Pumpkin is actually a nutritional powerhouse—it’s packed with vitamin A for eye health, fiber for digestion, and antioxidants that support your immune system. The cinnamon in the glaze has anti-inflammatory properties and can help stabilize blood sugar. So while these scones aren’t health food, they’re not totally empty calories either.
For those with dietary concerns, this recipe contains gluten, dairy, and eggs. For a gluten-free or vegan version, see the variations section above. If you’re watching your sugar intake, you can reduce the sugar in the scone dough to 1/3 cup and use a lighter hand with the glaze.
Conclusion
These copycat Starbucks pumpkin scones are everything you want in a fall treat—tender, flaky, warmly spiced, and topped with that signature crackly glaze. They come together in under 40 minutes with simple ingredients you probably already have, and they taste better than anything you can buy at a coffee shop. Plus, your whole house will smell like autumn while they’re baking.
I love this recipe because it’s forgiving enough for beginner bakers but impressive enough to serve at a brunch or holiday gathering. The first time I made these, I was nervous about the glaze—would it be too thin? Too thick? Would it set properly? But after a few tries, I realized this recipe is practically foolproof. Even my “ugly” batches got devoured within hours.
So go ahead and preheat that oven. Grab your pumpkin puree and your cold butter. Make these scones on a lazy Sunday morning, or whip them up for a weekday treat when you need a little fall comfort. And when you take that first bite—warm, glazed, perfectly spiced—come back and tell me how it went.
Have you made these scones? Did you try any fun variations? Drop a comment below and let me know—I love hearing about your kitchen adventures. And if you’re looking for more fall baking inspiration, check out my cozy pumpkin spice snickerdoodle cookies or these easy maple pecan pumpkin pie bars for even more seasonal deliciousness.
Happy baking, friends!
Frequently Asked Questions
Can I use pumpkin pie filling instead of pumpkin puree?
No, please don’t. Pumpkin pie filling has added sugar and spices, which will throw off the balance of this recipe. Stick with 100% pure pumpkin puree. If all you have is pumpkin pie filling, you’ll need to adjust the sugar and spices, but honestly, it’s easier to just grab the right ingredient.
Why did my scones turn out flat and dense?
This usually happens for one of three reasons: your butter was too warm, you overmixed the dough, or your baking powder was old. Make sure your butter is cold, mix until just combined, and check that your baking powder is fresh (it should bubble when you add it to water). Also, make sure your oven is fully preheated—scones need that initial blast of heat to rise properly.
Can I freeze the scone dough?
Absolutely! Cut the scones, place them on a baking sheet, and freeze until solid. Then transfer them to a freezer bag. When you’re ready to bake, place the frozen scones on a parchment-lined baking sheet and add 2-3 minutes to the baking time. No need to thaw first. This is my favorite meal prep trick for busy fall mornings.
How do I get the glaze to look like Starbucks?
The key is the double-glaze technique. First, drizzle the spiced glaze over the cooled scones and let it set for about 15 minutes. Then mix a simple glaze of 1/2 cup powdered sugar and 1 tablespoon milk, and drizzle that over the top. The white glaze on top of the spiced glaze creates that iconic two-tone look. If your glaze is too thin, add more powdered sugar. If it’s too thick, add more milk, one teaspoon at a time.
Can I make these scones without a pastry cutter?
Yes, you have options! Two forks work well—just use them to cut the butter into the flour in a crisscross motion. You can also use your fingertips, but work quickly so the heat from your hands doesn’t warm the butter. Some people even use a food processor—just pulse the dry ingredients with the butter until it looks like coarse meal, then transfer to a bowl and add the wet ingredients. Don’t over-pulse or you’ll lose those butter pieces that create flaky layers.
Pin This Recipe!

Easy Copycat Starbucks Pumpkin Scones with Spiced Glaze

Tender, flaky pumpkin scones with a signature spiced glaze that crackles when you bite into it. This easy copycat recipe tastes better than Starbucks and comes together in under 40 minutes with simple pantry ingredients.
- Prep Time: 15 minutes
- Cook Time: 15 minutes
- Total Time: 35 minutes
- Yield: 8 servings 1x
- Category: Dessert
- Cuisine: American
Ingredients
- 2 cups all-purpose flour
- 1/2 cup granulated sugar
- 1 tablespoon baking powder
- 1 teaspoon pumpkin pie spice
- 1/2 teaspoon ground cinnamon
- 1/2 teaspoon salt
- 6 tablespoons cold unsalted butter, cut into small cubes
- 1/3 cup pumpkin puree
- 1/3 cup heavy cream (plus extra for brushing)
- 1 large egg
- 1 teaspoon vanilla extract
- 1 1/2 cups powdered sugar
- 2–3 tablespoons milk or heavy cream
- 1/2 teaspoon pumpkin pie spice
- 1/4 teaspoon ground cinnamon
- 1/4 teaspoon vanilla extract
Instructions
- Preheat oven to 400°F (200°C). Line a baking sheet with parchment paper.
- In a large bowl, whisk together flour, sugar, baking powder, 1 teaspoon pumpkin pie spice, 1/2 teaspoon cinnamon, and salt.
- Cut cold butter into flour mixture using a pastry cutter or two forks until it resembles coarse sand with some pea-sized butter pieces.
- In a separate bowl, whisk together pumpkin puree, 1/3 cup heavy cream, egg, and 1 teaspoon vanilla until smooth.
- Pour wet ingredients into dry ingredients and stir until just combined. Dough should be shaggy with some dry spots.
- Turn dough onto a lightly floured surface. Gently bring together with hands, kneading 2-3 times. Pat into a 3/4-inch thick, 8-inch circle.
- Cut circle into 8 equal wedges. Transfer to prepared baking sheet, spacing 2 inches apart.
- Brush tops with extra heavy cream. Bake for 14-16 minutes until lightly golden on edges and a toothpick comes out clean.
- Cool on baking sheet for 5 minutes, then transfer to a cooling rack to cool completely.
- For glaze: whisk together powdered sugar, 2 tablespoons milk or cream, 1/2 teaspoon pumpkin pie spice, 1/4 teaspoon cinnamon, and 1/4 teaspoon vanilla. Add remaining milk if needed for drizzling consistency.
- Once scones are completely cool, spoon glaze over tops. Let set for 15-20 minutes before serving.
Notes
Keep butter and ingredients cold for flaky scones. Do not overmix dough. For the double-glaze Starbucks effect, drizzle a second layer of plain powdered sugar glaze over the spiced glaze after it sets. Store unglazed scones in an airtight container for up to 3 days, or freeze unglazed for up to 3 months.
Nutrition
- Serving Size: 1 scone
- Calories: 320
- Sugar: 28
- Sodium: 320
- Fat: 14
- Saturated Fat: 8
- Carbohydrates: 46
- Fiber: 2
- Protein: 5
Keywords: pumpkin scones, Starbucks copycat, fall baking, pumpkin spice, easy scone recipe, homemade scones, spiced glaze


