My friend Jenna took one bite, stopped mid-sentence, and just pointed at the pan with wide eyes. I’d brought these Easy Spiderweb Sugar Cookie Bars to our annual Halloween movie night—you know, the one where we pretend we’re going to watch something scary but end up laughing through Hocus Pocus for the eighth time. She didn’t say a word for a solid ten seconds, which for Jenna is basically an eternity. Then she mumbled, “I need this recipe. Like, right now.” And honestly? That’s exactly the reaction I was hoping for.
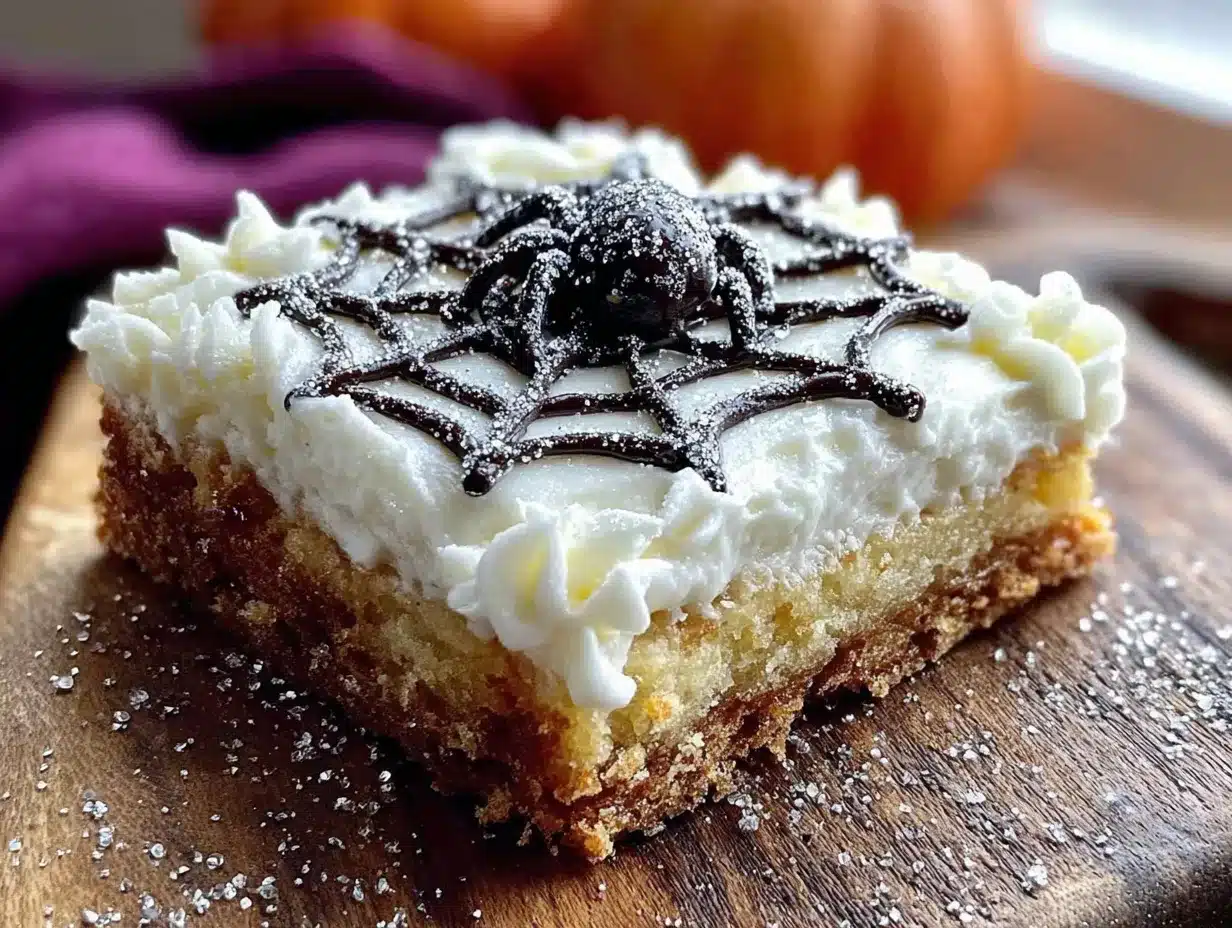
These bars came together out of pure laziness, if I’m being honest. I wanted the buttery, soft texture of classic sugar cookies but couldn’t deal with rolling and cutting individual shapes. Not when there were decorations to hang and spooky playlists to curate. So I pressed the dough into a pan, baked it up, and figured I’d just frost the whole thing. Then I got a little carried away with the piping bag—and the spiderweb pattern happened. It looked so good I almost didn’t want to cut into it. Almost.
The thing about these bars is they taste exactly like the sugar cookies you remember from childhood, but they’re about a thousand times easier. No chilling the dough. No worrying about even thickness. No leftover scraps to reroll. The chocolate spiderweb on top isn’t just for show either—it adds this rich, slightly bitter contrast to the sweet frosting that keeps you coming back for “just one more piece.” I’ve made them for three Halloween parties now, and every single time someone asks for the recipe before the first piece is even gone. That’s how you know it’s a keeper.
Why You’ll Love This Recipe
Let me tell you why these bars have become my go-to Halloween dessert—and why they’ll probably become yours too.
- So Easy You Won’t Believe It: No rolling pin required. No cookie cutters. No chilling time. You mix the dough, press it into a pan, bake, and frost. That’s it. Even if you’re not a confident baker, you’ve got this.
- Simple Pantry Ingredients: Butter, sugar, flour, eggs, vanilla—you probably have everything already. No hunting down specialty stores or weird ingredients you’ll never use again.
- Perfect for Halloween Parties: These bars travel well, slice cleanly, and look impressive without needing artistic skills. The spiderweb pattern hides imperfections beautifully—trust me on that one.
- Crowd-Pleaser for All Ages: Kids love the spiderweb design. Adults love the buttery cookie base. Everyone loves that they’re not overly sweet, just perfectly balanced.
- Unbelievably Delicious: The cookie base stays soft and tender for days. The frosting is creamy without being cloying. And that chocolate web? It’s the finishing touch that makes these feel special without extra work.
What sets these apart from other Halloween treats is the texture. Most cut-out sugar cookies turn crisp, which is fine for decorating but not always what you want to sink your teeth into. These bars stay soft, almost like a sugar cookie crossed with a shortbread—tender, buttery, and just sturdy enough to hold the frosting. I tested this recipe four times to get the texture exactly right. The first batch was too cakey. The second was too crumbly. The third? Let’s just say I ate half the pan before I could photograph it. The fourth was perfection.
These bars are the kind of dessert that makes you close your eyes after the first bite. It’s comfort food dressed up in a Halloween costume—familiar, satisfying, and just a little bit spooky.
What Ingredients You Will Need
This recipe uses simple, everyday ingredients to create something that tastes bakery-fancy without the fuss. Here’s what you’ll need and why each one matters.
For the Cookie Base
- 1 cup (226g) unsalted butter, softened – Butter gives these bars their rich flavor and tender crumb. Make sure it’s truly softened—leave it on the counter for about an hour. Cold butter won’t cream properly with the sugar.
- 1 cup (200g) granulated sugar – White sugar keeps the texture light and helps the bars brown evenly around the edges. I’ve tested this with a mix of granulated and brown sugar, and honestly, stick with all white for the classic sugar cookie taste.
- 1 large egg, room temperature – The egg binds everything together. Room temperature matters here—a cold egg can make the butter seize up and create a lumpy dough.
- 1 teaspoon vanilla extract – Use real vanilla if you can. The flavor difference is noticeable, even in a frosted bar.
- 2 cups (250g) all-purpose flour – Spoon and level your flour. Scooping straight from the bag packs it down and gives you too much, which makes the bars dry.
- ½ teaspoon baking powder – Just enough to give the bars a slight lift without making them puffy. You want them dense but tender.
- ¼ teaspoon salt – Salt balances the sweetness and brings out the buttery flavor. Don’t skip it.
For the Frosting
- ¼ cup (56g) unsalted butter, softened – The base of the frosting. Same rule applies—softened is key.
- 1½ cups (180g) powdered sugar – Sift it if it’s lumpy. Nobody wants lumpy frosting.
- 2-3 tablespoons heavy cream or milk – Heavy cream makes the frosting richer, but milk works fine in a pinch. Add it slowly until you reach your desired consistency.
- ½ teaspoon vanilla extract – Double the vanilla in the frosting. It makes the whole bar taste more complex.
For the Spiderweb Decoration
- ¼ cup (45g) semi-sweet chocolate chips – I prefer Ghirardelli or Guittard for smooth melting. Semi-sweet is perfect here because it balances the sweet frosting.
- 1 teaspoon coconut oil or vegetable shortening – This thins the melted chocolate just enough to pipe smoothly. Coconut oil adds a subtle flavor that works surprisingly well with the sugar cookie.
Ingredient Swap Notes: If you need a dairy-free version, use vegan butter sticks (not tub margarine) and a plant-based milk in the frosting. The texture won’t be exactly the same, but it’s still delicious. For a gluten-free option, swap the all-purpose flour with a 1:1 gluten-free baking flour blend that contains xanthan gum. I’ve tested this with King Arthur’s Measure for Measure and it worked beautifully.
Equipment Needed
You don’t need a fancy kitchen to make these bars. Here’s what you’ll actually use:
- 9×9-inch square baking pan – This is the perfect size for bars that are thick but not too thick. An 8×8 works too, but your bars will be slightly taller and need a couple extra minutes in the oven.
- Parchment paper – Line your pan with parchment, leaving overhang on two sides. This creates handles that let you lift the whole slab out for clean cutting. Worth every second.
- Electric hand mixer or stand mixer – You can cream butter and sugar by hand if you’ve got strong arms, but a mixer makes it much easier. I’ve used both and honestly, the hand mixer is faster for cleanup.
- Mixing bowls – One large bowl for the dough, one medium for the frosting.
- Rubber spatula – For scraping down the bowl and spreading the dough evenly in the pan.
- Piping bag or small zip-top bag – For the chocolate web. A zip-top bag with the corner snipped off works perfectly and costs nothing.
- Toothpick – This is your secret weapon for creating the spiderweb pattern. Don’t use a knife—it’s too thick and messes up the lines.
- Cooling rack – Letting the bars cool completely before frosting is crucial. A rack speeds that up.
If you don’t have a piping bag, seriously, just use a sandwich bag. I’ve done it a dozen times. Snip a tiny corner—smaller than you think you need—and practice on a plate first. You can always cut more off, but you can’t undo a too-big hole.
Preparation Method
Let’s make these Easy Spiderweb Sugar Cookie Bars. I’ll walk you through every step so you feel confident, even if this is your first time making a decorated bar.
Step 1: Preheat and Prep the Pan
Preheat your oven to 350°F (175°C). Line your 9×9-inch pan with parchment paper, leaving about 2 inches of overhang on two opposite sides. Lightly spray the exposed pan sides with nonstick spray. This ensures your bars lift out cleanly without sticking.
Step 2: Cream the Butter and Sugar
In a large mixing bowl, beat the softened butter and granulated sugar together on medium speed until light and fluffy. This takes about 2-3 minutes with a hand mixer. You’re looking for a pale, creamy texture—scrape the bowl halfway through. Don’t rush this step. Proper creaming incorporates air that gives the bars their tender structure.
Step 3: Add the Egg and Vanilla
Add the room temperature egg and vanilla extract. Beat on medium until fully combined, about 30 seconds. The mixture might look slightly curdled at this point—that’s normal, especially if your egg was a touch cold. Keep going and it will smooth out.
Step 4: Mix the Dry Ingredients
In a separate bowl, whisk together the flour, baking powder, and salt. Add the dry ingredients to the wet mixture in two additions, mixing on low speed after each. Stop as soon as the flour disappears. Overmixing at this stage develops gluten and makes the bars tough. You want a soft, slightly sticky dough that holds together when pressed.
Step 5: Press the Dough Into the Pan
Transfer the dough to your prepared pan. It will be thick and a little sticky. Use a rubber spatula or lightly floured fingers to press it into an even layer. Don’t worry if it doesn’t look perfect—it bakes into itself. Try to get the corners filled in, since they tend to be thinner if you’re not careful.
Step 6: Bake the Cookie Base
Bake for 18-22 minutes. The edges should be lightly golden and the center should look set but still soft. A toothpick inserted in the center should come out with a few moist crumbs, not wet batter. Every oven runs differently—mine takes exactly 20 minutes. Start checking at 18 minutes if your oven runs hot.
Let the bars cool in the pan on a wire rack for 15 minutes, then use the parchment overhang to lift them out. Cool completely on the rack before frosting. This is non-negotiable. Warm bars will melt your frosting into a puddle.
Step 7: Make the Frosting
In a medium bowl, beat the softened butter until creamy. Add the powdered sugar, vanilla, and 2 tablespoons of heavy cream. Beat on low until combined, then increase to medium and beat for 1-2 minutes until fluffy. If the frosting is too thick, add the remaining tablespoon of cream. Too thin? Add a little more powdered sugar. You want a spreadable consistency that holds its shape.
Step 8: Frost the Bars
Spread the frosting evenly over the completely cooled cookie base. Use an offset spatula or the back of a spoon. Don’t worry about perfection—the spiderweb covers most of it anyway.
Step 9: Create the Spiderweb
Melt the chocolate chips and coconut oil together in a microwave-safe bowl in 20-second bursts, stirring between each, until smooth. Transfer to a piping bag or zip-top bag and snip a tiny corner.
Pipe a small circle of chocolate in the center of the frosted bars. Then pipe concentric circles around it, spacing them about 1 inch apart. You should have 4-5 circles total.
Here’s the fun part: Take a toothpick and gently drag it from the center circle outward through all the rings, like drawing spokes on a wheel. Repeat this every inch or so around the circle. Then drag the toothpick in the opposite direction—from the outer edge back toward the center—between each spoke. This creates the classic spiderweb pattern. Wipe the toothpick clean between drags for the cleanest lines.
Step 10: Set and Slice
Let the chocolate set at room temperature for about 30 minutes, or pop the pan in the fridge for 15 minutes if you’re impatient. Use a sharp knife to slice into 16 squares. For clean cuts, wipe the knife between each slice.
Cooking Tips & Techniques
I’ve made this recipe enough times to know where things can go sideways. Here’s what I’ve learned the hard way so you don’t have to.
Don’t Overbake—Seriously. The biggest mistake people make with these bars is leaving them in the oven too long. They should look barely golden around the edges and still pale in the center. They continue cooking from residual heat after you pull them out. Overbaked bars turn dry and crumbly instead of soft and tender. If you’re unsure, pull them out a minute early. A slightly underbaked bar is still delicious. A dry one is just sad.
Room Temperature Ingredients Matter. I know, I know—every recipe says this and it feels fussy. But cold butter doesn’t cream properly, and cold eggs can make your butter seize into little chunks. Leave your butter and egg on the counter for an hour before you start. Set a timer if you have to. Your future self will thank you.
Practice the Spiderweb on a Plate First. The first time I tried this pattern, my chocolate was too thick and the lines came out looking like a toddler’s art project. Practice on a plate or piece of parchment before you go near the frosted bars. You want the chocolate to flow smoothly but not too fast. If it’s too thick, add a few more drops of coconut oil. Too thin? Let it cool for a minute to thicken up.
Clean Your Toothpick. This sounds so small, but it makes a huge difference. If you drag chocolate lines without wiping the toothpick, you end up with smudged, muddy webs. Keep a paper towel nearby and wipe between each spoke. The clean lines make the pattern pop.
Multitask Like a Pro. While the bars are cooling, make your frosting and melt your chocolate. That way everything is ready to go when you’re ready to decorate. I like to line up my piping bag and toothpick ahead of time so I’m not scrambling with chocolate melting on the counter.
Variations & Adaptations
One of the best things about these Easy Spiderweb Sugar Cookie Bars is how easy they are to customize. Here are some of my favorite variations.
White Chocolate Spiderweb: Swap the semi-sweet chocolate for white chocolate chips. The white web against a tinted frosting (try adding a drop of purple or orange food coloring) looks stunning. Just be careful—white chocolate burns faster, so melt it in 15-second bursts.
Gluten-Free Version: I tested this with a 1:1 gluten-free flour blend and it worked perfectly. The texture was slightly more tender, almost like a shortbread, but the bars held together beautifully. King Arthur’s Measure for Measure is my go-to for this.
Candy Corn Sprinkle: Before the chocolate web sets, scatter a few candy corn pieces or Halloween sprinkles around the edges. It adds a fun crunch and makes the bars even more festive. My niece calls these the “party bars” and requests them every year.
Peanut Butter Swirl: Drop spoonfuls of creamy peanut butter over the dough before baking and swirl it in with a knife. The peanut butter bakes into pockets of salty-sweet goodness. If you love peanut butter and chocolate, this is your version. I’ve also made a version similar to my Reese’s Peanut Butter Poke Cake and the flavor combo works just as well here.
Spiced Sugar Cookie Base: Add ½ teaspoon of cinnamon and ¼ teaspoon of nutmeg to the flour mixture. It gives the bars a subtle warmth that pairs perfectly with fall flavors. This works especially well if you’re serving these alongside other autumn treats like Easy Maple Pecan Pumpkin Pie Bars.
Serving & Storage Suggestions
These bars are best served at room temperature, which lets the frosting soften and the cookie base stay tender. If you’ve refrigerated them, let them sit out for about 20 minutes before serving.
Presentation Ideas: Arrange the bars on a black or orange platter for maximum Halloween vibes. Add a few fake spiders or candy eyeballs around the edges for a spooky touch. If you’re bringing these to a party, stack them in a clear container so the spiderweb pattern shows through.
What to Serve With Them: These bars pair beautifully with a cold glass of milk or a warm mug of apple cider. For an adult Halloween party, they’re fantastic alongside a pumpkin spice latte. I’ve also served them after a bowl of Cozy Slow Cooker Chicken Tortilla Soup with Lime Crema for a sweet-and-savory dinner combo that always works.
Storage Instructions: Store the bars in an airtight container at room temperature for up to 4 days. Layer them with parchment paper between each layer to prevent the spiderweb from smudging. Do not refrigerate them unless your kitchen is very warm—the fridge dries out the cookie base.
Freezing Instructions: These bars freeze beautifully. Freeze them unfrosted for up to 3 months. Wrap the cooled cookie slab tightly in plastic wrap, then foil. When you’re ready to serve, thaw at room temperature, then frost and decorate. You can also freeze the fully decorated bars, but the chocolate web might lose its crisp lines. I prefer freezing the base and finishing fresh.
Flavor Development: These bars actually taste even better the next day. The flavors meld together and the texture softens slightly. If you can resist eating them immediately (I rarely can), make them a day ahead for the best results.
Nutritional Information & Benefits
Let’s be real—these are a treat, not a health food. But here’s the approximate nutritional breakdown per bar (based on 16 servings):
- Calories: 275
- Total Fat: 14g
- Saturated Fat: 9g
- Carbohydrates: 36g
- Sugar: 24g
- Protein: 2g
- Sodium: 95mg
Dietary Considerations: This recipe contains dairy, eggs, and gluten. For a dairy-free version, use vegan butter and plant-based milk. For a gluten-free version, use a 1:1 gluten-free flour blend. These bars are naturally nut-free, but double-check your chocolate chips if allergies are a concern—some brands process chocolate on shared equipment.
Health Perspective: I believe in balance. These bars are meant to be enjoyed as part of a Halloween celebration, not as an everyday snack. The butter provides a small amount of vitamin A, and the chocolate offers a touch of antioxidants. Mostly, though, these are about joy and tradition. One bar won’t derail your wellness goals, but it might make your Halloween a little sweeter.
Conclusion
These Easy Spiderweb Sugar Cookie Bars have become a non-negotiable part of my Halloween season. They’re the dessert I bring to parties, the treat I make for my neighbors, and the recipe I text to friends who text me at 5 PM asking for something “spooky but easy.” They deliver on every level—flavor, texture, presentation, and simplicity.
What I love most about this recipe is how forgiving it is. The spiderweb pattern hides any uneven frosting. The soft cookie base doesn’t require precise rolling or cutting. And the end result looks like you spent hours when really, you spent about 30 minutes of active time. That’s my favorite kind of baking.
I’d love to hear how yours turn out. Did you try a variation? Did your kids help with the spiderweb? Did you eat three before anyone else got home? (No judgment—I’ve been there.) Drop a comment below and let me know. And if you’re looking for more Halloween inspiration, don’t miss my Best Spiderweb Sugar Cookies for Halloween for a classic cut-out version, or these Easy No-Bake Halloween Oreo Truffle Eyeballs for a no-oven-required option.
Happy Halloween, friend. Go make something deliciously spooky.
Frequently Asked Questions
Can I make these spiderweb sugar cookie bars ahead of time?
Absolutely. You can bake the cookie base up to 3 days ahead and store it wrapped tightly at room temperature. Frost and decorate the day you plan to serve them for the freshest look. The spiderweb pattern is crispest when freshly made.
Why did my cookie base turn out dry?
The most common culprit is overbaking. Pull the bars out when the edges are just barely golden and the center still looks soft. Overmixing the dough can also develop too much gluten, making the bars tough. Mix just until the flour disappears.
Can I use a different pan size?
A 9×9-inch pan is ideal. An 8×8 works but your bars will be thicker and need 2-3 extra minutes of baking time. A 9×13 pan will give you thinner bars—bake for about 14-16 minutes and check early. Adjust your serving sizes accordingly.
My chocolate web turned out messy. What went wrong?
Your chocolate might have been too thick or too thin. If it’s too thick, add a little more coconut oil. If it’s too thin, let it cool for a minute before piping. Also, make sure you’re wiping your toothpick clean between each drag—this makes a huge difference in the cleanliness of the lines.
Can I freeze these bars with the frosting and spiderweb?
You can, but the chocolate web may lose its sharp lines and the frosting can get a little soft during thawing. I recommend freezing the unfrosted cookie base and finishing with frosting and decoration after thawing. It takes 10 extra minutes and gives you much better results.
Pin This Recipe!
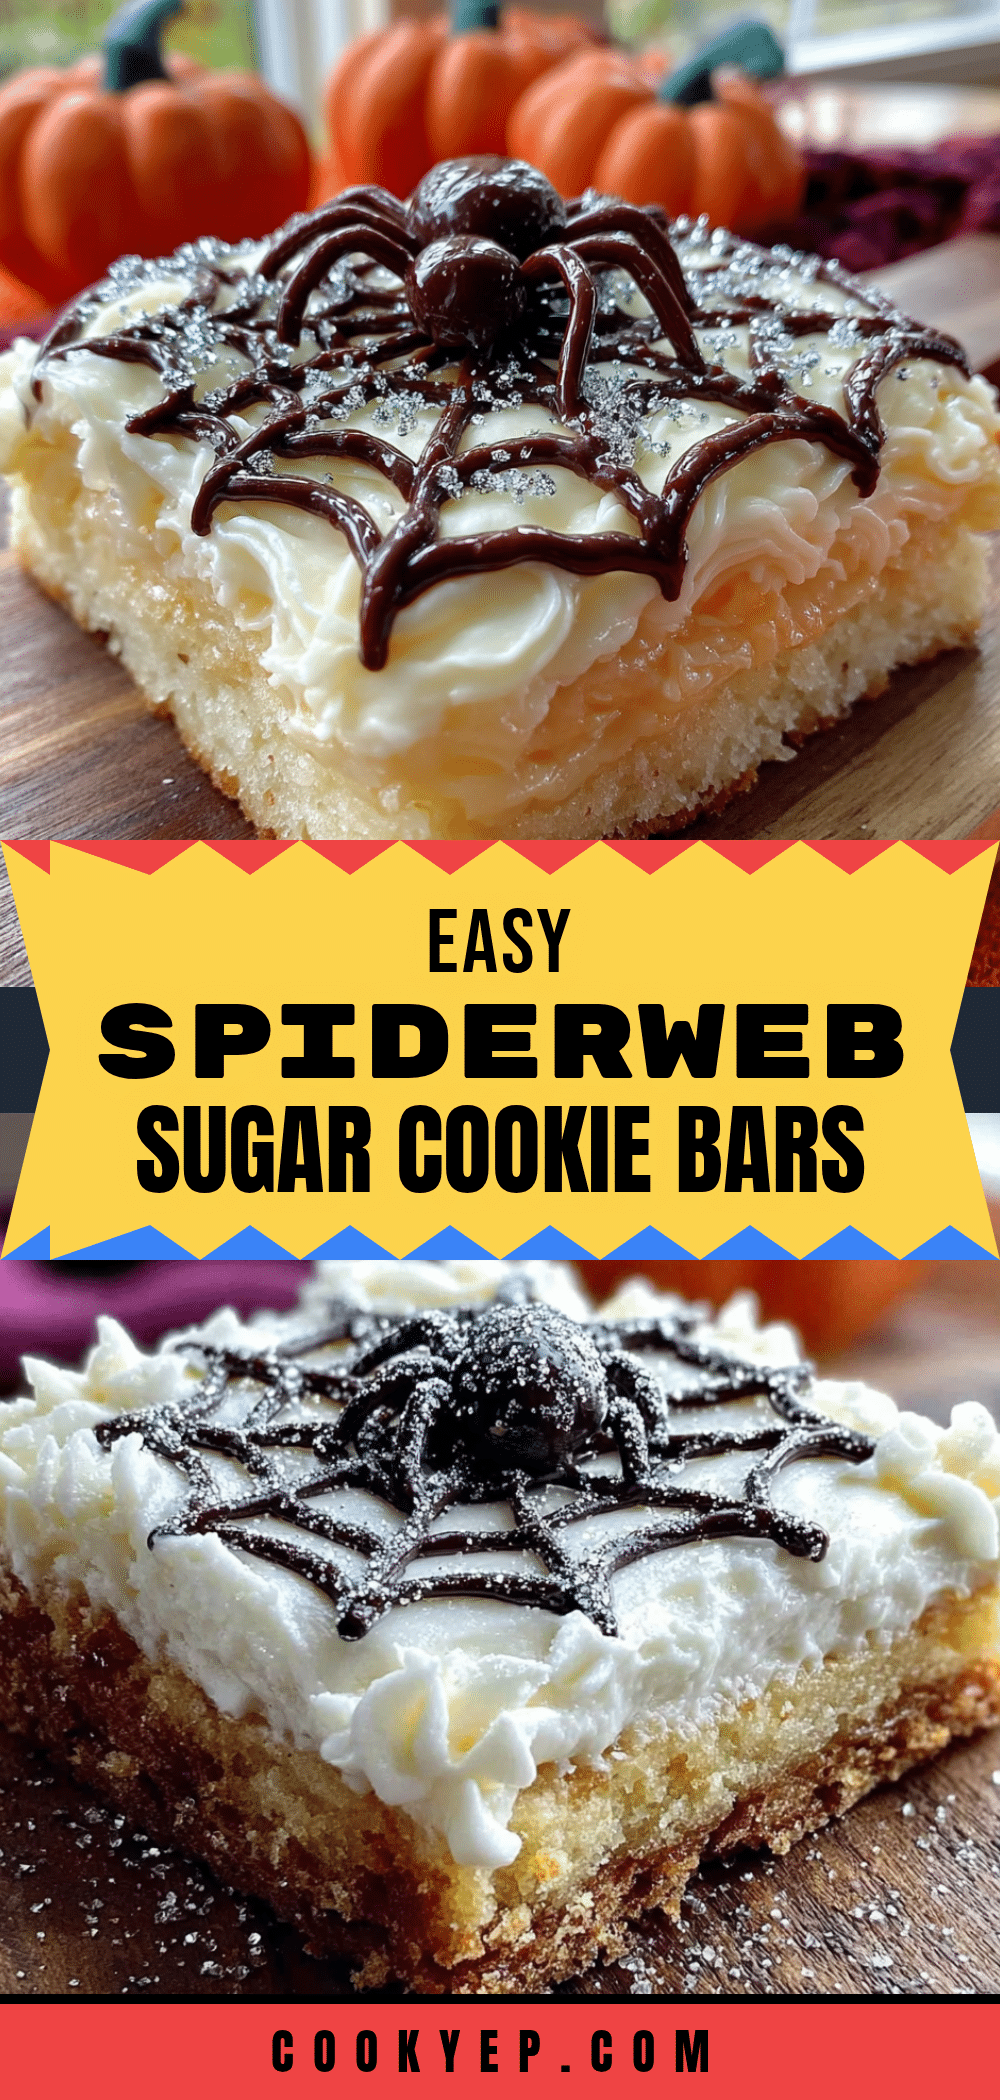
Easy Spiderweb Sugar Cookie Bars – Perfect Halloween Dessert
These Easy Spiderweb Sugar Cookie Bars are soft, buttery, and topped with a creamy vanilla frosting and a chocolate spiderweb. They’re the perfect no-fuss Halloween dessert that looks impressive but comes together quickly with simple pantry ingredients.
- Prep Time: 15 minutes
- Cook Time: 20 minutes
- Total Time: 35 minutes
- Yield: 16 servings 1x
- Category: Dessert
- Cuisine: American
Ingredients
- 1 cup (226g) unsalted butter, softened
- 1 cup (200g) granulated sugar
- 1 large egg, room temperature
- 1 teaspoon vanilla extract
- 2 cups (250g) all-purpose flour
- ½ teaspoon baking powder
- ¼ teaspoon salt
- ¼ cup (56g) unsalted butter, softened
- 1½ cups (180g) powdered sugar
- 2–3 tablespoons heavy cream or milk
- ½ teaspoon vanilla extract
- ¼ cup (45g) semi-sweet chocolate chips
- 1 teaspoon coconut oil or vegetable shortening
Instructions
- Preheat your oven to 350°F (175°C). Line a 9×9-inch baking pan with parchment paper, leaving overhang on two sides. Lightly spray exposed pan sides with nonstick spray.
- In a large mixing bowl, beat the softened butter and granulated sugar together on medium speed until light and fluffy, about 2-3 minutes. Scrape the bowl halfway through.
- Add the room temperature egg and vanilla extract. Beat on medium until fully combined, about 30 seconds.
- In a separate bowl, whisk together the flour, baking powder, and salt. Add the dry ingredients to the wet mixture in two additions, mixing on low speed after each. Stop as soon as the flour disappears.
- Transfer the dough to the prepared pan. Use a rubber spatula or lightly floured fingers to press it into an even layer, making sure to fill the corners.
- Bake for 18-22 minutes, until the edges are lightly golden and the center looks set but still soft. A toothpick inserted in the center should come out with a few moist crumbs. Let cool in the pan on a wire rack for 15 minutes, then lift out using the parchment overhang and cool completely.
- In a medium bowl, beat the softened butter until creamy. Add the powdered sugar, vanilla, and 2 tablespoons of heavy cream. Beat on low until combined, then increase to medium and beat for 1-2 minutes until fluffy. Add more cream if needed for spreadable consistency.
- Spread the frosting evenly over the completely cooled cookie base.
- Melt the chocolate chips and coconut oil together in a microwave-safe bowl in 20-second bursts, stirring between each, until smooth. Transfer to a piping bag or zip-top bag and snip a tiny corner.
- Pipe a small circle of chocolate in the center of the frosted bars. Pipe concentric circles around it, spacing them about 1 inch apart (4-5 circles total).
- Take a toothpick and gently drag it from the center circle outward through all the rings, like drawing spokes on a wheel. Repeat every inch or so around the circle. Then drag the toothpick from the outer edge back toward the center between each spoke. Wipe the toothpick clean between each drag.
- Let the chocolate set at room temperature for about 30 minutes, or refrigerate for 15 minutes. Use a sharp knife to slice into 16 squares, wiping the knife between each slice.
Notes
Don’t overbake—pull bars out when edges are just golden and center is still soft. Room temperature ingredients are important for proper creaming. Practice the spiderweb pattern on a plate first. Clean your toothpick between each drag for clean lines. Bars taste even better the next day.
Nutrition
- Serving Size: 1 bar
- Calories: 275
- Sugar: 24
- Sodium: 95
- Fat: 14
- Saturated Fat: 9
- Carbohydrates: 36
- Protein: 2
Keywords: spiderweb sugar cookie bars, Halloween dessert, easy sugar cookie bars, spiderweb cookies, Halloween bars


