“You really put peanut butter in the holes?” My sister-in-law stood over the counter, one eyebrow raised, watching me pour a warm, glossy mixture of sweetened condensed milk and peanut butter over a freshly baked chocolate cake. I had just poked holes all over it with the end of a wooden spoon—a step that, honestly, looks a little ridiculous if you’ve never seen it before.
She was skeptical. I get it. The whole concept of a poke cake sounds almost wrong at first. You bake a cake, poke holes in it, and then pour something delicious into those holes so it soaks in from the inside out. But that first bite? The one where the chocolate cake crumbles against your teeth and this creamy, peanut buttery sweetness seeps through? She stopped questioning and just reached for another slice.
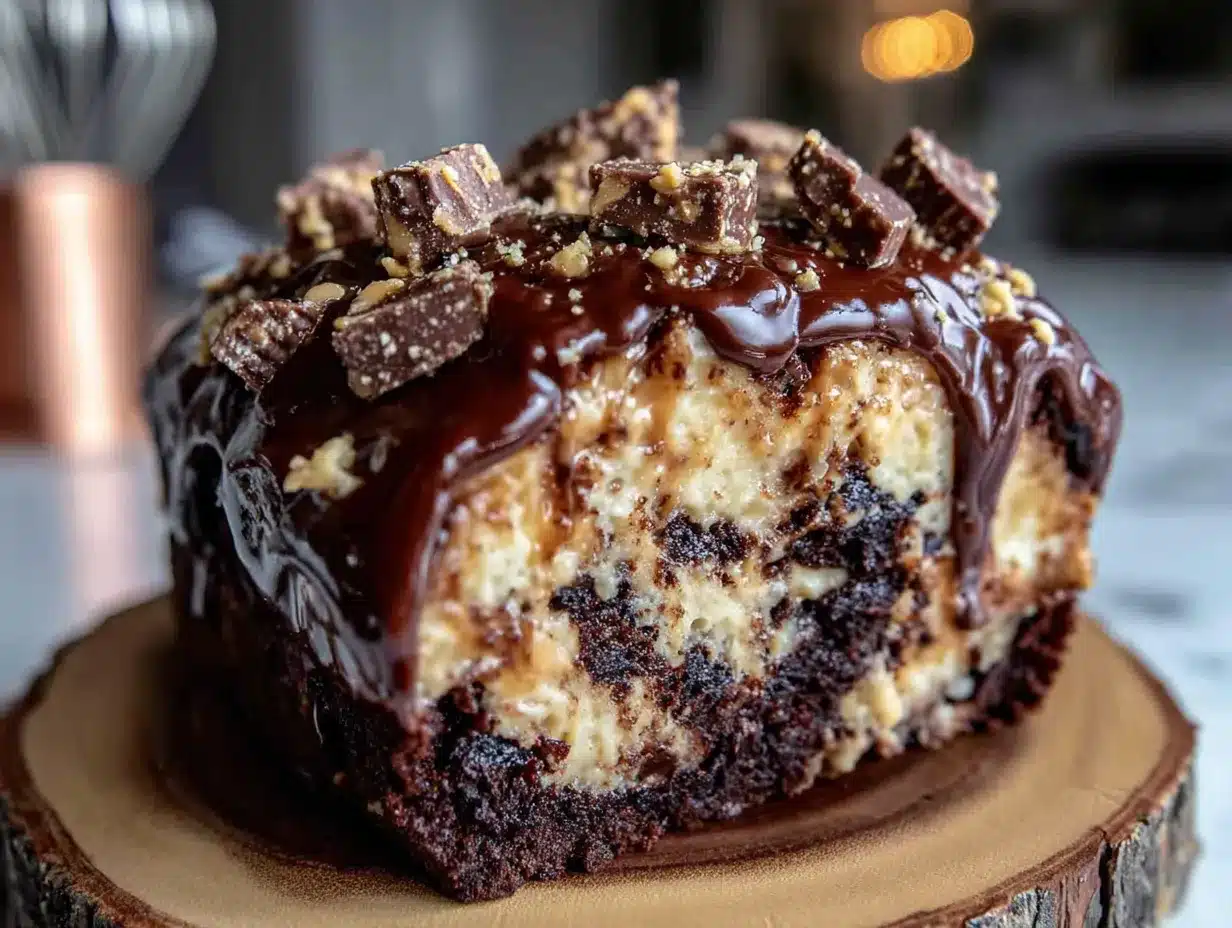
That moment is exactly why this Ultimate Reese’s Peanut Butter Poke Cake became a staple in my kitchen. It’s not fancy. It’s not complicated. But it delivers exactly what you’re hoping for—rich chocolate, creamy peanut butter, and that signature Reese’s cup crunch on top. It’s the kind of dessert that disappears before you’ve even had a chance to sit down.
And honestly? That’s my favorite kind of recipe to share.
Why You’ll Love This Recipe
This isn’t just another chocolate cake recipe. This is the cake that gets requested for birthdays, potlucks, and random Tuesday nights when you need something sweet. Here’s why it works so well:
- Incredibly Moist: The sweetened condensed milk and peanut butter mixture seeps into every single hole, creating a cake that stays moist for days. No dry crumbs here.
- Simple Ingredients: You probably already have most of these in your pantry. No fancy extracts or hard-to-find specialty items.
- Quick to Assemble: From start to finish, you’re looking at about 45 minutes of active time. The oven does most of the work.
- Perfect for Crowds: This cake feeds a lot of people. It’s ideal for family gatherings, holiday dinners, or any event where you need a dessert that everyone will love.
- That Reese’s Factor: Let’s be real—the combination of chocolate and peanut butter is iconic. Adding chopped Reese’s cups on top takes it from good to unforgettable.
I’ve tested this recipe more times than I can count, tweaking the ratios and the timing until everything landed just right. The cake bakes up tender, the filling soaks in perfectly without making the bottom soggy, and the chocolate ganache on top sets to a glossy, fudgy finish. It’s the kind of dessert that makes people close their eyes when they take a bite. That’s the reaction you want.
What Ingredients You Will Need
This recipe uses simple, everyday ingredients to create something that tastes anything but ordinary. Most of these are pantry staples, which makes this cake an easy last-minute dessert option.
For the Cake
- 1 box (15.25 oz) chocolate cake mix (I prefer Duncan Hines or Betty Crocker for consistent results)
- 3 large eggs (room temperature helps them mix in more evenly)
- 1 cup water
- 1/3 cup vegetable oil
- 1 cup sour cream (this is my secret for an extra-moist, tender crumb)
For the Peanut Butter Filling
- 1 can (14 oz) sweetened condensed milk
- 3/4 cup creamy peanut butter (Jif or Skippy work great—avoid natural peanut butter that separates, as it can make the filling grainy)
- 1 teaspoon vanilla extract
For the Topping
- 1 1/2 cups heavy cream
- 1 1/2 cups semi-sweet chocolate chips
- 1 cup chopped Reese’s peanut butter cups (about 8-10 mini cups or 4 regular-sized cups)
- 1/4 cup chopped salted peanuts (optional, for extra crunch)
Ingredient Notes: Using a boxed cake mix here is intentional. It keeps the recipe approachable and ensures a consistent texture every time. If you want to use a homemade chocolate cake recipe, go for it—just make sure it’s sturdy enough to hold up to the poking and pouring. The sour cream adds richness and moisture without making the cake heavy. And for the peanut butter filling, stick with a processed brand for the smoothest result. Natural peanut butter can separate during heating and leave you with a greasy, uneven filling.
Equipment Needed
You don’t need a lot of fancy equipment for this cake, which is part of its charm.
- 9×13-inch baking pan (metal or glass both work—just adjust baking time slightly for glass)
- Mixing bowls (one large, one medium)
- Whisk or electric mixer (a hand mixer makes the cake batter quicker, but a whisk works fine)
- Wooden spoon or skewer (for poking holes—the end of a wooden spoon is my favorite tool)
- Saucepan (for heating the filling and making the ganache)
- Spatula (for spreading the ganache evenly)
- Measuring cups and spoons
If you don’t have a hand mixer, you can absolutely mix the cake batter by hand with a whisk. It takes a little more elbow grease, but the results are the same. For the ganache, a small saucepan works perfectly, but you can also melt the chocolate and cream together in the microwave in 30-second bursts. Just stir well between each interval.
Preparation Method
Follow these steps carefully, and you’ll have a cake that looks like it came from a bakery.
- Preheat and Prep: Preheat your oven to 350°F (175°C). Grease your 9×13-inch baking pan thoroughly with butter or non-stick spray. If you want extra insurance, line the bottom with parchment paper, leaving some overhang on the sides for easy lifting later.
- Make the Cake Batter: In a large bowl, combine the chocolate cake mix, eggs, water, vegetable oil, and sour cream. Mix on medium speed with a hand mixer for about 2 minutes, or whisk vigorously by hand for about 3 minutes, until the batter is smooth and well-combined. The sour cream makes the batter slightly thicker than usual—that’s exactly what you want.
- Bake the Cake: Pour the batter into your prepared pan and spread it evenly. Bake for 28-32 minutes, or until a toothpick inserted into the center comes out with just a few moist crumbs attached. Don’t overbake—a slightly underdone cake is better than a dry one here. Let the cake cool in the pan on a wire rack for 10 minutes.
- Poke Those Holes: While the cake is still warm (this is crucial), use the end of a wooden spoon or a skewer to poke holes all over the cake. Space them about 1 inch apart. Don’t be shy—poke all the way to the bottom of the pan. The more holes, the more filling gets absorbed.
- Make the Peanut Butter Filling: In a small saucepan over medium-low heat, combine the sweetened condensed milk and creamy peanut butter. Stir constantly until the mixture is smooth, warm, and well-combined—about 3-4 minutes. Remove from heat and stir in the vanilla extract. The mixture should be pourable but thick.
- Pour the Filling: Slowly pour the warm peanut butter mixture over the entire surface of the cake, making sure it gets into all the holes. Use a spatula to spread it evenly if needed. Don’t worry if some pools on top—that’s part of the magic. Let the cake cool completely at room temperature, about 1-2 hours. This allows the filling to fully soak in.
- Make the Chocolate Ganache: In a small saucepan, heat the heavy cream over medium heat until it just begins to simmer—small bubbles around the edge, not a full boil. Remove from heat and pour over the chocolate chips in a heatproof bowl. Let it sit for 2-3 minutes, then stir gently until smooth and glossy. If the chocolate doesn’t fully melt, microwave in 15-second bursts, stirring between each.
- Top the Cake: Pour the ganache over the cooled cake and spread it evenly with a spatula. While the ganache is still wet, sprinkle the chopped Reese’s cups and salted peanuts (if using) evenly over the top. The ganache will set as it cools, holding the toppings in place.
- Chill and Set: Refrigerate the cake for at least 2 hours before serving. This allows everything to set properly and makes slicing much cleaner. The cake is actually even better the next day—the flavors meld together beautifully overnight.
Cooking Tips & Techniques
I’ve made this cake more times than I can count, and I’ve learned a few things along the way. Here are the tips that make the biggest difference:
- Don’t Skip the Sour Cream: This is non-negotiable in my kitchen. The sour cream adds moisture and a slight tang that balances the sweetness of the filling and ganache. Your cake will be noticeably denser and more tender with it.
- Poke While Warm: If you let the cake cool completely before poking, the holes won’t hold their shape as well, and the filling won’t soak in as effectively. Poking while the cake is still warm creates clean holes that absorb the filling beautifully.
- Use a Wooden Spoon Handle: A skewer makes holes that are too small. A chopstick is better, but the handle of a wooden spoon creates the perfect size hole—big enough to hold filling, small enough that the cake doesn’t fall apart.
- Pour Slowly: When adding the filling, pour it in a thin stream and let it settle into the holes before adding more. If you dump it all at once, it tends to pool on top and not penetrate as deeply.
- Chill Completely: I know it’s tempting to cut into this cake right away, but trust me—chilling it fully makes a massive difference. The ganache sets properly, the filling firms up, and the slices come out clean and beautiful.
I once rushed the chilling step for a party and ended up with a beautiful but messy cake that collapsed into a puddle of delicious chaos on the serving platter. It still tasted amazing, but it wasn’t the prettiest presentation. Lesson learned.
Variations & Adaptations
This recipe is incredibly flexible. Here are some ways to make it your own:
- Gluten-Free Version: Use a gluten-free chocolate cake mix and double-check that your peanut butter and chocolate chips are certified gluten-free. The rest of the ingredients are naturally gluten-free.
- Extra Peanut Butter Kick: Stir 1/2 cup of creamy peanut butter into the ganache before pouring it over the cake. This gives you a peanut butter-chocolate swirl effect that’s absolutely divine.
- Chocolate Lover’s Twist: Use a dark chocolate cake mix and dark chocolate chips for the ganache. The bitterness of the dark chocolate balances the sweetness of the filling beautifully.
- Nut-Free Option: Substitute the Reese’s cups with chocolate chips or chopped chocolate candy bars that don’t contain nuts. Omit the chopped peanuts on top.
- Add Some Crunch: Mix 1/2 cup of crushed pretzels into the topping for a salty-sweet crunch that contrasts perfectly with the soft cake.
I once made a version with a layer of triple chocolate mousse on top instead of the ganache, and it was absolutely over-the-top decadent. If you’re feeling extra indulgent, it’s a fun variation to try.
Serving & Storage Suggestions
This cake is best served cold or at room temperature. Here’s how to handle it:
- Serving Temperature: Straight from the fridge, the cake is firm and slices cleanly. Let it sit at room temperature for about 15-20 minutes before serving if you prefer a softer, more luscious texture.
- Presentation: For clean slices, use a sharp knife and wipe it clean between each cut. A warm knife (run it under hot water and dry it off) makes even cleaner cuts through the ganache.
- Storage: Cover the cake tightly with plastic wrap or aluminum foil and store it in the refrigerator for up to 5 days. The cake actually gets better after a day or two as the flavors continue to meld.
- Freezing: This cake freezes beautifully. Wrap individual slices or the whole cake (without toppings) in plastic wrap, then foil, and freeze for up to 3 months. Thaw in the refrigerator overnight before adding the ganache and toppings.
- Reheating: If you want a warm slice, microwave individual pieces for 15-20 seconds. The chocolate ganache gets slightly melty, and the cake becomes extra soft. It’s a completely different experience from the cold version—both are amazing.
The flavors in this cake develop over time. The peanut butter filling soaks deeper into the cake, the chocolate ganache sets to a fudgy consistency, and everything becomes more cohesive. If you can resist eating it all on day one, day two is even better.
Nutritional Information & Benefits
Let’s be honest—this is a dessert, not a health food. But knowing what’s in it helps you enjoy it mindfully.
| Nutrient | Per Serving (1/12 of cake) |
|---|---|
| Calories | 485 |
| Total Fat | 28g |
| Saturated Fat | 12g |
| Cholesterol | 65mg |
| Sodium | 410mg |
| Total Carbohydrates | 52g |
| Dietary Fiber | 3g |
| Sugars | 36g |
| Protein | 10g |
On the positive side, peanut butter provides a good amount of protein and healthy fats, and dark chocolate contains antioxidants. But this is definitely a treat—something to enjoy in moderation, not as a daily staple. I like to serve it with fresh berries on the side for a little brightness and a touch of acidity that cuts through the richness.
If you’re looking for something a bit lighter to balance out the indulgence, try serving this cake alongside a sparkling citrus ginger mojito mocktail for a refreshing contrast.
Conclusion
This Ultimate Reese’s Peanut Butter Poke Cake is everything a dessert should be—rich, indulgent, and surprisingly easy to make. It’s the kind of cake that makes people ask for the recipe before they’ve even finished their first slice. The combination of moist chocolate cake, creamy peanut butter filling, and fudgy chocolate ganache is absolutely irresistible.
I love that this recipe doesn’t require any special skills or complicated techniques. Anyone can make it, and it always turns out amazing. Whether you’re baking for a birthday, a holiday, or just because you need a chocolate fix, this cake delivers every single time.
I’d love to hear how yours turns out! Leave a comment below and let me know if you tried any variations—I’m always looking for new ideas to test in my kitchen. And if you’re looking for more crowd-pleasing desserts, check out the full recipe collection for more inspiration.
Happy baking, friends. Go make something delicious.
Frequently Asked Questions
Can I make this cake ahead of time?
Absolutely. In fact, this cake is better when made a day in advance. The flavors meld together beautifully overnight. Just keep it covered in the refrigerator and add any fresh toppings right before serving.
Can I use homemade chocolate cake instead of a box mix?
Yes, you can substitute your favorite homemade chocolate cake recipe. Just make sure it’s a sturdy cake that can hold up to the poking and filling. A lighter, fluffier cake might fall apart. Also, adjust the baking time as needed for your specific recipe.
Why did my filling not soak into the cake?
This usually happens if the cake has cooled too much before you poke the holes and add the filling. The cake needs to be warm so the holes stay open and the filling can seep in. Also, make sure you’re poking the holes all the way to the bottom of the pan.
Can I freeze this cake?
Yes, this cake freezes well. For best results, freeze the cake before adding the ganache and toppings. Wrap it tightly in plastic wrap and then foil. When you’re ready to serve, thaw it in the refrigerator overnight, then add the ganache and toppings fresh.
How do I get clean slices?
Chill the cake thoroughly—at least 2 hours, preferably overnight. Use a sharp knife and wipe it clean with a damp paper towel between each cut. For the cleanest slices, run your knife under hot water, dry it off, and make your cut while the blade is still warm.
Pin This Recipe!

Reeses Peanut Butter Poke Cake: Easy & Homemade

This Ultimate Reese’s Peanut Butter Poke Cake is a rich, indulgent dessert featuring moist chocolate cake soaked with a creamy peanut butter filling and topped with fudgy chocolate ganache and chopped Reese’s cups. It’s surprisingly easy to make and perfect for crowds.
- Prep Time: 15 minutes
- Cook Time: 30 minutes
- Total Time: 45 minutes (plus 2 hours chilling)
- Yield: 12 servings 1x
- Category: Dessert
- Cuisine: American
Ingredients
- 1 box (15.25 oz) chocolate cake mix
- 3 large eggs, room temperature
- 1 cup water
- 1/3 cup vegetable oil
- 1 cup sour cream
- 1 can (14 oz) sweetened condensed milk
- 3/4 cup creamy peanut butter (Jif or Skippy recommended)
- 1 teaspoon vanilla extract
- 1 1/2 cups heavy cream
- 1 1/2 cups semi-sweet chocolate chips
- 1 cup chopped Reese’s peanut butter cups (about 8–10 mini cups or 4 regular-sized cups)
- 1/4 cup chopped salted peanuts (optional)
Instructions
- Preheat oven to 350°F (175°C). Grease a 9×13-inch baking pan thoroughly with butter or non-stick spray. Optionally, line with parchment paper for easy removal.
- In a large bowl, combine chocolate cake mix, eggs, water, vegetable oil, and sour cream. Mix on medium speed with a hand mixer for 2 minutes, or whisk vigorously by hand for 3 minutes, until smooth.
- Pour batter into prepared pan and spread evenly. Bake for 28-32 minutes, or until a toothpick inserted in the center comes out with a few moist crumbs. Let cool in pan on a wire rack for 10 minutes.
- While cake is still warm, use the end of a wooden spoon or a skewer to poke holes all over the cake, spacing them about 1 inch apart and poking all the way to the bottom of the pan.
- In a small saucepan over medium-low heat, combine sweetened condensed milk and creamy peanut butter. Stir constantly until smooth and warm, about 3-4 minutes. Remove from heat and stir in vanilla extract.
- Slowly pour the warm peanut butter mixture over the entire surface of the cake, ensuring it fills the holes. Use a spatula to spread evenly if needed. Let cake cool completely at room temperature, about 1-2 hours.
- In a small saucepan, heat heavy cream over medium heat until it just begins to simmer. Remove from heat and pour over chocolate chips in a heatproof bowl. Let sit for 2-3 minutes, then stir until smooth and glossy. If needed, microwave in 15-second bursts, stirring between each.
- Pour ganache over cooled cake and spread evenly with a spatula. While ganache is still wet, sprinkle chopped Reese’s cups and optional salted peanuts on top.
- Refrigerate cake for at least 2 hours before serving. For best results, chill overnight to allow flavors to meld.
Notes
Use a processed peanut butter brand like Jif or Skippy for the smoothest filling. Natural peanut butter can separate and cause a grainy texture. Poke holes while the cake is still warm for best absorption. Chill thoroughly before slicing for clean pieces. The cake can be made a day ahead and actually tastes better the next day.
Nutrition
- Serving Size: 1/12 of cake
- Calories: 485
- Sugar: 36
- Sodium: 410
- Fat: 28
- Saturated Fat: 12
- Carbohydrates: 52
- Fiber: 3
- Protein: 10
Keywords: Reese's peanut butter poke cake, chocolate peanut butter cake, poke cake, easy dessert, chocolate cake with peanut butter filling


