Third time in six days and I finally stopped overcooking the panko. The first batch came out looking like golden little soldiers—beautiful, uniform, and dry as a desert cracker. Second time I pulled them early, and the coating slid right off like a bad toupee. But this time? The crust cracked when I bit into it, and the inside was so juicy I actually said “oh” out loud. Alone. In my kitchen. At 7 PM on a Tuesday.
I wasn’t even trying to perfect a recipe. I just wanted chicken tenders that didn’t require standing over a pot of spitting oil. You know the drill—you crave that crunch, but you don’t want your whole house smelling like a fast-food joint for two days. And honestly, I was tired of the baked versions that promised “crispy” and delivered “slightly less sad.”
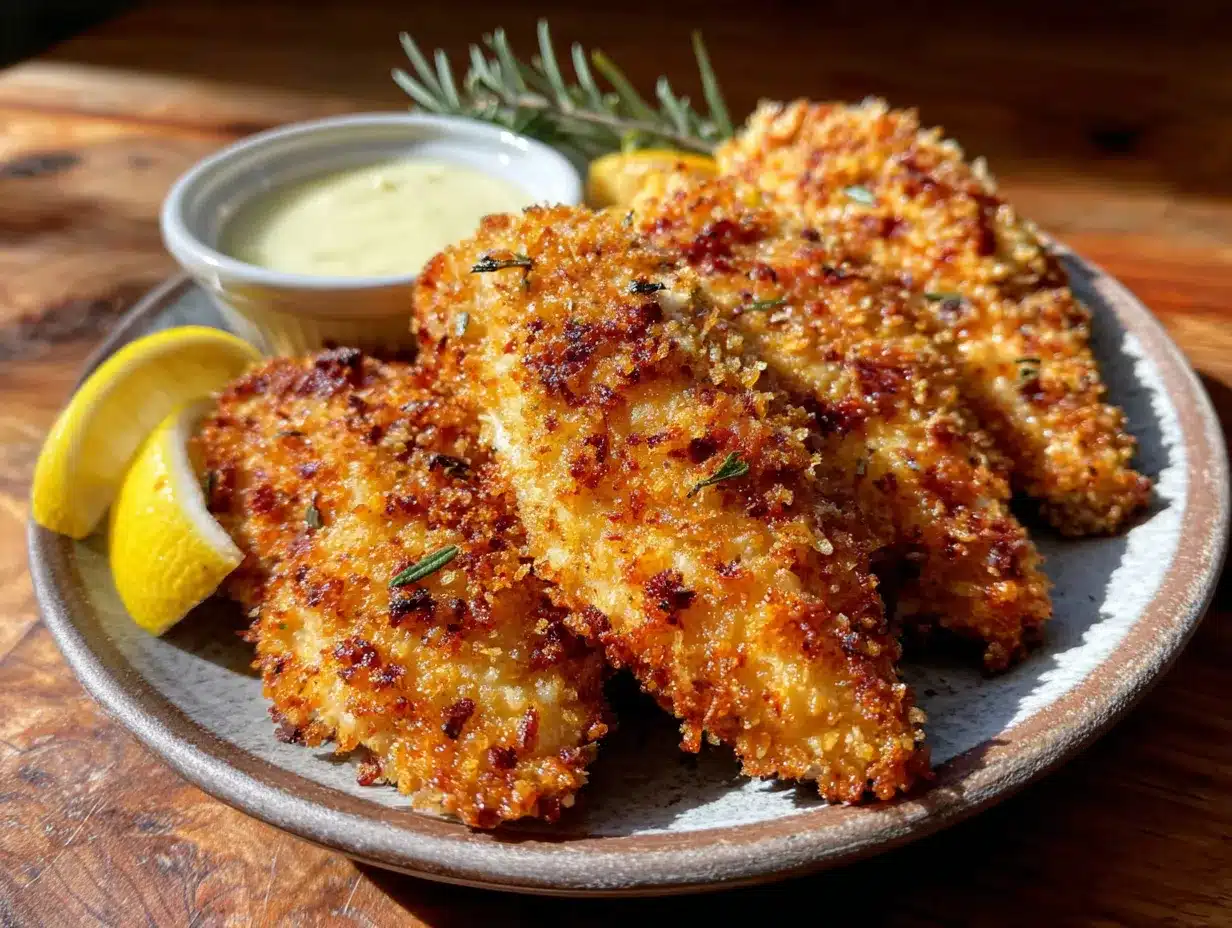
So I went back to basics. Buttermilk soak. Double-coating method. A wire rack situation that changed everything. These crispy baked chicken breast tenders crackle when you bite them. They’re salty, satisfying, and made with stuff you probably already have in your pantry. No deep fryer required. No grease burns. Just really good chicken tenders that make you wonder why you ever bothered with the fryer in the first place.
Sometimes the best recipes come from being stubborn. This one stuck because it actually works.
Why You’ll Love This Recipe
Look, I’ve tested a lot of baked chicken tender recipes. Some were okay. Some were sad. These are the ones I keep coming back to, and here’s why they’re different.
- Quick & Easy: From fridge to table in about 30 minutes flat. Perfect for those nights when you need dinner on the table before everyone starts asking what’s for dinner.
- Simple Ingredients: No weird specialty flours or hard-to-find seasonings. Just pantry staples you probably have right now. (Seriously, go check.)
- Perfect for Meal Prep: Make a big batch on Sunday, and you’ve got lunches or quick dinners all week. They reheat beautifully—more on that later.
- Crowd-Pleaser: My picky-eater nephew asked for seconds. My health-conscious sister asked for the recipe. That’s a win-win.
- Unbelievably Crispy: This is the part that gets people. No oil bath, yet the crust shatters when you bite into it. The secret is in the technique, not the grease.
What makes this recipe different from the rest? It’s the double-coating method combined with a buttermilk soak. The buttermilk tenderizes the chicken and helps the coating stick. The double dip—flour, then egg, then panko mixture—creates those craggy, crunchy edges that hold onto every bit of dipping sauce. And baking on a wire rack? That’s the game-changer. Air circulates all around each tender, so you get crispy on all sides, not just the top.
This isn’t just another version of baked chicken tenders. It’s the version that makes you forget you wanted fried in the first place.
What Ingredients You Will Need
This recipe uses simple, wholesome ingredients to deliver bold flavor and satisfying crunch without the fuss. Most of these are pantry staples, which means you can whip these up anytime the craving hits.
For the Chicken & Marinade
- 1½ pounds boneless, skinless chicken breasts (about 2 large breasts) – Look for even thickness so they cook uniformly. If they’re super thick, butterfly them or pound them to about ½-inch thickness.
- 1 cup buttermilk – This is the secret weapon. Buttermilk tenderizes the chicken and helps the coating stick. No buttermilk? Use 1 cup regular milk mixed with 1 tablespoon lemon juice or white vinegar. Let it sit 5 minutes.
- 1 teaspoon salt – For the brine. Don’t skip it.
- ½ teaspoon black pepper – Freshly ground if you’ve got it.
- ½ teaspoon garlic powder – Adds savory depth.
For the Coating
- ½ cup all-purpose flour – Creates the base layer that helps everything stick. Gluten-free all-purpose blend works too.
- 2 large eggs – The glue that holds the panko in place.
- 1 tablespoon water – Thins the egg wash slightly for easier coating.
- 1½ cups panko breadcrumbs – Regular breadcrumbs won’t give you the same crunch. Panko is non-negotiable here. I prefer Kikkoman brand for the flakiest texture.
- ½ cup grated Parmesan cheese – Adds salty, nutty flavor and helps the browning. Use the green can stuff or freshly grated—both work.
- 1 teaspoon paprika – Sweet or smoked, your call. Smoked adds a subtle depth.
- ½ teaspoon onion powder – Rounds out the savory notes.
- ¼ teaspoon cayenne pepper – Optional, but I love the tiny kick. Leave it out if you’re feeding kids or sensitive palates.
- ½ teaspoon salt – Don’t forget the coating needs salt too.
- ¼ teaspoon black pepper – A little more for the crust.
For Cooking
- Olive oil spray – Or any cooking spray. This is what helps the panko get golden and crispy without deep frying. Avocado oil spray works great too.
Substitution guidance: For a gluten-free version, use gluten-free all-purpose flour and gluten-free panko. Swap the Parmesan with nutritional yeast for a dairy-free option (though the texture will be slightly different). If you’re watching sodium, reduce the salt in the marinade and coating by half.
Equipment Needed
You don’t need much for this recipe, which is part of why I love it. Here’s what you’ll want to have on hand:
- Baking sheet – A standard half-sheet pan works perfectly. Line it with foil or parchment for easier cleanup.
- Wire cooling rack – This is crucial. A rack that fits inside your baking sheet allows air to circulate around the chicken, giving you crispy tenders on all sides. No rack? You can bake directly on the sheet, but you’ll need to flip them halfway through.
- Three shallow bowls – For the flour, egg wash, and panko mixture. Pie plates or wide soup bowls work great.
- Tongs – For transferring chicken from bowl to bowl without making a mess of your fingers.
- Meat mallet or rolling pin – For pounding chicken to even thickness. Not strictly necessary, but helpful.
- Sharp knife and cutting board – For trimming and cutting the chicken into strips.
Budget-friendly tip: If you don’t have a wire rack, you can crinkle up some aluminum foil into snake shapes and lay them on the baking sheet to create a makeshift rack. It’s not perfect, but it works in a pinch.
Preparation Method
Alright, let’s get cooking. I’ve tested this method about a dozen times, so trust me on the order of operations here.
- Prep the chicken – Trim any excess fat from the chicken breasts. Cut them lengthwise into strips about 1 inch wide and 3-4 inches long. You should get 4-5 strips per breast. If some pieces are thicker than others, place them between plastic wrap and gently pound to even thickness with a meat mallet or rolling pin. This ensures even cooking.
- Buttermilk soak – In a medium bowl, combine the buttermilk, 1 teaspoon salt, ½ teaspoon black pepper, and ½ teaspoon garlic powder. Add the chicken strips, making sure they’re fully submerged. Cover and refrigerate for at least 30 minutes, or up to 4 hours. The longer the soak, the more tender and flavorful the chicken gets. (I’ve done 8 hours before—still great.)
- Set up your breading station – Get three shallow bowls ready. In the first, add the ½ cup flour. In the second, whisk together the 2 eggs and 1 tablespoon water until smooth. In the third, combine the panko, Parmesan, paprika, onion powder, cayenne (if using), ½ teaspoon salt, and ¼ teaspoon pepper. Mix with your fingers to distribute everything evenly.
- Preheat the oven – Set your oven to 425°F (220°C). Place a wire rack on a baking sheet and spray it lightly with olive oil spray. This prevents sticking and helps the bottom get crispy.
- Bread the chicken – Working with one strip at a time, let excess buttermilk drip off. Dredge in flour, shaking off any excess. Dip into the egg wash, letting excess drip off again. Finally, press into the panko mixture, coating all sides. Place on the prepared rack. Repeat with all strips. Pro tip: Use one hand for dry ingredients and one hand for wet to avoid clumpy fingers. You’re welcome.
- Spray and bake – Once all tenders are on the rack, spray the tops generously with olive oil spray. Don’t be shy here—this is what makes them golden and crispy. Bake for 12 minutes, then flip each tender and spray the other side. Bake for another 10-12 minutes, until the internal temperature reaches 165°F (74°C) and the coating is deep golden brown.
- Rest before serving – Let the tenders rest on the rack for 2-3 minutes. This lets the crust set so it doesn’t slide off when you bite into it. I learned this the hard way.
Sensory cues: After the first 12 minutes, the coating should look set and lightly golden, not pale. When you flip them, the bottom should be slightly firm to the touch. The finished tenders should look craggy and browned in spots—that’s where the flavor lives.
Cooking Tips & Techniques
I’ve made every mistake in the book with these tenders, so you don’t have to. Here’s what I’ve learned:
Don’t skip the buttermilk soak. I tried skipping it once because I was in a hurry. The coating fell off in big sheets, and the chicken was dry. The buttermilk isn’t just for flavor—it’s structural. The acid tenderizes the meat and helps the flour stick. If you’re really short on time, 15 minutes is better than nothing, but 30 minutes is the sweet spot.
Let the excess drip off. After each coating step, let the excess drip back into the bowl. Too much flour or egg wash creates a gummy layer that steams instead of crisps. You want a thin, even coating.
Don’t overcrowd the rack. Leave at least ½ inch between each tender. If they’re touching, they’ll steam each other and you’ll lose that crunch. Use two racks if you need to.
Spray, then spray again. The oil spray is doing the work of deep frying here. If you skimp, you’ll get pale, sad tenders. Be generous on both sides.
Use a meat thermometer. Chicken breasts are lean and dry out fast. Pull them at 165°F (74°C) and no higher. I use a Thermapen instant-read thermometer, and it’s saved more dinners than I can count.
My biggest failure: I once baked these at 375°F because I was worried about burning. They took forever to cook, the coating got soggy, and I ended up ordering pizza. High heat is non-negotiable for crispy results. Trust the 425°F.
Variations & Adaptations
Once you’ve got the basic method down, the possibilities are endless. Here are some of my favorite twists:
- Spicy Buffalo Tenders: Add 2 tablespoons of hot sauce (Frank’s RedHot is my go-to) to the buttermilk marinade. Toss the baked tenders in extra hot sauce mixed with melted butter. Serve with blue cheese dip.
- Honey Garlic Glaze: Whisk together ¼ cup honey, 2 tablespoons soy sauce, 2 minced garlic cloves, and a pinch of red pepper flakes. Brush onto the tenders during the last 5 minutes of baking. Sweet, salty, sticky perfection.
- Parmesan Herb Crust: Add 1 tablespoon dried Italian seasoning and 2 extra tablespoons of Parmesan to the panko mixture. Serve with marinara for a chicken parmesan vibe.
- Gluten-Free Version: Use gluten-free all-purpose flour and gluten-free panko (I like Aleia’s brand). Everything else stays the same. The texture is slightly less crunchy but still delicious.
- Air Fryer Adaptation: Cook at 400°F (200°C) for 10-12 minutes, flipping halfway through. No need to spray the rack because the air fryer basket provides plenty of air circulation. They come out even crispier, honestly.
My personal favorite variation? The honey garlic glaze. I made it on a whim one night when I was craving something sweet and savory, and now I can’t go back. It turns these simple tenders into something that feels restaurant-worthy.
Serving & Storage Suggestions
These tenders are best served hot, right off the rack, while the crust is still crackling. But they’re also pretty great at room temperature, which makes them perfect for picnics or lunchboxes.
Serving ideas: Pile them on a platter with a few dipping sauces—honey mustard, ranch, barbecue, and sriracha mayo are my favorites. Serve alongside a crisp creamy dill cucumber salad for a refreshing contrast, or with cozy tomato basil soup for dipping. For a game-day spread, arrange them on a board with easy loaded football charcuterie board elements.
Storage: Store leftovers in an airtight container in the refrigerator for up to 4 days. The coating will soften slightly, but they’ll still be tasty.
Reheating: The air fryer is your best friend here. Reheat at 375°F (190°C) for 3-4 minutes until hot and crispy. In the oven, place them on a wire rack over a baking sheet at 400°F (200°C) for 5-7 minutes. Avoid the microwave—it turns them into sad, rubbery things.
Freezing: These freeze beautifully. Place the baked and cooled tenders on a baking sheet in a single layer and freeze until solid (about 2 hours). Transfer to a freezer bag for up to 3 months. Reheat directly from frozen in the air fryer or oven—add 2-3 minutes to the reheating time.
Flavor note: The tenders actually get more flavorful after a day in the fridge as the seasoning melds with the chicken. Day-old leftovers make amazing chicken salad or sliced over a green salad.
Nutritional Information & Benefits
Here’s the breakdown for one serving (about 3-4 tenders, based on the recipe making 12 total):
- Calories: 385
- Protein: 42g
- Carbohydrates: 28g
- Fat: 12g
- Saturated Fat: 4g
- Fiber: 2g
- Sodium: 780mg
These tenders are a solid source of lean protein, which helps keep you full and supports muscle repair. The buttermilk adds calcium and probiotics (if using traditional fermented buttermilk). Panko breadcrumbs are lower in fat than traditional breadcrumbs because they absorb less oil during baking.
Dietary considerations: This recipe is nut-free and can be made gluten-free and dairy-free with the substitutions mentioned above. It’s not low-carb due to the breading, but you could try a crushed pork rind or almond flour coating for a keto-friendly version.
Personal note: I love that this recipe lets me enjoy a comfort food classic without the guilt of deep frying. It’s still indulgent, but in a way that feels balanced. My body thanks me, and my taste buds don’t know the difference.
Conclusion
These crispy baked chicken breast tenders are proof that you don’t need a deep fryer to get that satisfying crunch. The buttermilk soak keeps the chicken juicy, the double-coating method builds a crust that actually stays put, and the high-heat oven bake gives you golden, craggy edges that shatter with every bite.
What I love most about this recipe is how adaptable it is. You can keep it simple with just salt and pepper, or go wild with spices and glazes. It works for a quick weeknight dinner, a game-day snack, or meal prep lunches that don’t feel like punishment. And because it’s baked, you can feel a little better about going back for seconds.
I’d love to hear how yours turn out. Did you try a variation? Find a new favorite dipping sauce? Drop a comment below and let me know. And if you’re looking for more easy weeknight dinners, check out this easy one-pan lemon garlic salmon or these slow cooker buffalo chicken sliders.
Now go make some tenders. Your dinner table will thank you.
Frequently Asked Questions
Can I use chicken thighs instead of breasts?
Absolutely! Chicken thighs are more forgiving and stay juicier. The cooking time might be slightly longer (add 2-3 minutes) because they’re typically thicker. Just make sure they reach 165°F (74°C) internally.
Why did my coating fall off?
This usually happens for one of three reasons: you didn’t let the excess buttermilk drip off before flouring, you skipped the buttermilk soak entirely, or you didn’t press the panko mixture firmly enough onto the chicken. Make sure each layer is thin and even, and press the panko in well.
Can I make these ahead of time?
Yes! You can bread the chicken up to 24 hours ahead and refrigerate on the rack (unbaked). Just cover loosely with plastic wrap. When you’re ready to bake, spray with oil and add 2-3 minutes to the baking time since they’re starting cold.
How do I get the panko to stick better?
The key is the flour layer. It acts as a glue between the chicken and the egg wash. Make sure the chicken is still slightly moist from the buttermilk when you dredge in flour, and don’t skip the egg wash step. Pressing the panko mixture firmly onto the chicken also helps.
Can I bake these without a wire rack?
You can, but you’ll need to flip them halfway through and the bottoms won’t be as crispy. Place them directly on a greased baking sheet, bake for 12 minutes, flip carefully, and bake another 10-12 minutes. The rack really does make a difference, though.
Pin This Recipe!
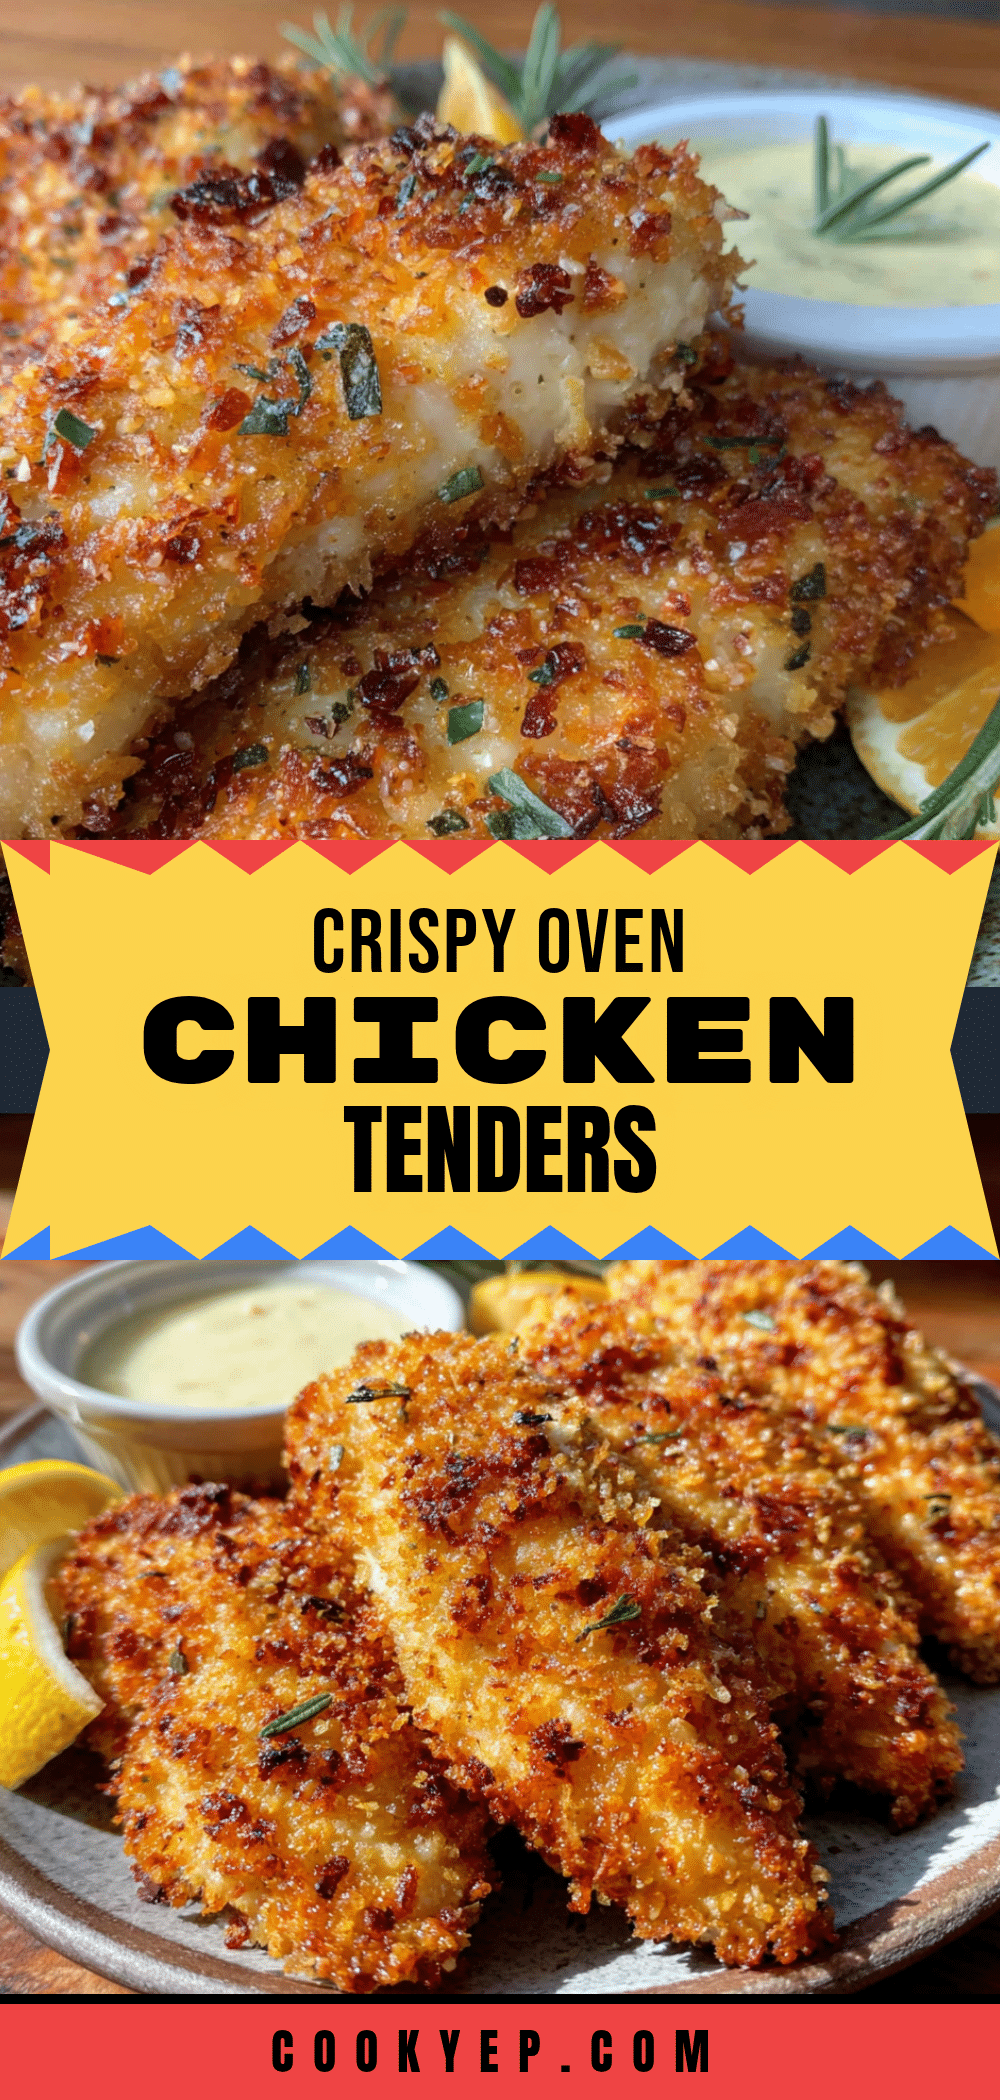
Crispy Baked Chicken Breast Tenders (Easy No-Fry Recipe)
These crispy baked chicken breast tenders crackle when you bite them. They’re salty, satisfying, and made with simple pantry staples—no deep fryer required.
- Prep Time: 15 minutes
- Cook Time: 22-24 minutes
- Total Time: 37-39 minutes (plus 30 minutes marinating)
- Yield: 4 servings 1x
- Category: Main Course
- Cuisine: American
Ingredients
- 1½ pounds boneless, skinless chicken breasts (about 2 large breasts)
- 1 cup buttermilk
- 1 teaspoon salt
- ½ teaspoon black pepper
- ½ teaspoon garlic powder
- ½ cup all-purpose flour
- 2 large eggs
- 1 tablespoon water
- 1½ cups panko breadcrumbs
- ½ cup grated Parmesan cheese
- 1 teaspoon paprika
- ½ teaspoon onion powder
- ¼ teaspoon cayenne pepper (optional)
- ½ teaspoon salt
- ¼ teaspoon black pepper
- Olive oil spray (or any cooking spray)
Instructions
- Prep the chicken: Trim any excess fat from the chicken breasts. Cut them lengthwise into strips about 1 inch wide and 3-4 inches long. If some pieces are thicker than others, place them between plastic wrap and gently pound to even thickness with a meat mallet or rolling pin.
- Buttermilk soak: In a medium bowl, combine the buttermilk, 1 teaspoon salt, ½ teaspoon black pepper, and ½ teaspoon garlic powder. Add the chicken strips, making sure they’re fully submerged. Cover and refrigerate for at least 30 minutes, or up to 4 hours.
- Set up your breading station: Get three shallow bowls ready. In the first, add the ½ cup flour. In the second, whisk together the 2 eggs and 1 tablespoon water until smooth. In the third, combine the panko, Parmesan, paprika, onion powder, cayenne (if using), ½ teaspoon salt, and ¼ teaspoon pepper. Mix with your fingers to distribute everything evenly.
- Preheat the oven: Set your oven to 425°F (220°C). Place a wire rack on a baking sheet and spray it lightly with olive oil spray.
- Bread the chicken: Working with one strip at a time, let excess buttermilk drip off. Dredge in flour, shaking off any excess. Dip into the egg wash, letting excess drip off again. Finally, press into the panko mixture, coating all sides. Place on the prepared rack. Repeat with all strips.
- Spray and bake: Once all tenders are on the rack, spray the tops generously with olive oil spray. Bake for 12 minutes, then flip each tender and spray the other side. Bake for another 10-12 minutes, until the internal temperature reaches 165°F (74°C) and the coating is deep golden brown.
- Rest before serving: Let the tenders rest on the rack for 2-3 minutes before serving.
Notes
Don’t skip the buttermilk soak—it tenderizes the chicken and helps the coating stick. Use a wire rack for maximum crispiness. Spray generously with oil for golden results. Let tenders rest after baking to set the crust.
Nutrition
- Serving Size: 3-4 tenders
- Calories: 385
- Sodium: 780
- Fat: 12
- Saturated Fat: 4
- Carbohydrates: 28
- Fiber: 2
- Protein: 42
Keywords: baked chicken tenders, crispy chicken, no-fry chicken, easy chicken recipe, healthy chicken tenders, panko chicken


