My aunt handed me a napkin with a square of something golden-brown and said, “Just try it. No commentary.” I did not trust pumpkin bars that claimed to be “easy.” Every easy pumpkin recipe I had tried ended up either soggy or so dense they could double as doorstops. But I was hungry, and she was blocking the fridge, so I took a bite.
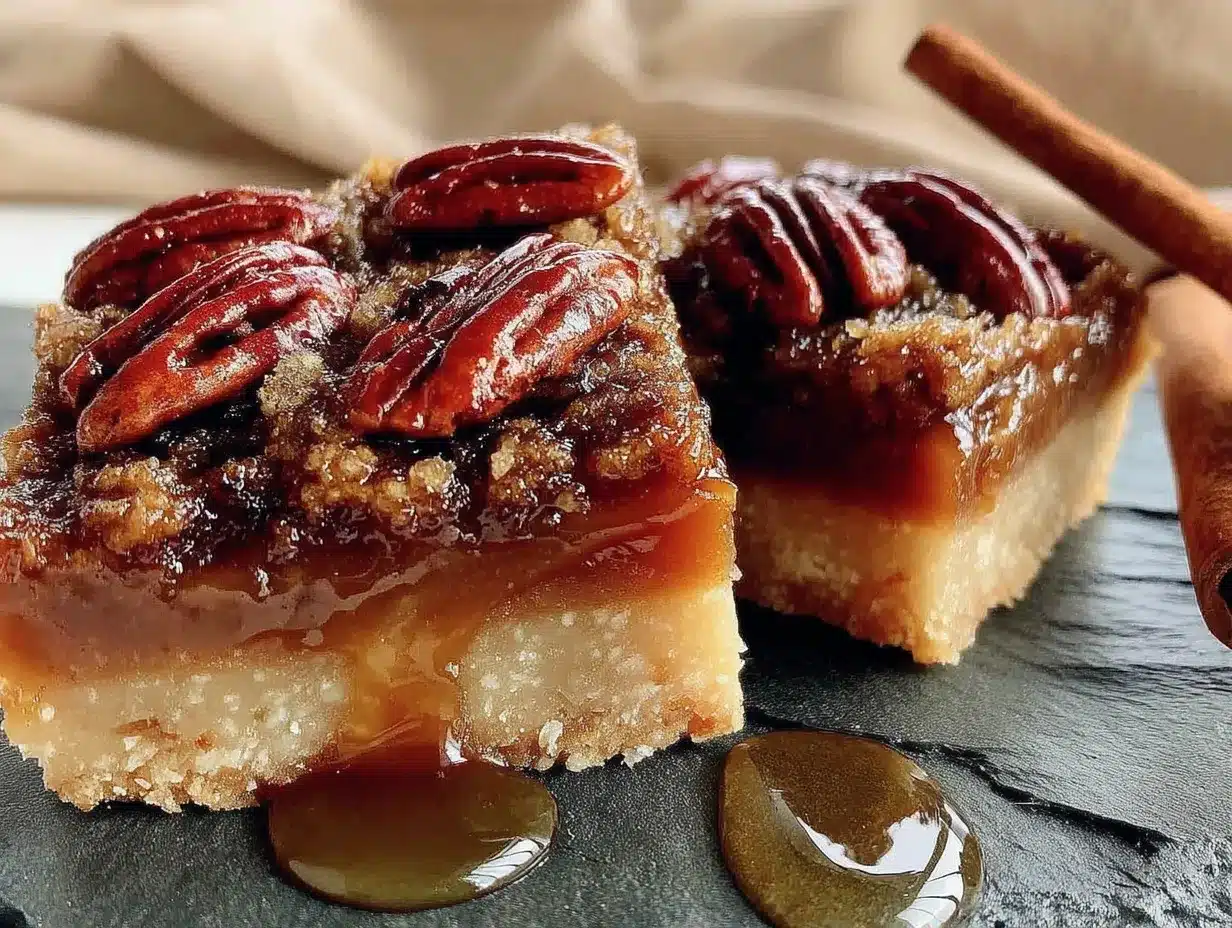
The first thing I noticed was the crust — not a sad, crumbly afterthought but something with real structure, like a shortbread that had been doing crunches. Then came the pumpkin layer, which was somehow both creamy and firm, and it tasted like actual pumpkin, not just a spice delivery system. And on top? A pecan-maple situation that had gone all brown and bubbly and tasted like the part of autumn that makes you want to buy a plaid blanket. I asked for the recipe before I finished chewing.
She shrugged and said it was just a few cans and a box of something. I did not believe her. So I went home and reverse-engineered the whole thing over three weekends. The first batch was too wet. The second had a crust that fought back. The third? That was the one. These Easy Maple Pecan Pumpkin Pie Bars are the result of me being stubborn enough to prove my aunt right.
They taste like Thanksgiving decided to show up early and bring dessert.
Why You’ll Love This Recipe
Let me be real with you — I have tested about seventeen versions of pumpkin bars in the last two years, and this one is the only one I keep making. Here is why these Easy Maple Pecan Pumpkin Pie Bars actually work:
- No blind baking required. I hate recipes that make you pre-bake a crust with weights and then wait for it to cool. This crust goes in raw and comes out perfectly golden because the filling bakes at the right temperature to cook everything evenly.
- The texture is a three-layer miracle. The crust stays firm but not hard. The pumpkin filling is custard-smooth with zero graininess. The pecan topping gets crunchy on top and chewy underneath. Every bite has three different things happening.
- Real pumpkin flavor, not just spice. Most pumpkin bars taste like cinnamon with a side of pumpkin. This recipe lets the squash speak for itself, with maple enhancing instead of masking.
- They travel like a champ. I brought a pan to a Friendsgiving potluck, and they survived the car ride, the coffee table, and a toddler who tried to grab one. No sogginess, no crumbling.
- They freeze beautifully. I wrapped individual bars in plastic wrap and forgot about them for three weeks. Thawed one on the counter, and it tasted like I had just baked it.
If you have ever had a pumpkin dessert that looked promising but collapsed into a wet mess, this is the redemption arc you need.
What Ingredients You Will Need
This recipe uses mostly pantry staples, which is exactly why I keep coming back to it. No special trips to a gourmet store, no ingredients you will use once and then forget about.
For the Crust
- 1 ½ cups all-purpose flour — Spoon and level it. Scooping directly from the bag packs too much flour and makes the crust dry.
- ½ cup granulated sugar — Just regular white sugar. It gives the crust structure without making it sweet like a cookie.
- ½ cup cold unsalted butter, cubed — Cold is non-negotiable. If the butter softens before it goes in, the crust will spread instead of holding its shape. I use Kerrygold because the lower water content makes a difference here.
- ¼ teaspoon salt — Balances the sweetness and keeps the crust from tasting flat.
For the Pumpkin Filling
- 1 can (15 oz) pumpkin puree — Not pumpkin pie filling. They are different things, and using the wrong one will mess up the sweetness and texture. Libby’s is my go-to because it is consistently thick and not watery.
- ¾ cup granulated sugar — You can reduce this to ½ cup if you prefer less sweet desserts, but do not go lower or the filling may not set properly.
- 2 large eggs — Room temperature. Cold eggs can make the filling seize up when you mix them in.
- ¾ cup heavy cream — Half-and-half works in a pinch, but heavy cream gives that silky, almost cheesecake-like texture. Do not use milk — it will make the filling too loose.
- 1 teaspoon vanilla extract — Pure, not imitation. It rounds out the pumpkin flavor without competing with it.
- 1 teaspoon ground cinnamon — I use Vietnamese cinnamon because it is stronger and more aromatic than the standard grocery store kind.
- ½ teaspoon ground ginger — Freshly ground if you have it, but dried works fine.
- ¼ teaspoon ground nutmeg — Freshly grated makes a noticeable difference, but pre-ground is okay.
- ¼ teaspoon ground cloves — Go light here. Cloves are potent and can overpower everything else.
- ¼ teaspoon salt — Do not skip it. Salt makes the spices taste like themselves.
For the Maple Pecan Topping
- 1 cup pecan halves or pieces — I prefer halves because they look prettier, but pieces are easier to sprinkle evenly. Toast them lightly in a dry pan first for extra flavor.
- ⅓ cup pure maple syrup — Not pancake syrup. Real maple syrup is thinner and has a more complex flavor. Grade A dark amber works best here because it stands up to the pumpkin.
- 2 tablespoons unsalted butter, melted — Helps the topping caramelize and stick to the pecans.
- 1 tablespoon brown sugar, packed — Light or dark, either works. Dark gives more molasses flavor.
- Pinch of salt — Just a tiny pinch to keep the topping from being cloying.
Equipment Needed
You do not need a fancy kitchen for these bars. Here is what you will actually use:
- 9×9-inch square baking pan — Glass, ceramic, or metal all work. If you use metal, line it with parchment so the bars release easily. Glass takes slightly longer to bake, so add 5 minutes if using it.
- Parchment paper — Do not skip this. It makes lifting the whole slab out of the pan so much easier. Leave overhang on two opposite sides.
- Mixing bowls — One medium bowl for the crust, one large for the filling, one small for the topping.
- Pastry cutter or fork — For cutting the butter into the flour. A food processor works too, but pulse carefully so you do not overwork the dough.
- Whisk — For the filling. A hand whisk is fine; no need to drag out the mixer.
- Spatula — For spreading the filling evenly.
- Cooling rack — The bars need to cool completely before slicing, and a rack helps air circulate so the bottom does not get soggy.
If you do not have a pastry cutter, two butter knives work fine — just cut the butter into the flour in opposite directions until it looks like coarse meal.
Preparation Method
This recipe has three components, but the timing is straightforward. The whole thing comes together in about an hour, with most of that being hands-off baking time.
Step 1: Make the Crust
Preheat your oven to 350°F (175°C). Line your 9×9 pan with parchment paper, leaving about 2 inches of overhang on two sides. In a medium bowl, whisk together the flour, sugar, and salt. Add the cold cubed butter and cut it in using a pastry cutter or fork until the mixture looks like coarse sand with some pea-sized butter pieces remaining. Do not overwork it — those little butter chunks create flakiness.
Press the mixture firmly into the bottom of the prepared pan. I use the bottom of a flat measuring cup to really compact it. Bake for 12 minutes — the crust should look set but not brown. Set it aside while you make the filling.
Step 2: Make the Pumpkin Filling
In a large bowl, whisk the pumpkin puree and sugar together until smooth. Add the eggs one at a time, whisking well after each. Pour in the heavy cream and vanilla and whisk until fully combined. Add the cinnamon, ginger, nutmeg, cloves, and salt, and whisk until the spices are evenly distributed. The mixture should be smooth, glossy, and the color of a perfect autumn leaf.
Pour the filling over the warm crust and spread it gently to the edges. Do not pour too fast or the crust might shift. Bake for 25 minutes at 350°F. The filling should be mostly set but still slightly jiggly in the center — like a cheesecake that has not quite finished.
Step 3: Make the Topping and Finish Baking
While the bars bake, make the topping. In a small bowl, stir together the pecans, maple syrup, melted butter, brown sugar, and salt. Let it sit while the bars finish their first bake so the pecans absorb some of the maple flavor.
After 25 minutes, remove the bars from the oven and carefully spoon the pecan mixture evenly over the top. Return to the oven and bake for another 15 to 18 minutes. The topping should be bubbling and the pecans should look toasted. The filling should be fully set with no jiggle left.
Step 4: Cool and Slice
Let the bars cool completely in the pan on a wire rack. This takes about 2 hours at room temperature. Do not rush this — if you slice them warm, the filling will ooze and the crust will crumble. Once cool, use the parchment overhang to lift the whole slab out onto a cutting board. Slice into 9 or 16 bars, depending on how generous you are feeling. Wipe the knife clean between cuts for neat edges.
Cooking Tips & Techniques
I learned most of these the hard way, so you do not have to.
Do not overmix the crust. I know it is tempting to keep working the butter into the flour until it looks uniform, but those little butter lumps are what keep the crust tender. If the mixture looks like wet sand with some pea-sized pieces, you are exactly where you need to be.
Room temperature ingredients matter. I once used cold eggs straight from the fridge, and the filling turned out slightly lumpy because the fat in the cream seized up. Let your eggs and cream sit on the counter for 20 minutes before starting.
Watch the edges. The filling around the perimeter of the pan bakes faster than the center. If the edges look puffed and dark before the center is set, tent the whole pan loosely with foil for the last 10 minutes of baking.
Let them cool completely. I cannot stress this enough. I cut into a warm batch once because I was impatient, and I ended up with pumpkin soup on a plate. These bars need time to firm up. If you are in a hurry, pop the pan in the fridge for 45 minutes after they have cooled to room temperature.
Use a sharp knife. A dull knife drags through the pecan topping and pulls it off. Use a long, sharp chef’s knife and wipe it clean between cuts.
Variations & Adaptations
One of the best things about this recipe is how easy it is to tweak without breaking the whole thing.
Gluten-free version: Swap the all-purpose flour for a 1:1 gluten-free baking flour blend. I have used King Arthur Measure for Measure with good results. The crust will be slightly more crumbly, so press it firmly into the pan.
Dairy-free version: Use cold vegan butter in the crust (I like Miyoko’s) and full-fat coconut cream in place of the heavy cream. The coconut flavor is subtle and actually works well with the pumpkin.
Spice it up: Add ¼ teaspoon of cardamom or allspice to the filling for a more complex flavor profile. I did this by accident once and it became my new favorite version.
Extra maple: Drizzle a little extra maple syrup over the top right when the bars come out of the oven. It sinks into the pecan layer and makes everything even more decadent.
Lower sugar option: Reduce the sugar in the filling to ½ cup and use a sugar-free maple syrup alternative in the topping. The texture stays the same, but the sweetness is dialed back.
If you love pumpkin desserts as much as I do, you might also enjoy my Perfect Small Batch Pumpkin Roll with Cream Cheese Filling or these Brown Butter Pumpkin Snickerdoodle Cookies for more fall baking inspiration.
Serving & Storage Suggestions
These bars are good at room temperature, but they are next-level when slightly warmed. Pop a slice in the microwave for 10 seconds, and the pecan topping gets all gooey again. Serve with a dollop of lightly sweetened whipped cream or a scoop of vanilla ice cream for maximum effect.
For a non-dessert pairing, these bars go surprisingly well with a cup of black coffee or chai tea. The bitterness cuts through the sweetness and makes each bite taste more balanced.
Storage: Keep the bars in an airtight container at room temperature for up to 3 days. If your kitchen is warm, store them in the fridge to prevent the topping from getting sticky. Let them come back to room temperature before serving for the best texture.
Freezing: Wrap individual bars tightly in plastic wrap, then place them in a freezer bag. They keep for up to 3 months. Thaw on the counter for about 30 minutes, or warm in the microwave for 20 seconds.
The flavors actually get better after a day in the fridge — the pumpkin and maple have time to meld together. I have been known to make these bars specifically to eat on day two.
Nutritional Information & Benefits
These are dessert bars, so I am not going to pretend they are health food. But they are made with real ingredients, and pumpkin does bring some actual nutritional value to the table.
One bar (based on 9 servings) contains approximately:
- Calories: 380
- Fat: 22g
- Carbohydrates: 44g
- Fiber: 3g
- Sugar: 28g
- Protein: 5g
Pumpkin is rich in vitamin A (from beta-carotene), fiber, and antioxidants. Pecans provide healthy fats and magnesium, which is good for muscle function and sleep. Maple syrup contains zinc and manganese, though it is still sugar, so moderation matters.
If you are watching your sugar intake, cut the bars into 16 smaller portions instead of 9. You still get the full flavor experience with less impact.
Conclusion
These Easy Maple Pecan Pumpkin Pie Bars have become my go-to fall dessert for a reason. They deliver everything I want from a seasonal treat — real pumpkin flavor, a buttery crust that actually holds up, and a pecan topping that tastes like a warm hug — without the stress of making a full pie. No rolling dough, no blind baking, no worrying about cracks.
I love that I can make them for a casual weekend baking project or dress them up for a holiday gathering, and they always get the same reaction: someone takes a bite, pauses, and asks for the recipe. That never gets old.
Try them once, and I think you will understand why I spent three weekends getting them right. If you make them, tag me in your photos or leave a comment below telling me how they turned out. I would love to hear if you added your own twist — maybe extra maple, maybe a pinch of cayenne for heat. That is the fun part.
Happy baking, and may your kitchen smell like autumn.
Frequently Asked Questions
Can I use pumpkin pie filling instead of pumpkin puree?
No, please do not. Pumpkin pie filling already has sugar and spices mixed in, so using it will throw off the sweetness and spice balance of this recipe. Stick with 100% pure pumpkin puree for the best results.
Can I make these bars ahead of time?
Absolutely. These bars actually taste better the next day. Bake them, let them cool completely, cover the pan tightly, and refrigerate overnight. Bring them to room temperature before serving.
Why did my crust turn out soggy?
Soggy crust usually means the filling was poured in while the crust was still too hot, or the crust was not pressed firmly enough into the pan. Make sure to cool the crust for at least 5 minutes before adding the filling, and really compact it with a flat-bottomed cup.
Can I use a different nut instead of pecans?
Walnuts work well as a substitute, though they have a slightly more bitter edge. Chopped almonds would also work, but toast them first for maximum crunch. You could even leave the nuts out entirely for a nut-free version.
How do I know when the bars are fully baked?
The edges should look set and slightly puffed, and the center should not jiggle when you gently shake the pan. A toothpick inserted near the center should come out mostly clean, with just a few moist crumbs attached. If it comes out wet, bake for another 5 minutes and check again.
Pin This Recipe!
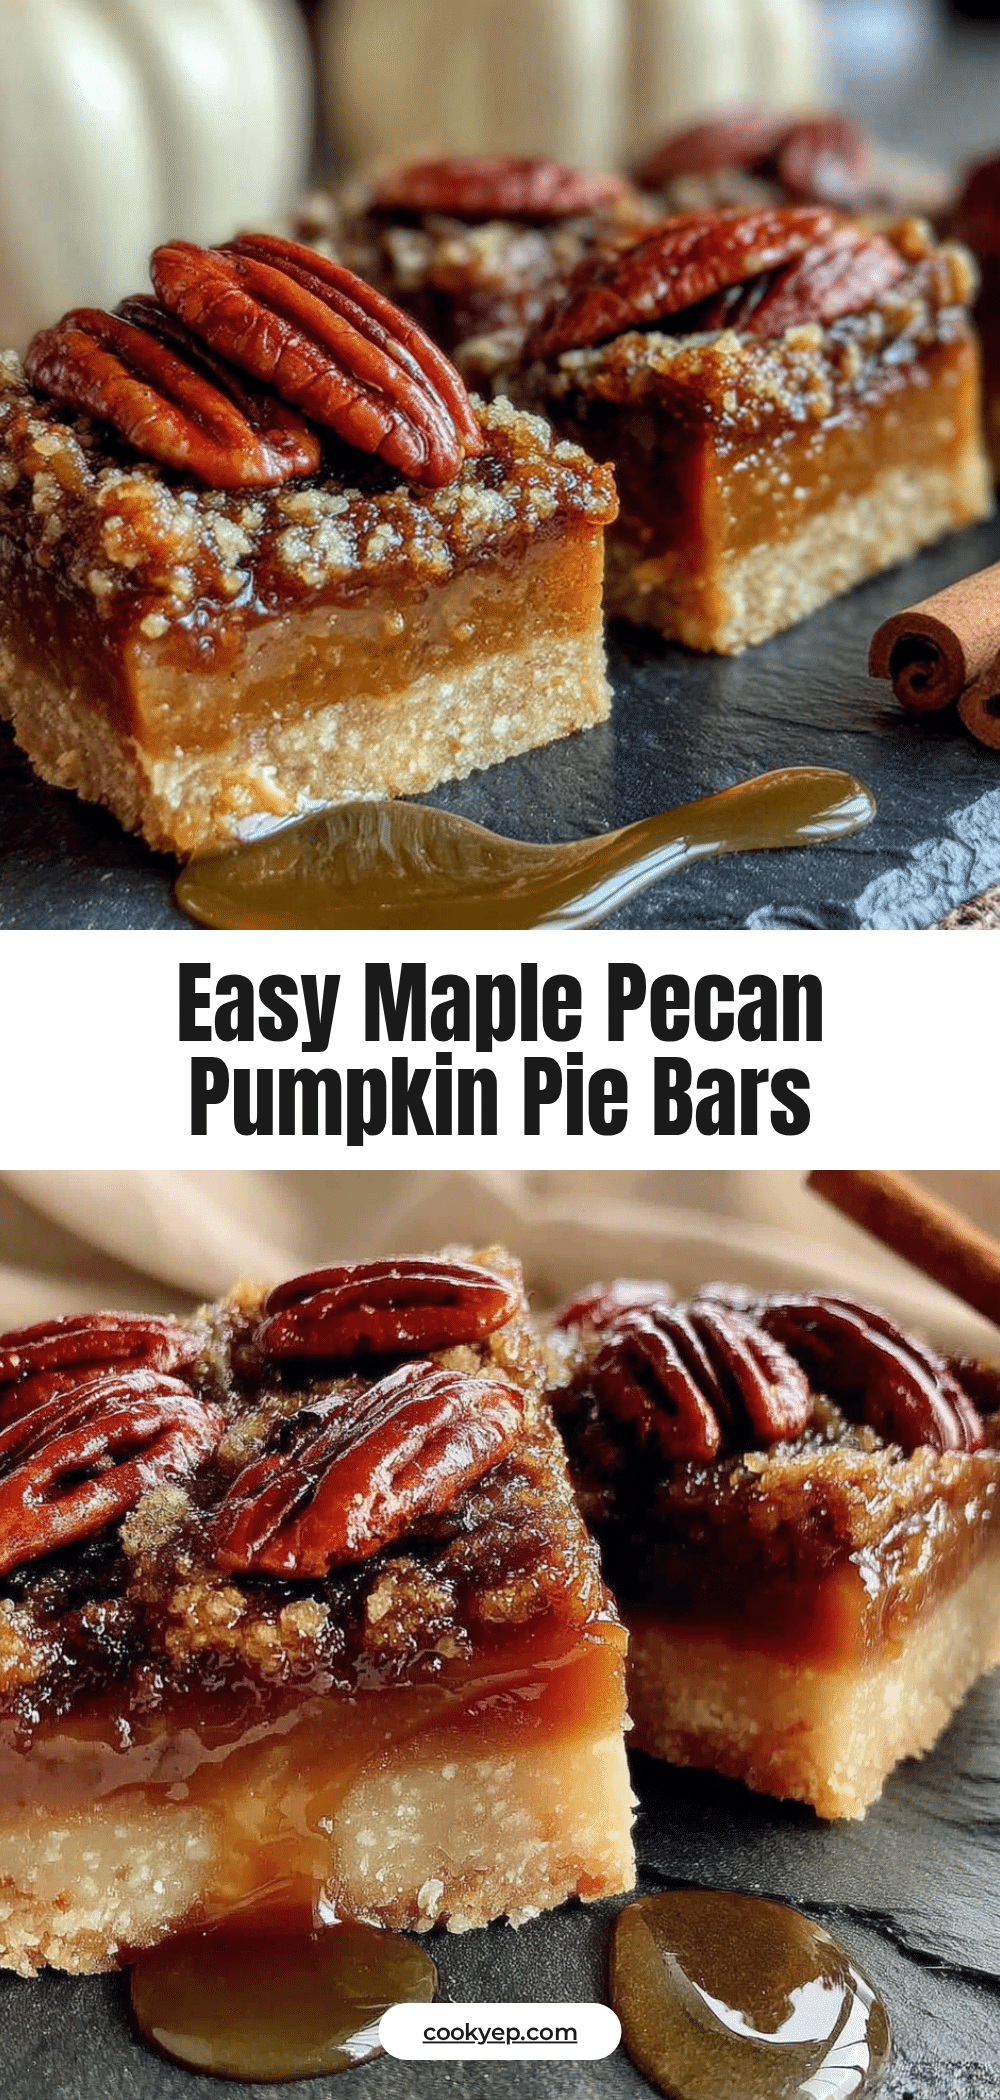
Easy Maple Pecan Pumpkin Pie Bars
These Easy Maple Pecan Pumpkin Pie Bars feature a buttery shortbread crust, a creamy pumpkin filling, and a crunchy maple pecan topping. They are the perfect fall dessert that tastes like Thanksgiving without the stress of making a full pie.
- Prep Time: 20 minutes
- Cook Time: 52-55 minutes
- Total Time: 1 hour 15 minutes
- Yield: 9 servings 1x
- Category: Dessert
- Cuisine: American
Ingredients
- 1 ½ cups all-purpose flour
- ½ cup granulated sugar
- ½ cup cold unsalted butter, cubed
- ¼ teaspoon salt
- 1 can (15 oz) pumpkin puree
- ¾ cup granulated sugar
- 2 large eggs, room temperature
- ¾ cup heavy cream
- 1 teaspoon vanilla extract
- 1 teaspoon ground cinnamon
- ½ teaspoon ground ginger
- ¼ teaspoon ground nutmeg
- ¼ teaspoon ground cloves
- ¼ teaspoon salt
- 1 cup pecan halves or pieces
- ⅓ cup pure maple syrup
- 2 tablespoons unsalted butter, melted
- 1 tablespoon brown sugar, packed
- Pinch of salt
Instructions
- Preheat oven to 350°F (175°C). Line a 9×9-inch baking pan with parchment paper, leaving overhang on two sides.
- Make the crust: In a medium bowl, whisk together flour, ½ cup sugar, and ¼ teaspoon salt. Cut in cold cubed butter using a pastry cutter or fork until mixture resembles coarse sand with some pea-sized butter pieces. Press firmly into the bottom of the prepared pan. Bake for 12 minutes until set but not brown. Set aside.
- Make the pumpkin filling: In a large bowl, whisk pumpkin puree and ¾ cup sugar until smooth. Add eggs one at a time, whisking well after each. Pour in heavy cream and vanilla, whisk until combined. Add cinnamon, ginger, nutmeg, cloves, and ¼ teaspoon salt, whisk until evenly distributed.
- Pour filling over warm crust and spread gently to edges. Bake for 25 minutes at 350°F until mostly set but still slightly jiggly in the center.
- While bars bake, make the topping: In a small bowl, stir together pecans, maple syrup, melted butter, brown sugar, and a pinch of salt. Let sit.
- After 25 minutes, remove bars from oven and spoon pecan mixture evenly over the top. Return to oven and bake for another 15-18 minutes until topping is bubbling and pecans are toasted, and filling is fully set.
- Cool bars completely in the pan on a wire rack (about 2 hours). Use parchment overhang to lift slab onto a cutting board. Slice into 9 or 16 bars, wiping knife clean between cuts.
Notes
Do not overmix the crust; leave some pea-sized butter pieces for flakiness. Use room temperature eggs and cream to avoid lumpy filling. Let bars cool completely before slicing to prevent oozing. For gluten-free, use a 1:1 gluten-free flour blend. For dairy-free, use cold vegan butter and full-fat coconut cream. Bars can be stored in an airtight container at room temperature for up to 3 days or frozen for up to 3 months.
Nutrition
- Serving Size: 1 bar (based on 9 se
- Calories: 380
- Sugar: 28
- Sodium: 200
- Fat: 22
- Saturated Fat: 10
- Carbohydrates: 44
- Fiber: 3
- Protein: 5
Keywords: pumpkin bars, maple pecan, fall dessert, Thanksgiving dessert, easy pumpkin recipe, pumpkin pie bars