I heard my phone buzz from across the counter. It was my sister-in-law, and she’d sent a photo of an empty skillet with a single garlic clove stuck to the side. The caption read: “Made it again. Send help.” I laughed, because that skillet was mine two nights earlier, and the same thing happened to me.
This recipe for Easy Garlic Butter Chicken Thighs in 20 Minutes started on a Tuesday night when I had zero energy and even less inspiration. I’d defrosted chicken thighs that morning, hoping something would come to me by dinner. Nothing did. So I grabbed a head of garlic, some butter, and a cast iron pan, and started cooking on pure instinct. Honestly, I wasn’t expecting much. I figured we’d eat, clean up, and move on with our evening.
But then the smell hit. That butter hitting the pan, the garlic sizzling, the chicken skin crisping up in a way that made everyone wander into the kitchen asking what was for dinner. My husband stood over the stove with a fork before I even plated it. That’s when I knew this was something special.
Why You’ll Love This Recipe
This isn’t just another chicken recipe. It’s the one you’ll come back to on busy weeknights when you need dinner on the table fast, but you still want it to taste like you actually tried. These garlic butter chicken thighs are juicy, golden, and packed with flavor that comes together in one skillet with zero fuss.
Here’s why this recipe works:
- Ready in 20 minutes — From fridge to table in the time it takes to scroll through takeout options. This is faster than delivery and tastes way better.
- Simple ingredients — You probably already have everything you need. Butter, garlic, chicken thighs, salt, pepper, and a few pantry staples. No fancy grocery runs required.
- One skillet, minimal cleanup — Everything cooks in a single pan. Less dishes means more time to actually enjoy your evening.
- Juicy every time — Chicken thighs are naturally forgiving. They stay moist and tender even if you get distracted for a minute or two.
- Customizable — Add herbs, a splash of lemon, or some red pepper flakes. This recipe works with whatever you have on hand.
- Kid-approved and crowd-pleasing — The garlic butter flavor is mild enough for picky eaters but bold enough to satisfy adults. I’ve served this to friends who asked for the recipe before they finished eating.
What makes this different from other chicken thigh recipes is the technique. Instead of just searing the chicken and calling it done, you finish it in a garlic butter sauce that coats every piece. The skin gets crispy, the meat stays tender, and that butter sauce becomes the star of the show. It’s comfort food that doesn’t take all day to make.
I’ve tested this recipe more times than I can count, tweaking the heat levels and timing to get that perfect balance. Whether you’re a beginner cook or someone who’s been making dinner for years, this one’s foolproof.
What Ingredients You Will Need
This recipe uses simple ingredients that work together to create something surprisingly delicious. Most of these are pantry staples, so you might not even need a shopping trip.
For the Chicken:
- 4 bone-in, skin-on chicken thighs (about 1.5 pounds) — Bone-in thighs stay juicier during cooking, and the skin crisps up beautifully. If you only have boneless thighs, that works too, just reduce the cooking time by a few minutes.
- Salt and black pepper — Don’t skimp here. Season generously on both sides. I use about 1 teaspoon of salt and half a teaspoon of pepper for four thighs.
- 1 teaspoon garlic powder — This adds an extra layer of garlic flavor that works with the fresh garlic later. I prefer McCormick for consistent quality.
- 1 teaspoon paprika — Regular or smoked both work. Smoked paprika adds a subtle depth that’s really nice here.
For the Garlic Butter Sauce:
- 3 tablespoons unsalted butter — Salted butter works too, just reduce the added salt slightly. I use unsalted so I can control the salt level myself.
- 6 cloves garlic, minced — Fresh garlic is non-negotiable here. The pre-minced stuff in a jar won’t give you the same flavor. Take the extra minute to mince fresh cloves.
- 1 tablespoon olive oil — This helps prevent the butter from burning during the searing process. It also adds a bit of richness.
- 1/4 cup chicken broth — This deglazes the pan and creates a light sauce. Use low-sodium broth if you’re watching your salt intake.
- 1 tablespoon fresh lemon juice (optional but recommended) — The acidity cuts through the richness of the butter and brightens the whole dish.
- 2 tablespoons fresh parsley, chopped — For garnish and a fresh finish. Dried parsley works in a pinch, but fresh really makes a difference here.
Optional Add-ins:
- Red pepper flakes — Add a pinch if you like heat. Start with 1/4 teaspoon and adjust from there.
- Fresh thyme or rosemary — A couple of sprigs in the pan while the chicken cooks infuses the butter with herb flavor. I do this when I have fresh herbs on hand.
- Parmesan cheese — A sprinkle of grated parmesan over the finished dish is never a bad idea.
For the best results, let your chicken thighs sit at room temperature for about 10 minutes before cooking. This helps them cook more evenly. And use a good quality butter if you can — it really does make a difference in the final flavor.
Equipment Needed
You don’t need much for this recipe, which is part of why I love it. Here’s what you’ll need:
- Large cast iron skillet or heavy-bottomed pan — Cast iron holds heat beautifully and gives you that perfect golden crust. If you don’t have cast iron, a stainless steel or non-stick skillet works fine. Just make sure it’s oven-safe if you plan to finish the chicken in the oven.
- Tongs — These make flipping the chicken much easier than trying to use a spatula. I’ve burned myself too many times trying to flip chicken with a fork.
- Cutting board and sharp knife — For mincing the garlic and chopping parsley. A dull knife will crush the garlic instead of cutting it cleanly.
- Meat thermometer — This is optional but highly recommended if you’re new to cooking chicken. It takes the guesswork out of knowing when it’s done.
- Small bowl — For mixing your seasoning blend before applying it to the chicken.
If you don’t have a cast iron skillet, don’t worry. I’ve made this in a regular non-stick pan plenty of times and it still turns out great. The key is making sure the pan is hot enough before you add the chicken. If you’re looking for a budget-friendly option, Lodge makes excellent cast iron skillets that won’t break the bank. They last forever too.
One tip: if you’re using non-stick, avoid using metal utensils that could scratch the surface. Stick with silicone or wooden tools to keep your pan in good shape.
Preparation Method
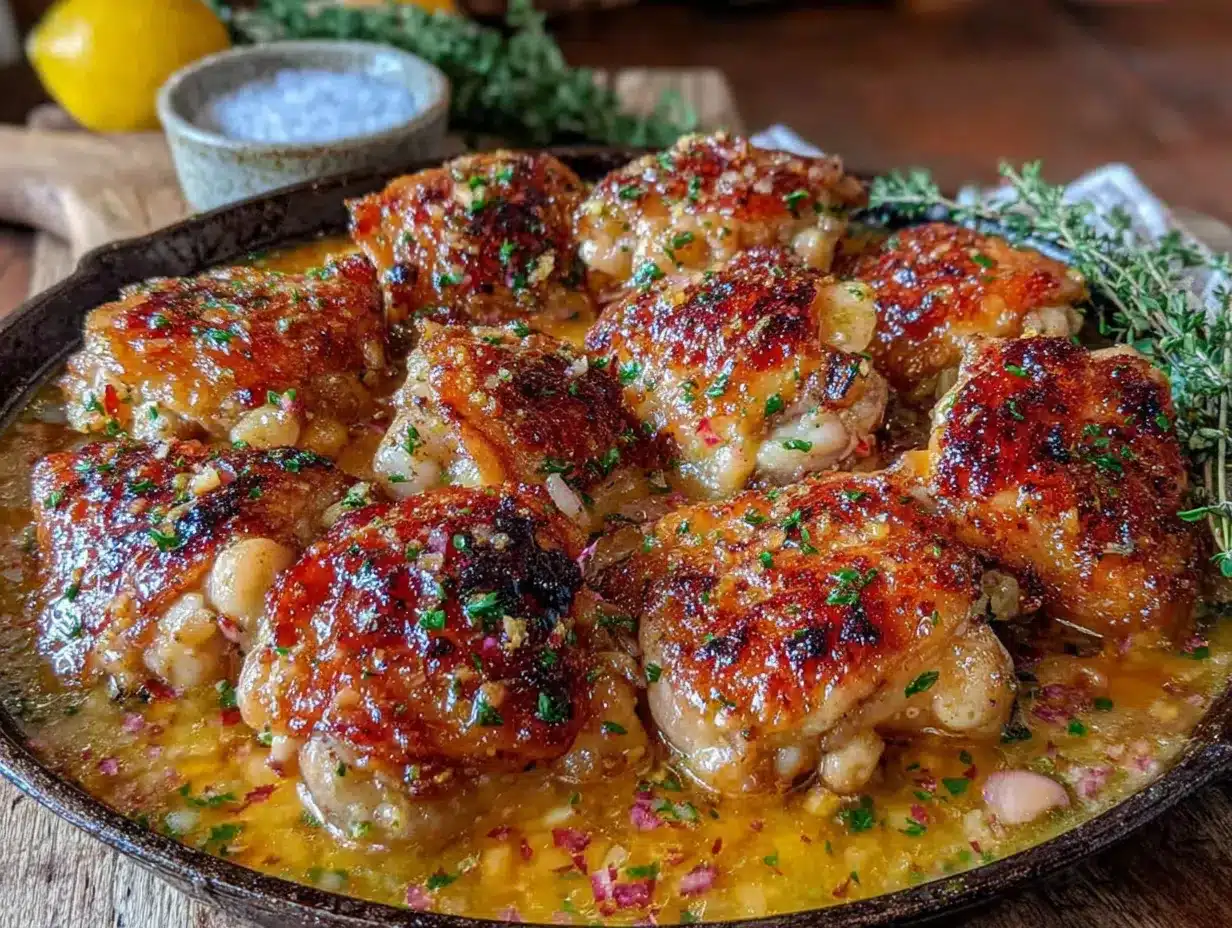
Let me walk you through this step by step. I’ve made this so many times that I could do it in my sleep, but I remember how intimidating cooking chicken used to feel. Trust me, it’s easier than you think.
Step 1: Prep the chicken (5 minutes)
Pat the chicken thighs dry with paper towels. This is important — moisture is the enemy of crispy skin. If the chicken is wet, it’ll steam instead of sear. Season both sides generously with salt, pepper, garlic powder, and paprika. Don’t be shy with the seasoning. Rub it in with your hands so it sticks. Let the chicken sit for about 5 minutes while you get the pan ready.
Step 2: Heat the pan (2 minutes)
Place your skillet over medium-high heat and add the olive oil. Wait until the oil shimmers and you see the first wisp of smoke. That’s your cue that the pan is hot enough. If you add the chicken too early, it won’t brown properly. Patience here pays off.
Step 3: Sear the chicken (8-10 minutes)
Place the chicken thighs skin-side down in the hot pan. You should hear a satisfying sizzle when they hit the oil. If you don’t, the pan isn’t hot enough. Let them cook undisturbed for 5-6 minutes. I know it’s tempting to poke and move them around, but resist the urge. Let that skin get deep golden brown and crispy.
After 5-6 minutes, use your tongs to flip the chicken. The skin should release easily from the pan. If it sticks, give it another minute. Cook the other side for 3-4 minutes until golden. The chicken should be almost cooked through at this point, but we’ll finish it in the sauce.
Step 4: Make the garlic butter sauce (3 minutes)
Reduce the heat to medium-low. Push the chicken to one side of the pan and add the butter to the empty space. Let it melt, then add the minced garlic. Stir constantly for about 30 seconds until the garlic is fragrant. You don’t want it to brown — burnt garlic turns bitter really fast.
Pour in the chicken broth and lemon juice, scraping up any browned bits from the bottom of the pan. Those bits are packed with flavor, so don’t leave them behind. Let the sauce simmer for about a minute until it thickens slightly.
Step 5: Finish cooking (3-4 minutes)
Spoon the garlic butter sauce over the chicken thighs. Let them cook in the sauce for another 2-3 minutes, basting occasionally with a spoon. The internal temperature should reach 165°F (74°C) when measured at the thickest part, away from the bone.
Step 6: Rest and serve (2 minutes)
Remove the pan from heat. Sprinkle fresh parsley over the chicken and let it rest for 2 minutes before serving. This resting period lets the juices redistribute throughout the meat, so every bite is tender and moist.
That’s it. Six steps, about 20 minutes, and you’ve got restaurant-quality chicken thighs right in your own kitchen. I usually serve this with rice or crusty bread to soak up all that garlic butter sauce. Don’t waste a drop of it.
Cooking Tips & Techniques
I’ve made this recipe more times than I can count, and I’ve learned a few things along the way. Here are my best tips for getting it right every time.
Pat the chicken dry. I can’t stress this enough. Wet skin won’t crisp up. Take an extra minute to really dry those thighs with paper towels. Your future self will thank you when you bite into that golden, crunchy skin.
Don’t crowd the pan. If your skillet is too small, cook the chicken in batches. Overcrowding lowers the pan temperature and causes the chicken to steam instead of sear. You want that beautiful brown crust, not pale, sad chicken.
Watch the garlic. Garlic burns fast. Once you add it to the butter, keep stirring and don’t walk away. Burnt garlic ruins the whole dish. If you’re nervous about it, you can add the garlic after you’ve added the broth — it’s safer that way.
Use a meat thermometer. I know, I sound like a broken record. But undercooked chicken is no joke, and overcooked chicken is dry and disappointing. A thermometer takes the guesswork out. I use a digital instant-read one and it’s never let me down.
Let it rest. I’m guilty of skipping this step sometimes when I’m hungry, but it really does make a difference. Those two minutes of resting time let the juices settle so they don’t run out all over your plate.
One mistake I made early on was using too high heat for the whole process. The sear needs high heat, but the garlic butter sauce needs low heat. Adjusting the temperature as you go is key. I’ve definitely had a few batches where the garlic burned and I had to start over. It happens, but you learn from it.
If you’re in a rush and need a quick side dish, try serving this alongside our cozy one-pot chili mac for a complete meal that comes together fast.
Variations & Adaptations
One of the best things about this recipe is how flexible it is. Here are some ways to make it your own.
Herb butter version: Add 1 tablespoon of fresh chopped rosemary or thyme to the butter while it melts. The herbs infuse the sauce with a woodsy, aromatic flavor that pairs beautifully with the garlic. I do this when I have fresh herbs from my garden.
Spicy garlic chicken: Add 1/2 teaspoon of red pepper flakes along with the garlic. If you really like heat, drizzle some sriracha or chili oil over the finished dish. My husband loves this version and requests it at least once a week.
Creamy garlic butter sauce: After you’ve made the sauce, stir in 1/4 cup of heavy cream or half-and-half. Let it simmer for a minute until it thickens. This creates a richer, more indulgent sauce that’s perfect for pasta or mashed potatoes.
Lemon herb twist: Increase the lemon juice to 2 tablespoons and add the zest of one lemon along with the garlic. Finish with extra fresh parsley and a squeeze of lemon right before serving. This brightens the dish and makes it feel lighter.
Air fryer adaptation: Season the chicken as directed, then cook in an air fryer at 375°F (190°C) for 12-15 minutes, flipping halfway through. While the chicken cooks, make the garlic butter sauce in a small pan on the stove. Pour it over the cooked chicken before serving. This method gives you extra crispy skin with less oil.
Dairy-free option: Substitute the butter with a high-quality vegan butter or use olive oil instead. The flavor will be slightly different, but it still tastes great. I’ve made this for dairy-free friends and they loved it.
I once tried a version with balsamic vinegar instead of lemon juice, and honestly, it was pretty good. The vinegar added a tangy sweetness that worked surprisingly well with the garlic. Sometimes the best variations come from experimenting with what you have in the pantry.
Serving & Storage Suggestions
These garlic butter chicken thighs are versatile enough to serve with almost anything. Here’s how I like to enjoy them.
Serving temperature: Serve the chicken hot, right out of the skillet. The garlic butter sauce should be warm and glossy. If it’s cooled down too much, just reheat it gently on the stove.
What to serve with it: The garlic butter sauce is the star here, so you want something to soak it up. Mashed potatoes, rice, crusty bread, or pasta all work beautifully. For a lighter option, serve with steamed green beans or a simple side salad. I personally love it over a bed of fluffy rice with a squeeze of fresh lemon.
Storage: Store leftover chicken in an airtight container in the refrigerator for up to 3 days. Keep the sauce with the chicken — it helps keep the meat moist when you reheat it. If you’re meal prepping, this recipe works great for lunches throughout the week.
Freezing: You can freeze the cooked chicken for up to 3 months. Let it cool completely, then place it in a freezer-safe container with the sauce. Thaw overnight in the refrigerator before reheating.
Reheating: The best way to reheat is in a skillet over medium-low heat with a splash of chicken broth or water to loosen the sauce. Cover the pan to help the chicken heat through evenly. You can also microwave it, but the skin won’t be as crispy. If you have an air fryer, reheat at 350°F (175°C) for 3-4 minutes for the crispiest results.
The flavors actually deepen after a day in the fridge. I sometimes make extra just so I can have leftovers for lunch the next day. The garlic butter sauce gets even more flavorful as it sits.
If you’re hosting a game day gathering, these chicken thighs pair perfectly with our game day baked spinach artichoke dip football bread bowl for a spread that’ll impress everyone.
Nutritional Information & Benefits
Here’s a rough estimate of the nutritional content per serving (one chicken thigh with sauce):
- Calories: 350-400
- Protein: 28-32g
- Fat: 25-30g
- Carbohydrates: 3-5g
- Fiber: 0g
- Sugar: 1g
These numbers are estimates and will vary based on the exact ingredients and portion sizes you use.
Health benefits: Chicken thighs are a good source of protein, which helps with muscle repair and keeps you feeling full. They also contain B vitamins, particularly B6 and B12, which support energy metabolism. Garlic is known for its anti-inflammatory properties and may help support immune function. Butter provides fat-soluble vitamins like vitamin A, though it should be enjoyed in moderation.
Dietary considerations: This recipe is naturally low-carb and keto-friendly. It’s also gluten-free if you use gluten-free chicken broth. If you’re watching your sodium intake, use low-sodium broth and reduce the added salt. For a lower-fat option, you can remove the skin before eating, though you’ll lose some of the crispy texture.
Allergens: This recipe contains dairy (butter). If you’re dairy-free, use a plant-based butter alternative. The recipe is free of nuts, eggs, and soy, making it suitable for many common dietary restrictions.
I’m not a nutritionist, so take these numbers as a general guide. Everyone’s dietary needs are different. I personally love that this recipe feels indulgent but isn’t loaded with hidden sugars or processed ingredients. It’s real food made from real ingredients, and that’s something I can feel good about serving my family.
Conclusion
This easy garlic butter chicken thighs recipe has become a staple in my kitchen for good reason. It’s fast, it’s forgiving, and it delivers every single time. Whether you’re cooking for a busy weeknight dinner, meal prepping for the week, or impressing someone with minimal effort, this recipe has your back.
Don’t be afraid to make it your own. Add more garlic if you’re a garlic lover like me. Throw in some herbs. Make it spicy. The beauty of this recipe is that it works as a base for whatever flavors you’re craving.
I’d love to hear how yours turns out. Did you try any variations? What did you serve it with? Drop a comment below and let me know. And if you share a photo on social media, tag me — I love seeing your creations.
Happy cooking, and remember: the best meals don’t have to be complicated. Sometimes all you need is good butter, fresh garlic, and a hot pan.
Frequently Asked Questions
Can I use boneless, skinless chicken thighs?
Yes, absolutely. Boneless thighs will cook faster, so reduce the cooking time by about 3-4 minutes. They won’t have that crispy skin, but they’ll still be juicy and delicious. Just make sure the internal temperature reaches 165°F (74°C).
Can I make this recipe with chicken breasts instead?
You can, but chicken breasts cook differently than thighs. They’re leaner and can dry out more easily. If you use breasts, pound them to an even thickness first and reduce the cooking time. Watch the internal temperature closely — you want 165°F (74°C), not a degree more.
How do I prevent the garlic from burning?
The key is lowering the heat before you add the garlic. After searing the chicken, reduce the heat to medium-low before adding the butter and garlic. Keep stirring constantly, and only cook the garlic for about 30 seconds until it’s fragrant. If it starts to brown, it’s already too late.
Can I double this recipe?
Yes, but you’ll need a larger pan or you’ll need to cook the chicken in batches. Overcrowding the pan will prevent the chicken from browning properly. If you’re cooking for a crowd, I recommend using two skillets or cooking in batches and keeping the finished chicken warm in a low oven.
What can I use instead of chicken broth?
White wine works beautifully here — about 1/4 cup of dry white wine like Sauvignon Blanc or Pinot Grigio. If you don’t have broth or wine, you can use water with a splash of soy sauce or Worcestershire sauce for extra flavor. Even just water with a pinch of salt will work in a pinch.
Pin This Recipe!

Easy Garlic Butter Chicken Thighs Recipe in 20 Minutes

Juicy, golden chicken thighs cooked in a rich garlic butter sauce, ready in just 20 minutes. This one-skillet recipe is perfect for busy weeknights and uses simple pantry ingredients.
- Prep Time: 5 minutes
- Cook Time: 15 minutes
- Total Time: 20 minutes
- Yield: 4 servings 1x
- Category: Main Course
- Cuisine: American
Ingredients
- 4 bone-in, skin-on chicken thighs (about 1.5 pounds)
- 1 teaspoon salt
- 1/2 teaspoon black pepper
- 1 teaspoon garlic powder
- 1 teaspoon paprika (regular or smoked)
- 3 tablespoons unsalted butter
- 6 cloves garlic, minced
- 1 tablespoon olive oil
- 1/4 cup chicken broth (low-sodium if preferred)
- 1 tablespoon fresh lemon juice (optional but recommended)
- 2 tablespoons fresh parsley, chopped
- Optional: red pepper flakes, fresh thyme or rosemary, Parmesan cheese
Instructions
- Pat the chicken thighs dry with paper towels. Season both sides generously with salt, pepper, garlic powder, and paprika. Let sit for 5 minutes.
- Heat olive oil in a large cast iron skillet or heavy-bottomed pan over medium-high heat until shimmering.
- Place chicken skin-side down in the hot pan. Cook undisturbed for 5-6 minutes until deep golden brown and crispy. Flip and cook for another 3-4 minutes.
- Reduce heat to medium-low. Push chicken to one side, add butter to the empty space. Once melted, add minced garlic and stir constantly for about 30 seconds until fragrant.
- Pour in chicken broth and lemon juice, scraping up browned bits from the pan. Let simmer for 1 minute until slightly thickened.
- Spoon garlic butter sauce over chicken. Cook for another 2-3 minutes, basting occasionally, until internal temperature reaches 165°F (74°C).
- Remove from heat, sprinkle with fresh parsley, and let rest for 2 minutes before serving.
Notes
Pat chicken dry for crispy skin. Don’t crowd the pan. Watch garlic carefully to avoid burning. Let chicken rest before serving. For dairy-free, use vegan butter or olive oil. For boneless thighs, reduce cooking time by 3-4 minutes.
Nutrition
- Serving Size: 1 chicken thigh with
- Calories: 375
- Sugar: 1
- Sodium: 650
- Fat: 28
- Saturated Fat: 10
- Carbohydrates: 4
- Protein: 30
Keywords: garlic butter chicken thighs, easy chicken recipe, 20 minute dinner, one skillet chicken, weeknight dinner


