My neighbor Mark showed up at my back door on a Tuesday evening holding a bottle of red wine and looking hopeful. I had exactly forty-five minutes, a pack of chicken thighs defrosting on the counter, and absolutely nothing planned. The fridge was in that sad state between grocery runs—some garlic, a sad wedge of Parmesan, and half a stick of butter. Mark loves crispy food, and honestly, so do I. So I grabbed my air fryer, which honestly felt a little too new and shiny for a night like this, and started winging it.
The garlic hit the hot butter first and filled the whole kitchen with that smell that makes everyone wander in asking what’s for dinner. I tossed the thighs in some oil and seasoning, then halfway through cooking, I had this wild idea to pile on Parmesan and broil it for a minute. The result was ridiculous—crispy, golden, cheesy, garlicky chicken that made Mark forget he was supposed to be eating light that week. We ate at the kitchen island standing up because neither of us could wait. That night, I scribbled the rough version on a napkin and stuck it in my recipe binder. Now it’s the one I make when I need dinner to feel like a win without any actual effort.
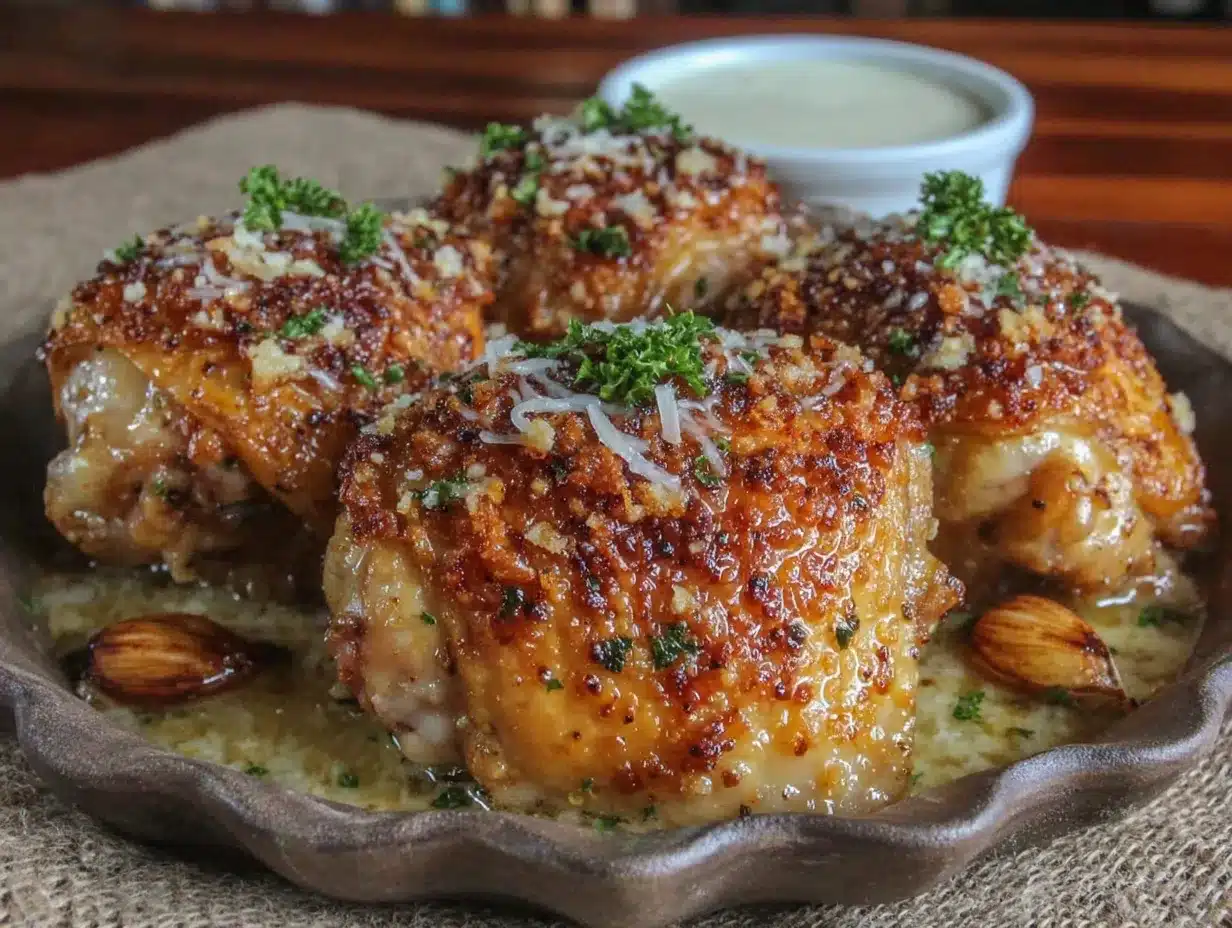
These crispy garlic Parmesan chicken thighs in the air fryer have become my secret weapon for busy nights, unexpected guests, and those evenings when you just want something deeply satisfying. They come out perfectly every time—crispy on the outside, juicy on the inside, and absolutely loaded with flavor. No deep frying, no mess, and minimal cleanup. Honestly, this might be the best thing I’ve ever made in my air fryer, and I’ve made a lot of things in there.
Why You’ll Love These Crispy Garlic Parmesan Chicken Thighs
I’ve tested this recipe about seven times now—yes, seven—to get the texture and flavor just right. My husband has been a very willing taste tester, and even my picky kid who usually picks at chicken cleaned her plate twice. Here’s why this recipe works and why you’ll keep coming back to it:
- Quick & Easy: From fridge to table in under 30 minutes. Seriously. The air fryer does all the heavy lifting while you throw together a quick salad or roast some veggies.
- Simple Ingredients: You probably have everything in your kitchen right now. Chicken thighs, garlic, Parmesan, butter, and a few pantry staples. No weird specialty items or grocery store scavenger hunts.
- Perfect for Weeknights: This is the kind of dinner that feels special but takes almost no effort. It works for busy Tuesday nights, last-minute dinner guests, or when you just need something comforting after a long day.
- Crowd-Pleaser: I’ve served these to kids, adults, in-laws, and friends, and every single person has asked for the recipe. The crispy Parmesan crust is basically magic.
- Unbelievably Delicious: The garlic butter base combined with the salty, nutty Parmesan creates this incredible crust that stays crispy even after resting. The chicken stays incredibly juicy because the air fryer seals in all the moisture while crisping up the outside.
What makes this recipe different from all the other air fryer chicken recipes out there? It’s the two-step cooking method. You cook the chicken first to get it perfectly done and juicy, then you add the Parmesan and broil it for a minute to create that ultra-crispy, golden crust. Most recipes just sprinkle cheese on top and hope for the best, but this method guarantees that perfect crispy texture every single time. It’s not just another version—it’s the best version, and I say that with zero hesitation.
What Ingredients You Will Need
This recipe uses simple, everyday ingredients that come together to create something truly special. The magic is in how they work together—the garlic butter infuses the chicken with flavor while the Parmesan creates that irresistible crispy crust. Here’s everything you need:
For the Chicken
- 4 bone-in, skin-on chicken thighs (about 1.5 pounds total) — Bone-in thighs stay juicier and more flavorful than boneless. The skin helps create that crispy texture. If you only have boneless thighs, reduce cooking time by about 5 minutes.
- 1 tablespoon olive oil — Helps the seasoning stick and promotes browning. I use extra virgin for flavor, but regular olive oil works fine too.
- 1 teaspoon salt — I recommend fine sea salt for even distribution. Kosher salt works too, just use a little more.
- 1/2 teaspoon black pepper — Freshly ground is always better, but pre-ground works in a pinch.
- 1/2 teaspoon garlic powder — Not the same as fresh garlic, but it adds a nice background flavor that complements the fresh garlic.
- 1/2 teaspoon paprika — Adds color and a subtle smoky sweetness. Smoked paprika works beautifully here too.
For the Garlic Parmesan Crust
- 3 tablespoons unsalted butter — Melted. I use unsalted so I can control the salt level. If you only have salted butter, reduce the added salt slightly.
- 4 cloves garlic, minced — Fresh garlic is non-negotiable here. The jarred stuff won’t give you the same flavor. Trust me on this one.
- 1/2 cup freshly grated Parmesan cheese — Please, please grate your own. The pre-shredded stuff has anti-caking agents that prevent it from melting properly and getting crispy. I recommend a good quality Parmesan like Parmigiano-Reggiano if you can find it.
- 2 tablespoons panko breadcrumbs — Optional, but they add extra crunch. Regular breadcrumbs work too, but panko gives a lighter, crispier texture.
- 1 tablespoon fresh parsley, chopped — For garnish and a pop of freshness. Dried parsley works if that’s all you have, but fresh is noticeably better.
For Serving (Optional but Recommended)
- Lemon wedges — A squeeze of fresh lemon juice right before eating brightens up all the flavors beautifully.
- Extra Parmesan for sprinkling — Because more cheese is always a good idea.
I get my chicken from a local farm when I can, but honestly, regular grocery store thighs work perfectly too. Just look for thighs that are similar in size so they cook evenly. For the Parmesan, I really recommend splurging on a good wedge and grating it yourself. It makes a huge difference in both flavor and texture. If you’re dairy-free, you can try a high-quality vegan Parmesan, but I haven’t tested that myself so I can’t guarantee the same crispy results.
Equipment Needed
You don’t need much for this recipe, which is part of why I love it. Here’s what you’ll need:
- Air fryer — Any size works, but a 5-6 quart basket-style air fryer is ideal for fitting four chicken thighs without overcrowding. I use a Cosori Pro II and love it. If your air fryer is smaller, cook the thighs in batches.
- Small saucepan — For melting the butter and infusing it with garlic. A small skillet works too.
- Mixing bowls — One for seasoning the chicken and one for the Parmesan mixture.
- Tongs — For flipping the chicken without piercing the skin. Silicone-tipped tongs are great because they won’t scratch your air fryer basket.
- Cheese grater — For grating fresh Parmesan. A microplane works beautifully for fine grating.
- Pastry brush — For brushing the garlic butter onto the chicken. A silicone brush is easiest to clean.
- Meat thermometer — This is crucial for ensuring your chicken is cooked perfectly without drying it out. I use an instant-read digital thermometer and it’s been a game-changer.
If you don’t have a pastry brush, you can just spoon the garlic butter over the chicken. It’s a little messier but works fine. And if you don’t have a meat thermometer, you can cut into the thickest part of the thigh to check for doneness—the juices should run clear and there should be no pink. But honestly, a thermometer takes all the guesswork out and costs like ten bucks.
Preparation Method
Alright, let’s get cooking! This recipe comes together fast, so I recommend having everything prepped and ready before you start. Here’s how to make the best crispy garlic Parmesan chicken thighs in your air fryer:
- Prep the chicken (5 minutes): Pat the chicken thighs dry with paper towels. This is super important—dry skin equals crispy skin. Don’t skip this step! Season both sides with salt, pepper, garlic powder, and paprika. Drizzle with olive oil and rub it all in so every bit of chicken is coated. Let the chicken sit at room temperature for about 10 minutes while you prep the garlic butter. This helps it cook more evenly.
- Make the garlic butter (3 minutes): In a small saucepan over medium-low heat, melt the butter. Add the minced garlic and cook for about 1 minute until fragrant—you should be able to smell it across the kitchen. Don’t let the garlic brown or burn, or it will turn bitter. Remove from heat and set aside. The butter will continue to infuse with garlic flavor as it sits.
- Preheat the air fryer (3 minutes): Preheat your air fryer to 380°F (193°C). Most air fryers need about 3 minutes to preheat. If yours doesn’t have a preheat function, just run it empty for 3 minutes. This ensures the chicken starts cooking immediately and the skin begins crisping right away.
- Air fry the chicken (18-20 minutes): Place the seasoned chicken thighs in the air fryer basket, skin side down, in a single layer. Don’t overcrowd—leave a little space between each thigh so the air can circulate. Cook at 380°F for 10 minutes. Flip the chicken using tongs (be gentle so you don’t tear the skin) and cook for another 8-10 minutes. The chicken should be golden brown and the internal temperature should reach 165°F (74°C) when checked with a meat thermometer inserted into the thickest part without touching the bone.
- Add the Parmesan crust (2 minutes): In a small bowl, mix together the grated Parmesan and panko breadcrumbs. Brush the top of each chicken thigh generously with the garlic butter. Sprinkle the Parmesan mixture over the top, pressing gently so it sticks. Return the chicken to the air fryer and cook at 400°F (204°C) for 1-2 minutes, until the cheese is melted and golden and the crust is crispy. Watch it closely—Parmesan can go from perfect to burnt very quickly!
- Rest and serve (5 minutes): Remove the chicken from the air fryer and let it rest for 5 minutes. This allows the juices to redistribute throughout the meat so every bite is juicy and tender. Sprinkle with fresh parsley and serve with lemon wedges on the side. The lemon really brightens up all the rich flavors—don’t skip it!
A few things I’ve learned from making this so many times: If your chicken thighs are particularly large, you might need an extra 2-3 minutes of cooking time. If they’re small, check them a few minutes early. Also, if your air fryer runs hot (some do), reduce the temperature by 10-15 degrees. The first time I made these, I walked away for “just a minute” and came back to slightly overdone chicken. Learn from my mistake—stay nearby and keep an eye on things, especially during that final Parmesan broil.
Cooking Tips & Techniques
After making these crispy garlic Parmesan chicken thighs more times than I can count (and definitely more than I needed to for “testing purposes”), I’ve picked up some tips that make a real difference. Here’s what I’ve learned:
Patience with the patting dry: I cannot stress this enough—dry skin is the secret to crispy chicken. Take an extra 30 seconds and really blot those thighs dry with paper towels. If you have time, let them sit uncovered in the fridge for an hour or two to dry out even more. This is a trick I learned from making crispy baked buffalo cauliflower bites, and it works just as well for chicken.
Don’t skip the preheat: I know it’s tempting to just throw the chicken in and turn it on, but preheating makes a huge difference. It ensures the skin starts crisping immediately rather than slowly warming up and steaming. Your air fryer manual probably says to preheat, and for once, the manual is right.
The flip matters: Starting skin-side down gives the fat a chance to render out and crisp up the skin. When you flip it, the skin side gets exposed to the circulating hot air and gets even crispier. If you skip the flip, the skin won’t be as crispy on the bottom. Trust the process.
Fresh garlic vs. garlic powder: Both have their place in this recipe. The garlic powder in the initial seasoning adds a subtle background flavor that develops during cooking. The fresh garlic in the butter adds that punchy, aromatic quality that makes your kitchen smell incredible. Using both gives you the best of both worlds.
The Parmesan trap: I’ve made the mistake of adding the Parmesan too early, and it just melted off and burned on the bottom of the air fryer. Adding it at the very end, after the chicken is fully cooked, is the key. The cheese melts just enough to stick and create that crispy crust without burning. Also, grate your own cheese—the pre-shredded stuff has cellulose that prevents it from melting properly.
Multitasking strategy: While the chicken is cooking in the air fryer, make a quick side dish. I love serving these with cozy one-pot healthy fall vegetable soup for a complete meal that comes together in about the same time. Or just throw some asparagus or broccoli in the air fryer during the last 5 minutes of chicken cooking time.
Variations & Adaptations
One of the best things about this recipe is how adaptable it is. Here are some variations I’ve tried and loved:
Spicy Buffalo Version: Add 2 tablespoons of hot sauce to the melted butter along with the garlic. Sprinkle the Parmesan crust with a pinch of cayenne pepper. Serve with ranch or blue cheese dressing for dipping. This is my husband’s favorite variation, and it’s perfect for game day—especially alongside healthy turkey taco dip for a full spread.
Herb and Lemon Version: Add 1 tablespoon of fresh lemon zest and 1 teaspoon of dried Italian herbs (oregano, thyme, rosemary) to the Parmesan mixture. Squeeze fresh lemon juice over the finished chicken. This version feels lighter and brighter, perfect for spring or summer dinners.
Low-Carb/Keto Version: Skip the panko breadcrumbs entirely and just use Parmesan. The cheese alone will still create a beautiful crispy crust. This version is naturally keto-friendly and gluten-free. I’ve made it this way for friends on low-carb diets and they couldn’t tell the difference.
Dairy-Free Version: Use a high-quality dairy-free butter alternative (I like Miyoko’s) and a dairy-free Parmesan substitute. The texture won’t be exactly the same, but the flavor is still delicious. I’ve tested this with vegan butter and it worked surprisingly well—just watch the cooking time as dairy-free cheese can burn faster.
Air Fryer vs. Oven Method: If you don’t have an air fryer, you can bake these in a 400°F (204°C) oven for 35-40 minutes, then broil for 2-3 minutes at the end to get the Parmesan crust crispy. The texture won’t be quite as crispy as the air fryer version, but it’s still really good. Place the chicken on a wire rack set over a baking sheet to allow air to circulate underneath.
Serving & Storage Suggestions
These crispy garlic Parmesan chicken thighs are best served hot and fresh, right out of the air fryer. Here’s how to make the most of them:
Serving temperature and presentation: Serve the chicken hot, with the Parmesan crust still crispy and golden. Arrange on a platter with lemon wedges and fresh parsley scattered over the top. The contrast of the golden chicken, green parsley, and bright yellow lemon makes for a beautiful presentation that looks like you spent way more effort than you actually did.
What to serve with them: These chicken thighs pair beautifully with so many sides. I love them with a simple arugula salad dressed with lemon vinaigrette—the peppery greens and bright dressing cut through the richness of the chicken perfectly. Roasted vegetables like asparagus, broccoli, or Brussels sprouts work wonderfully too. For something heartier, serve with mashed potatoes, rice, or crusty bread to soak up any extra garlic butter.
Storage instructions: Store leftover chicken in an airtight container in the refrigerator for up to 3-4 days. The Parmesan crust will soften over time, but the flavor will still be delicious. I don’t recommend freezing these, as the texture of both the chicken and the crust will suffer significantly upon thawing and reheating.
Reheating tips: The air fryer is your best friend for reheating these. Reheat at 350°F (177°C) for 3-4 minutes until warmed through and the crust crisps back up. You can also reheat in a 375°F (190°C) oven for about 10 minutes. Avoid the microwave at all costs—it will make the crust soggy and the chicken rubbery. I learned this the hard way.
How flavors develop over time: Interestingly, these chicken thighs taste even better the next day if you reheat them properly. The garlic and Parmesan flavors meld together overnight, creating an even more complex, savory profile. The leftovers make an amazing chicken salad if you chop the meat up and mix it with a little mayo and celery.
Nutritional Information & Benefits
Here’s the approximate nutritional breakdown for one serving (one chicken thigh with crust):
- Calories: 380-420
- Protein: 32g
- Fat: 26g
- Carbohydrates: 3g
- Fiber: 0g
- Sugar: 0g
- Sodium: 680mg
These values are estimates and will vary based on the size of your chicken thighs and specific ingredients used. If you’re tracking macros closely, I recommend calculating with your specific ingredients.
Health benefits: Chicken thighs are a great source of high-quality protein, which supports muscle health and keeps you feeling full and satisfied. They also provide essential B vitamins, particularly B6 and B12, which support energy metabolism and brain function. Garlic is known for its immune-boosting properties and anti-inflammatory benefits. Parmesan cheese adds calcium for bone health, and in moderation, fits well into a balanced diet.
Dietary considerations: This recipe is naturally low-carb and can be made keto-friendly by omitting the panko breadcrumbs. It’s also gluten-free if you use gluten-free panko or skip the breadcrumbs entirely. For dairy-free, use vegan butter and dairy-free Parmesan. The recipe contains dairy and garlic, so it may not be suitable for those with dairy allergies or garlic sensitivities.
I personally love that this recipe feels indulgent but actually fits pretty well into a balanced eating plan. It’s real food made with real ingredients, and that’s what matters most to me. I’d rather eat a satisfying meal like this than a sad, flavorless “diet” dinner any day.
Frequently Asked Questions
Can I use boneless, skinless chicken thighs for this recipe?
Yes, you can, but the results won’t be as crispy or juicy. Boneless, skinless thighs cook faster (about 12-15 minutes total) and won’t have the same crispy skin texture. If you use them, reduce the cooking time and watch closely to avoid drying them out. The Parmesan crust will still be delicious, just less overall crunch.
How do I prevent the Parmesan from burning in the air fryer?
The key is adding the Parmesan at the very end of cooking, not at the beginning. Cook the chicken until it’s almost done, then add the Parmesan mixture and cook for just 1-2 minutes at a slightly higher temperature. Watch it closely—Parmesan can go from perfectly golden to burnt in seconds. If your air fryer runs hot, reduce the final cooking temperature to 375°F.
Can I make these in advance for a party?
These are best served fresh, but you can prep ahead. Season the chicken and make the garlic butter up to 24 hours in advance and store them separately in the refrigerator. When you’re ready to cook, just follow the recipe as written. If you need to reheat for a party, use the air fryer at 350°F for 3-4 minutes to restore the crispiness.
What can I use instead of panko breadcrumbs?
You can skip the breadcrumbs entirely for a low-carb version, or use crushed pork rinds for a keto-friendly option. Regular breadcrumbs work too, but they won’t be as light and crispy as panko. Almond flour is another option, though it will give a slightly different texture and nutty flavor.
How do I know when the chicken is fully cooked?
The most reliable way is to use a meat thermometer. Insert it into the thickest part of the thigh without touching the bone. The chicken is done when it reaches 165°F (74°C). If you don’t have a thermometer, cut into the thickest part—the juices should run clear and there should be no pink meat. The meat should also feel firm to the touch and pull away from the bone easily.
Conclusion
These crispy garlic Parmesan chicken thighs in the air fryer have honestly become one of my most-made recipes, and for good reason. They deliver that perfect combination of crispy, juicy, garlicky, and cheesy that makes everyone at the table happy. The air fryer does all the hard work, and you get to look like a kitchen hero with minimal effort.
What I love most about this recipe is how forgiving it is. You can tweak the seasonings, swap the cheese, adjust the spice level, and it still comes out amazing. It’s the kind of recipe that builds your confidence in the kitchen because it works every single time. And honestly, that feeling of pulling perfectly crispy, golden chicken out of the air fryer never gets old.
I really hope you give these a try. Whether it’s a busy Tuesday night, a casual dinner with friends, or just a night when you need something comforting and delicious, these chicken thighs deliver. If you make them, I’d love to hear how they turned out—drop a comment below and let me know if you added any fun twists or variations. And if you loved them, share this recipe with someone who needs a good air fryer win in their life!
Pin This Recipe!

Best Crispy Garlic Parmesan Chicken Thighs in Air Fryer

These crispy garlic Parmesan chicken thighs in the air fryer are juicy on the inside, crispy on the outside, and loaded with garlic and Parmesan flavor. Perfect for busy weeknights or last-minute guests, they come together in under 30 minutes with minimal cleanup.
- Prep Time: 10 minutes
- Cook Time: 20 minutes
- Total Time: 30 minutes
- Yield: 4 servings 1x
- Category: Main Course
- Cuisine: American
Ingredients
- 4 bone-in, skin-on chicken thighs (about 1.5 pounds total)
- 1 tablespoon olive oil
- 1 teaspoon fine sea salt
- 1/2 teaspoon freshly ground black pepper
- 1/2 teaspoon garlic powder
- 1/2 teaspoon paprika
- 3 tablespoons unsalted butter
- 4 cloves garlic, minced
- 1/2 cup freshly grated Parmesan cheese
- 2 tablespoons panko breadcrumbs (optional)
- 1 tablespoon fresh parsley, chopped
- Lemon wedges for serving
- Extra Parmesan for sprinkling (optional)
Instructions
- Pat the chicken thighs dry with paper towels. Season both sides with salt, pepper, garlic powder, and paprika. Drizzle with olive oil and rub to coat evenly. Let sit at room temperature for 10 minutes.
- In a small saucepan over medium-low heat, melt the butter. Add minced garlic and cook for about 1 minute until fragrant. Remove from heat and set aside.
- Preheat the air fryer to 380°F (193°C) for 3 minutes.
- Place the seasoned chicken thighs in the air fryer basket, skin side down, in a single layer. Cook at 380°F for 10 minutes. Flip the chicken and cook for another 8-10 minutes, until golden brown and internal temperature reaches 165°F (74°C).
- In a small bowl, mix together the grated Parmesan and panko breadcrumbs. Brush the top of each chicken thigh with garlic butter. Sprinkle the Parmesan mixture over the top, pressing gently to adhere. Return to the air fryer and cook at 400°F (204°C) for 1-2 minutes, until the cheese is melted and golden.
- Remove the chicken from the air fryer and let rest for 5 minutes. Sprinkle with fresh parsley and serve with lemon wedges.
Notes
Pat chicken thighs very dry for crispiest skin. Add Parmesan at the very end to prevent burning. If chicken thighs are large, add 2-3 minutes cooking time. For best results, grate Parmesan from a block rather than using pre-shredded.
Nutrition
- Serving Size: 1 chicken thigh with
- Calories: 400
- Sodium: 680
- Fat: 26
- Saturated Fat: 10
- Carbohydrates: 3
- Protein: 32
Keywords: air fryer chicken thighs, crispy chicken, garlic parmesan chicken, easy weeknight dinner, air fryer recipe


