Okay, I need a breakfast that actually works for my life right now. Not the kind that sounds good in theory but falls apart by Wednesday. I want something I can grab from the fridge, reheat in thirty seconds, and eat while packing lunches or scrolling through emails. And honestly, I want it to taste like fall without requiring a full kitchen production at 7 AM.
These pumpkin baked oatmeal cups started as a happy accident. I had half a can of pumpkin leftover from making pumpkin chocolate chip bread and a serious craving for something warm and portable. The first batch came out a little dry, so I tweaked the liquid ratio. The second batch was too soft and fell apart when I tried to grab one. But the third batch? That was the one. Firm enough to hold their shape, soft enough to feel like a real breakfast, and packed with just enough spice to make your kitchen smell incredible.
Here is the thing about meal prep. It only works if you actually want to eat what you prepped. I have made this recipe every Sunday for the past month and I am still not tired of it. That is the real test, you know? Not whether a recipe looks good on Instagram, but whether you reach for it on a Thursday morning when you are running late and everything feels chaotic. These little oatmeal cups pass that test every single time.
They are not fancy. They are not complicated. They are just genuinely good, reliable breakfast that makes your week easier. And honestly, that is exactly what I need.
Why You Will Love This Recipe
I have tested this recipe about seven times to get the texture exactly right. Not too dense, not too crumbly, not so soft that they disintegrate when you wrap them in foil. Here is why these pumpkin baked oatmeal cups deserve a permanent spot in your meal prep rotation.
- Meal Prep Dream : Make one batch on Sunday and you have breakfast for the whole week. They reheat in under a minute and taste just as good on day five as they did on day one.
- Simple Ingredients : You probably have most of these in your pantry right now. No weird flours, no specialty sweeteners, nothing that requires a special trip to the store.
- Perfect for Busy Mornings : Grab one, heat it up, and go. No bowls to wash, no measuring, no waiting for oatmeal to cook on the stove.
- Naturally Sweetened : Maple syrup does the heavy lifting here instead of refined sugar. It adds a warm, deep sweetness that pairs perfectly with pumpkin and cinnamon.
- Kid-Approved : My niece calls them breakfast muffins and asks for them every time she stays over. If picky eaters love them, that is a win in my book.
- Freezer-Friendly : Double the batch and freeze half for those weeks when you know you will not have time to cook at all.
What makes this recipe different from the dozens of baked oatmeal recipes out there? The texture. Most baked oatmeal turns into a dense, heavy block that feels more like a brick than breakfast. These cups stay light and tender because of the right balance of oats to liquid and the addition of Greek yogurt for moisture. Plus, they are portioned perfectly so you do not have to scoop and cut every morning.
This is the kind of breakfast that makes you feel like you have your life together, even on days when you absolutely do not.
What Ingredients You Will Need
This recipe uses simple, wholesome ingredients that work together to create something greater than the sum of their parts. Nothing complicated here, just smart choices that deliver flavor and texture without fuss.
For the Oatmeal Cups
- Rolled oats – 2 cups (use old-fashioned rolled oats, not quick oats. Quick oats turn mushy and the texture gets weird. I prefer Bob’s Red Mill or Quaker old-fashioned)
- Pumpkin puree – 1 cup (not pumpkin pie filling. Make sure it is 100% pure pumpkin. Libby’s is my go-to brand)
- Milk – 1 cup (any milk works here. I use whole milk for richness, but almond milk or oat milk work great too)
- Greek yogurt – 1/2 cup (plain, full-fat or 2%. This adds protein and keeps the oatmeal cups tender. If you are dairy-free, use a thick coconut yogurt instead)
- Maple syrup – 1/3 cup (pure maple syrup, not pancake syrup. The real stuff makes a difference in flavor)
- Eggs – 2 large, room temperature (they bind everything together and add structure)
- Coconut oil – 2 tablespoons, melted (or melted butter if you prefer. Both work beautifully)
- Vanilla extract – 1 teaspoon
- Pumpkin pie spice – 2 teaspoons (store-bought is fine, or make your own with cinnamon, nutmeg, ginger, and cloves)
- Cinnamon – 1 teaspoon (I add extra because I love cinnamon. You can adjust to taste)
- Baking powder – 1 teaspoon (helps them rise slightly and stay light)
- Salt – 1/4 teaspoon (brings out all the flavors)
Optional Mix-Ins
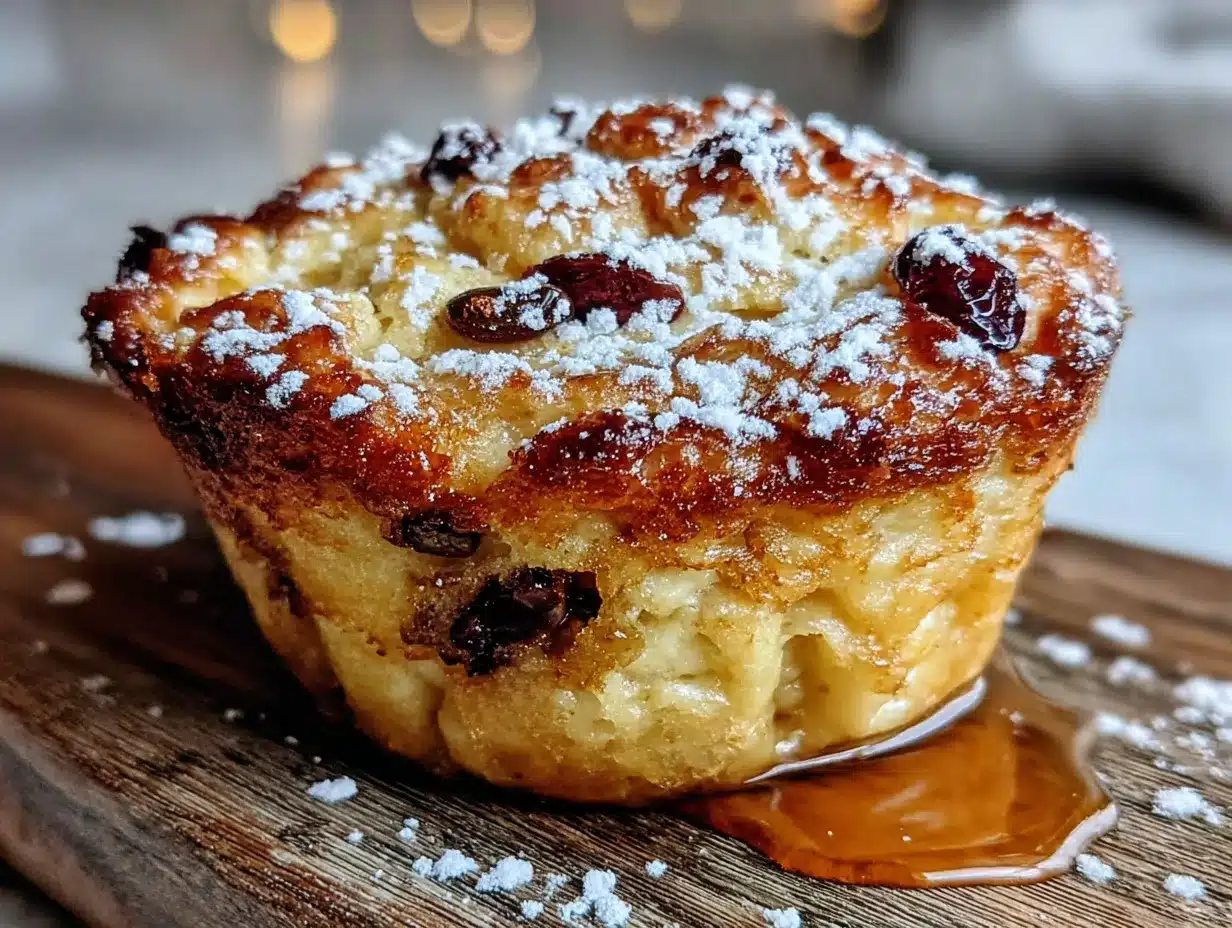
- Chocolate chips – 1/3 cup (semi-sweet or dark. They melt into little pockets of goodness)
- Chopped pecans or walnuts – 1/3 cup (adds crunch and makes them feel more substantial)
- Dried cranberries – 1/4 cup (for a tart pop of flavor)
Equipment Needed
You do not need a fancy kitchen to make these. Here is what you will need.
- Muffin tin – Standard 12-cup muffin tin. I recommend a non-stick one or lining with paper liners for easy removal.
- Mixing bowls – One large bowl for dry ingredients, one medium bowl for wet ingredients.
- Whisk – For combining wet ingredients smoothly.
- Spatula – For folding everything together without overmixing.
- Measuring cups and spoons – Accurate measurements matter in baking, even for something as forgiving as oatmeal cups.
- Ice cream scoop or cookie scoop – Not essential, but it makes filling the muffin cups so much easier and keeps portions even.
- Cooling rack – Lets the oatmeal cups cool evenly so they do not get soggy on the bottom.
If you do not have a muffin tin, you can bake this in an 8×8 dish and cut it into squares. Just adjust the baking time to about 25-30 minutes. I have done it both ways and honestly, the muffin tin version is more fun and portable.
Preparation Method
Let me walk you through this step by step. I have made mistakes so you do not have to.
Step 1: Preheat and Prepare
Preheat your oven to 375°F (190°C). Grease your muffin tin well with cooking spray or line with paper liners. If you use liners, spray them lightly too. Pumpkin oatmeal cups can be sticky and you want them to release easily. I learned this the hard way when half my first batch stayed in the pan.
Step 2: Mix the Dry Ingredients
In a large bowl, whisk together the rolled oats, pumpkin pie spice, cinnamon, baking powder, and salt. Make sure everything is evenly distributed. The spices should coat the oats so every bite tastes consistent.
Step 3: Combine the Wet Ingredients
In a separate medium bowl, whisk together the pumpkin puree, milk, Greek yogurt, maple syrup, eggs, melted coconut oil, and vanilla extract. Whisk until smooth and fully combined. The mixture should look creamy and pale orange. If your coconut oil solidifies when it hits cold ingredients, warm the bowl slightly or whisk faster. It will still work.
Step 4: Combine Wet and Dry
Pour the wet ingredients into the dry ingredients. Fold gently with a spatula until just combined. Do not overmix. A few streaks of flour are fine. If you are adding chocolate chips or nuts, fold them in now. The batter will be thick and scoopable, not runny like regular muffin batter.
Step 5: Fill the Muffin Cups
Divide the batter evenly among the 12 muffin cups. An ice cream scoop makes this effortless. Fill each cup to the top and press down gently to pack the mixture. These do not rise much, so filling them full is correct. The tops should be slightly rounded.
Step 6: Bake
Bake for 18-22 minutes, or until the tops are golden brown and a toothpick inserted in the center comes out clean. The edges should be slightly firm and pulling away from the sides of the pan. Every oven runs differently. Mine is done at exactly 20 minutes. Start checking at 18 minutes to be safe.
Step 7: Cool
Let the oatmeal cups cool in the pan for 10 minutes. This is crucial. They need this time to set and hold their shape. If you try to remove them too early, they will fall apart. After 10 minutes, transfer them to a cooling rack and let them cool completely before storing.
Cooking Tips and Techniques
I have made this recipe enough times to know exactly where things can go wrong. Here is what I have learned.
Do not skip the cooling time. I know you are hungry and your kitchen smells amazing. But those ten minutes in the pan are non-negotiable. The oatmeal cups continue to set as they cool. Pull them out too early and you will be eating crumbles instead of cups. Trust me on this one.
Use room temperature eggs. Cold eggs can seize the coconut oil and make the batter lumpy. Leave your eggs on the counter for 15 minutes before starting, or place them in a bowl of warm water for five minutes. Small detail, big difference.
Press the mixture down firmly. When you fill the muffin cups, press the batter down with the back of your scoop or a spoon. This helps the oats pack together so the cups hold their shape after baking. Loose batter leads to crumbly cups.
Line your pan even if it is non-stick. I have a good non-stick muffin tin and I still use liners. Pumpkin is sticky and oatmeal cups are more delicate than regular muffins. Liners make removal foolproof and cleanup effortless.
Let them cool completely before storing. If you put warm oatmeal cups in a container, condensation will make them soggy. Wait until they are completely cool to the touch. Patience pays off here.
Toast your oats first for extra flavor. This is optional, but spreading the oats on a baking sheet and toasting them at 350°F for 8-10 minutes before mixing adds a nutty depth that takes these cups to another level. I do this when I have an extra ten minutes.
Variations and Adaptations
One of the best things about this recipe is how flexible it is. Here are some ways to make it your own.
Gluten-Free Version : Use certified gluten-free rolled oats. That is the only swap needed. Everything else is naturally gluten-free. I have made this for friends with celiac disease and they could not tell the difference.
Dairy-Free Version : Use almond milk or oat milk instead of regular milk, and swap the Greek yogurt for a thick dairy-free coconut yogurt. The texture stays the same. Just make sure your yogurt is thick, not runny.
Higher Protein Version : Add a scoop of vanilla or unflavored protein powder. Reduce the oats by 1/4 cup and add 1/4 cup protein powder. You may need to add an extra tablespoon of milk if the batter feels too dry. This version keeps me full until lunch easily.
Apple Pumpkin Version : Finely dice one small apple and fold it into the batter along with the mix-ins. The apple adds little bursts of sweetness and texture. This is my favorite fall variation and pairs beautifully with a pumpkin chai latte.
Lower Sugar Version : Reduce the maple syrup to 1/4 cup. The pumpkin and spices provide plenty of flavor, so you will not miss the extra sweetness. If you have a sweet tooth, add a few drops of liquid stevia to compensate.
Chocolate Pumpkin Version : Add 1/4 cup unsweetened cocoa powder to the dry ingredients and increase the maple syrup to 1/2 cup. Fold in chocolate chips. This tastes like a healthier brownie for breakfast and I am completely here for it.
Serving and Storage Suggestions
These oatmeal cups are designed for real life. Here is how to make them work for your week.
Serving : Eat them warm or at room temperature. I prefer them warm, so I pop one in the microwave for 20-25 seconds. The edges get slightly soft and the inside steams up perfectly. They are great on their own, but a drizzle of maple syrup or a dollop of Greek yogurt on top never hurts.
Refrigerator Storage : Store in an airtight container in the refrigerator for up to 5 days. Place a paper towel at the bottom of the container to absorb excess moisture and replace it every couple of days. This keeps them from getting soggy.
Freezer Storage : These freeze beautifully. Let them cool completely, then place them in a single layer on a baking sheet and freeze for one hour. Transfer to a freezer-safe bag or container. They will keep for up to 3 months. To reheat, microwave straight from frozen for 45-60 seconds or thaw overnight in the fridge.
Reheating : Microwave is fastest. For a crisper exterior, reheat in a toaster oven at 350°F for 5-7 minutes. I do this on weekends when I have a little more time and want that freshly baked texture.
Flavor Development : Honestly, these taste better on day two. The flavors meld together overnight and the spices become more pronounced. Do not be surprised if you like them more on Wednesday than you did on Sunday.
Nutritional Information and Benefits
These pumpkin baked oatmeal cups are not just convenient. They are genuinely good for you.
Estimated per oatmeal cup (without mix-ins) :
- Calories: 185
- Protein: 7g
- Carbohydrates: 28g
- Fiber: 4g
- Sugar: 11g (naturally occurring from maple syrup and pumpkin)
- Fat: 6g
- Iron: 1.5mg
Health Benefits : Pumpkin is packed with vitamin A, which supports eye health and immune function. Rolled oats provide soluble fiber that helps lower cholesterol and keeps you full. Greek yogurt adds protein and probiotics for gut health. This is a breakfast that fuels your body without weighing you down.
Dietary Considerations : This recipe is naturally vegetarian and can easily be made gluten-free, dairy-free, or higher protein. It is also nut-free if you skip the pecan or walnut mix-ins. Always check your ingredient labels if you have specific allergies.
Conclusion
These easy pumpkin baked oatmeal cups have genuinely changed my morning routine. I wake up, grab one from the fridge, heat it up, and I am out the door with a warm, satisfying breakfast in hand. No stress, no mess, no decisions to make before I have had my coffee.
I love this recipe because it does not ask much of you. It uses simple ingredients, comes together in under 30 minutes, and makes your whole week easier. That is the kind of recipe I want in my life. The kind that works with my schedule, not against it.
Try them this weekend. Make a batch for the week ahead. Throw some in the freezer for those mornings when you need a win. And when you make them, come back and tell me how they turned out. Did you add chocolate chips? Did you try the apple version? I want to hear about it.
Drop a comment below or tag me in your photos. Happy meal prepping, friends. You have got this.
Frequently Asked Questions
Can I use quick oats instead of rolled oats?
I do not recommend it. Quick oats absorb liquid differently and will make your oatmeal cups dense and mushy. Rolled oats give you that chewy, satisfying texture that holds up through the week. Stick with old-fashioned rolled oats for the best results.
Why did my oatmeal cups fall apart?
This usually happens for one of two reasons. Either you did not let them cool in the pan long enough before removing them, or your batter was too dry. Make sure you measure your pumpkin puree accurately and let the cups rest for the full 10 minutes after baking. They need that time to set.
Can I make these without eggs?
Yes, you can use a flax egg instead. Mix one tablespoon of ground flaxseed with three tablespoons of water and let it sit for five minutes until it forms a gel. Use this in place of each egg. The texture will be slightly denser but still delicious.
How do I make these sweeter without adding sugar?
Add more cinnamon and pumpkin pie spice. Spices trick your brain into perceiving sweetness without any actual sugar. You can also add mashed banana or finely diced apple for natural sweetness. If you need a little extra, a few drops of liquid stevia work well too.
Can I double this recipe?
Absolutely. This recipe doubles perfectly. Use two muffin tins or bake in batches. The baking time stays the same. I often make a double batch on Sunday and freeze half for later. It is the ultimate meal prep move.
PrintEasy Pumpkin Baked Oatmeal Cups: Best Meal Prep Recipe
These pumpkin baked oatmeal cups are a perfect meal prep breakfast. They are easy to make, portable, and taste like fall. Made with simple ingredients, they reheat in under a minute and are freezer-friendly.
- Prep Time: 15 minutes
- Cook Time: 20 minutes
- Total Time: 35 minutes
- Yield: 12 servings 1x
- Category: Breakfast
- Cuisine: American
Ingredients
- 2 cups rolled oats (old-fashioned)
- 1 cup pumpkin puree (100% pure pumpkin)
- 1 cup milk (any kind)
- 1/2 cup plain Greek yogurt (full-fat or 2%)
- 1/3 cup pure maple syrup
- 2 large eggs, room temperature
- 2 tablespoons coconut oil, melted (or melted butter)
- 1 teaspoon vanilla extract
- 2 teaspoons pumpkin pie spice
- 1 teaspoon cinnamon
- 1 teaspoon baking powder
- 1/4 teaspoon salt
- 1/3 cup chocolate chips (optional)
- 1/3 cup chopped pecans or walnuts (optional)
- 1/4 cup dried cranberries (optional)
Instructions
- Preheat oven to 375°F (190°C). Grease a 12-cup muffin tin with cooking spray or line with paper liners. Spray liners lightly.
- In a large bowl, whisk together rolled oats, pumpkin pie spice, cinnamon, baking powder, and salt.
- In a separate medium bowl, whisk together pumpkin puree, milk, Greek yogurt, maple syrup, eggs, melted coconut oil, and vanilla extract until smooth.
- Pour wet ingredients into dry ingredients. Fold gently with a spatula until just combined. Do not overmix. If using mix-ins, fold them in now.
- Divide batter evenly among the 12 muffin cups. Fill each cup to the top and press down gently to pack the mixture.
- Bake for 18-22 minutes, or until tops are golden brown and a toothpick inserted in the center comes out clean.
- Let oatmeal cups cool in the pan for 10 minutes. Then transfer to a cooling rack and cool completely before storing.
Notes
Do not skip the cooling time in the pan. Use room temperature eggs. Press the mixture down firmly in the muffin cups. Line the pan even if it is non-stick. Let cool completely before storing. Toast oats first for extra flavor (optional).
Nutrition
- Serving Size: 1 oatmeal cup
- Calories: 185
- Sugar: 11
- Sodium: 150
- Fat: 6
- Saturated Fat: 3
- Carbohydrates: 28
- Fiber: 4
- Protein: 7
Keywords: pumpkin baked oatmeal cups, meal prep breakfast, healthy breakfast, fall breakfast, easy oatmeal cups


