My friend Jenna dropped off a plate of these at my door last October, and I honestly thought they looked like a kids’ craft project gone wrong. Bright yellow, orange, and white layers stacked up like some sort of geometry homework. I thanked her, smiled, and set them on the counter, fully expecting to toss them after she left. But then I got curious around midnight (when my best decisions happen) and took one tiny bite. That was three years ago, and I have not stopped making them since.
These Easy Candy Corn Sugar Cookie Bars are the dessert that made me eat my words. They look playful—almost silly—with those tri-colored layers mimicking everyone’s favorite controversial Halloween candy. But underneath that candy corn disguise is a soft, buttery sugar cookie base that stays tender for days. No chilling, no rolling, no fussing with individual cookies. You press everything into a pan, chill for a bit, slice, and suddenly you have the most adorable fall treat that actually tastes like a real dessert, not just a sugar rush.
The thing is, I am not a candy corn person. Never have been. But these bars? They do not taste like candy corn at all. They taste like a really good sugar cookie with a little vanilla punch, dyed in layers to look festive. The candy corn on top adds a tiny bit of chew and sweetness, but it is totally optional. I have made them without, and they are still dangerously good. This recipe has become my secret weapon for fall parties, classroom treats, and those afternoons when you just need something sweet without spending hours in the kitchen.
Why You’ll Love This Recipe
These sugar cookie bars solve a very real problem. You want something festive and fun for fall, but you do not have time to roll out dozens of individual cookies, chill dough, and decorate each one. These bars give you all the satisfaction of a homemade sugar cookie with about a quarter of the effort. Honestly, that is a win in my book any day of the week.
- Quick & Easy : From start to finish, you are looking at about 35 minutes of active work. The dough comes together in one bowl, and you do not even need a mixer if your butter is soft enough.
- Simple Ingredients : Butter, sugar, flour, eggs, vanilla, and food coloring. That is it. No specialty extracts, no hard-to-find baking mixes, nothing weird.
- Perfect for Fall Gatherings : These bars disappear at Halloween parties, Thanksgiving dessert tables, and even casual game-day spreads. They are festive without being over-the-top.
- Crowd-Pleaser : Kids love the candy corn look, and adults love that they actually taste like real baked goods. I have watched people grab three before they even sit down.
- Unbelievably Delicious : The texture is what gets you. Soft, almost cake-like in the center with slightly firmer edges. The butter and vanilla flavor is front and center, and the candy corn adds just a hint of that nostalgic Halloween taste.
What makes these different from every other sugar cookie bar recipe out there is the layering technique. Instead of mixing all the colors into one weird blob, you press them in distinct bands so each slice looks like a perfect little candy corn. It sounds fancy, but it is actually easier than trying to swirl everything together. Trust me on this one.
This is the kind of recipe that makes you feel like you pulled off something impressive even though it took almost no effort. That is my favorite kind of baking, honestly.
What Ingredients You Will Need
This recipe keeps things simple. No fancy flours, no obscure extracts, nothing that requires a special trip to a specialty store. These are all pantry staples that you probably already have on hand, especially if you do any kind of fall baking.
- Unsalted butter, softened to room temperature (1 cup / 2 sticks / 226g) — I use Kerrygold when I want that extra buttery flavor, but any good unsalted butter works. Make sure it is truly softened, not melted. Melted butter changes the texture completely.
- Granulated sugar (1 ½ cups / 300g) — Regular white sugar gives these bars that classic sugar cookie sweetness and helps create that slightly crisp edge.
- Large eggs (2, room temperature) — Room temperature eggs incorporate better into the butter-sugar mixture, giving you a smoother, more even dough. If you forgot to take them out early, place them in a bowl of warm water for 5 minutes.
- Vanilla extract (2 teaspoons) — Pure vanilla extract makes a real difference here. The imitation stuff works in a pinch, but the flavor is noticeably less rich. I use Nielsen-Massey when I am feeling fancy.
- All-purpose flour (2 ½ cups / 312g) — Spoon and level your flour. Scooping directly from the bag packs it down and gives you too much flour, which makes dry, crumbly bars.
- Baking powder (1 teaspoon) — This gives the bars a little lift so they are not flat and dense. Make sure your baking powder is fresh (test it by dropping a bit in hot water—it should bubble immediately).
- Salt (½ teaspoon) — Do not skip this. Salt balances the sweetness and brings out the vanilla flavor. I use fine sea salt for baking.
- Yellow and orange gel food coloring — Gel coloring is key here. Liquid food coloring will mess with the dough consistency and give you muddy colors. I use AmeriColor brand, but any gel works. You will need about 6-8 drops of yellow and 4-6 drops of orange for each section.
- Candy corn (about ½ cup / 100g, for topping) — This is optional but highly recommended for the full effect. I use Brach’s classic candy corn, but any brand works. You can also use candy pumpkins or skip the topping entirely.
One note on the candy corn: some people hate it. If you are feeding a crowd where candy corn is controversial, you can absolutely leave it off and just enjoy the layered sugar cookie bars on their own. They are still gorgeous and delicious without it.
Equipment Needed
You do not need a professional bakery setup for these bars. Just a few basic tools that most home bakers already own.
- 9×13-inch baking pan — A metal pan gives you more even browning than glass. If you only have glass, reduce the oven temperature by 25°F and keep an eye on the edges.
- Parchment paper — This is non-negotiable. Line your pan with parchment, leaving some overhang on the long sides. It makes lifting the entire block of bars out so much easier, and cleanup is a breeze.
- Large mixing bowl — Any big bowl works. I use a glass mixing bowl because it does not retain smells from previous recipes.
- Electric hand mixer or stand mixer — You can do this by hand with a wooden spoon if your butter is really soft, but a mixer makes it much faster and gives you a creamier texture.
- Spatula — A good silicone spatula for scraping down the bowl and pressing the dough into the pan.
- Small bowls — Three small bowls for dividing and coloring the dough. I use cereal bowls, nothing fancy.
- Sharp knife or bench scraper — For cutting clean slices. A serrated knife also works well.
If you do not have a 9×13 pan, you can use two 8×8 square pans. Just reduce the baking time by about 5-7 minutes and check for doneness early. The bars will be thicker, so keep an eye on the center.
Preparation Method
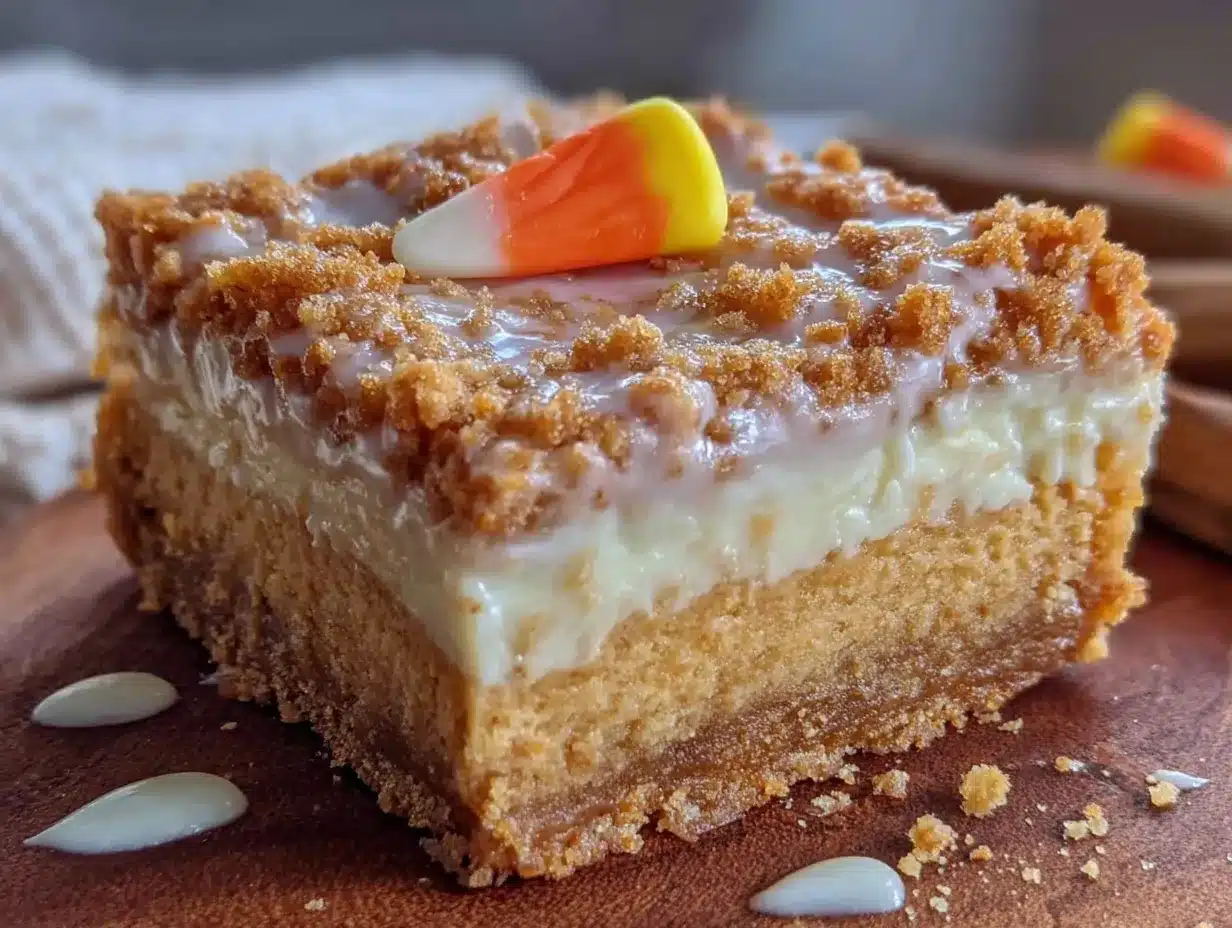
Alright, let us get into the actual making of these bars. The process is straightforward, but the layering part requires a little patience. I promise it is worth it.
- Preheat and prep. Preheat your oven to 350°F (175°C). Line your 9×13 baking pan with parchment paper, leaving about 2 inches of overhang on the two long sides. This will be your handle later when you lift the bars out.
- Cream the butter and sugar. In a large mixing bowl, beat the softened butter and granulated sugar together until light and fluffy. This takes about 2-3 minutes with an electric mixer on medium speed. You want the mixture to look pale and almost doubled in volume. Scrape down the sides of the bowl halfway through.
- Add eggs and vanilla. Crack the eggs into a small bowl first (just in case you get shell fragments), then add them to the butter mixture one at a time, beating well after each addition. Add the vanilla extract and beat until everything is combined. The mixture might look a little curdled at this point—that is normal, do not panic.
- Mix the dry ingredients. In a separate medium bowl, whisk together the flour, baking powder, and salt. Add the dry ingredients to the wet mixture in two additions, mixing on low speed until just combined. Overmixing at this stage will make your bars tough. Stop as soon as you do not see any more flour streaks.
- Divide the dough. This is where the magic happens. Split the dough into three equal portions. I use a kitchen scale for accuracy (about 280g each), but you can eyeball it. Place each portion into a separate small bowl.
- Color the dough. Add yellow gel food coloring to one portion and mix until the color is even and bright. Add orange gel food coloring to another portion and mix well. Leave the third portion plain (white/cream colored). Start with a few drops and add more until you reach the shade you want. Remember, the colors will bake up slightly lighter, so go a touch darker than you think you need.
- Layer the dough. Here is the trick: press the yellow dough evenly into the bottom of your prepared pan. Use your fingers or a spatula to spread it all the way to the edges. Next, take the orange dough and press it gently on top of the yellow layer, spreading it evenly. Finally, press the plain (white) dough on top. You want each layer to be relatively even in thickness. Do not worry if the layers blend a little at the edges—it adds to the homemade look.
- Chill the pan. Pop the pan into the refrigerator for 15-20 minutes. This step is important. Chilling firms up the dough so the layers stay distinct when you bake. If you skip this, the colors might bleed together and you will end up with a muddy mess instead of clean stripes.
- Bake. Place the pan in the preheated oven and bake for 18-22 minutes. The edges should be lightly golden and the center should look set but still soft. A toothpick inserted into the center should come out with a few moist crumbs, not wet batter. Do not overbake—these bars continue to cook a bit as they cool in the pan.
- Add candy corn. If you are using candy corn, remove the pan from the oven and immediately press the candy corn pieces gently into the top layer. Space them out evenly. The residual heat will soften them just enough to stick without melting into puddles.
- Cool completely. Let the bars cool in the pan on a wire rack for at least 1 hour. Then, using the parchment overhang, lift the entire block out of the pan and transfer to a cutting board. Let it cool completely before slicing. I know it is tempting to cut into them warm, but they will crumble and fall apart. Patience, friend.
- Slice and serve. Use a sharp knife to cut the block into bars. I usually go for 24 bars (cut into 4 rows by 6 rows). Wipe the knife clean between cuts for the neatest slices. For the cleanest presentation, chill the block for another 20 minutes before slicing.
Cooking Tips & Techniques
I have made these bars probably two dozen times at this point, and I have learned a few things the hard way. Let me save you some trouble.
Do not overmix the dough. This is the number one mistake people make with sugar cookie bars. Once you add the flour, mix only until it disappears. Overmixing develops gluten, which makes the bars tough and bread-like instead of tender and soft. I learned this after making a batch that could have doubled as a doorstop.
Use gel food coloring. I cannot stress this enough. Liquid food coloring from the grocery store baking aisle will thin out your dough and give you washed-out colors. Gel colors are concentrated, so you use less, and they do not affect the dough consistency. A little goes a long way—start with a tiny drop and add more until you like the shade.
Chill the layered dough. I know you want to get these in the oven fast, but that 15-minute chill is your best friend. It firms up the butter in the dough, which means the layers stay where you put them instead of melting together into one sad beige blob. One time I skipped this step because I was in a rush, and my “candy corn” bars looked more like a muddy sunset. Still tasted good, but not as pretty.
Check for doneness early. Every oven runs differently. My old oven would bake these in exactly 19 minutes. My new one takes 22. Start checking at 18 minutes. The edges should be golden brown and pulling away from the pan slightly. The center should look set but still soft—if it jiggles, give it another 2 minutes.
Let them cool fully before cutting. This is the hardest part, I know. But warm sugar cookie bars are fragile and will crumble into a delicious but messy pile. If you need them to look pretty for a party, let them cool completely, then chill for 20 minutes before slicing. Clean cuts every time.
Variations & Adaptations
These bars are surprisingly versatile. Here are some ways to switch them up depending on your mood, dietary needs, or what you have in the pantry.
Gluten-Free Version : Substitute the all-purpose flour with a 1:1 gluten-free baking flour blend. I have used Bob’s Red Mill and King Arthur Measure for Measure with great results. Add an extra tablespoon of milk or water to the dough since gluten-free flours tend to absorb more liquid. The texture will be slightly more cake-like, but still delicious.
Dairy-Free Version : Use vegan butter sticks (not the spreadable tub kind) in place of regular butter. I like Earth Balance or Miyoko’s. Make sure your candy corn is dairy-free too—most brands are, but check the label if you are serving someone with a dairy allergy.
Holiday Color Variations : This technique works for any holiday. Use red and green for Christmas bars, pink and red for Valentine’s Day, or blue and white for winter celebrations. You can even do three layers of different shades of the same color for a monochromatic look.
Flavor Twists : Add 1 teaspoon of almond extract along with the vanilla for a subtle nutty flavor. Or stir in ½ teaspoon of cinnamon and ¼ teaspoon of nutmeg to the flour mixture for a warm fall spice version. I made a batch with orange zest mixed into the white layer once, and it was incredible.
No Candy Corn Option : If candy corn is not your thing (no judgment here), top the bars with white chocolate chips, sprinkles, or a simple powdered sugar glaze instead. The bars are just as good without any topping at all—the layered colors are festive enough on their own.
Mini Bar Version : Press the dough into a 9×9 square pan and bake for 15-17 minutes. You will get thicker, more substantial bars that are perfect for lunchboxes or afternoon snacks.
Serving & Storage Suggestions
These bars are best served at room temperature, straight from the cutting board. The texture is soft and tender, the candy corn (if you used it) has a slight chew, and the butter-vanilla flavor really shines when they are not cold.
Presentation Ideas : Arrange the bars on a white platter or cake stand so the colorful layers really pop. For Halloween parties, I like to place them on a black serving tray with some candy corn scattered around. They also look great stacked in a mason jar or clear cookie jar for a more casual vibe.
Pairing Suggestions : These bars go beautifully with a hot cup of coffee or a tall glass of cold milk. For a fun fall dessert board, serve them alongside soft baked pumpkin snickerdoodle cookies and some apple slices. They also make a great addition to a Halloween party spread with mummy pigs in a blanket and other savory snacks.
Storage : Store leftover bars in an airtight container at room temperature for up to 5 days. Place a piece of parchment paper between layers to prevent sticking. Do not refrigerate them—the fridge dries out baked goods and makes them stale faster. If your kitchen is particularly warm, you can store them in the fridge for up to a week, but bring them to room temperature before serving for the best texture.
Freezing : These bars freeze beautifully. Wrap the entire cooled block (or individual bars) tightly in plastic wrap, then in aluminum foil. Freeze for up to 3 months. To thaw, let them sit at room temperature for about 30 minutes. Do not microwave to thaw—it will make the edges hard and the center gummy.
Flavor Development : Honestly, these bars taste even better the day after baking. The flavors meld together, and the texture softens slightly. If you can resist eating them all on day one, you will be rewarded on day two.
Nutritional Information & Benefits
Let us be real—these are a treat, not a health food. But knowing what is in them helps you make informed choices, especially if you are serving them to kids or people with dietary restrictions.
Estimated Nutrition (per bar, based on 24 servings) :
- Calories: 185
- Total Fat: 9g
- Saturated Fat: 5g
- Cholesterol: 35mg
- Sodium: 95mg
- Total Carbohydrates: 26g
- Sugars: 16g
- Protein: 2g
Dietary Considerations : This recipe contains wheat (gluten), dairy (butter), and eggs. It is not suitable for vegans or those with celiac disease unless you use the substitutions mentioned above. The candy corn topping contains corn syrup and artificial colors, so skip it if you are avoiding those ingredients.
Health Perspective : I am not here to tell you that sugar cookie bars are good for you. But I will say this—baking from scratch using real ingredients like butter, eggs, and vanilla is always going to be better than anything from a box or a package. You control what goes in, and there are no preservatives, stabilizers, or mystery ingredients. Plus, there is something good for the soul about pulling a pan of homemade treats out of the oven and sharing them with people you love. That counts for something.
Conclusion
These Easy Candy Corn Sugar Cookie Bars have become my go-to fall dessert for a reason. They look festive and fun without requiring any fancy decorating skills. They taste like a really good sugar cookie—buttery, soft, and just sweet enough. And they come together in under an hour with ingredients you probably already have in your kitchen.
I love that this recipe lets me bring something homemade to parties without spending all day in the kitchen. I love watching people’s faces light up when they see the candy corn layers in the first bite. And I love that I can customize them for any holiday or occasion with just a few tweaks.
If you make these bars, I would love to hear how they turned out. Did you add the candy corn? Did you try a different color combination? Did you eat three before they even cooled? (No judgment, I have been there.) Drop a comment below and let me know. And if you are looking for more easy fall treats, check out my creamy pumpkin cheesecake bars or these apple cider donut bites for more seasonal baking inspiration.
Happy baking, friends. Go make something sweet.
Frequently Asked Questions
Can I use salted butter instead of unsalted?
Yes, you can. Just reduce or omit the added salt in the recipe. Salted butter typically has about ¼ teaspoon of salt per stick, so if you use salted butter, skip the extra ½ teaspoon of salt in the dry ingredients. The bars might be slightly saltier, but it will not ruin them.
Why did my layers blend together?
This usually happens for one of two reasons. Either you did not chill the dough long enough before baking, or your dough was too warm when you layered it. Make sure your butter is softened but not greasy, and do not skip the 15-minute chill in the fridge. If your kitchen is very warm, chill for 20 minutes.
Can I make these bars ahead of time?
Absolutely. You can bake them up to 2 days in advance and store them in an airtight container at room temperature. They actually taste better on day two. You can also freeze the baked and cooled bars for up to 3 months. Just thaw at room temperature before serving.
How do I get clean, neat slices?
Let the bars cool completely, then chill them in the fridge for 20-30 minutes before cutting. Use a sharp chef’s knife and wipe the blade clean between each cut. If you want really precise edges, trim off the outer edges of the block before slicing into bars.
Can I use natural food coloring instead of gel?
You can, but the colors will be much more muted. Natural food colorings tend to produce pastel shades rather than bright, vibrant ones. If you want that classic candy corn orange and yellow, gel food coloring is your best bet. If you are okay with softer, more subtle colors, natural options work fine.
Pin This Recipe!
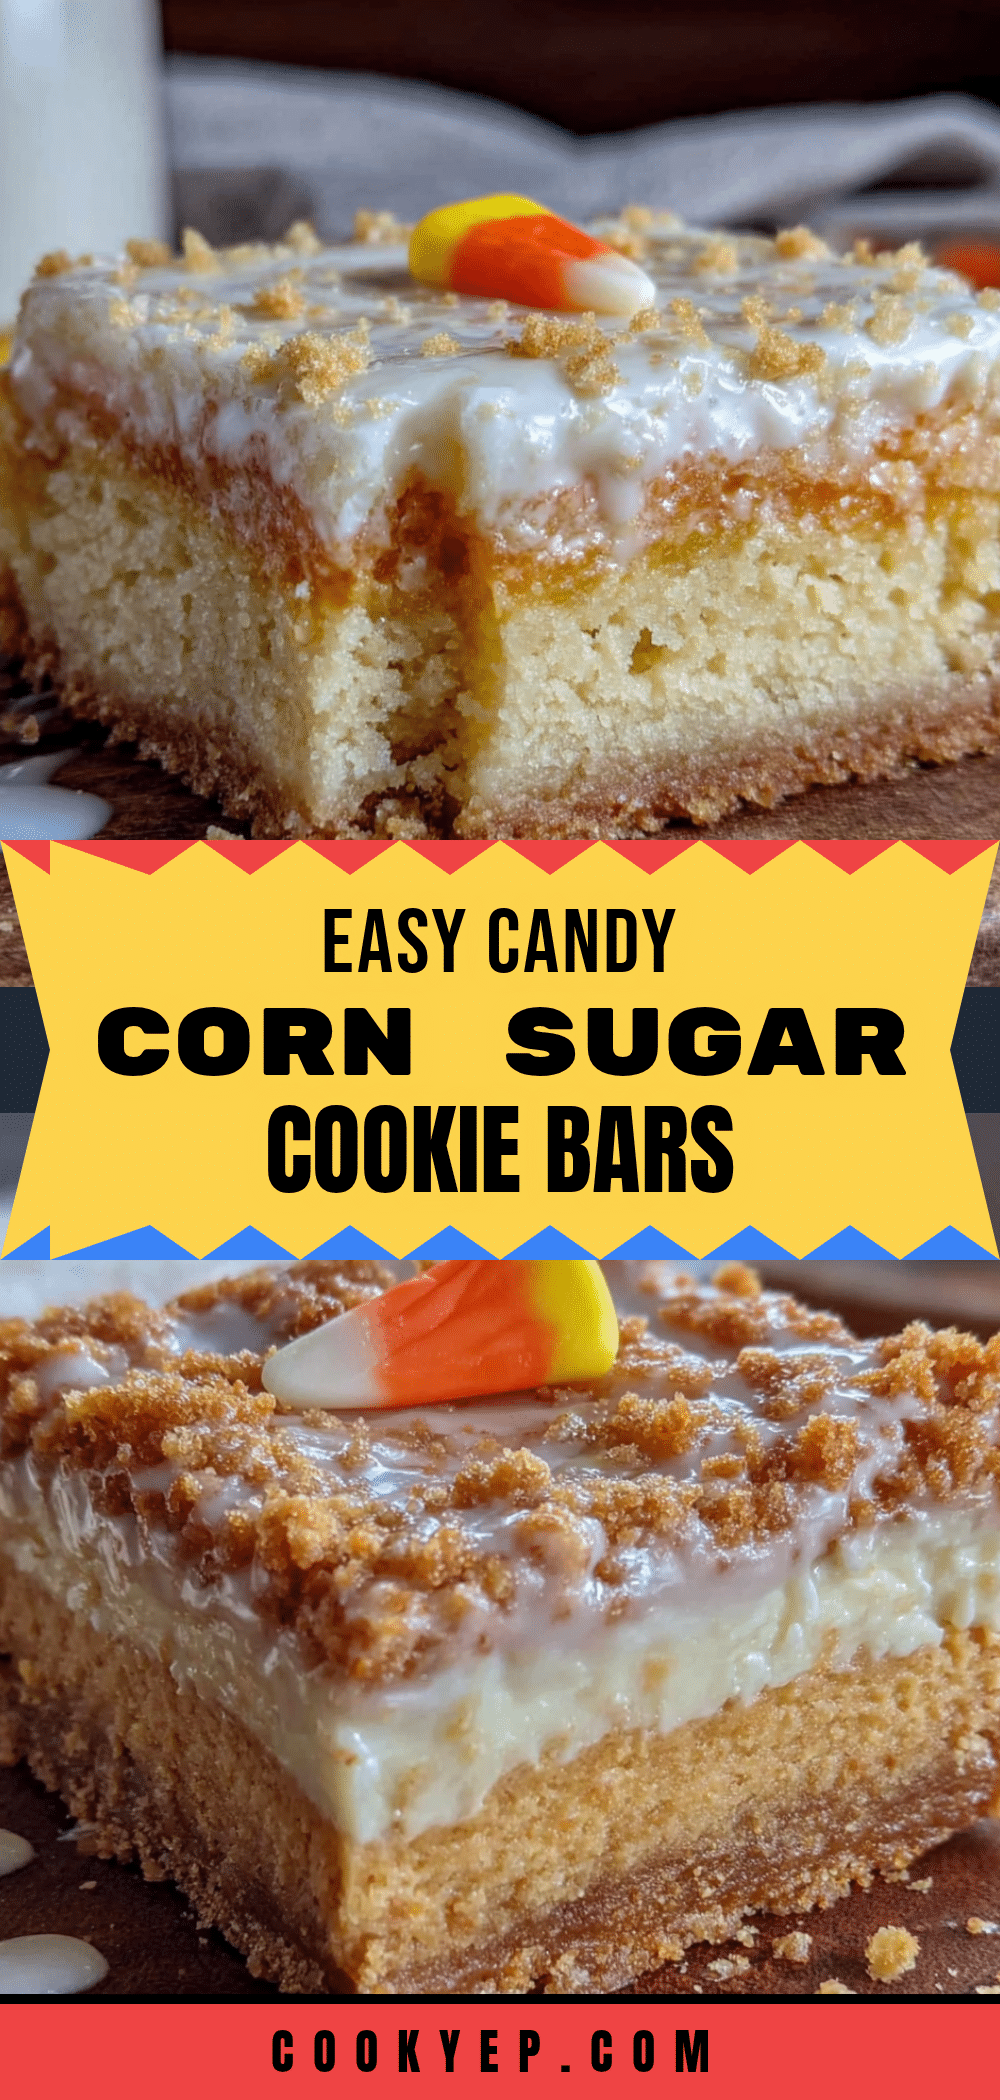
Easy Candy Corn Sugar Cookie Bars: Best Fall Dessert
These Easy Candy Corn Sugar Cookie Bars are a soft, buttery sugar cookie base with festive tri-colored layers mimicking candy corn. They come together in under an hour with simple ingredients and are perfect for fall gatherings.
- Prep Time: 15 minutes
- Cook Time: 20 minutes
- Total Time: 35 minutes
- Yield: 24 bars 1x
- Category: Dessert
- Cuisine: American
Ingredients
- 1 cup (2 sticks / 226g) unsalted butter, softened to room temperature
- 1 ½ cups (300g) granulated sugar
- 2 large eggs, room temperature
- 2 teaspoons vanilla extract
- 2 ½ cups (312g) all-purpose flour
- 1 teaspoon baking powder
- ½ teaspoon salt
- Yellow and orange gel food coloring
- ½ cup (100g) candy corn (optional, for topping)
Instructions
- Preheat oven to 350°F (175°C). Line a 9×13-inch baking pan with parchment paper, leaving overhang on the long sides.
- In a large bowl, beat softened butter and granulated sugar together until light and fluffy, about 2-3 minutes.
- Add eggs one at a time, beating well after each addition. Add vanilla extract and beat until combined.
- In a separate bowl, whisk together flour, baking powder, and salt. Add dry ingredients to wet mixture in two additions, mixing on low until just combined.
- Divide dough into three equal portions (about 280g each). Place each in a separate small bowl.
- Add yellow gel food coloring to one portion and mix until evenly colored. Add orange gel food coloring to another portion and mix. Leave the third portion plain.
- Press the yellow dough evenly into the bottom of the prepared pan. Gently press the orange dough on top, then the plain dough on top. Spread each layer evenly.
- Refrigerate the pan for 15-20 minutes to firm up the dough.
- Bake for 18-22 minutes, until edges are lightly golden and center is set but still soft. A toothpick inserted in the center should come out with moist crumbs.
- If using candy corn, remove pan from oven and immediately press candy corn pieces gently into the top layer.
- Cool in the pan on a wire rack for at least 1 hour. Then lift the block out using parchment overhang and cool completely before slicing.
- Slice into 24 bars (4 rows by 6 rows) using a sharp knife, wiping clean between cuts.
Notes
Do not overmix the dough to avoid tough bars. Use gel food coloring for vibrant colors. Chilling the layered dough is essential to keep layers distinct. Let bars cool completely before slicing for clean cuts. Bars taste even better the next day.
Nutrition
- Serving Size: 1 bar
- Calories: 185
- Sugar: 16
- Sodium: 95
- Fat: 9
- Saturated Fat: 5
- Carbohydrates: 26
- Protein: 2
Keywords: candy corn, sugar cookie bars, fall dessert, Halloween, easy, no chill