That sizzle — the one that hits your ears a full second before the smell of browning beef reaches your nose — still takes me straight to my first apartment. I was twenty-two, had exactly three pans to my name, and my entire cooking philosophy boiled down to “how fast can I get this on the table?” This cheesy ground beef rice skillet was born on a Tuesday night when my fridge held ground beef, a block of cheddar, and half an onion rolling around the crisper drawer. I remember staring at that sad little onion like it held the answers to adulthood. Turns out, it kind of did.
I had no grand plan. No recipe card. Just a hungry stomach and the vague memory of my mom making something similar on chaotic weeknights. I tossed the beef in the pan, added some rice straight from the bag (because I didn t own a measuring cup that wasn t a coffee mug), and prayed. The cheese went on top at the last minute — partly for flavor, mostly for drama. When I lifted the lid and saw that melted, bubbly blanket stretching across the rice, I felt like I d discovered fire.
This recipe stuck because it asks nothing of you. It doesn t demand fancy techniques or a pantry full of obscure spices. It meets you exactly where you are — tired, hungry, maybe a little overwhelmed. And somehow, it still tastes like you tried. That s the magic of a quick cheesy ground beef rice skillet. It s not trying to impress anyone. It s just trying to feed you, fast.
Why You ll Love This Recipe
Let me tell you why this one earns a permanent spot in my weekly rotation. After testing this dish more times than I care to admit (including one memorable attempt where I forgot the cheese entirely — tragic), I can confidently say this version hits every single note.
- Ready in under 30 minutes — From pan to plate, this comes together faster than takeout delivery. Perfect for those nights when hangry sets in.
- Pantry-friendly ingredients — Ground beef, rice, cheese, and a few basics. No special trips to the store required.
- One skillet, minimal cleanup — Everything cooks in a single pan. Less dishes means more time to actually sit down and enjoy your meal.
- Crowd-pleaser guaranteed — I ve served this to picky kids, skeptical in-laws, and hungry college friends. Empty plates every single time.
- Comfort food that delivers — The combination of savory beef, tender rice, and gooey melted cheese is pure weeknight magic.
What makes this version different from every other skillet recipe out there? Two things. First, I toast the rice in the pan with the beef drippings before adding liquid — this small step adds a nutty depth that takes the whole dish up a notch. Second, I use a blend of cheddar and Monterey Jack for that perfect stretchy, creamy melt. No clumpy, greasy mess here.
This isn t just another ground beef recipe. It s the one you ll make on autopilot, the one you ll text your friends about, the one that becomes your emergency dinner playbook. And honestly? That s exactly what a weeknight dinner should be.
What Ingredients You Will Need
This quick cheesy ground beef rice skillet relies on simple, everyday ingredients that work together to create something greater than the sum of their parts. Here s what you ll need and why each one matters.
For the Base
- 1 pound ground beef (80/20) — I prefer 80/20 for this recipe because the extra fat means more flavor and you don t need to add oil. If using leaner beef, add a tablespoon of olive oil to prevent sticking.
- 1 medium yellow onion, diced — About 1 cup. Onion adds sweetness and savory depth. Yellow onions are my go-to here, but white or sweet onions work fine too.
- 3 cloves garlic, minced — Fresh garlic makes a difference. Don t skip it, and don t use the jarred stuff if you can help it. The flavor just isn t the same.
- 1 cup long-grain white rice, uncooked — I use standard long-grain rice for the best texture. Basmati works too, but avoid instant rice — it gets mushy. For a broader look at weeknight-friendly recipes, this skillet fits right in with other no-fuss meals.
- 2 cups beef broth — Low-sodium is best so you can control the salt level. Chicken broth works in a pinch, but beef broth gives a richer flavor.
- 1 can (14.5 oz) diced tomatoes, undrained — Fire-roasted adds a subtle smokiness I love. Regular diced tomatoes are perfectly fine too.
- 1 teaspoon paprika — Smoked paprika adds warmth; sweet paprika keeps it mild. Either works.
- 1 teaspoon dried oregano — Italian or Mexican oregano both work here. Adds that subtle herbaceous note.
- ½ teaspoon salt — Adjust to taste, especially if using salted broth.
- ½ teaspoon black pepper — Freshly ground if you have it.
For the Cheesy Finish
- 1 ½ cups shredded cheddar cheese — Sharp cheddar gives the most flavor. Shred your own if you can — pre-shredded cheese has anti-caking agents that prevent smooth melting.
- ½ cup shredded Monterey Jack cheese — This adds creaminess and that perfect stretch. Mozzarella works as a substitute.
- 2 tablespoons chopped fresh parsley (optional) — For color and a fresh finish. Completely optional but nice for presentation.
Ingredient swap tip: For a lower-carb version, swap the rice for cauliflower rice and reduce the broth to 1 cup. Cook time drops to about 10 minutes after adding the cauliflower. For a dairy-free option, use your favorite plant-based shredded cheese — just know the melt won t be quite as luxurious.
Equipment Needed
You don t need a fancy kitchen to make this recipe work. Here s what you ll actually use:
- Large skillet or Dutch oven (12-inch) — A deep, heavy-bottomed skillet is ideal. Cast iron works beautifully, but any non-stick or stainless steel pan with a lid will do. I use my trusty 12-inch cast iron skillet — it holds heat evenly and goes from stovetop to table nicely.
- Wooden spoon or spatula — For breaking up the beef and stirring the rice. A flat-edged wooden spoon works best for scraping up browned bits.
- Lid — Essential for cooking the rice. If your skillet doesn t have a lid, use a baking sheet or aluminum foil tightly sealed.
- Cheese grater — Block cheese melts better, so grate it yourself. A box grater or microplane works fine.
- Measuring cups and spoons — Nothing fancy needed. I use my coffee mug for broth in a pinch, but measuring cups are more accurate.
- Cutting board and knife — For dicing the onion and mincing garlic.
Budget-friendly tip: If you don t own a Dutch oven, a deep non-stick skillet from the grocery store costs under $20 and works perfectly for this recipe. I used one for years before upgrading.
Preparation Method
Let s walk through this step by step. Trust me, once you make this once, you ll have it memorized.
- Brown the beef — Place your skillet over medium-high heat. Add the ground beef and break it apart with your spoon. Cook for 5-6 minutes, stirring occasionally, until the beef is browned and no longer pink. Don t drain all the fat — leave about 1 tablespoon in the pan for flavor. If you drain too much, the rice won t have enough fat to toast properly.
- Sauté the aromatics — Reduce heat to medium. Add the diced onion to the skillet and cook for 3-4 minutes, stirring frequently, until softened and translucent. Add the minced garlic and cook for 30 seconds more — just until fragrant. Be careful not to burn the garlic; it turns bitter quickly.
- Toast the rice — Add the uncooked rice to the skillet and stir to coat it in the beef drippings and onion mixture. Cook for 2 minutes, stirring constantly. You ll notice the rice turning slightly golden and smelling nutty. This step is non-negotiable — it prevents mushy rice and adds incredible depth.
- Add liquids and seasonings — Pour in the beef broth and undrained diced tomatoes. Add the paprika, oregano, salt, and pepper. Stir everything together, scraping the bottom of the pan to release any browned bits. Bring the mixture to a boil.
- Simmer the rice — Once boiling, reduce the heat to low, cover the skillet with a tight-fitting lid, and let it simmer for 18-20 minutes. Do not lift the lid during this time — the steam is what cooks the rice evenly. Set a timer so you don t forget.
- Check for doneness — After 18 minutes, remove the lid carefully (steam will rush out). The rice should be tender and most of the liquid should be absorbed. If the rice is still firm and there s liquid left, cover and cook for 2-3 more minutes. If the rice is tender but there s excess liquid, leave the lid off and cook for 1-2 minutes to evaporate it.
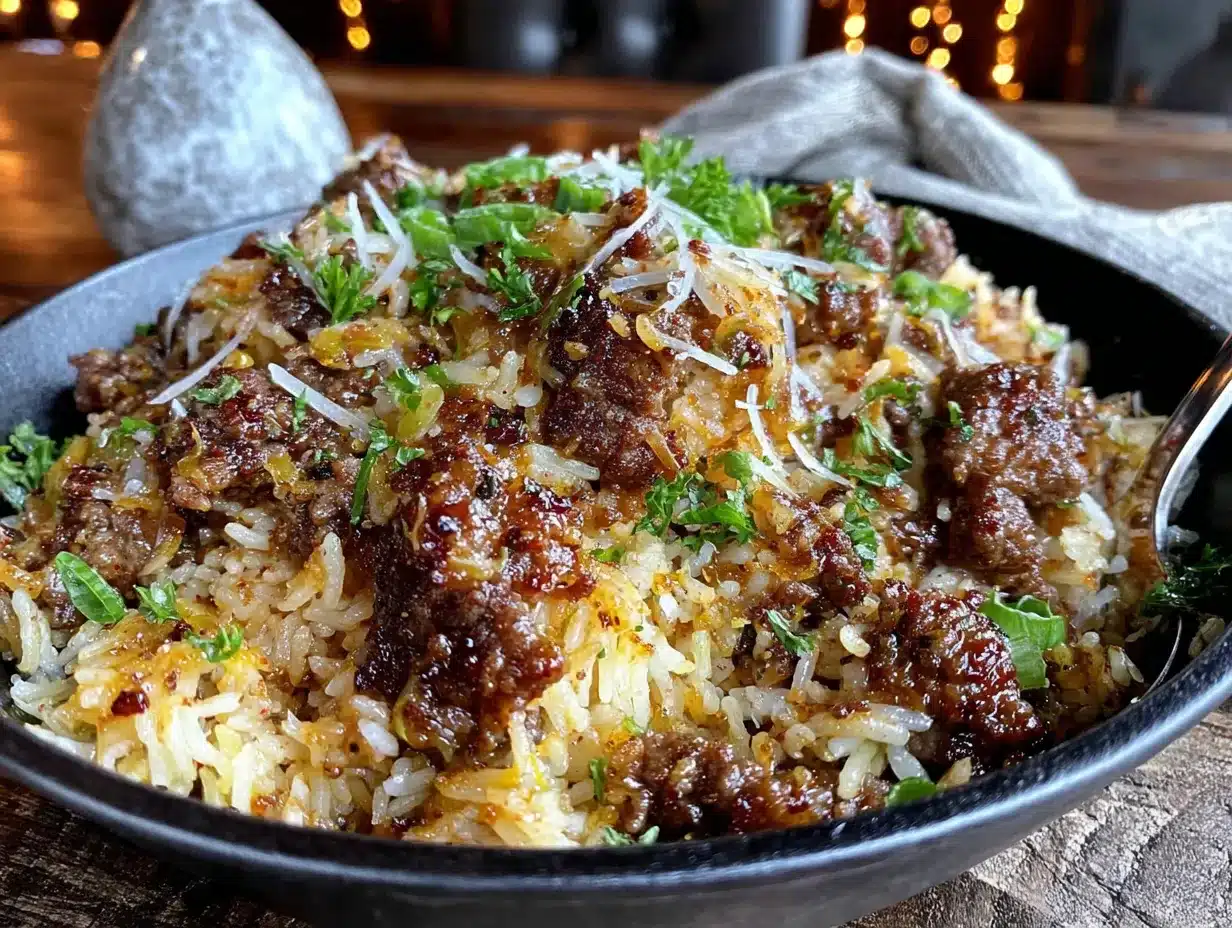
- Add the cheese — Remove the skillet from heat. Sprinkle the shredded cheddar and Monterey Jack evenly over the top of the rice mixture. Cover the skillet again and let it sit for 2-3 minutes — the residual heat will melt the cheese into a gooey, irresistible blanket.
- Finish and serve — Uncover the skillet. The cheese should be fully melted and bubbly. Sprinkle with fresh parsley if using. Serve directly from the skillet or spoon into bowls. Let it cool for 2 minutes before digging in — molten cheese burns are real.
Sensory cue: At step 3, you should smell a toasty, popcorn-like aroma from the rice. At step 7, the cheese should look glossy and stretchy when you pull the spoon through it. If it looks oily, you may have used pre-shredded cheese — that s normal, just stir it in.
Cooking Tips & Techniques
I ve made this quick cheesy ground beef rice skillet at least forty times, and I ve learned a few things the hard way. Here s what I wish someone had told me.
Don t rush the browning. I know you re hungry, but letting the beef develop a deep brown crust adds flavor you can t get any other way. If the pan is too crowded, the beef steams instead of browning. Work in batches if needed, or use a wider pan.
Toast the rice properly. This was my biggest game-changer. Toasting the rice in the beef drippings before adding liquid keeps each grain separate and adds a nutty flavor. I once skipped this step because I was in a hurry, and the rice turned out gummy and bland. Learn from my mistake.
Resist the lid-lifting urge. I know it s tempting to peek. Don t. Every time you lift that lid, steam escapes and your cooking time increases. Trust the process and let the rice do its thing.
Shred your own cheese. Pre-shredded cheese is coated in potato starch or cellulose to prevent clumping, which also prevents smooth melting. I learned this after a particularly sad, grainy batch. A block of cheddar and a grater take 30 seconds — worth every second.
Let it rest before serving. That 2-3 minute rest after adding the cheese isn t just for melting. It lets the rice absorb any remaining liquid and the flavors meld together. Serve too early and you ll have a soupy skillet. Patience pays off here.
Timing strategy: While the rice simmers (step 5), use those 18 minutes to wash the cutting board, set the table, or make a quick side salad. The fresh quinoa and kale power salad from this site pairs beautifully if you want something green alongside.
Variations & Adaptations
This recipe is a blank canvas. Here are some ways I ve adapted it over the years.
Spicy Southwest version — Add 1 diced jalapeño with the onion, swap the paprika for 1 teaspoon chili powder and ½ teaspoon cumin, and use pepper jack cheese instead of Monterey Jack. Top with sliced avocado and a squeeze of lime. This is my personal favorite when I want a kick.
Vegetable-loaded skillet — Add 1 cup frozen corn, 1 diced bell pepper, and ½ cup diced zucchini after the onion softens. Cook for 3-4 minutes before adding the rice. You get extra nutrients and the vegetables soak up all that beefy flavor.
Low-carb adaptation — Replace the white rice with 3 cups cauliflower rice. After browning the beef and sautéing the aromatics, add the cauliflower rice, broth (reduce to 1 cup), and tomatoes. Cook covered for 8-10 minutes, then add cheese. It s lighter but still satisfying.
Mexican-inspired twist — Use 1 can of Rotel tomatoes (diced tomatoes with green chiles) instead of regular diced tomatoes. Add ½ cup black beans and ½ cup corn with the tomatoes. Top with fresh cilantro and a dollop of sour cream. Serve with tortilla chips for scooping.
Dairy-free option — Use dairy-free shredded cheese (I like Violife or Miyoko s for melting) and ensure your broth is dairy-free. The texture won t be quite as stretchy, but the flavor is still excellent.
I once made a Greek-inspired version with ground lamb, oregano, feta cheese crumbled on top, and a splash of lemon juice. It was incredible. Don t be afraid to experiment — this skillet forgives almost everything.
Serving & Storage Suggestions
This cheesy ground beef rice skillet is at its best served hot, straight from the skillet. Here s how to make the most of it.
Serving temperature and presentation: Let the skillet rest for 2-3 minutes after adding the cheese, then serve while it s still bubbly. Spoon into shallow bowls and garnish with fresh parsley or chopped green onions. I like to serve it with a side of crusty bread for soaking up any saucy bits, or a simple green salad dressed with lemon vinaigrette to cut through the richness. A side of creamy stuffed mushroom caps makes this feel like a special occasion dinner.
What to drink with it: A cold beer (lager or pale ale works well), iced tea, or even a glass of milk if you re keeping it kid-friendly. For a non-alcoholic option, the refreshing sparkling citrus ginger mojito mocktail adds a bright, fizzy contrast.
Storage instructions: Store leftovers in an airtight container in the refrigerator for up to 4 days. The rice will absorb more liquid as it sits, so the texture will be slightly softer the next day — but the flavor actually improves. I often make a double batch just for leftovers.
Freezing: This skillet freezes well for up to 3 months. Let it cool completely, then transfer to a freezer-safe container. Thaw overnight in the refrigerator before reheating.
Reheating methods: The best way to reheat is in a skillet over medium-low heat with a splash of beef broth or water to loosen it up. Cover and cook for 5-7 minutes, stirring occasionally. The microwave works in a pinch — heat in 60-second intervals, stirring between each, until hot. Add a sprinkle of fresh cheese on top before reheating to revive that gooey factor.
Flavor development note: Like many one-pot meals, this skillet tastes even better the next day. The flavors meld and deepen overnight. Don t be surprised if you find yourself looking forward to leftovers.
Nutritional Information & Benefits
Here s the nutritional breakdown for one serving (based on 6 servings, using 80/20 beef and full-fat cheese).
- Calories: 485
- Protein: 28g
- Fat: 22g
- Carbohydrates: 42g
- Fiber: 2g
- Iron: 3.5mg (19% DV)
- Calcium: 280mg (22% DV)
Health highlights: Ground beef is an excellent source of high-quality protein, iron, and B vitamins — particularly B12, which supports energy and nerve function. The tomatoes provide lycopene, a powerful antioxidant linked to heart health. Onions and garlic offer prebiotic fiber that supports gut health. And yes, cheese has calcium and protein too.
Dietary considerations: This recipe is naturally gluten-free (double-check your broth label). For lower sodium, use no-salt-added broth and reduce added salt. For a lower-fat version, use 93/7 ground beef and reduced-fat cheese — the flavor will be slightly less rich but still satisfying.
My personal take: I don t believe in labeling food as “good” or “bad.” This skillet is a balanced meal with protein, carbs, and veggies. It fuels a busy evening and makes everyone at the table happy. That s a win in my book.
Conclusion
This quick cheesy ground beef rice skillet is more than just a recipe — it s a weeknight survival tool. It asks for very little and gives back everything. A full meal in one pan, ready in under 30 minutes, with ingredients you probably already have. That s the kind of cooking that keeps dinner stress-free and leaves you with time for what actually matters.
I love this recipe because it reminds me that good food doesn t need to be complicated. It just needs to be made with a little care and shared with people you care about. Whether you re feeding a hungry family, meal-prepping for the week, or just trying to use up that ground beef in the fridge, this skillet delivers every single time.
Now I want to hear from you. Did you add your own twist? Throw in some extra veggies? Swap the cheese for something unexpected? Drop a comment below and tell me how your version turned out. And if you loved it, share this recipe with a friend who needs an easy dinner win. Happy cooking, friend — you ve got this.
Frequently Asked Questions
Can I use brown rice instead of white rice?
Yes, but you ll need to adjust the liquid and cooking time. Use 2 ½ cups broth instead of 2 cups, and simmer for 40-45 minutes instead of 18-20. Brown rice needs more time and liquid to become tender. I d recommend parboiling it slightly before adding to the skillet, or just stick with white rice for the quick version.
Can I make this in a slow cooker?
You can, but the texture will be different. Brown the beef and onions first in a skillet, then transfer everything except the cheese to a slow cooker. Cook on low for 3-4 hours or high for 1 ½-2 hours. Add the cheese in the last 15 minutes. The rice will be softer than the stovetop version, but it s still delicious and convenient.
How do I prevent the rice from getting mushy?
Two things: toast the rice before adding liquid, and don t lift the lid while it simmers. Toasting creates a barrier that keeps each grain separate. Keeping the lid on ensures even steam distribution. Also, use long-grain rice — short-grain rice releases more starch and gets gummy.
Can I add vegetables to this recipe?
Absolutely. I regularly add frozen peas, corn, diced bell peppers, or zucchini. Add firmer vegetables (like bell peppers) with the onion, and softer ones (like peas) in the last 5 minutes of simmering. This is a great way to use up whatever vegetables you have in the fridge.
How do I make this spicier?
Add 1 diced jalapeño with the onion, use pepper jack cheese, and stir in ½ teaspoon cayenne pepper or red pepper flakes with the seasonings. For even more heat, top with sliced fresh jalapeños and a drizzle of hot sauce before serving. This is my go-to when I want a fiery kick.
Pin This Recipe!

Best Easy Cheesy Ground Beef Rice Skillet Recipe

This cheesy ground beef rice skillet is a quick, one-pan weeknight dinner that comes together in under 30 minutes with simple pantry ingredients. It’s comfort food at its finest, featuring savory beef, tender rice, and a gooey melted cheese topping.
- Prep Time: 10 minutes
- Cook Time: 20 minutes
- Total Time: 30 minutes
- Yield: 6 servings 1x
- Category: Main Course
- Cuisine: American
Ingredients
- 1 pound ground beef (80/20)
- 1 medium yellow onion, diced
- 3 cloves garlic, minced
- 1 cup long-grain white rice, uncooked
- 2 cups beef broth, low-sodium
- 1 can (14.5 oz) diced tomatoes, undrained
- 1 teaspoon paprika
- 1 teaspoon dried oregano
- ½ teaspoon salt
- ½ teaspoon black pepper
- 1 ½ cups shredded cheddar cheese
- ½ cup shredded Monterey Jack cheese
- 2 tablespoons chopped fresh parsley (optional)
Instructions
- Brown the beef: Place your skillet over medium-high heat. Add the ground beef and break it apart with your spoon. Cook for 5-6 minutes, stirring occasionally, until the beef is browned and no longer pink. Leave about 1 tablespoon of fat in the pan.
- Sauté the aromatics: Reduce heat to medium. Add the diced onion to the skillet and cook for 3-4 minutes, stirring frequently, until softened and translucent. Add the minced garlic and cook for 30 seconds more until fragrant.
- Toast the rice: Add the uncooked rice to the skillet and stir to coat it in the beef drippings and onion mixture. Cook for 2 minutes, stirring constantly, until the rice turns slightly golden and smells nutty.
- Add liquids and seasonings: Pour in the beef broth and undrained diced tomatoes. Add the paprika, oregano, salt, and pepper. Stir everything together, scraping the bottom of the pan to release any browned bits. Bring the mixture to a boil.
- Simmer the rice: Once boiling, reduce the heat to low, cover the skillet with a tight-fitting lid, and let it simmer for 18-20 minutes. Do not lift the lid during this time.
- Check for doneness: After 18 minutes, remove the lid carefully. The rice should be tender and most of the liquid should be absorbed. If the rice is still firm and there’s liquid left, cover and cook for 2-3 more minutes. If the rice is tender but there’s excess liquid, leave the lid off and cook for 1-2 minutes to evaporate it.
- Add the cheese: Remove the skillet from heat. Sprinkle the shredded cheddar and Monterey Jack evenly over the top of the rice mixture. Cover the skillet again and let it sit for 2-3 minutes until the cheese is melted.
- Finish and serve: Uncover the skillet. Sprinkle with fresh parsley if using. Serve directly from the skillet or spoon into bowls. Let it cool for 2 minutes before serving.
Notes
Toast the rice in the beef drippings before adding liquid for best texture. Shred your own cheese for smooth melting. Do not lift the lid while the rice simmers. Let the skillet rest for 2-3 minutes after adding cheese before serving.
Nutrition
- Serving Size: 1 serving
- Calories: 485
- Sugar: 4
- Sodium: 680
- Fat: 22
- Saturated Fat: 10
- Carbohydrates: 42
- Fiber: 2
- Protein: 28
Keywords: cheesy ground beef rice skillet, easy weeknight dinner, one skillet meal, ground beef recipe, quick dinner, comfort food


