By the third batch in as many weeks, I stopped pretending this was about holiday prep. It was mid-October—too early for tinsel, too late to blame the weather. I just wanted gingerbread cookies, and I wanted them on demand. Not the kind you bake the day of, but the kind you pull from the freezer at 10 p.m. on a Tuesday because the craving hits and you have zero willpower to argue. That’s when I started freezing the dough instead of the cookies.
Here’s the thing nobody tells you about gingerbread: the dough is the hard part. The rolling, the chilling, the patience. But once you’ve got a log of it wrapped in parchment, tucked into a freezer bag, you’ve basically bought yourself a ticket to spontaneous cookie joy. I’ve made this freeze-ready gingerbread cookie dough four times now—twice for actual baking, twice just to see if I could stop myself. I couldn’t.
The first batch I baked straight from frozen, and honestly? They came out better than the fresh ones. The edges crisper, the centers softer, the spice more settled. Something about the deep freeze gives the molasses time to stop shouting and start singing. That’s when I knew I wasn’t just meal-prepping cookies. I was solving a problem I didn’t know I had.
So here it is—the recipe that made me a freezer convert. No fuss, no last-minute dough drama. Just good gingerbread waiting for whenever you are.
Why You’ll Love This Recipe
Let me be real with you—I’ve tested this dough more times than I care to count. I’m a recipe developer by trade, but this one became personal. I wanted a gingerbread cookie that didn’t sacrifice texture for convenience, and I wanted it to freeze like a dream. After rounds of tweaking butter ratios, flour types, and chilling times, this version finally clicked.
- Freezer-Friendly & Convenient: Make the dough now, bake later. You can keep it frozen for up to three months and bake off as many or as few cookies as you want. No more making a full batch when you only need a dozen.
- Simple Pantry Ingredients: You probably have most of these already—flour, butter, sugar, molasses, and spices. No weird stabilizers or preservatives needed.
- Perfect for Holiday Baking Prep: December gets chaotic. Having this dough in the freezer means you can whip up a cozy gingerbread latte and bake fresh cookies in the same breath. It’s the ultimate holiday hack.
- Crowd-Pleasing Texture: These cookies hold their shape beautifully—no spreading into sad puddles. The edges are snappy, the centers are soft, and the spice is warm without being aggressive.
- Customizable for Any Occasion: Roll them thick for chewy cookies, thin for crispy ones. Add a royal icing drizzle, sandwich them with cream cheese filling, or just eat them plain (which is honestly my favorite).
This isn’t just another gingerbread cookie recipe. It’s the one that saves your sanity during the holidays. The one that lets you show up to a cookie swap with fresh-baked goods without spending all morning covered in flour. And honestly? It’s the kind of cookie that makes you close your eyes after the first bite—because it actually tastes like you put in more effort than you did.
What Ingredients You Will Need
This recipe uses simple, honest ingredients. Nothing fancy, nothing hard to find. The magic comes from how they work together—especially after a stint in the freezer.
- Unsalted Butter (1 cup / 2 sticks, softened) — I always use unsalted so I can control the salt level. Kerrygold is my go-to for flavor, but any good quality butter works. Let it soften to room temperature for easier creaming.
- Light Brown Sugar (1 cup, packed) — Brown sugar brings moisture and that deep, caramel-like sweetness that gingerbread needs. Dark brown sugar works too, but it’ll make the cookies slightly darker and more molasses-forward.
- Molasses (¾ cup) — This is non-negotiable. Use unsulfured molasses (like Grandma’s or Brer Rabbit) for the best flavor. Blackstrap molasses is too bitter and will throw off the sweetness balance.
- Large Egg (1, room temperature) — Helps bind everything together. A room-temperature egg incorporates more evenly into the butter mixture.
- Vanilla Extract (1 teaspoon) — Pure vanilla adds warmth. Imitation works in a pinch, but pure is worth the splurge here.
- All-Purpose Flour (3 cups) — Spoon and level your flour for accuracy. Scooping directly from the bag packs in too much flour and makes dry cookies.
- Baking Soda (2 teaspoons) — Gives the cookies just enough lift without making them puffy.
- Ground Ginger (2 teaspoons) — The star of the show. Freshly ground ginger is great, but good quality dried ginger works perfectly.
- Ground Cinnamon (1½ teaspoons) — Warm and sweet, it rounds out the ginger’s bite.
- Ground Cloves (½ teaspoon) — A little goes a long way. Cloves add that classic holiday depth.
- Ground Nutmeg (½ teaspoon) — Freshly grated nutmeg is incredible here, but pre-ground is fine.
- Salt (½ teaspoon) — Balances the sweetness and enhances the spices. I use fine sea salt.
Substitution Notes: For a dairy-free version, use vegan butter sticks (not tub margarine). For a gluten-free option, swap the all-purpose flour with a 1:1 gluten-free baking blend that contains xanthan gum. The texture will be slightly different, but still delicious.
Equipment Needed
You don’t need a fancy bakery setup for this. Just a few basics that you probably already own.
- Stand Mixer or Hand Mixer — Creaming butter and sugar by hand is possible, but your arm will hate you. A stand mixer with the paddle attachment is ideal.
- Large Mixing Bowls — One for wet ingredients, one for dry.
- Plastic Wrap or Parchment Paper — For shaping the dough logs. Parchment is easier to work with and less wasteful.
- Freezer-Safe Bags or Containers — I use quart-sized freezer bags for individual logs. Squeeze out as much air as possible before sealing.
- Baking Sheets — Light-colored metal sheets work best for even browning. Dark sheets can over-brown the bottoms.
- Parchment Paper or Silicone Baking Mats — Non-stick and easy cleanup.
- Sharp Knife or Bench Scraper — For slicing the frozen dough into even rounds.
- Cooling Rack — Essential for crisp edges. Let the cookies cool on the sheet for 2 minutes, then transfer to the rack.
Budget Tip: If you don’t have a stand mixer, a wooden spoon and some elbow grease work fine. Just make sure your butter is really soft. I’ve done it both ways, and honestly, the hand-mixed batches had a slightly more rustic texture that I kind of loved.
Preparation Method
This method is designed for freezing, so we’re building the dough with stability in mind. Follow these steps, and you’ll have perfect cookies for months.
- Cream the butter and sugar. In a large mixing bowl (or stand mixer), beat the softened butter and packed brown sugar together on medium speed until light and fluffy—about 3 minutes. Scrape down the sides once. You want the mixture to look pale and airy. This step traps air that helps the cookies rise just a little.
- Add the wet ingredients. Beat in the molasses, egg, and vanilla extract until fully combined. The mixture will look a little curdled at first—that’s normal. Keep mixing until it comes back together into a smooth, glossy paste. Scrape the bowl again.
- Whisk the dry ingredients separately. In a medium bowl, whisk together the flour, baking soda, ginger, cinnamon, cloves, nutmeg, and salt. Whisking aerates the flour and distributes the spices evenly. Don’t skip this—it matters more than you think.
- Combine wet and dry. Add the dry ingredients to the wet mixture in two additions, mixing on low speed after each. Stop as soon as the flour disappears. Overmixing develops gluten and makes tough cookies. The dough will be soft and slightly sticky—that’s perfect.
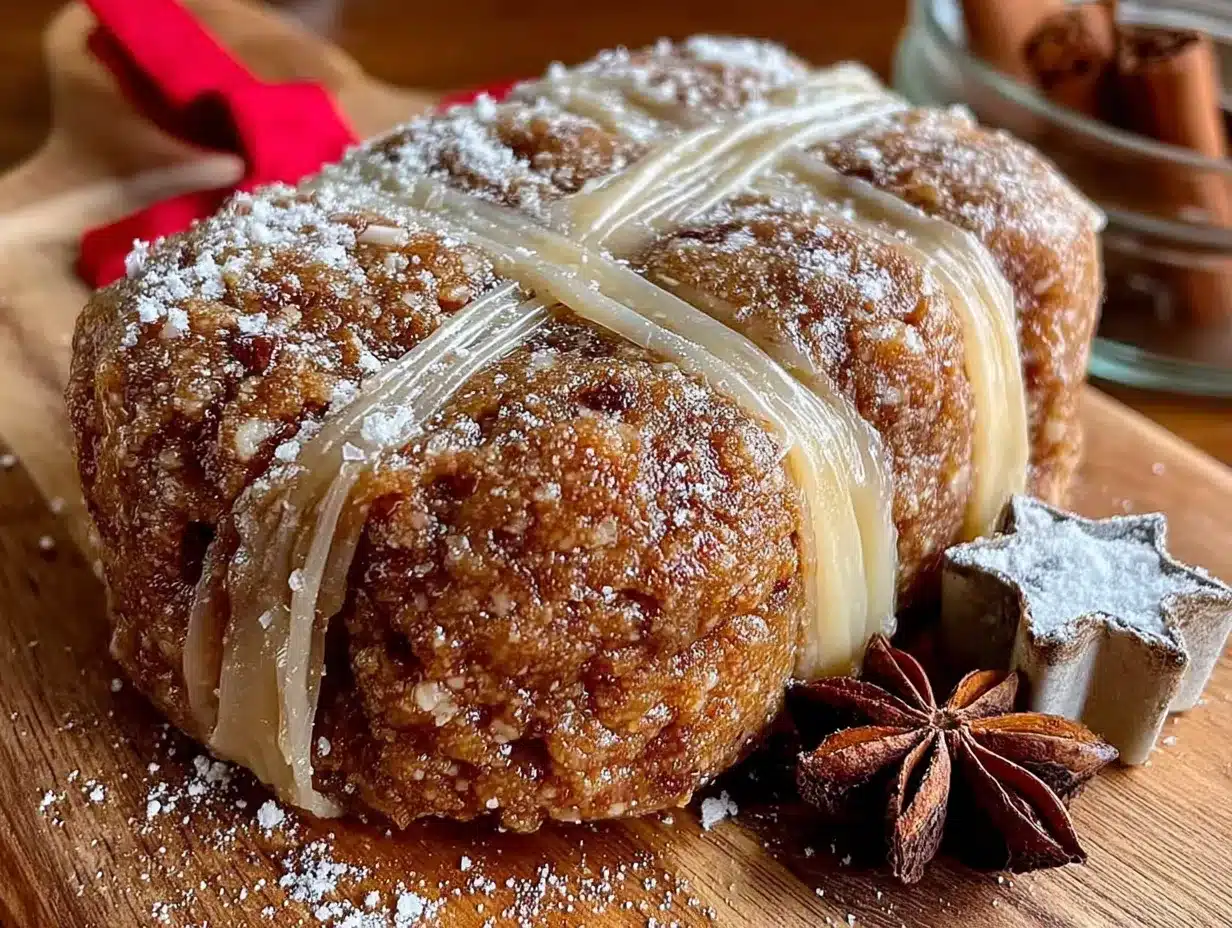
- Divide and shape the dough. Turn the dough out onto a lightly floured surface. Divide it into two equal portions. Shape each portion into a log about 8 inches long and 2 inches in diameter. If the dough is too sticky, dust your hands with a little flour. Don’t go overboard—you want the logs smooth, not dry.
- Wrap tightly for freezing. Lay each log on a sheet of plastic wrap or parchment paper. Roll it up tightly, twisting the ends like a candy wrapper. For extra protection, wrap each log again in aluminum foil or place it in a freezer bag. Label with the date and “Gingerbread Cookie Dough.”
- Freeze for at least 2 hours. The dough needs to be solid before slicing. Overnight is best, but 2 hours works in a pinch. The dough keeps for up to 3 months.
- Bake from frozen (no thawing needed). When you’re ready to bake, preheat your oven to 350°F (175°C). Line a baking sheet with parchment or a silicone mat. Unwrap a frozen log and use a sharp knife to slice ¼-inch thick rounds. Place them 2 inches apart on the sheet—they spread a little.
- Bake for 10-12 minutes. The edges should look set and slightly darker, but the centers will still look soft. That’s okay—they’ll firm up as they cool. Let the cookies rest on the baking sheet for 2 minutes, then transfer to a cooling rack.
- Cool completely before decorating. If you’re adding royal icing or sanding sugar, wait until the cookies are fully cool. Warm cookies will melt icing into a sticky mess.
Sensory Cue: When the dough is ready, it should smell like Christmas in a bowl—warm, spicy, and sweet. The baked cookies should be fragrant enough to pull anyone from another room.
Cooking Tips & Techniques
I’ve made every mistake in the book with this dough so you don’t have to. Here’s what I learned the hard way.
- Don’t skip the chill before slicing. I once tried to slice a log that had only been in the freezer for 30 minutes. It squished into a flat, misshapen mess. The dough needs to be fully frozen—at least 2 hours—to slice cleanly. If you’re in a hurry, pop the log in the freezer for 15 minutes after shaping instead of freezing completely, then roll and cut with cookie cutters. But honestly, the log method is easier.
- Use a sharp knife for clean cuts. A dull knife will crush the edges and leave you with ragged cookies. Run the blade under hot water, dry it, and slice. Repeat between cuts if the dough starts to stick.
- Rotate the baking sheet halfway through. Ovens have hot spots. Turning the sheet at the 5-minute mark ensures even browning. I forgot once and ended up with half-burnt cookies and half-raw ones. Not my finest moment.
- Let cookies cool completely before stacking. Warm gingerbread cookies are soft and fragile. Stacking them while warm turns them into a sticky, broken mess. Patience pays off here.
- Freeze the dough in portions. If you only want a few cookies at a time, divide the dough into smaller logs before freezing. That way you’re not thawing a whole log just for a midnight snack.
- Add a pinch of black pepper for warmth. This is my secret trick. A tiny amount (like ⅛ teaspoon) adds a subtle heat that makes the gingerbread taste more complex. No one will know it’s there, but they’ll notice something special.
Variations & Adaptations
This dough is a blank canvas. Here are a few ways I’ve played with it.
- Spiced-Up Version: Add ½ teaspoon of cardamom and a pinch of cayenne pepper to the dry ingredients. It gives the cookies a warm, slightly exotic kick that’s amazing with a cup of chai.
- Chocolate Gingerbread: Replace ¼ cup of the flour with unsweetened cocoa powder. You’ll get a darker, richer cookie that tastes like a brownie-gingerbread hybrid. My kids went crazy for these.
- Gluten-Free Adaptation: Use a 1:1 gluten-free baking blend with xanthan gum. The dough will be a bit softer, so chill it for an extra 30 minutes before slicing. The baked cookies are slightly more crumbly but just as delicious.
- Vegan Version: Substitute the butter with vegan butter sticks and the egg with a flax egg (1 tablespoon ground flaxseed mixed with 3 tablespoons water, let sit for 5 minutes). The texture is a little less tender, but the flavor holds up beautifully.
- Cookie Sandwiches: Bake the cookies slightly thinner (about ⅛ inch) and sandwich them with cream cheese frosting or a gingerbread cheesecake bar-inspired filling. It’s next-level indulgence.
Personal Favorite: I once added chopped crystallized ginger to the dough—about ⅓ cup. The little bursts of chewy, spicy sweetness were incredible. If you like texture in your cookies, try it.
Serving & Storage Suggestions
These cookies are versatile enough for any occasion, from a casual snack to a holiday dessert table.
- Serving Temperature: Room temperature is best. The spices are more pronounced, and the texture is perfect—crisp edges with a soft center. If you’re serving them warm, pop them in a 300°F oven for 3-4 minutes.
- Presentation Ideas: Arrange on a platter with fresh cranberries and rosemary sprigs for a festive look. Dust with powdered sugar for a snowy effect. Or drizzle with a simple royal icing and top with sanding sugar for a classic holiday cookie.
- Pairings: These cookies are made for dunking. Serve with hot coffee, a copycat gingerbread latte, or a glass of cold milk. For a grown-up treat, pair with a dark rum or bourbon—the spices complement the alcohol beautifully.
- Storage for Baked Cookies: Store in an airtight container at room temperature for up to 2 weeks. Layer them with parchment paper to prevent sticking. The cookies actually get softer and more flavorful after a day or two.
- Freezing Baked Cookies: Yes, you can freeze the baked cookies too. Place them in a single layer on a baking sheet, freeze until solid, then transfer to a freezer bag. They’ll keep for 3 months. Thaw at room temperature for 15 minutes before serving.
- Flavor Development: The spices mellow and meld overnight. If you can resist eating them all on day one, day two cookies are even better. The molasses flavor becomes deeper, and the ginger loses its sharp edge.
Nutritional Information & Benefits
Let’s be honest—these are cookies, not health food. But knowing what’s in them helps you enjoy them mindfully.
- Estimated Per Cookie (based on 36 cookies): Calories: 120, Fat: 5g, Saturated Fat: 3g, Carbohydrates: 18g, Sugar: 10g, Fiber: 0.5g, Protein: 1.5g, Sodium: 85mg.
- Health Highlights: Molasses is a good source of iron, calcium, and magnesium—surprising, right? Ginger has anti-inflammatory properties and can help with digestion. Cinnamon may help regulate blood sugar. So there are some redeeming qualities!
- Dietary Considerations: This recipe is vegetarian. For vegan and gluten-free adaptations, see the Variations section above. It contains dairy (butter) and gluten (flour), so it’s not suitable for those with allergies to those ingredients unless modified.
- Potential Allergens: Wheat, dairy, eggs. If you’re serving a crowd, consider making a small batch of the vegan version for those with restrictions.
- My Take: I believe in balance. These cookies are a treat, and they’re meant to be enjoyed—especially during the holidays. I’d rather have one really good gingerbread cookie than a handful of mediocre ones. Quality over quantity, every time.
Conclusion
This freeze-ready gingerbread cookie dough has genuinely changed how I approach holiday baking. No more scrambling at the last minute. No more flour-covered counters at midnight. Just a log of dough in the freezer, waiting to become warm, spiced cookies whenever I need them. It’s the kind of recipe that makes you feel like you’ve got your act together—even when you don’t.
I love this recipe because it’s forgiving. You can tweak the spices, adjust the thickness, add mix-ins, or leave it plain. It works for cookie swaps, lazy Sunday afternoons, and emergency dessert situations. And honestly? It’s just really, really good gingerbread.
If you try this recipe, I’d love to hear about it. Leave a comment below and let me know how you customized it—did you add chocolate? Go gluten-free? Double the ginger? Share your version, and tag me in your photos. Happy baking, and may your freezer always have a log of gingerbread dough ready to go.
Frequently Asked Questions
Can I bake the dough immediately without freezing?
Yes, absolutely. If you want cookies right now, skip the freezing step. After shaping the dough into logs, wrap and refrigerate for at least 1 hour (or until firm). Then slice and bake as directed. The freezing is just for convenience—it doesn’t change the flavor.
How long does the dough last in the freezer?
Properly wrapped, the dough stays fresh for up to 3 months. After that, the quality starts to decline—the cookies may spread more or lose some flavor. I always label my logs with the date so I know which batch to use first.
Can I use this dough for cut-out cookies?
Yes, but with a modification. Instead of shaping into logs, wrap the dough in a flat disc, refrigerate for 1 hour, then roll it out on a floured surface to ¼-inch thickness. Cut into shapes and freeze the cut-out cookies on a baking sheet before transferring to a freezer bag. Bake from frozen, adding 1-2 minutes to the baking time.
Why did my cookies spread too much?
This usually happens if the dough wasn’t cold enough when it went into the oven, or if the butter was too soft when you mixed it. Make sure your dough log is fully frozen before slicing. If you’re still having trouble, try chilling the sliced cookies on the baking sheet for 10 minutes before baking.
Can I double this recipe?
Absolutely. This recipe doubles beautifully. Just make sure your mixing bowl is big enough—a stand mixer with a 5-quart bowl handles a double batch fine. If you’re mixing by hand, do it in two separate batches to avoid overworking the dough.
Pin This Recipe!
Best Freeze-Ready Gingerbread Cookie Dough Recipe

This freeze-ready gingerbread cookie dough lets you bake fresh, spiced cookies on demand. Make the dough now, freeze it for up to three months, and bake straight from frozen for perfectly crisp edges and soft centers every time.
- Prep Time: 20 minutes
- Cook Time: 12 minutes
- Total Time: 32 minutes (plus 2 hours freezing)
- Yield: 36 cookies 1x
- Category: Dessert
- Cuisine: American
Ingredients
- 1 cup (2 sticks) unsalted butter, softened
- 1 cup packed light brown sugar
- 3/4 cup unsulfured molasses
- 1 large egg, room temperature
- 1 teaspoon vanilla extract
- 3 cups all-purpose flour, spooned and leveled
- 2 teaspoons baking soda
- 2 teaspoons ground ginger
- 1 1/2 teaspoons ground cinnamon
- 1/2 teaspoon ground cloves
- 1/2 teaspoon ground nutmeg
- 1/2 teaspoon fine sea salt
Instructions
- Cream the butter and sugar: In a large mixing bowl (or stand mixer), beat the softened butter and packed brown sugar together on medium speed until light and fluffy—about 3 minutes. Scrape down the sides once.
- Add the wet ingredients: Beat in the molasses, egg, and vanilla extract until fully combined. The mixture will look a little curdled at first—that’s normal. Keep mixing until it comes back together into a smooth, glossy paste. Scrape the bowl again.
- Whisk the dry ingredients separately: In a medium bowl, whisk together the flour, baking soda, ginger, cinnamon, cloves, nutmeg, and salt.
- Combine wet and dry: Add the dry ingredients to the wet mixture in two additions, mixing on low speed after each. Stop as soon as the flour disappears. The dough will be soft and slightly sticky.
- Divide and shape the dough: Turn the dough out onto a lightly floured surface. Divide it into two equal portions. Shape each portion into a log about 8 inches long and 2 inches in diameter.
- Wrap tightly for freezing: Lay each log on a sheet of plastic wrap or parchment paper. Roll it up tightly, twisting the ends like a candy wrapper. For extra protection, wrap each log again in aluminum foil or place it in a freezer bag. Label with the date and ‘Gingerbread Cookie Dough.’
- Freeze for at least 2 hours: The dough needs to be solid before slicing. Overnight is best, but 2 hours works in a pinch. The dough keeps for up to 3 months.
- Bake from frozen (no thawing needed): When you’re ready to bake, preheat your oven to 350°F (175°C). Line a baking sheet with parchment or a silicone mat. Unwrap a frozen log and use a sharp knife to slice 1/4-inch thick rounds. Place them 2 inches apart on the sheet.
- Bake for 10-12 minutes: The edges should look set and slightly darker, but the centers will still look soft. Let the cookies rest on the baking sheet for 2 minutes, then transfer to a cooling rack.
- Cool completely before decorating: If you’re adding royal icing or sanding sugar, wait until the cookies are fully cool.
Notes
For dairy-free, use vegan butter sticks. For gluten-free, use a 1:1 gluten-free baking blend with xanthan gum. The dough can be baked immediately if refrigerated for at least 1 hour. For cut-out cookies, shape into a disc, chill, roll, and cut before freezing.
Nutrition
- Serving Size: 1 cookie
- Calories: 120
- Sugar: 10
- Sodium: 85
- Fat: 5
- Saturated Fat: 3
- Carbohydrates: 18
- Fiber: 0.5
- Protein: 1.5
Keywords: gingerbread cookies, freeze-ready cookie dough, holiday baking, make-ahead cookies, gingerbread dough, freezer cookies


