I need a turkey that actually tastes like something. Not dry. Not bland. Not something you drown in gravy just to get it down. I want that crispy, golden skin that shatters when you cut into it, and meat so juicy it almost doesn’t need anything else. But let’s be real—I still want the gravy. The kind of gravy that’s rich, silky, and tastes like the turkey itself, not like flour and water. I have the bird, I have the butter, and I have a fridge full of herbs that are about to become the star of the show. The only thing missing is the confidence that I won’t mess it up.
Here’s the thing about roasted turkey—it’s not actually hard. It’s just intimidating because there’s a whole bird involved and people are watching. But I’ve learned that the secret isn’t complicated brines or fancy equipment. It’s butter. Specifically, garlic herb butter that you massage under the skin like you’re giving the turkey a really good spa treatment. And the pan gravy? That’s just the drippings from the pan doing all the work for you. No extra stock, no weird thickening tricks. Just good, honest turkey flavor.
I’ve made this turkey for Thanksgiving, Christmas, and even a random Sunday dinner in March when I just needed something that felt special. It never fails. The skin gets that deep golden brown color that makes everyone stop and stare. The meat stays tender because the butter keeps it moist from the inside out. And the gravy comes together in the same pan while the turkey rests, which means less cleanup and more time to actually enjoy the meal. This is the recipe I turn to when I want to impress without the stress.
Why You’ll Love This Recipe
I’ve tested this recipe more times than I can count, and every single time, it delivers. Here’s why this turkey is different from every other roasted bird you’ve tried:
- Incredibly Juicy Meat : The garlic herb butter gets worked under the skin, which means the flavor goes straight into the meat, not just on top. You get tender, moist turkey in every single bite.
- Crispy, Golden Skin : The butter helps the skin crisp up beautifully without burning. It’s that perfect crackly texture that makes turkey worth eating.
- Simple Ingredients : You don’t need a grocery list longer than your arm. Butter, garlic, fresh herbs, salt, and pepper. That’s it.
- One-Pan Gravy : The gravy uses the drippings from the turkey itself. No extra broth, no cornstarch slurry. Just pure, concentrated flavor from the pan.
- Perfect for Holidays : This turkey is the centerpiece that makes everyone feel like you spent all day in the kitchen. But honestly, most of the time is just the oven doing its thing.
- Foolproof Method : I’ve learned the hard way what not to do. This recipe skips all the common mistakes so you can nail it on your first try.
This isn’t just another turkey recipe. It’s the one that makes you close your eyes after the first bite. It’s the one your family will request every single year. And it’s the one that proves you don’t need to be a professional chef to roast a bird that looks and tastes like a million bucks.
What Ingredients You Will Need
This recipe uses simple, everyday ingredients to create something truly special. You probably already have most of these in your kitchen, which makes this turkey even easier to pull off.
For the Garlic Herb Butter
- 1 cup unsalted butter, softened to room temperature (I use Kerrygold for the richest flavor, but any good quality butter works)
- 6 cloves garlic, minced finely (use a microplane if you want it to melt into the butter completely)
- 2 tablespoons fresh rosemary, chopped (dried rosemary works in a pinch, but fresh gives you that piney, aromatic flavor)
- 2 tablespoons fresh thyme leaves, chopped (strip the leaves off the stems—the stems are too woody)
- 1 tablespoon fresh sage, chopped (sage and turkey are best friends, honestly)
- 1 tablespoon fresh parsley, chopped (adds a fresh, bright note to balance the richness)
- 1 teaspoon salt (use kosher salt for better control)
- 1/2 teaspoon black pepper, freshly ground
- 1 teaspoon lemon zest (optional, but it cuts through the richness beautifully)
For the Turkey
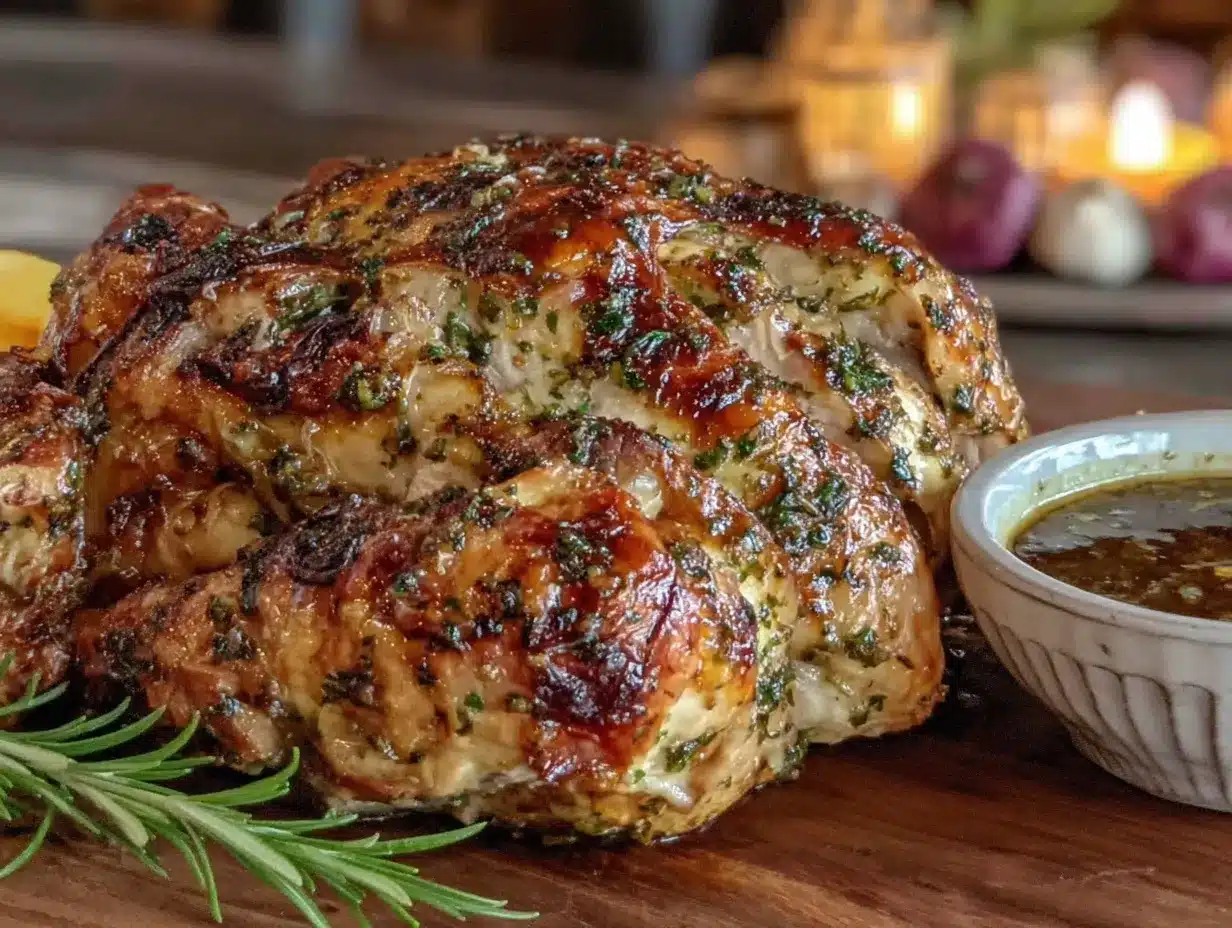
- 1 whole turkey, 12-14 pounds (thawed completely if frozen—this takes 3-4 days in the fridge)
- 1 large onion, quartered
- 2 carrots, cut into large chunks
- 2 celery stalks, cut into large chunks
- 1 head of garlic, halved horizontally
- Fresh herb sprigs (rosemary, thyme, sage) for stuffing the cavity
- 2 tablespoons olive oil for rubbing the outside
- Salt and pepper for seasoning the outside
For the Pan Gravy
- Pan drippings from the roasted turkey (this is the gold—don’t you dare throw it away)
- 2 tablespoons all-purpose flour (use gluten-free flour blend if needed)
- 1 cup turkey or chicken broth (low-sodium so you can control the salt)
- 1/2 cup dry white wine (optional, but adds incredible depth—use a Sauvignon Blanc or Pinot Grigio)
- Salt and pepper to taste
I always recommend using fresh herbs when you can. They make a real difference in the flavor of the butter. But if all you have is dried, use about one-third of the amount. Dried herbs are more concentrated, so you don’t need as much. And for the butter, make sure it’s truly softened. Cold butter won’t spread under the skin properly, and that’s where all the magic happens.
Equipment Needed
You don’t need a kitchen full of fancy gadgets to make this turkey. Here’s what you’ll actually use:
- Roasting pan with a rack (the rack keeps the turkey elevated so air circulates and the bottom doesn’t get soggy)
- Meat thermometer —this is non-negotiable. A digital instant-read thermometer is best. Trust me, you cannot guess doneness by looking at the turkey.
- Large mixing bowl for the herb butter
- Chef’s knife and cutting board
- Kitchen twine for tying the legs (optional but helps the turkey cook evenly)
- Aluminum foil for tenting the turkey if the skin gets too dark
- Fine-mesh strainer for straining the gravy (gets rid of any lumpy bits)
- Whisk for making the gravy smooth
- Basting brush (optional, but I like to brush the turkey with butter halfway through)
If you don’t have a roasting rack, you can use a bed of vegetables—onions, carrots, and celery—to lift the turkey off the bottom of the pan. It works just as well and adds flavor to the drippings. And if you don’t have kitchen twine, you can skip tying the legs. The turkey will still cook fine, it just might look a little more relaxed.
Preparation Method
Let’s get to the good part. Follow these steps carefully, and you’ll have the best turkey of your life.
Step 1: Make the Garlic Herb Butter
In a medium bowl, combine the softened butter, minced garlic, chopped rosemary, thyme, sage, parsley, salt, pepper, and lemon zest if using. Mix everything together until it’s evenly combined. The butter should be soft enough to spread easily—like the texture of a really good mayonnaise. If your butter is too cold, let it sit out for another 15 minutes. This step takes about 5 minutes, but it’s the most important part of the whole recipe.
Step 2: Prep the Turkey
Take your thawed turkey out of the fridge about 1 hour before you plan to roast it. You want it to come to room temperature slightly—this helps it cook more evenly. Remove the turkey from its packaging and take out the giblets and neck from the cavity. Save them for making stock if you want, or just discard them. Pat the turkey completely dry with paper towels. I mean really dry. Any moisture on the skin will steam instead of crisp, and we want that skin golden and crackly.
Step 3: Apply the Herb Butter
This is the step that makes all the difference. Gently loosen the skin of the turkey breast by sliding your fingers between the skin and the meat. Start at the neck end and work your way down, being careful not to tear the skin. Once you’ve created a pocket, take about half of the herb butter and spread it directly onto the breast meat under the skin. Use your fingers to massage it around so it covers the entire breast area. Then rub the remaining butter all over the outside of the turkey—the legs, thighs, wings, and back. Don’t forget the underside. Season the outside generously with salt and pepper.
Step 4: Stuff the Cavity
Stuff the cavity of the turkey with the quartered onion, carrot chunks, celery chunks, halved garlic head, and fresh herb sprigs. These aromatics will flavor the turkey from the inside as it roasts. Don’t pack it too tight—you want air to circulate. If you’re using kitchen twine, tie the legs together at the ankles. Tuck the wing tips under the body of the turkey so they don’t burn.
Step 5: Roast the Turkey
Preheat your oven to 425°F (220°C). Place the turkey breast-side up on the rack in your roasting pan. Pour about 1 cup of water or broth into the bottom of the pan—this prevents the drippings from burning and makes the gravy better. Roast the turkey at 425°F for 30 minutes. This high heat kickstarts the browning and crisps up the skin. Then, without opening the oven, reduce the temperature to 350°F (175°C) and continue roasting.
Step 6: Baste and Monitor
After about 1 hour of total roasting time, baste the turkey with the pan juices. Use a basting brush or a spoon to drizzle the juices over the breast and legs. Do this every 30 minutes. If the skin is getting too dark, tent the turkey loosely with aluminum foil. The total roasting time for a 12-14 pound turkey is about 2.5 to 3 hours. But don’t rely on time alone—use your meat thermometer.
Step 7: Check for Doneness
Insert the meat thermometer into the thickest part of the thigh without touching the bone. You’re looking for 165°F (74°C). Also check the breast—it should be around 160°F (71°C). The temperature will rise another 5 degrees while the turkey rests, so don’t overcook it. When it’s done, the juices should run clear when you pierce the thigh, not pink.
Step 8: Rest the Turkey
This step is crucial. Remove the turkey from the oven and transfer it to a cutting board. Let it rest for at least 30 minutes, loosely tented with foil. Do not skip this. Resting allows the juices to redistribute throughout the meat. If you cut into it too soon, all those delicious juices will run out onto the cutting board, and you’ll be left with dry turkey. While the turkey rests, make the gravy.
Step 9: Make the Pan Gravy
Pour the pan drippings through a fine-mesh strainer into a fat separator or a glass measuring cup. Let it sit for a minute so the fat rises to the top. Skim off most of the fat, leaving about 2 tablespoons in the drippings. Place the roasting pan on the stovetop over medium heat (or transfer the drippings to a saucepan). Whisk in the flour and cook for 1-2 minutes until it turns golden and smells nutty. Slowly pour in the broth and wine if using, whisking constantly to prevent lumps. Bring the gravy to a simmer and cook for 3-5 minutes until it thickens to your liking. Season with salt and pepper. If you want it extra smooth, pour it through the strainer one more time.
Cooking Tips & Techniques
I’ve learned these lessons the hard way so you don’t have to. Here’s what I wish someone had told me before my first turkey.
Don’t skip the drying step. I made this mistake once and ended up with pale, rubbery skin. Patting the turkey dry with paper towels is not optional—it’s the difference between crispy skin and sad skin. Get in all the crevices and really absorb that moisture.
Use a thermometer, not a timer. Ovens vary wildly. I’ve had turkeys cook in 2 hours and others take nearly 4. The only way to know for sure is to check the internal temperature. And don’t trust those pop-up thermometers that come with some turkeys—they’re notoriously unreliable.
Let the turkey breathe. Taking it out of the fridge an hour before roasting helps it cook more evenly. A cold turkey going into a hot oven will cook unevenly, with the outside drying out before the inside is done. Room temperature is your friend.
Butter under the skin is non-negotiable. I tried skipping this step once because I was in a hurry. The turkey was fine, but it wasn’t great. The butter under the skin is what keeps the breast meat moist and infuses it with flavor. Don’t skip it.
Basting is for flavor, not moisture. There’s a myth that basting keeps the turkey moist. It doesn’t. Every time you open the oven, you lose heat, which extends cooking time. Baste for the flavor boost, but don’t think you’re saving the turkey from drying out. The herb butter does that job.
If the skin gets too dark, tent it. Aluminum foil is your emergency brake. If the skin is browning faster than the interior is cooking, just lay a piece of foil loosely over the top. It’ll slow down the browning without stopping the cooking.
Variations & Adaptations
This recipe is flexible enough to work for almost any dietary need or flavor preference. Here are some ways to make it your own.
Herb Variations
Not a fan of rosemary? Swap it out for tarragon or marjoram. Both work beautifully with turkey. You can also add a teaspoon of dried oregano or a pinch of red pepper flakes for a little heat. The base formula stays the same—just change the herbs to match your taste.
Dairy-Free Version
Use vegan butter or a high-quality olive oil instead of regular butter. The texture will be slightly different, but the flavor will still be incredible. Just make sure whatever you use is solid enough to spread under the skin. Olive oil works best if you brush it on rather than trying to spread it.
Gluten-Free Gravy
Swap the all-purpose flour for a gluten-free flour blend or use cornstarch. If using cornstarch, mix 2 tablespoons with 2 tablespoons of cold water to make a slurry, then whisk it into the simmering drippings. Cook for 1-2 minutes until thickened. It works perfectly and nobody will know the difference.
Spiced Turkey
Add 1 teaspoon of smoked paprika, 1/2 teaspoon of cumin, and 1/2 teaspoon of ground coriander to the herb butter. This gives the turkey a warm, smoky flavor that’s perfect for fall. I tried this variation last Thanksgiving and it was a huge hit with anyone who likes a little extra depth in their food.
Make-Ahead Herb Butter
The garlic herb butter can be made up to 3 days in advance. Just wrap it tightly in plastic wrap or store it in an airtight container in the fridge. Let it come to room temperature before spreading it under the skin. You can even freeze the butter for up to 3 months—just thaw it overnight in the fridge before using.
Serving & Storage Suggestions
This turkey is best served hot, right after it’s rested. But here’s how to handle leftovers and make the most of every bite.
Serving Temperature: Slice the turkey and serve it immediately after the resting period. The meat should still be warm, and the skin should be crispy. If you need to hold it for a while, keep it loosely covered with foil in a warm oven (200°F) for up to 30 minutes. Don’t leave it longer than that or the skin will soften.
What to Serve With It: This turkey pairs beautifully with classic sides. Try it with mashed potatoes, roasted Brussels sprouts, or a fresh green salad. The gravy is perfect over everything. For a complete holiday meal, I love serving it alongside my creamy stuffed mushroom caps as an appetizer—the garlic and herbs in both dishes complement each other perfectly.
Storing Leftovers: Remove all the meat from the bones and store it in an airtight container in the fridge. It’ll keep for 3-4 days. Store the gravy separately in a jar or container. Don’t leave the turkey sitting out at room temperature for more than 2 hours—food safety first.
Reheating: The best way to reheat turkey is in a low oven. Place the slices in a baking dish, add a splash of broth or gravy, cover with foil, and warm at 300°F for 10-15 minutes. This keeps the meat moist without drying it out. The microwave works in a pinch, but it’ll make the turkey tough. For the gravy, just warm it in a saucepan over low heat, whisking occasionally.
Freezing: Cooked turkey freezes beautifully. Pack the meat in freezer-safe bags or containers, removing as much air as possible. It’ll keep for up to 3 months. Thaw overnight in the fridge before reheating. The gravy also freezes well—just pour it into a freezer-safe jar, leaving some room for expansion.
Flavor Development: Here’s a secret—leftover turkey actually tastes better the next day. The flavors have time to meld together, and the meat becomes even more tender. I always make extra turkey just so I can have leftovers for sandwiches and salads. Try it on a tender slow cooker BBQ pulled pork slider bun for a next-level turkey sandwich that’ll blow your mind.
Nutritional Information & Benefits
Turkey is one of the leanest and healthiest meats you can eat. Here’s what you’re getting in a typical serving of roasted turkey breast (about 4 ounces, without skin):
| Nutrient | Amount |
|---|---|
| Calories | 190 |
| Protein | 34g |
| Fat | 5g |
| Saturated Fat | 2g |
| Carbohydrates | 0g |
| Fiber | 0g |
| Sodium | 70mg (without added salt) |
Turkey is packed with high-quality protein, which is essential for muscle repair and growth. It’s also rich in B vitamins, particularly B6 and B12, which support energy metabolism and brain function. The selenium in turkey is a powerful antioxidant that helps protect your cells from damage. And the garlic in the herb butter? It’s known for its immune-boosting properties and anti-inflammatory effects. This isn’t just a delicious meal—it’s one that actually supports your health.
If you’re watching your sodium intake, use low-sodium broth for the gravy and go easy on the added salt. The herbs and garlic provide so much flavor that you won’t miss the extra salt. And if you’re following a low-carb or keto diet, this turkey is perfect—zero carbs and plenty of healthy fats from the butter.
Frequently Asked Questions
Can I use this recipe for a smaller turkey or just a turkey breast?
Absolutely. The same garlic herb butter method works beautifully for a turkey breast or a smaller bird. Just adjust the cooking time. For a bone-in turkey breast, roast at 350°F for about 1.5 to 2 hours, or until the internal temperature reaches 160°F. The butter under the skin is even more important for a breast because it helps keep the lean meat moist.
How do I prevent the turkey from drying out?
The garlic herb butter under the skin is your best defense against dry meat. It melts as the turkey roasts and bastes the meat from the inside. Also, don’t overcook it—use a meat thermometer and pull the turkey out when the thigh hits 165°F. And never skip the resting period. Those 30 minutes of rest allow the juices to redistribute so every slice is moist and tender.
Can I make the gravy ahead of time?
Yes, you can make the gravy up to 2 days in advance. Store it in an airtight container in the fridge. When you’re ready to serve, warm it gently in a saucepan over low heat, whisking occasionally. If it’s too thick, add a splash of broth or water. If it’s too thin, let it simmer for a few more minutes to reduce. The flavor actually gets better as it sits.
What if I don’t have fresh herbs?
Dried herbs work in a pinch. Use about one-third of the amount called for in the recipe. So instead of 2 tablespoons of fresh rosemary, use 2 teaspoons of dried. The flavor won’t be quite as bright, but it’ll still be delicious. You can also use a dried herb blend like herbes de Provence or poultry seasoning for a shortcut.
How do I get the skin extra crispy?
The key to crispy skin is dryness and high heat. Pat the turkey completely dry before applying the butter. Then start the roasting at 425°F for the first 30 minutes to really crisp things up. After that, reduce the heat to finish cooking. If the skin isn’t as crispy as you’d like at the end, you can broil it for 2-3 minutes—just watch it carefully so it doesn’t burn.
Conclusion
This garlic herb butter roasted turkey with pan gravy is the recipe that changed how I think about holiday cooking. It’s not complicated. It’s not fussy. It’s just good food made with simple ingredients and a little bit of care. The butter does the heavy lifting, the herbs bring the flavor, and the gravy ties everything together in the most satisfying way.
I love this recipe because it proves that you don’t need to be a professional chef to make a turkey that looks like it belongs on a magazine cover. You just need good butter, fresh herbs, and the willingness to get your hands a little messy. And honestly? That’s the fun part.
I’d love to hear how your turkey turns out. Did you try any variations? Did the gravy come out perfect? Drop a comment below and let me know. And if you’re looking for more holiday inspiration, check out my crispy herb crusted roast chicken for a smaller-scale version of this same technique. Happy roasting, friend. You’ve got this.
Pin This Recipe!
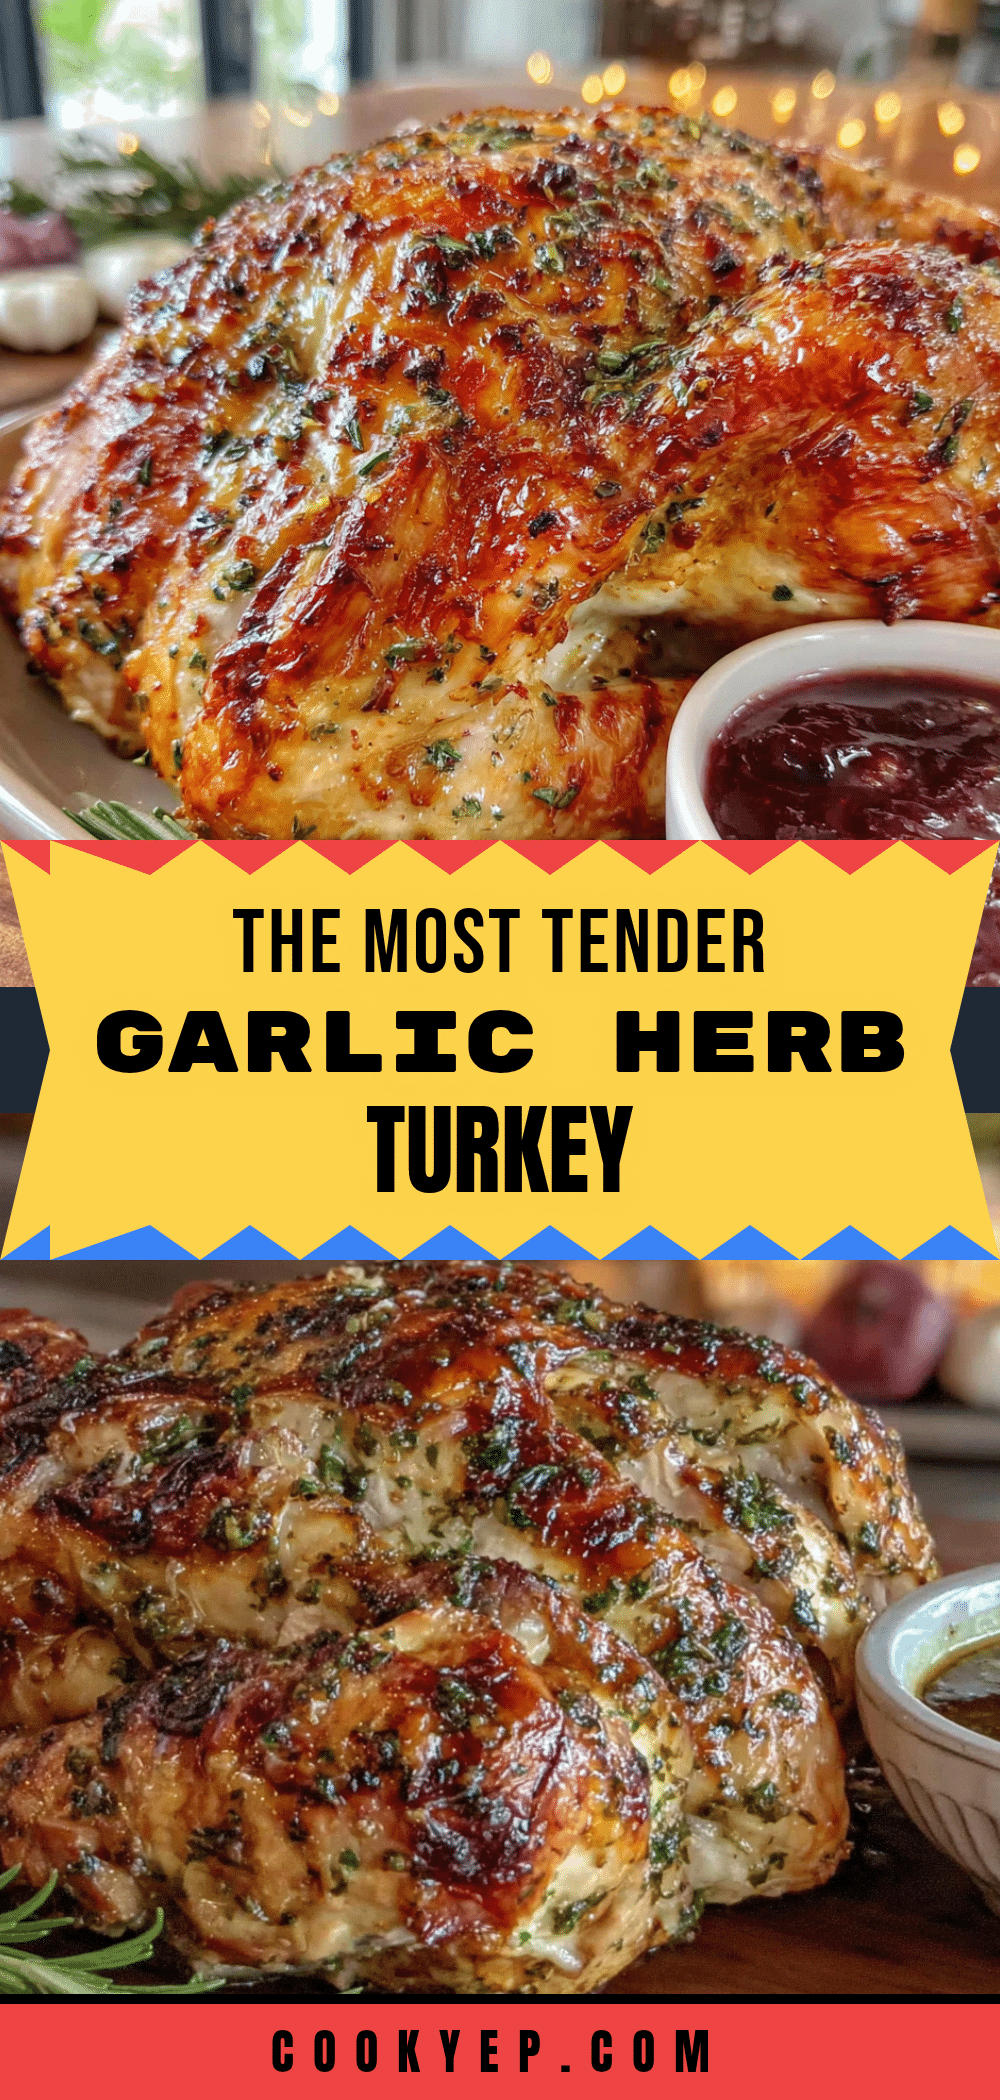
Best Garlic Herb Butter Roasted Turkey with Easy Pan Gravy
A foolproof roasted turkey with crispy golden skin and juicy meat, thanks to a garlic herb butter massaged under the skin. The easy pan gravy uses the drippings for rich, silky flavor without extra stock or thickeners.
- Prep Time: 20 minutes
- Cook Time: 2 hours 30 minutes
- Total Time: 3 hours 20 minutes
- Yield: 8 servings 1x
- Category: Main Course
- Cuisine: American
Ingredients
- 1 cup unsalted butter, softened
- 6 cloves garlic, minced
- 2 tablespoons fresh rosemary, chopped
- 2 tablespoons fresh thyme leaves, chopped
- 1 tablespoon fresh sage, chopped
- 1 tablespoon fresh parsley, chopped
- 1 teaspoon salt
- 1/2 teaspoon black pepper, freshly ground
- 1 teaspoon lemon zest (optional)
- 1 whole turkey (12–14 pounds), thawed
- 1 large onion, quartered
- 2 carrots, cut into large chunks
- 2 celery stalks, cut into large chunks
- 1 head of garlic, halved horizontally
- Fresh herb sprigs (rosemary, thyme, sage) for stuffing
- 2 tablespoons olive oil
- Salt and pepper for seasoning
- Pan drippings from roasted turkey
- 2 tablespoons all-purpose flour
- 1 cup turkey or chicken broth, low-sodium
- 1/2 cup dry white wine (optional)
- Salt and pepper to taste
Instructions
- Make the garlic herb butter: In a medium bowl, combine softened butter, minced garlic, chopped rosemary, thyme, sage, parsley, salt, pepper, and lemon zest (if using). Mix until evenly combined.
- Prep the turkey: Remove turkey from fridge 1 hour before roasting. Remove giblets and neck, pat turkey completely dry with paper towels.
- Apply the herb butter: Gently loosen skin over the breast, spread half the butter under the skin. Rub remaining butter all over the outside. Season generously with salt and pepper.
- Stuff the cavity: Fill cavity with quartered onion, carrot chunks, celery chunks, halved garlic head, and fresh herb sprigs. Tie legs with kitchen twine if desired, tuck wing tips under body.
- Roast the turkey: Preheat oven to 425°F (220°C). Place turkey breast-side up on rack in roasting pan. Pour 1 cup water or broth into pan. Roast at 425°F for 30 minutes, then reduce temperature to 350°F (175°C) and continue roasting.
- Baste and monitor: After 1 hour total roasting time, baste with pan juices every 30 minutes. Tent with foil if skin gets too dark. Total roasting time for 12-14 pound turkey is about 2.5 to 3 hours.
- Check for doneness: Insert meat thermometer into thickest part of thigh without touching bone. Target 165°F (74°C). Breast should be around 160°F (71°C). Juices should run clear.
- Rest the turkey: Transfer turkey to cutting board, tent loosely with foil, and let rest for at least 30 minutes.
- Make the pan gravy: Pour pan drippings through fine-mesh strainer into fat separator. Skim off most fat, leaving about 2 tablespoons. Place roasting pan on stovetop over medium heat, whisk in flour and cook 1-2 minutes until golden. Slowly pour in broth and wine (if using), whisking constantly. Simmer 3-5 minutes until thickened. Season with salt and pepper. Strain again if desired.
Notes
Pat turkey completely dry for crispy skin. Use a meat thermometer for accuracy. Let turkey rest at least 30 minutes before carving. Butter under the skin is essential for moist meat. Baste for flavor, not moisture. Tent with foil if skin browns too quickly.
Nutrition
- Serving Size: 4 ounces (without sk
- Calories: 190
- Sodium: 70
- Fat: 5
- Saturated Fat: 2
- Protein: 34
Keywords: roasted turkey, garlic herb butter, pan gravy, Thanksgiving, holiday turkey, crispy skin turkey


