The last bar was gone before I even offered it to my neighbor. She’d texted me the night before asking if I had any extra dessert for her book club, and I honestly thought I’d stashed a few in the back of the fridge. But when I opened the container, there was just one sad little crumb left. I hadn’t planned on eating the whole pan myself, but somewhere between Tuesday afternoon and Wednesday midnight, it just happened. That’s the thing about these pumpkin cheesecake bars—they disappear quietly. You cut one piece for yourself, then another because it’s technically breakfast food (pumpkin is a vegetable, right?), and suddenly the pan is empty. I knew I had to make them again, but this time with a proper plan. Not because I wanted to share, but because I realized this recipe deserved to be the one I bring everywhere this fall. It’s not flashy or complicated. It’s just really, really good.
Why You’ll Love This Recipe
I’ve tested a lot of pumpkin desserts over the years, and honestly, most of them fall into two camps: they’re either too fussy for a weeknight or they taste like you’re eating a candle. These bars are neither. They hit that sweet spot where the pumpkin flavor feels like fall, but the cheesecake keeps it creamy and indulgent. No dry, crumbly crusts here. No watery filling that never sets. This version just works.
- Make-Ahead Magic : You can prep these bars up to three days in advance. The flavors actually get better after a day in the fridge, which means one less thing to stress about when you’re hosting.
- Simple Ingredients : Nothing weird or hard to find. Cream cheese, canned pumpkin, eggs, sugar, butter, and a few spices. Chances are you already have most of this in your pantry.
- Perfect for Fall Gatherings : Whether it’s Thanksgiving, a Friendsgiving potluck, or just a cozy Saturday with coffee, these bars fit right in. They’re portable, sliceable, and everyone grabs one without needing a plate and fork.
- No Water Bath Required : Traditional cheesecake can be a hassle with that water bath situation. These bars use a different technique that gives you a smooth, crack-free top without the drama.
- Crowd-Pleaser : I’ve brought these to three different gatherings this season, and every single time someone asked for the recipe. Even people who say they don’t like pumpkin desserts go back for seconds.
What makes these different from every other pumpkin cheesecake bar recipe out there? It’s the crust. Most recipes use a basic graham cracker crust that gets soggy. I use a brown butter shortbread base that stays crisp even after days in the fridge. That little extra step makes everything better. Plus, the filling uses a trick I learned from a pastry chef friend—adding a bit of cornstarch to stabilize the cheesecake so it cuts cleanly without cracking. No more ugly bars that look like a mess on the platter.
These bars aren’t just good. They’re the kind of dessert that makes people close their eyes after the first bite. And honestly, isn’t that what we’re all after?
What Ingredients You Will Need
This recipe uses simple, wholesome ingredients that come together to create something truly special. Most of these are pantry staples, especially if you do a lot of fall baking. Let me walk you through each one and why it matters.
For the Brown Butter Shortbread Crust
- Unsalted butter, 1 cup (2 sticks or 226 grams) — You’ll brown this, so don’t use salted butter or the crust will taste too salty. I prefer Kerrygold or Plugrà for the best flavor, but any good-quality unsalted butter works.
- All-purpose flour, 2 cups (240 grams) — No need for anything fancy here. Just standard AP flour. If you want a gluten-free option, you can swap with a 1:1 gluten-free baking blend, but the texture will be slightly different.
- Powdered sugar, ½ cup (60 grams) — This gives the crust a melt-in-your-mouth texture that granulated sugar just can’t match. Plus it dissolves more evenly into the butter.
- Vanilla extract, 1 teaspoon — Pure vanilla extract, not imitation. The difference is noticeable in a shortbread crust.
- Salt, ¼ teaspoon — Just enough to balance the sweetness and bring out the buttery flavor.
For the Cheesecake Filling
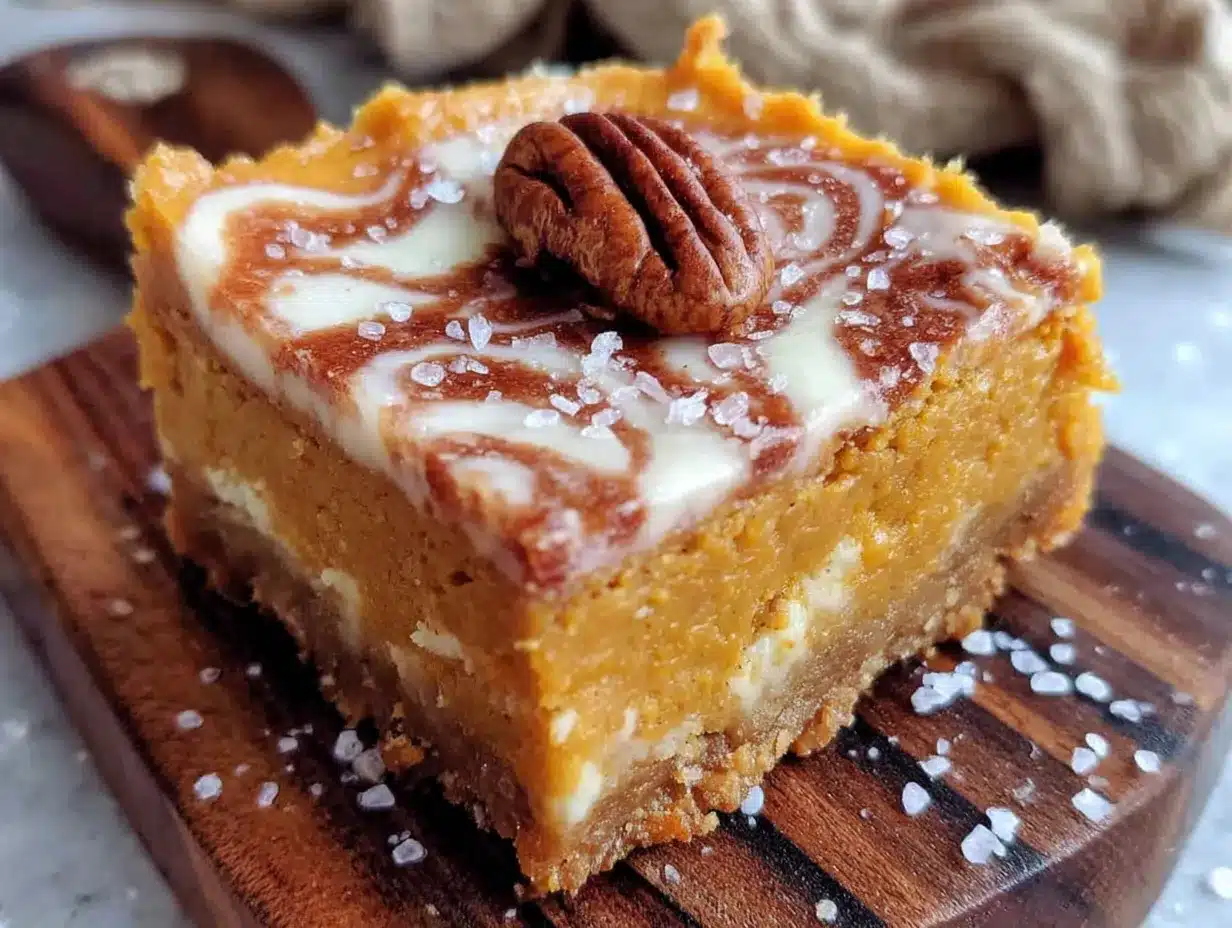
- Cream cheese, 24 ounces (three 8-ounce blocks) — Must be full-fat and softened to room temperature. Low-fat cream cheese will make the filling runny and won’t set properly. I use Philadelphia cream cheese because it’s consistently reliable.
- Granulated sugar, 1 cup (200 grams) — Regular white sugar. Don’t reduce this or the texture will suffer.
- Pumpkin puree, 1 cup (about 240 grams) — Make sure you’re using 100% pumpkin puree, not pumpkin pie filling. The pie filling already has sugar and spices added, which will throw off the balance. Libby’s is my go-to brand.
- Sour cream, ½ cup (120 grams) — This adds tanginess and makes the cheesecake extra creamy. Full-fat is best, but Greek yogurt works in a pinch.
- Large eggs, 3 — Room temperature is crucial here. Cold eggs will seize the cream cheese mixture and leave you with lumps.
- Vanilla extract, 2 teaspoons — Again, go for the pure stuff.
- Cornstarch, 2 tablespoons — This is the secret ingredient that prevents cracking. It stabilizes the filling without changing the flavor.
For the Pumpkin Spice Blend
- Ground cinnamon, 2 teaspoons — The backbone of the spice flavor. I use Saigon cinnamon for a warmer, more aromatic taste.
- Ground ginger, ½ teaspoon — Adds a little warmth without being overpowering.
- Ground nutmeg, ¼ teaspoon — Freshly grated if you have it, but pre-ground works fine.
- Ground cloves, ¼ teaspoon — Just a tiny amount. Cloves are strong, so don’t overdo it.
- Allspice, ¼ teaspoon — Optional but nice. It rounds out the spice profile.
Substitution Notes: If you’re dairy-free, you can use a plant-based cream cheese alternative, but the texture won’t be as rich. For a lower-sugar version, you can reduce the sugar to ¾ cup in the filling, but the crust needs the full amount for proper structure. And if you don’t have pumpkin pie spice on hand, just use the individual spices listed above—it’s actually better that way because you can control the proportions.
Equipment Needed
You don’t need a fancy kitchen to make these bars, but a few specific tools will make your life easier.
- 9×13-inch baking pan — Metal or glass both work, but metal gives you a crisper crust. If you only have a glass dish, reduce the oven temperature by 25°F.
- Parchment paper — This is non-negotiable. You need parchment slings to lift the bars out cleanly. Trust me on this.
- Stand mixer or hand mixer — You can do this by hand with a whisk and some elbow grease, but a mixer makes the cream cheese filling silky smooth without overworking it.
- Medium saucepan — For browning the butter. A light-colored pan helps you see when the butter turns amber.
- Large mixing bowls — You’ll need at least two: one for the crust and one for the filling.
- Rubber spatula — For scraping down the bowl and folding ingredients together.
- Sharp knife — A chef’s knife works best for cutting clean bars. Run it under hot water and wipe it dry between cuts for the neatest slices.
- Cooling rack — Lets air circulate around the pan so the bars cool evenly.
If you don’t have a stand mixer, don’t worry. I actually prefer using a hand mixer for this recipe because it’s easier to control and you’re less likely to overbeat the filling. And if you’re really in a pinch, you can even use a food processor for the crust.
Preparation Method
Let me walk you through this step by step. I’ve made these bars at least a dozen times, so I know exactly where things can go wrong and how to fix them.
Step 1: Brown the Butter
Start by making the brown butter for the crust. Cut 1 cup of unsalted butter into pieces and toss them in a medium saucepan over medium heat. Stir constantly with a rubber spatula as the butter melts. After a few minutes, it’ll start to foam and bubble. Keep stirring. You’ll see little brown specks forming at the bottom of the pan, and the butter will smell nutty and amazing. This takes about 5 to 7 minutes. As soon as it turns a deep amber color, remove it from the heat immediately. Don’t walk away—brown butter can go from perfect to burnt in seconds.
Pour the brown butter into a heatproof bowl and let it cool for about 10 minutes. It should still be liquid but not hot enough to cook the other ingredients.
Step 2: Make the Crust
Preheat your oven to 350°F (175°C). Line your 9×13-inch baking pan with parchment paper, leaving a 2-inch overhang on the long sides. This creates handles so you can lift the bars out later.
In a large bowl, whisk together 2 cups of all-purpose flour, ½ cup of powdered sugar, and ¼ teaspoon of salt. Pour in the cooled brown butter and 1 teaspoon of vanilla extract. Stir with a fork until the mixture looks like coarse crumbs and holds together when you squeeze it. Don’t overmix—you want it just combined.
Press the crust mixture evenly into the bottom of the prepared pan. I use the bottom of a measuring cup to get it flat and compact. Bake for 18 to 20 minutes, until the edges are golden brown and the center looks set. Let it cool on a wire rack while you make the filling.
Step 3: Make the Cheesecake Filling
In a large mixing bowl, beat 24 ounces of softened cream cheese with an electric mixer on medium speed until smooth and creamy. This takes about 2 minutes. Scrape down the sides and bottom of the bowl with a rubber spatula.
Add 1 cup of granulated sugar and beat for another 2 minutes until light and fluffy. Then add ½ cup of sour cream and 2 teaspoons of vanilla extract. Mix until just combined.
Add the eggs one at a time, beating on low speed after each addition until just incorporated. Don’t overbeat here—you don’t want to whip air into the filling, which can cause cracks later.
In a small bowl, whisk together the spices: 2 teaspoons cinnamon, ½ teaspoon ginger, ¼ teaspoon nutmeg, ¼ teaspoon cloves, and ¼ teaspoon allspice. Add this to the cream cheese mixture along with 1 cup of pumpkin puree and 2 tablespoons of cornstarch. Mix on low speed until smooth and uniform. The filling should be thick and creamy, not runny.
Step 4: Assemble and Bake
Pour the filling over the cooled crust and spread it evenly with a spatula. Give the pan a few gentle taps on the counter to release any air bubbles.
Bake at 350°F (175°C) for 35 to 40 minutes. The edges should be set and slightly puffed, but the center should still jiggle slightly when you shake the pan. That’s normal—it’ll set as it cools. Overbaking is the number one cause of cracks, so don’t wait until the center is completely firm.
Turn off the oven, crack the door open, and let the bars sit inside for 30 minutes. This slow cooling process prevents the top from cracking. After 30 minutes, remove the pan from the oven and let it cool completely on a wire rack.
Step 5: Chill and Slice
Once the bars are at room temperature, cover the pan with plastic wrap and refrigerate for at least 4 hours, but overnight is better. The longer they chill, the cleaner the slices will be.
When you’re ready to serve, lift the bars out of the pan using the parchment paper slings. Place them on a cutting board and use a sharp knife to cut into squares. For the neatest cuts, run the knife under hot water and wipe it dry between each slice.
I usually cut mine into 24 bars, but you can go bigger or smaller depending on your crowd. If you’re bringing them to a party, I’d recommend cutting them smaller—people always want to try more than one.
Cooking Tips & Techniques
I’ve messed up this recipe more times than I care to admit, so let me save you the trouble.
Don’t skip the brown butter. I know it’s an extra step, but it transforms the crust from something ordinary into something you’ll want to eat by itself. The nutty flavor pairs perfectly with the pumpkin and spices. One time I was in a rush and used melted butter instead, and the crust was just… fine. Not bad, but not memorable either.
Room temperature ingredients matter. This is the tip I always stress to friends who ask why their cheesecake filling is lumpy. Cold cream cheese doesn’t blend smoothly, and cold eggs can cause the mixture to seize. Take everything out of the fridge at least an hour before you start. If you’re in a hurry, you can microwave the cream cheese in 10-second bursts, but be careful not to melt it.
Watch your oven temperature. Every oven runs differently. I have a friend whose oven runs 25°F hot, and her bars always crack. Invest in an oven thermometer if you don’t have one. It’s a cheap fix that makes a huge difference.
Let them cool slowly. That step where you leave the bars in the turned-off oven with the door cracked? Don’t skip it. The gradual temperature change is what prevents those ugly surface cracks. I learned this the hard way after pulling a pan out too early and watching a giant crack form right down the middle.
Use the parchment slings. I cannot emphasize this enough. Trying to flip a pan of cheesecake bars onto a cutting board is a disaster waiting to happen. The parchment handles make lifting them out effortless.
Variations & Adaptations
One of the best things about this recipe is how easy it is to customize. Here are some variations I’ve tried and loved.
Gingersnap Crust : Swap the shortbread crust for a gingersnap cookie crust. Crush 2 cups of gingersnap cookies, mix with 5 tablespoons of melted butter, and press into the pan. Bake for 10 minutes at 350°F before adding the filling. The spicy ginger flavor is incredible with the pumpkin. If you’ve tried my cozy gingerbread cheesecake bars with molasses crust, you know how well those warm spices work with cream cheese.
Maple Pecan Topping : After the bars have chilled, drizzle them with a maple glaze made from 1 cup of powdered sugar and 3 tablespoons of maple syrup. Sprinkle with toasted pecans. This turns them into something truly special for holiday gatherings. My easy maple pecan pumpkin pie bars use a similar topping, and it’s always a crowd favorite.
Chocolate Swirl : Melt ½ cup of semisweet chocolate chips and drizzle it over the filling before baking. Use a knife to swirl it into the cheesecake for a marbled effect. The chocolate and pumpkin combination is surprisingly good.
Dairy-Free Version : Use plant-based cream cheese and sour cream alternatives. I’ve tested this with Kite Hill cream cheese and it works, though the texture is slightly less creamy. The crust can be made with vegan butter, but make sure to brown it the same way.
Mini Bars : Make these in a muffin tin for individual servings. Line a 12-cup muffin tin with paper liners, press the crust into each cup, fill with cheesecake mixture, and bake for 18 to 20 minutes. They’re perfect for parties where people want to grab and go.
Serving & Storage Suggestions
These bars taste best when they’re cold, straight from the fridge. The texture is firm and creamy, and the flavors are more pronounced. If you prefer a softer cheesecake, let them sit at room temperature for about 15 minutes before serving.
For presentation, I like to arrange the bars on a white platter and dust them lightly with cinnamon or powdered sugar. A dollop of whipped cream on each bar is optional but never a bad idea. If you’re serving these alongside other fall desserts, they pair beautifully with a warm cup of coffee or spiced cider.
Storage: Keep the bars in an airtight container in the refrigerator for up to 5 days. They actually taste better on day two or three as the flavors meld together. I’ve also frozen these successfully. Wrap each bar individually in plastic wrap, then place them in a freezer bag. They’ll keep for up to 3 months. Thaw overnight in the refrigerator before serving.
Reheating: Don’t. These are meant to be served cold. If you really want a warm dessert, try my easy brown butter pumpkin bread with maple glaze instead—it’s designed to be served warm with butter.
One more thing: if you’re transporting these to a gathering, keep them cold until you leave. A chilled cheesecake travels much better than one that’s been sitting out. I usually pack them in a cooler with an ice pack, especially if I’m driving more than 30 minutes.
Nutritional Information & Benefits
Let’s be real—these are not health food. But they’re not as bad as you might think, especially compared to traditional cheesecake.
| Per Bar (24 servings) | Amount |
|---|---|
| Calories | 285 |
| Total Fat | 18g |
| Saturated Fat | 11g |
| Cholesterol | 85mg |
| Sodium | 180mg |
| Total Carbohydrates | 28g |
| Dietary Fiber | 1g |
| Sugars | 18g |
| Protein | 5g |
Pumpkin is actually a nutritional powerhouse. It’s packed with vitamin A (over 200% of your daily needs per cup), fiber, and antioxidants like beta-carotene. The cream cheese provides calcium and protein, while the eggs add a good dose of B vitamins. Is it a superfood? No. But it’s a dessert that happens to have some redeeming qualities, and I can get behind that.
If you’re watching your sugar intake, you can reduce the sugar in the filling to ¾ cup without affecting the texture too much. The crust needs the full amount for proper structure, though. And if you’re gluten-free, the crust can be made with a 1:1 gluten-free flour blend, though it won’t be quite as crisp.
Allergen note: This recipe contains dairy, eggs, and wheat. It’s not suitable for vegans or those with celiac disease without significant modifications.
Conclusion
These pumpkin cheesecake bars have become my go-to fall dessert for a reason. They’re reliable, delicious, and they always get the reaction I’m looking for—that quiet moment where someone takes a bite and just stops talking. They’re not complicated or pretentious. They’re just really good bars made with simple ingredients and a little bit of care.
I hope you’ll try them and make them your own. Maybe you’ll add a chocolate swirl or a pecan topping. Maybe you’ll make them for Thanksgiving and watch your relatives fight over the last piece. Or maybe you’ll just make them for yourself on a random Tuesday because you deserve something nice. That’s valid too.
If you do make these, I’d love to hear about it. Drop a comment below and tell me how they turned out, or share a photo of your bars on Pinterest. And if you have a variation that works especially well, please share it—I’m always looking for new ideas to try.
Happy baking, friends. Fall is too short not to enjoy every single bite.
Frequently Asked Questions
Can I use pumpkin pie filling instead of pumpkin puree?
No, I wouldn’t recommend it. Pumpkin pie filling already has sugar and spices added, which will throw off the balance of this recipe. Stick with 100% pure pumpkin puree for the best results.
Why did my cheesecake bars crack on top?
Cracks usually happen from overbaking or sudden temperature changes. Make sure you pull the bars out when the center is still slightly jiggly, and let them cool slowly in the turned-off oven with the door cracked. Also, don’t overbeat the filling—too much air incorporated during mixing can cause cracks as the bars cool.
Can I make these bars gluten-free?
Yes! Use a 1:1 gluten-free all-purpose flour blend in the crust. I’ve tested this with Bob’s Red Mill 1:1 Baking Flour and it works well. The texture will be slightly more tender and less crisp, but still delicious.
How far in advance can I make these bars?
You can make them up to 3 days ahead of time and keep them in the refrigerator. They actually taste better on day two because the flavors have more time to meld together. You can also freeze them for up to 3 months.
Do I need to use a water bath?
Nope! That’s one of the best things about this recipe. The cornstarch in the filling acts as a stabilizer, so you get a smooth, crack-free top without the hassle of a water bath. Just follow the cooling instructions and you’ll be fine.
Pin This Recipe!
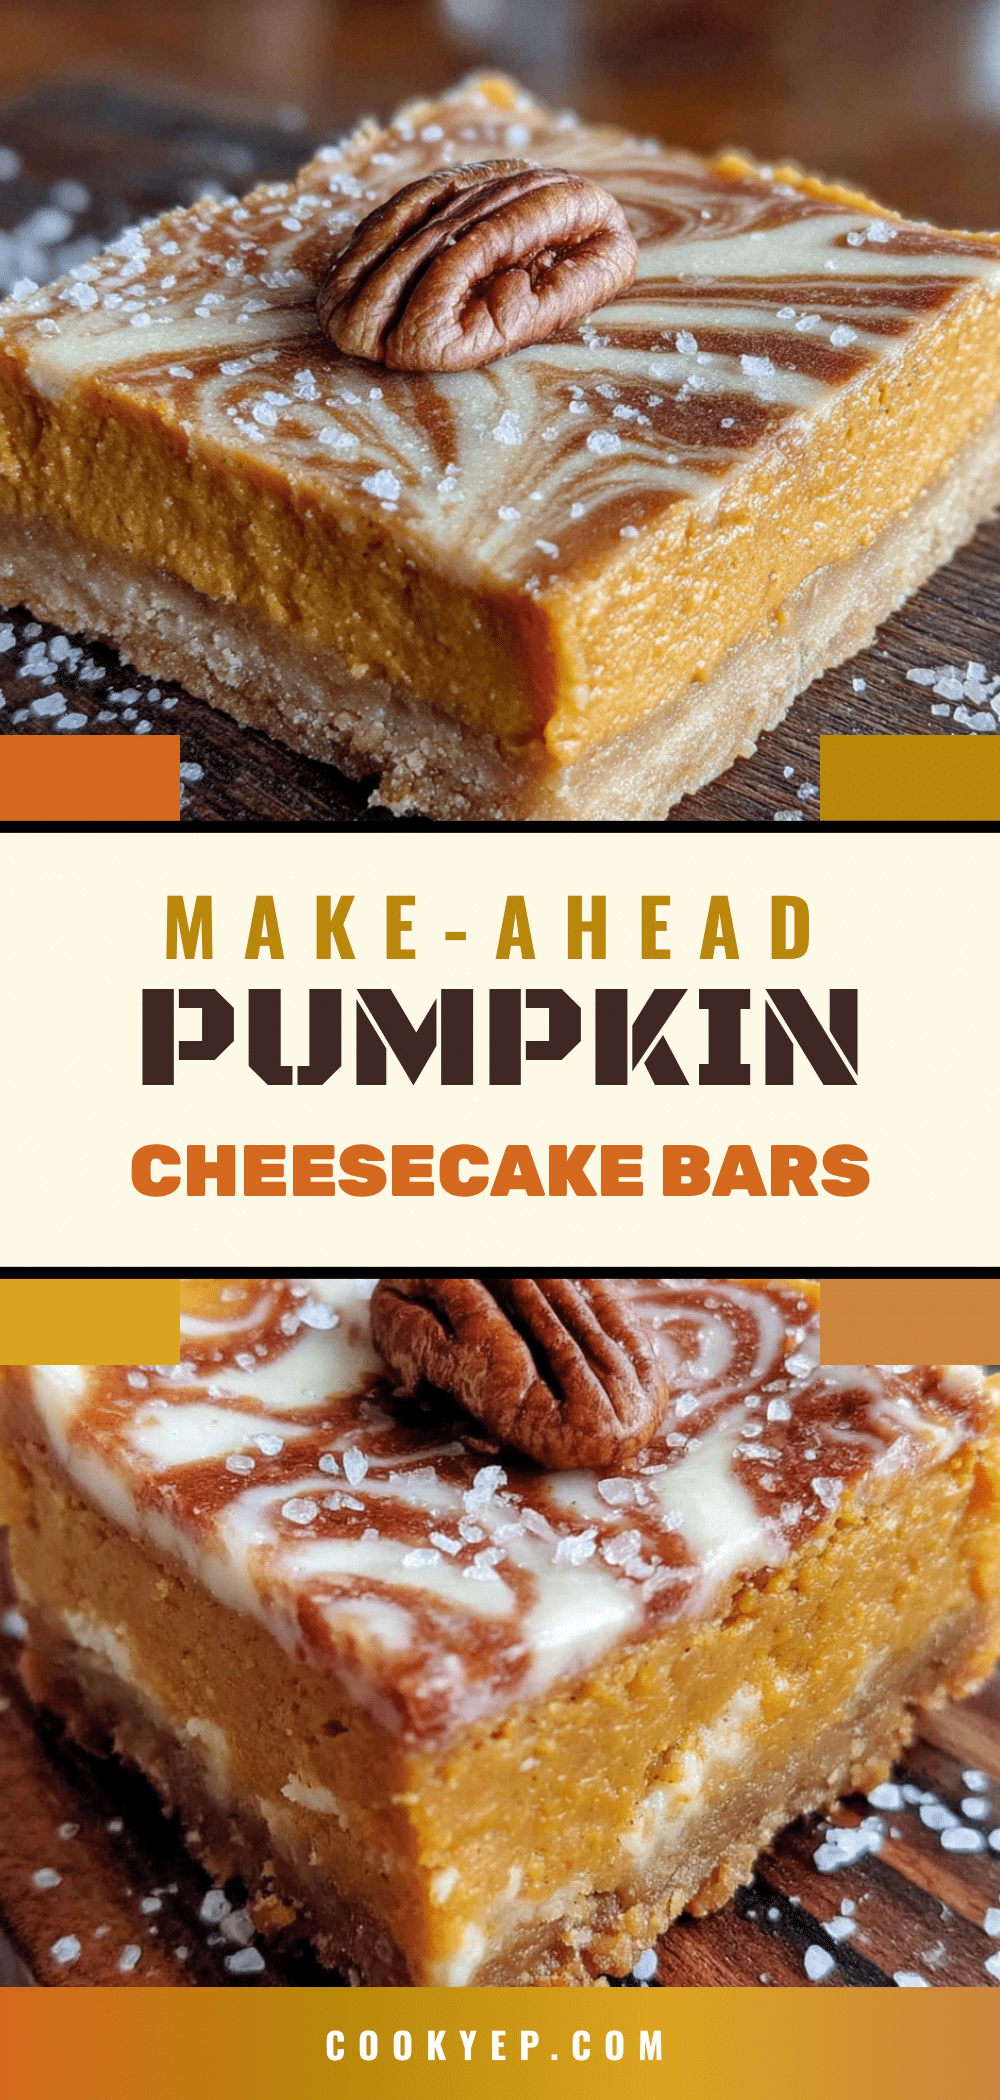
Best Pumpkin Cheesecake Bars: Easy Make-Ahead Dessert
These pumpkin cheesecake bars feature a brown butter shortbread crust and a creamy, spiced pumpkin cheesecake filling. They’re make-ahead friendly, require no water bath, and are perfect for fall gatherings.
- Prep Time: 30 minutes
- Cook Time: 35-40 minutes
- Total Time: 5 hours (including chilling)
- Yield: 24 bars 1x
- Category: Dessert
- Cuisine: American
Ingredients
- 1 cup (2 sticks or 226 grams) unsalted butter
- 2 cups (240 grams) all-purpose flour
- ½ cup (60 grams) powdered sugar
- 1 teaspoon vanilla extract
- ¼ teaspoon salt
- 24 ounces (three 8-ounce blocks) cream cheese, softened
- 1 cup (200 grams) granulated sugar
- 1 cup (about 240 grams) pumpkin puree
- ½ cup (120 grams) sour cream
- 3 large eggs, room temperature
- 2 teaspoons vanilla extract
- 2 tablespoons cornstarch
- 2 teaspoons ground cinnamon
- ½ teaspoon ground ginger
- ¼ teaspoon ground nutmeg
- ¼ teaspoon ground cloves
- ¼ teaspoon allspice
Instructions
- Brown the butter: Cut 1 cup unsalted butter into pieces and melt in a medium saucepan over medium heat, stirring constantly. Cook until the butter turns deep amber and smells nutty, about 5-7 minutes. Remove from heat immediately and pour into a heatproof bowl. Let cool for about 10 minutes.
- Make the crust: Preheat oven to 350°F (175°C). Line a 9×13-inch baking pan with parchment paper, leaving a 2-inch overhang on the long sides. In a large bowl, whisk together 2 cups flour, ½ cup powdered sugar, and ¼ teaspoon salt. Pour in the cooled brown butter and 1 teaspoon vanilla extract. Stir with a fork until the mixture resembles coarse crumbs and holds together when squeezed. Press evenly into the bottom of the prepared pan. Bake for 18-20 minutes until edges are golden and center is se…
- Make the filling: In a large bowl, beat 24 ounces softened cream cheese with an electric mixer on medium speed until smooth, about 2 minutes. Add 1 cup granulated sugar and beat for another 2 minutes until light and fluffy. Add ½ cup sour cream and 2 teaspoons vanilla extract; mix until combined. Add eggs one at a time, beating on low speed after each addition until just incorporated. In a small bowl, whisk together 2 teaspoons cinnamon, ½ teaspoon ginger, ¼ teaspoon nutmeg, ¼ teaspoon cloves, a…
- Assemble and bake: Pour the filling over the cooled crust and spread evenly. Tap the pan gently on the counter to release air bubbles. Bake at 350°F (175°C) for 35-40 minutes, until edges are set and center jiggles slightly. Turn off the oven, crack the door open, and let the bars sit inside for 30 minutes. Remove from oven and cool completely on a wire rack.
- Chill and slice: Cover the pan with plastic wrap and refrigerate for at least 4 hours, preferably overnight. Lift the bars out using the parchment slings, place on a cutting board, and cut into squares with a sharp knife (run knife under hot water and wipe dry between cuts for neat slices).
Notes
Don’t skip browning the butter—it transforms the crust. Use room temperature ingredients for a smooth filling. Let bars cool slowly in the turned-off oven to prevent cracks. For clean slices, chill overnight and use a hot knife. Bars can be stored in the refrigerator for up to 5 days or frozen for up to 3 months.
Nutrition
- Serving Size: 1 bar
- Calories: 285
- Sugar: 18
- Sodium: 180
- Fat: 18
- Saturated Fat: 11
- Carbohydrates: 28
- Fiber: 1
- Protein: 5
Keywords: pumpkin cheesecake bars, pumpkin dessert, fall dessert, cheesecake bars, make-ahead dessert, Thanksgiving dessert, brown butter shortbread crust


