I didn’t trust roasted tomato sauce. Not really. For years, I thought roasting tomatoes was just a fancy way to make them taste like they’d been sitting in a hot car too long. I’d stand over a stovetop for hours, stirring, sweating, convincing myself that slow-simmered was the only honest way to make sauce. Then my neighbor showed up at my door with a cardboard box overflowing with Roma tomatoes from her garden. She said, “I have too many. Please take them before they rot.” And I froze. Because I knew if I didn’t do something with them fast, they’d end up in the compost bin. That’s when I finally gave in and tried the oven method. And honestly? I was wrong. So wrong. The roasting concentrates everything good about a tomato and leaves behind all the watery nonsense. It’s a small-batch harvest recipe that actually respects your time and your counter space. These days, I make this small-batch homemade roasted tomato sauce every time I see a pile of ripe tomatoes at the farmers market. It’s become my quiet little ritual. A way to capture summer in a jar without turning my kitchen into a steam room.
Why You’ll Love This Recipe
This isn’t your grandmother’s all-day tomato sauce. It’s better. Faster. And somehow, it tastes even more like summer than the stuff that simmers for six hours. I’ve tested this recipe at least a dozen times, tweaking temperatures and timing until every batch came out consistent. Here’s what makes it special:
- Small-Batch Friendly : No need to can fifty jars or spend an entire weekend in the kitchen. This recipe uses about 3 pounds of tomatoes, which is perfect for one dinner and maybe a little leftover for tomorrow’s lunch.
- Minimal Hands-On Time : The oven does most of the work. You chop, toss, and let the heat transform everything while you go read a book or fold laundry. Seriously.
- Intense, Concentrated Flavor : Roasting caramelizes the natural sugars in the tomatoes and deepens the savory notes. You get a richness that stovetop sauces just can’t achieve without hours of reduction.
- Simple, Real Ingredients : No sugar, no tomato paste from a can, no weird additives. Just tomatoes, garlic, herbs, and olive oil. Things you can actually pronounce.
- Freezer-Friendly : This sauce freezes beautifully. Make a batch now, and you’ll have a taste of summer waiting for you in January.
What really sets this apart is the roasting technique itself. It’s not just about softening the tomatoes—it’s about coaxing out their deepest, most complex flavors. The garlic gets sweet and mellow. The herbs infuse into the olive oil. Everything melds together in a way that feels almost magical. And when you blend it all up, the color is this gorgeous deep red that makes you want to eat it with a spoon. Which I have done. Multiple times. No regrets.
What Ingredients You Will Need
This recipe is built around a short list of everyday ingredients. No hunting down specialty items or spending a fortune. Most of these are probably already in your kitchen. Here’s what you need and why each one matters:
- Roma Tomatoes (3 pounds) : These are my go-to for sauce because they have fewer seeds and less water than other varieties. They roast up meaty and concentrated. If you can’t find Romas, use San Marzano or any paste tomato variety. Avoid beefsteak tomatoes—they’re too watery and will give you a thin sauce.
- Garlic (1 whole head) : Don’t skimp here. Roasted garlic turns sweet and buttery, almost like a spread. Cut the top off the head so the cloves are exposed, and let them roast right alongside the tomatoes. Trust me on this.
- Yellow Onion (1 medium) : Adds a subtle sweetness and body to the sauce. I like to cut it into wedges so it roasts evenly without burning. Red onion works too, but it’ll give the sauce a slightly different color.
- Extra Virgin Olive Oil (¼ cup) : Use a good quality oil here. It’s a major flavor component, not just a cooking medium. The oil helps the tomatoes caramelize and carries the flavors of the herbs.
- Fresh Basil (¼ cup, packed) : Adds that unmistakable summer aroma. I add some before roasting and then stir in more fresh basil at the end for brightness. If you only have dried basil, use 2 teaspoons and add it with the other dried herbs.
- Fresh Oregano (2 sprigs) or Dried Oregano (1 teaspoon) : Oregano brings an earthy, slightly peppery note that pairs beautifully with roasted tomatoes. Fresh is lovely, but dried works perfectly fine.
- Thyme (3-4 sprigs) : Adds a subtle lemony-herbal quality. The stems are easy to remove after roasting. If you don’t have thyme, a pinch of dried rosemary works as a substitute.
- Salt (1 teaspoon, plus more to taste) : I use kosher salt because it’s easier to control. Salt is crucial here—it draws out moisture and helps concentrate the tomato flavor. Don’t be shy with it.
- Black Pepper (½ teaspoon, freshly ground) : Adds a gentle warmth. Freshly ground makes a difference, but pre-ground is fine in a pinch.
- Balsamic Vinegar (1 tablespoon, optional) : This is my secret ingredient. A tiny splash at the end brightens everything up and adds a touch of complexity. You won’t taste vinegar—it just makes the tomatoes taste more like themselves.
I usually buy my Roma tomatoes from a local farm stand when they’re in season. The flavor difference is night and day compared to supermarket tomatoes in winter. But honestly, even grocery store Romas work well for this recipe because the roasting concentrates their flavor so much.
Equipment Needed
You don’t need a lot of fancy gear for this recipe. That’s part of the beauty. Here’s what you’ll want to have on hand:
- Large Rimmed Baking Sheet (half-sheet pan) : A rimmed sheet is essential because the tomatoes release liquid as they roast. You don’t want that juice spilling all over your oven. I use a sturdy aluminum half-sheet pan that I’ve had for years. It’s dark and well-seasoned, which helps with browning.
- Parchment Paper or Silicone Baking Mat : Makes cleanup a breeze. The caramelized tomato juices can stick to the pan, and nobody wants to scrub that off. Parchment paper is my preference—just toss it when you’re done.
- Chef’s Knife and Cutting Board : For chopping tomatoes, onions, and herbs. A sharp knife makes the job faster and safer. I use an 8-inch chef’s knife that I sharpen every few weeks.
- Garlic Roaster or Small Oven-Safe Dish : You can wrap the garlic head in foil if you don’t have a garlic roaster. That’s what I did for years. Just drizzle it with a little oil, wrap it up, and roast it alongside the tomatoes.
- Immersion Blender or Regular Blender : An immersion blender lets you puree the sauce right in the pan, which means less cleanup. If you’re using a regular blender, let the sauce cool for a few minutes first and work in batches. Hot liquid expands, and you don’t want a tomato explosion.
- Fine-Mesh Strainer or Food Mill (optional) : If you want a completely smooth sauce without any seeds or skins, pass the pureed sauce through a strainer. I usually skip this step because I like a little texture, but it’s nice to have the option.
- Mason Jars or Freezer-Safe Containers : For storing your finished sauce. I use pint-sized Mason jars with plastic lids. Glass jars are fine for the fridge, but use freezer-safe containers if you’re freezing.
If you don’t have an immersion blender, a potato masher works in a pinch. You’ll end up with a chunkier sauce, but that’s not necessarily a bad thing. Some of my favorite pasta sauces are rustic and textured.
Preparation Method
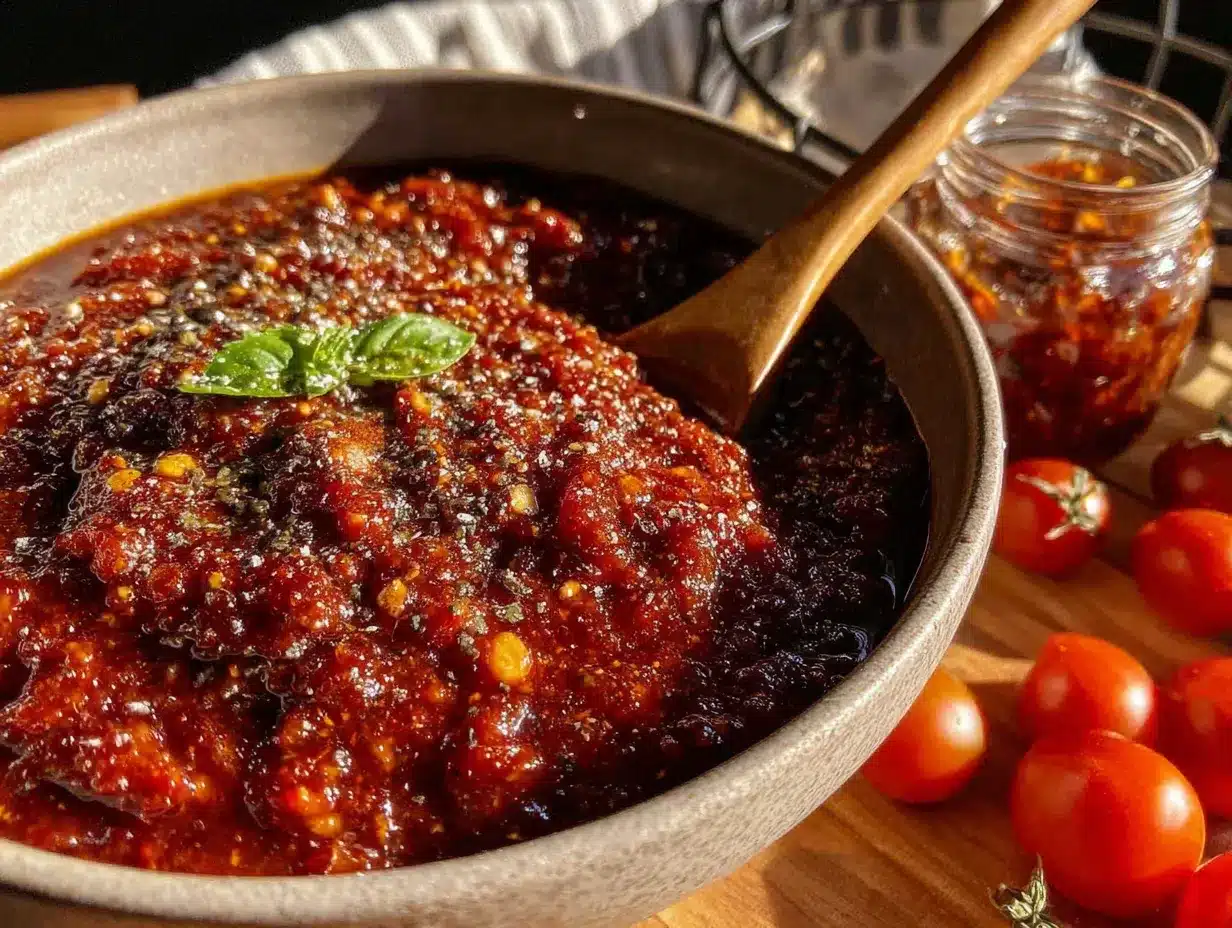
Let me walk you through this step by step. I’ve made this sauce more times than I can count, so I’ve learned a few tricks along the way. Follow these steps, and you’ll get perfect results every time.
- Preheat your oven to 400°F (200°C). Give it a full 15 minutes to come to temperature. A hot oven is key for good caramelization. While it’s heating, line your baking sheet with parchment paper.
- Prep the tomatoes. Wash and dry your Roma tomatoes. Cut each one in half lengthwise through the stem end. If you’re using larger tomatoes, cut them into quarters. Remove the tough core and any green spots. Don’t worry about the seeds—they’ll soften during roasting and add body to the sauce.
- Prep the onion and garlic. Peel the onion and cut it into 6-8 wedges. Leave the root end intact so the wedges hold together during roasting. For the garlic, slice off the top quarter of the head to expose the cloves. Don’t peel the individual cloves—they’ll soften and squeeze out easily after roasting.
- Arrange everything on the baking sheet. Place the tomato halves cut-side up on the parchment. Tuck the onion wedges in between the tomatoes. Set the garlic head in the corner of the pan, cut-side up. Drizzle everything with the olive oil, making sure to get some oil directly on the garlic. Sprinkle with salt and pepper.
- Add the herbs. Tuck the fresh basil leaves, oregano sprigs, and thyme sprigs around the tomatoes. They’ll wilt and infuse the oil as everything roasts. If you’re using dried herbs, sprinkle them evenly over the tomatoes.
- Roast for 45-55 minutes. The tomatoes should be soft, wrinkled, and starting to brown around the edges. The onion wedges should be tender and caramelized. The garlic should feel soft when you squeeze it gently through the skin. Halfway through roasting, give the pan a gentle shake to redistribute everything.
- Let everything cool slightly. Pull the pan out of the oven and let it sit for about 5 minutes. This makes handling the garlic much safer and easier. You’ll see a beautiful pool of ruby-red juice mixed with olive oil at the bottom of the pan. That’s liquid gold, don’t waste it.
- Squeeze out the roasted garlic. Using tongs or a fork, pick up the garlic head. Squeeze the bottom of the head, and the soft, caramelized cloves will slide right out. Discard the papery skins. Add the garlic to the pan with the tomatoes.
- Remove the herb stems. Fish out the thyme and oregano stems. The leaves will have fallen off during roasting, so you’re just removing the woody parts. Leave the basil leaves—they’ll blend right in.
- Blend the sauce. If you’re using an immersion blender, blend everything right in the baking sheet until you reach your desired consistency. I like it slightly chunky, about 10-15 seconds of blending. For a smoother sauce, blend longer. If you’re using a regular blender, carefully transfer the roasted vegetables and juices to the blender jar. Work in batches if needed, filling the jar no more than halfway. Remove the center cap from the blender lid and cover it with a kitchen towel to let steam escape. Blend on low speed, gradually increasing to high, until smooth.
- Stir in the balsamic vinegar and fresh basil. If you’re using the balsamic, stir it in now along with a handful of fresh chopped basil. Taste and adjust salt and pepper. Sometimes I add a tiny pinch of red pepper flakes for heat.
- Use immediately or store. Serve the sauce over pasta, use it as a pizza base, or spoon it over grilled chicken. Let any leftovers cool completely before transferring to jars or containers.
One thing I learned the hard way: don’t rush the roasting. I once pulled the pan out at 35 minutes because I was impatient, and the sauce was thin and watery. Those extra 10-15 minutes make all the difference. The tomatoes need time to really concentrate and develop that deep, sweet flavor.
Cooking Tips & Techniques
Over the years, I’ve made every mistake you can imagine with this sauce. I’ve burned the garlic. I’ve under-roasted the tomatoes. I’ve forgotten the salt. Here’s what I’ve learned so you don’t have to repeat my failures:
Don’t overcrowd the pan. If you have more than 3 pounds of tomatoes, use two baking sheets. When tomatoes are crowded, they steam instead of roast. You want them to have space so the moisture can evaporate and the sugars can caramelize. A single layer with a little breathing room is the goal.
Use a dark-colored baking sheet if possible. Dark pans absorb heat better and promote browning. If your pan is light-colored and shiny, the tomatoes will take longer to caramelize. You can compensate by adding 5-10 minutes to the roasting time.
Resist the urge to stir. I know it’s tempting to toss everything around halfway through, but leave the tomatoes alone until they’re done. Moving them around prevents the bottoms from browning properly. Just shake the pan gently if you’re worried about sticking.
Save the juices. When you pull the pan out of the oven, there will be a lot of liquid pooled around the tomatoes. Don’t pour it off. That liquid is pure concentrated tomato flavor mixed with herb-infused olive oil. It all goes into the blender.
Season gradually. It’s easier to add more salt than to fix an over-salted sauce. Start with 1 teaspoon and adjust after blending. Remember that the flavors will continue to develop as the sauce sits, especially if you’re storing it for later use.
Let the sauce rest before serving. If you’re eating it right away, let the sauce sit for 10-15 minutes after blending. This allows the flavors to meld and the texture to settle. Freshly blended sauce can taste a bit sharp, but it smooths out beautifully after a short rest.
Double the recipe if you have the oven space. This sauce freezes so well that I always make extra. I roast two pans at once, rotating them halfway through. Then I freeze the extra in pint-sized jars for busy weeknights.
Variations & Adaptations
This recipe is a starting point, not a rigid rule. Here are some ways I’ve adapted it over the years depending on what I have on hand or what I’m craving:
Smoky Roasted Tomato Sauce : Add 1-2 chipotle peppers in adobo sauce to the blender along with the roasted tomatoes. The smokiness pairs beautifully with the sweetness of the roasted tomatoes. I love this version on tacos or stirred into black bean soup.
Herb-Forward Version : Swap the basil and oregano for rosemary, sage, and marjoram. This gives the sauce a more rustic, almost woodsy flavor that’s perfect with roasted vegetables or hearty pasta like pappardelle.
Roasted Red Pepper Addition : Add 1-2 roasted red bell peppers to the blender with the tomatoes. This adds sweetness and a beautiful orange-red color. I do this when I want a sauce that’s a little milder and sweeter.
Dairy-Free Creamy Sauce : After blending, stir in ¼ cup of full-fat coconut milk or cashew cream. It makes the sauce velvety and rich without any dairy. My sister-in-law, who’s vegan, loves this version stirred into a big bowl of penne.
Spicy Arrabbiata Style : Add 1-2 teaspoons of red pepper flakes to the tomatoes before roasting. The heat infuses into the oil and spreads through the whole sauce. This is my go-to when I want something with a kick.
Oven-Dried Tomato Sauce : For an even more concentrated flavor, roast the tomatoes at 250°F (120°C) for 2-3 hours instead of at 400°F. This slowly dehydrates the tomatoes, giving you an intensely flavored sauce that’s almost like sun-dried tomato paste. It’s a weekend project, but worth it.
I once made a batch with yellow tomatoes and orange bell peppers just to see what would happen. The sauce was a gorgeous golden color and tasted milder and fruitier than the red version. It wasn’t better or worse—just different. Sometimes the best variations come from happy accidents.
Serving & Storage Suggestions
This sauce is incredibly versatile. Here’s how I like to use it and store it:
Serving Ideas : Toss it with al dente spaghetti or rigatoni for a simple weeknight dinner. Spread it on pizza dough instead of canned sauce. Spoon it over grilled chicken or fish. Use it as a dipping sauce for crusty bread or mozzarella sticks. Stir it into soups or stews for extra depth. I’ve even used it as a base for shakshuka—just warm the sauce in a skillet, crack a few eggs on top, and bake until the whites are set.
Serving Temperature : This sauce is best served warm, not piping hot. Let it sit for a few minutes after heating so the flavors can settle. If you’re using it cold, like on a pasta salad, let it come to room temperature first for the best texture.
Refrigerator Storage : Transfer cooled sauce to an airtight container or Mason jar. It will keep in the refrigerator for up to 5 days. The flavor actually improves after a day or two as the ingredients meld together. I often make a batch on Sunday and use it throughout the week.
Freezer Storage : This sauce freezes like a dream. Let it cool completely, then pour it into freezer-safe containers or zip-top bags. Leave about an inch of headspace for expansion. Label with the date and freeze for up to 3 months. I freeze mine in pint-sized portions so I can thaw exactly what I need. To thaw, transfer to the refrigerator overnight or run the sealed container under warm water.
Reheating : Warm the sauce gently in a saucepan over medium-low heat, stirring occasionally. If it’s too thick after freezing, add a splash of pasta cooking water or chicken broth to loosen it up. Avoid boiling the sauce—it can make the texture grainy and dull the flavors.
Flavor Development : I’ve noticed that this sauce tastes best on day two or three. The roasted flavors deepen and the garlic mellows further. If you’re planning a dinner party, make the sauce a day ahead. Your future self will thank you.
Nutritional Information & Benefits
This sauce is not just delicious—it’s genuinely good for you. Here’s a rough nutritional breakdown per ½-cup serving:
| Nutrient | Amount |
|---|---|
| Calories | 85 |
| Total Fat | 7g |
| Saturated Fat | 1g |
| Sodium | 300mg |
| Total Carbohydrates | 6g |
| Dietary Fiber | 2g |
| Sugars | 3g |
| Protein | 1g |
| Vitamin C | 15% DV |
| Vitamin A | 10% DV |
| Potassium | 8% DV |
Tomatoes are packed with lycopene, a powerful antioxidant that’s been linked to heart health and reduced inflammation. Roasting actually increases the bioavailability of lycopene, so this sauce is even more beneficial than raw tomatoes. The olive oil adds healthy monounsaturated fats, which help your body absorb the fat-soluble vitamins in the tomatoes. Garlic is known for its immune-supporting properties, and fresh herbs contribute additional antioxidants.
This sauce is naturally gluten-free, dairy-free, vegan, and low in sugar. It’s also Whole30-friendly if you skip the balsamic vinegar. If you’re watching your sodium, reduce the salt to ½ teaspoon and rely on the herbs for flavor.
Conclusion
This small-batch homemade roasted tomato sauce has become a staple in my kitchen for good reason. It’s simple, honest, and packed with the kind of flavor that makes you slow down and actually taste what you’re eating. The roasting does all the heavy lifting, turning ordinary tomatoes into something extraordinary with almost no effort on your part. It’s the kind of recipe that makes you feel like a good cook even on days when you don’t feel like cooking at all.
I love that this recipe respects the season without demanding too much of your time. It captures the essence of summer tomatoes and preserves it for those cold winter nights when you need a reminder that warm days will come again. And because it’s small-batch, you can make it whenever you have a few pounds of tomatoes without committing to a full day of canning.
Try it once, and I think you’ll understand why I was so wrong about roasted tomato sauce. Toss it with pasta, spread it on a pizza, or just eat it with a spoon straight from the jar. I won’t judge. When you make it, come back and let me know how it turned out. Did you add your own twist? Discover a new favorite way to use it? I’d love to hear. Drop a comment below or tag me in your photos. Happy cooking, friends.
Frequently Asked Questions
Can I use canned tomatoes instead of fresh?
Technically yes, but the whole point of this recipe is using fresh, in-season tomatoes. The roasting process works best with fresh tomatoes because they have more structure and moisture to caramelize. If you only have canned, drain them well and reduce the roasting time by about 15 minutes. The flavor won’t be quite the same, but it’ll still be good.
Do I need to peel the tomatoes before roasting?
Nope. The skins soften during roasting and blend up completely smooth. If you’re really bothered by tiny bits of skin, you can pass the finished sauce through a fine-mesh strainer or food mill. But I’ve never found it necessary. The skins add fiber and color, so I leave them on.
Why is my sauce watery?
This usually happens when the tomatoes aren’t roasted long enough. Give them more time in the oven until they’re wrinkled and the edges are browned. Also, make sure you’re using Roma or paste tomatoes, which have less water content. If your sauce is still thin after proper roasting, simmer it in a saucepan for 10-15 minutes to reduce it further.
Can I can this sauce for long-term storage?
This recipe is designed for small-batch, short-term storage in the fridge or freezer. It hasn’t been tested for water-bath canning or pressure canning safety. If you want a shelf-stable sauce for canning, check out my homemade roasted tomato garlic pasta sauce for canning recipe, which includes proper acidity levels and processing times.
What’s the best pasta shape for this sauce?
I love this sauce with short, sturdy pasta shapes like rigatoni, penne, or fusilli. The nooks and crannies catch the chunky sauce beautifully. It’s also amazing on fresh pappardelle or fettuccine. If you’re feeling cozy, serve it over creamy polenta or with a side of crusty bread for dipping. And if you’re in the mood for soup, try it as a base for my cozy tomato basil soup with perfect grilled cheese dippers—it’s a game-changer.
Pin This Recipe!
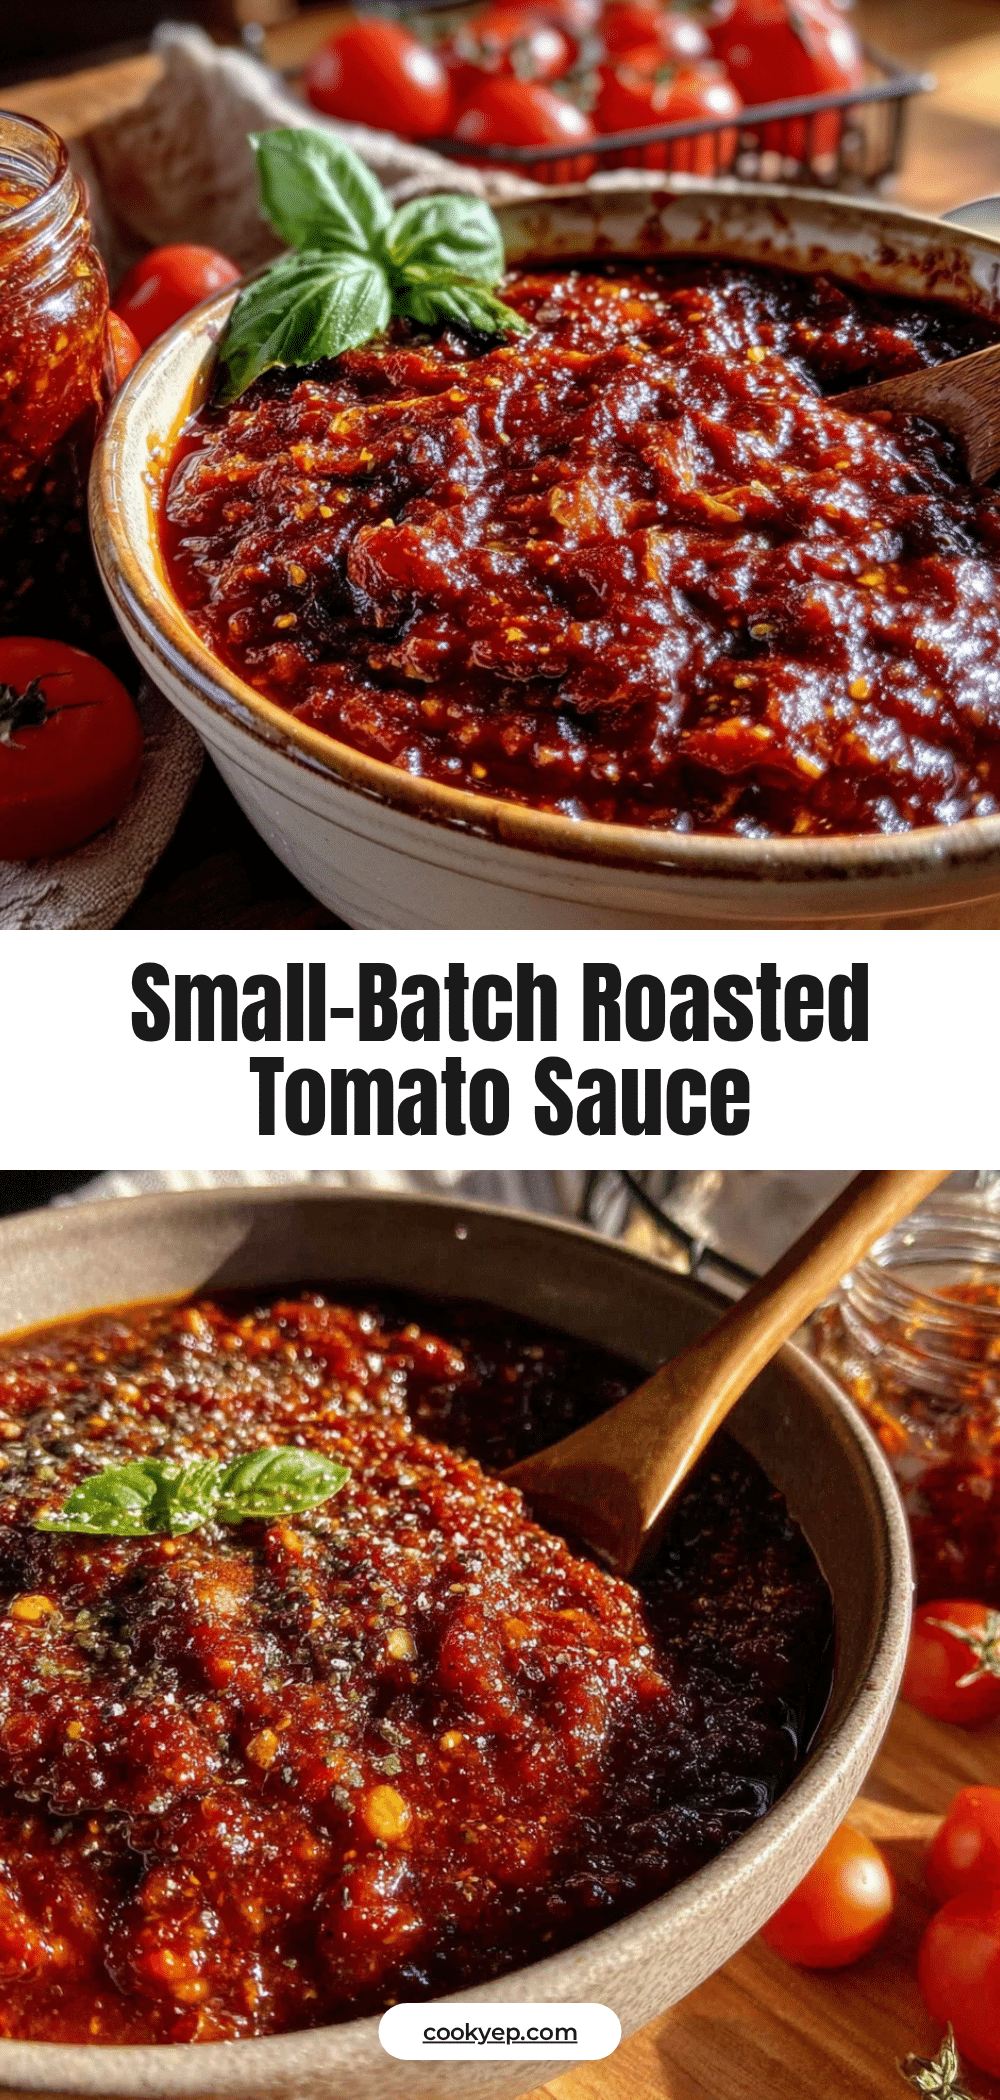
Best Small-Batch Homemade Roasted Tomato Sauce Recipe
This small-batch roasted tomato sauce is simple, honest, and packed with intense, concentrated flavor. The oven does most of the work, transforming ordinary Roma tomatoes into a rich, caramelized sauce with minimal hands-on time.
- Prep Time: 15 minutes
- Cook Time: 50 minutes
- Total Time: 1 hour 5 minutes
- Yield: 4 servings 1x
- Category: Sauce
- Cuisine: Italian
Ingredients
- 3 pounds Roma tomatoes (or San Marzano/paste tomatoes)
- 1 whole head garlic
- 1 medium yellow onion
- ¼ cup extra virgin olive oil
- ¼ cup packed fresh basil leaves
- 2 sprigs fresh oregano (or 1 teaspoon dried oregano)
- 3–4 sprigs fresh thyme
- 1 teaspoon kosher salt, plus more to taste
- ½ teaspoon freshly ground black pepper
- 1 tablespoon balsamic vinegar (optional)
Instructions
- Preheat oven to 400°F (200°C). Line a large rimmed baking sheet with parchment paper.
- Wash and dry tomatoes. Cut each in half lengthwise (quarter if large). Remove tough core and green spots.
- Peel onion and cut into 6-8 wedges, leaving root end intact. Slice top off garlic head to expose cloves.
- Arrange tomatoes cut-side up on baking sheet. Tuck onion wedges between tomatoes. Place garlic head cut-side up in a corner. Drizzle everything with olive oil, getting some on the garlic. Sprinkle with salt and pepper.
- Tuck fresh basil, oregano sprigs, and thyme sprigs around tomatoes. (If using dried herbs, sprinkle evenly.)
- Roast for 45-55 minutes until tomatoes are soft, wrinkled, and starting to brown; onions are tender and caramelized; garlic is soft when squeezed. Halfway through, gently shake the pan.
- Let cool for 5 minutes. Squeeze roasted garlic cloves from skins into the pan. Discard herb stems (leaves will have fallen off).
- Blend using an immersion blender directly in the pan, or transfer to a regular blender (work in batches, venting steam). Blend to desired consistency (10-15 seconds for chunky, longer for smooth).
- Stir in balsamic vinegar (if using) and additional fresh chopped basil. Adjust salt and pepper to taste. Optionally add a pinch of red pepper flakes for heat.
- Use immediately or let cool completely before storing in airtight containers in the refrigerator for up to 5 days or freezer for up to 3 months.
Notes
Don’t overcrowd the pan; use two sheets if needed. Use a dark-colored baking sheet for better browning. Resist stirring during roasting. Save all juices from the pan. Season gradually. Let sauce rest 10-15 minutes before serving for best flavor. Double the recipe if you have oven space.
Nutrition
- Serving Size: ½ cup
- Calories: 85
- Sugar: 3
- Sodium: 300
- Fat: 7
- Saturated Fat: 1
- Carbohydrates: 6
- Fiber: 2
- Protein: 1
Keywords: roasted tomato sauce, small batch, homemade, Roma tomatoes, easy, freezer-friendly, vegan, gluten-free


