Marta, the woman who runs the little spice shop on Elm Street, watched me pawing through her bins of ground ginger one drizzly October afternoon. I was muttering to myself about needing something warming, something that tasted like fall but wasn’t another pie. She didn’t say anything at first. Then she slid a small paper bag across the counter. “Crush these up,” she said, pointing to the bag of gingersnaps. “And call me when you figure out the rest.” I laughed, bought the cookies, and spent the next two days in my tiny kitchen, testing and tasting. The first batch of these pumpkin cheesecake bars came out lopsided—I forgot to line the pan—but the flavor? Honestly, it was like someone bottled a crisp November afternoon. Marta’s gingersnaps gave the crust this deep, spicy crunch that regular graham crackers just can’t touch. Now I bring these bars to every fall gathering, and people always ask for the recipe. Maybe you’ve been there, standing in a kitchen with a pile of ingredients and a hunch that something good is about to happen. That’s how these bars were born.
Why You’ll Love This Recipe
These pumpkin cheesecake bars are the kind of dessert that makes you close your eyes after the first bite. I’ve tested this recipe at least six times to get the texture just right—creamy, not dense, with a crust that stays crunchy even after a day in the fridge. Here’s why they work so well:
- Simple Ingredients: No fancy grocery trips. You probably have most of this in your pantry right now.
- Perfect for Fall Gatherings: Whether it’s Thanksgiving, a cozy Friendsgiving, or just a quiet Sunday, these bars fit right in.
- Crowd-Pleaser: I’ve brought them to potlucks and watched people who “don’t like pumpkin” go back for seconds.
- Make-Ahead Friendly: They actually taste better after a night in the fridge. One less thing to stress about on the big day.
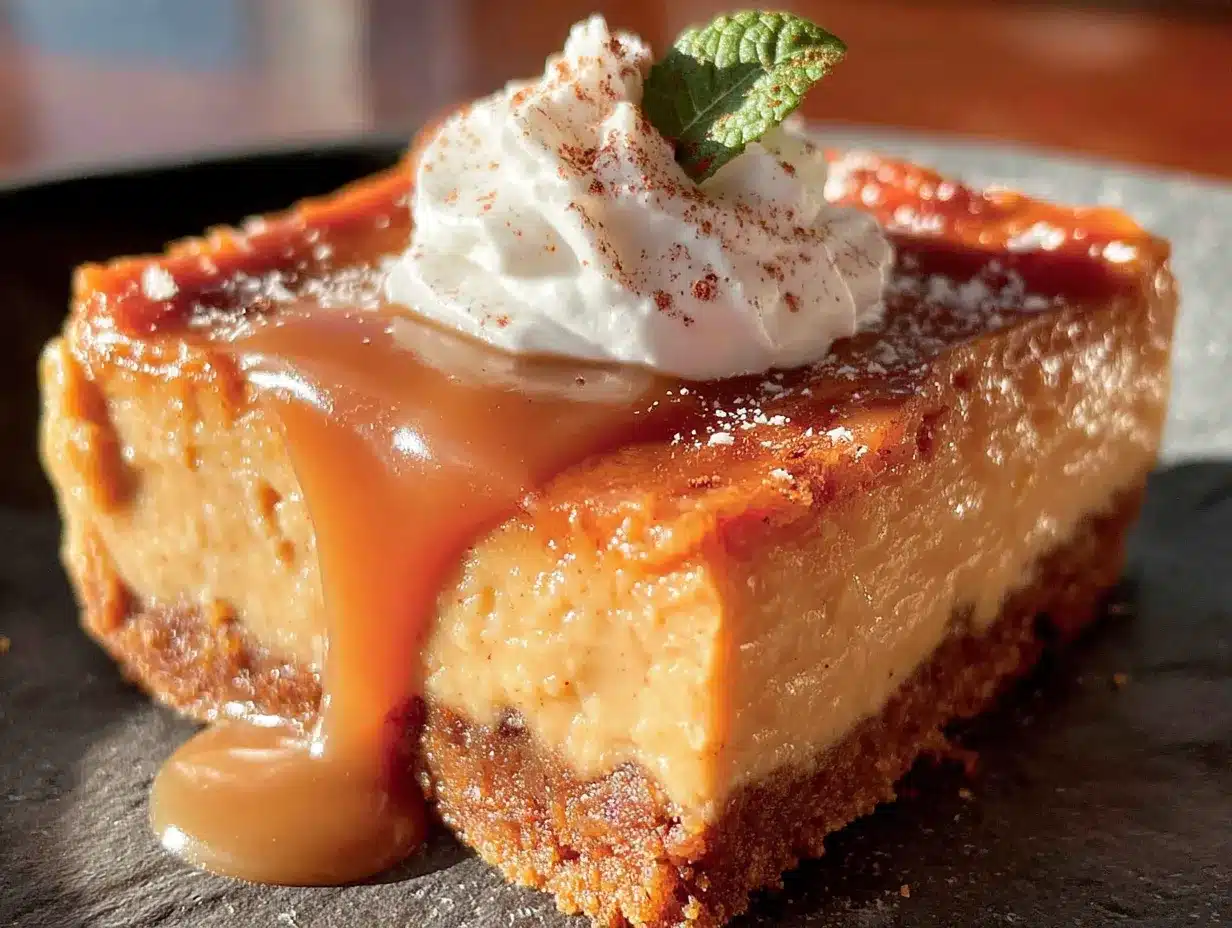
- Unbelievably Delicious: The creamy pumpkin layer sits on a spicy gingersnap crust, with a tangy cheesecake swirl running through it. It’s comfort food reimagined—faster than a full cheesecake, but with the same soul-soothing satisfaction.
What makes these bars different from the rest? It’s the crust, honestly. Marta’s gingersnaps add a warmth that plain graham crackers just can’t match. And the cheesecake layer? I blend it just enough to stay silky without getting that cracked, overbaked look. Perfect for impressing guests without the stress of a springform pan.
What Ingredients You Will Need
This recipe uses simple, wholesome ingredients to deliver bold flavor and satisfying texture. Most are pantry staples, but a few seasonal touches make all the difference.
For the Gingersnap Crust
- 2 cups (about 200g) gingersnap cookie crumbs (from about 30 cookies; I recommend Anna’s or Mi-Del for that perfect spice kick)
- 1/4 cup (50g) granulated sugar
- 6 tablespoons (85g) unsalted butter, melted
- Pinch of salt (optional, but it balances the sweetness)
For the Pumpkin Cheesecake Filling
- 16 ounces (450g) cream cheese, softened to room temperature (Philadelphia works best for that creamy texture)
- 3/4 cup (150g) granulated sugar
- 1/2 cup (110g) packed light brown sugar
- 1 cup (245g) pumpkin puree (not pumpkin pie filling—make sure it’s 100% pure pumpkin)
- 3 large eggs, room temperature
- 1 teaspoon vanilla extract
- 1 1/2 teaspoons pumpkin pie spice (or 1 teaspoon cinnamon + 1/2 teaspoon ginger + 1/4 teaspoon nutmeg + pinch of cloves)
- 1/2 teaspoon ground cinnamon
- 1 tablespoon all-purpose flour (helps prevent cracking)
For the Cheesecake Swirl (optional but recommended)
- 4 ounces (113g) cream cheese, softened
- 2 tablespoons granulated sugar
- 1/2 teaspoon vanilla extract
- 1 tablespoon milk (any kind works)
If you’re dairy-free, swap the cream cheese with a high-quality plant-based version—I’ve had good luck with Kite Hill. For a gluten-free option, use gluten-free gingersnaps (Mi-Del makes those too). The pumpkin puree should be plain, not spiced or sweetened, so you control the flavor.
Equipment Needed
- 9×9-inch square baking pan (an 8×8 works too, but your bars will be thicker and need a few extra minutes of baking)
- Parchment paper (non-negotiable for easy removal—trust me, I learned the hard way)
- Food processor or zip-top bag and rolling pin (for crushing the cookies)
- Electric hand mixer or stand mixer (a whisk and some elbow grease also work, but your arm will thank you for the mixer)
- Medium mixing bowls (at least two)
- Rubber spatula
- Measuring cups and spoons
- Sharp knife (for clean cuts—run it under hot water between slices)
No food processor? No problem. Put the gingersnaps in a zip-top bag and go to town with a rolling pin. It’s oddly satisfying and takes about five minutes.
Preparation Method
Preheat your oven to 350°F (175°C). Line your 9×9 pan with parchment paper, leaving a little overhang on two sides—this is your handle for lifting the bars out later.
- Make the crust: In a food processor, pulse the gingersnaps until they’re fine crumbs. You want about 2 cups. Transfer to a medium bowl, stir in the sugar and salt, then pour in the melted butter. Mix with a fork until every crumb is moistened. Press this mixture firmly into the bottom of your prepared pan. I use the bottom of a measuring cup to really pack it down. Bake for 10 minutes, then set aside to cool slightly while you make the filling.
- Start the filling: In a large bowl, beat the softened cream cheese with an electric mixer on medium speed until smooth—about 2 minutes. Scrape down the sides of the bowl. Add both sugars and beat until fluffy, another 2 minutes. Don’t rush this step; you want it light and airy.
- Add the pumpkin and eggs: Mix in the pumpkin puree until combined. It’ll look a little streaky at first, that’s fine. Add the eggs one at a time, beating on low after each addition—just until the yolk disappears. Overmixing at this stage can make the cheesecake puff up and crack. Stir in the vanilla, pumpkin pie spice, cinnamon, and flour. Mix on low for about 30 seconds until everything is smooth.
- Make the swirl (if using): In a small bowl, beat the remaining 4 ounces of cream cheese with the sugar, vanilla, and milk until smooth. It should be pourable but not runny.
- Assemble: Pour the pumpkin cheesecake filling over the warm crust. Smooth the top with a spatula. Drop spoonfuls of the cream cheese swirl mixture on top—about 6 to 8 dollops. Use a butter knife or skewer to swirl them into the pumpkin layer. Don’t over-swirl or you’ll lose the contrast. I like to do a figure-eight motion just a few times.
- Bake: Place the pan in the center of the oven and bake for 40 to 45 minutes. The edges should look set and slightly puffed, but the center will still jiggle a little when you gently shake the pan. That’s okay—it’ll firm up as it cools. If the top starts browning too fast around minute 30, tent loosely with foil.
- Cool completely: Let the bars cool on a wire rack for about 1 hour. Then transfer to the refrigerator and chill for at least 4 hours—overnight is even better. This is the hardest part, I know. But cold cheesecake bars slice so much cleaner.
- Slice and serve: Use the parchment overhang to lift the entire block onto a cutting board. Run a sharp knife under hot water, wipe it dry, and make your cuts. Clean the knife between each slice for those Instagram-worthy edges.
Cooking Tips & Techniques
I’ve made this recipe about a dozen times now, and I’ve messed up plenty along the way. Here’s what I’ve learned so you don’t have to repeat my mistakes.
Don’t overmix the filling. That first time I made these, I got distracted and beat the eggs into the cream cheese like I was making frosting. The bars came out puffy and cracked—still tasty, but not pretty. Mix just until combined after each egg addition.
Room temperature ingredients matter. Cold cream cheese creates lumps that no amount of beating will fix. Leave it on the counter for about 30 minutes before you start. Same goes for the eggs—if you forget, place them in a bowl of warm water for 5 minutes.
Press the crust firmly. A loose crust will crumble when you cut the bars. Use the flat bottom of a glass or measuring cup to really compact those crumbs. I press for about 30 seconds, focusing on the edges and corners.
Watch the baking time. Every oven runs a little different. My friend’s oven bakes these in 38 minutes flat; mine takes 43. Start checking at 35 minutes—the edges should be set, and the center should have a slight jiggle, like firm Jell-O.
Chill before slicing. I know it’s tempting to dig in while they’re warm, but warm cheesecake bars are a mess. Patience pays off. Four hours minimum in the fridge, and you’ll get clean, beautiful slices every time.
Use a hot knife. This tip changed my life. Run your knife under hot water, dry it with a towel, then slice. Repeat between each cut. No more dragging the filling across the bars.
Variations & Adaptations
One of the best things about these pumpkin cheesecake bars is how easy they are to tweak. Here are a few ways I’ve played with the recipe:
- Gluten-Free Version: Swap the gingersnaps for gluten-free gingersnaps (Mi-Del makes a great one) and use a gluten-free all-purpose flour blend in the filling. The texture stays almost identical.
- Dairy-Free Option: Use plant-based cream cheese and butter. I’ve tried this with Kite Hill cream cheese and Miyoko’s butter, and it works beautifully. Just make sure the cream cheese is well softened.
- Extra Spicy: If you love ginger, add 1/2 teaspoon of freshly grated ginger to the filling. It gives the bars a little kick that pairs perfectly with the crust.
- Chocolate Drizzle: After the bars have chilled, melt 1/4 cup of dark chocolate chips with a teaspoon of coconut oil and drizzle it over the top. The bitterness of the chocolate balances the sweetness of the pumpkin.
- Mini Version: Use a muffin tin lined with paper liners. Press about 1 tablespoon of crust into each liner, then fill with the cheesecake mixture. Bake for 18 to 20 minutes. Perfect for parties or portion control.
I once tried adding a layer of salted caramel between the crust and the filling—it was good, but a little too sweet for my taste. If you try it, use a light hand with the caramel.
Serving & Storage Suggestions
These bars are best served cold, straight from the fridge. I like to let them sit at room temperature for about 5 minutes before serving—just enough to take the chill off without losing that clean slice.
For presentation, dust the tops with a little cinnamon or powdered sugar. A dollop of whipped cream and a sprinkle of candied ginger takes them over the top. They pair beautifully with a hot cup of spiced chai or a bold cup of black coffee—the bitterness cuts through the sweetness.
Storage: Keep the bars in an airtight container in the refrigerator for up to 5 days. Layer them with parchment paper between each row so they don’t stick together. The flavors actually deepen after a day or two—the ginger in the crust mellows into the pumpkin filling, and everything gets more cohesive.
Freezing: These freeze like a dream. Slice the bars individually, place them on a baking sheet in the freezer for 1 hour, then wrap each slice tightly in plastic wrap and store in a freezer-safe bag. They’ll keep for up to 3 months. Thaw in the fridge overnight before serving.
Reheating: I don’t recommend reheating these—they’re meant to be eaten cold. But if you want a warm dessert, pop a slice in the microwave for 10 seconds. It’ll soften the cream cheese without melting it completely.
Nutritional Information & Benefits
Each bar (based on 16 servings) contains approximately:
- Calories: 285
- Fat: 16g
- Carbohydrates: 30g
- Protein: 5g
- Fiber: 1g
- Sugar: 22g
Pumpkin is packed with vitamin A and fiber, which supports eye health and digestion. The ginger in the crust has anti-inflammatory properties—so you can feel a tiny bit virtuous while eating dessert. Cream cheese provides calcium and protein, though it’s also higher in saturated fat, so moderation is key.
These bars are vegetarian and can be made gluten-free or dairy-free with the substitutions mentioned above. They contain eggs, dairy, and gluten (unless modified).
Personally, I love that these bars let me enjoy a seasonal treat without the heaviness of a full pumpkin pie. They’re indulgent but not over-the-top—the perfect ending to a fall meal.
Conclusion
These cozy pumpkin cheesecake bars with gingersnap crust are everything I want in a fall dessert—warm spices, creamy texture, and that satisfying crunch from Marta’s cookies. They’re simple enough for a weeknight bake but impressive enough for a holiday table. I love how the flavors come together, each bite a little different depending on how much swirl you get.
I hope you give these a try and make them your own. Maybe you’ll add extra ginger, or skip the swirl, or serve them with a scoop of vanilla ice cream. Whatever you do, I’d love to hear about it. Drop a comment below and tell me how your batch turned out—or tag me in your photos if you share them online. Happy baking, friends. Fall is waiting.
Frequently Asked Questions
Can I use store-bought pumpkin pie filling instead of pumpkin puree?
I wouldn’t recommend it. Pumpkin pie filling already has sugar and spices added, which will throw off the sweetness and texture of these bars. Stick with 100% pure pumpkin puree so you control the flavor.
Why did my cheesecake crack on top?
Cracks usually happen from overmixing or overbaking. Make sure your cream cheese and eggs are at room temperature, and mix on low speed after adding the eggs. Also, don’t overbake—the center should still jiggle slightly when you pull it out of the oven.
Can I make these bars ahead of time?
Absolutely. In fact, they taste better after a day in the fridge. Bake them up to 2 days in advance, keep them covered in the refrigerator, and slice just before serving. They also freeze beautifully for up to 3 months.
How do I get clean slices without the crust crumbling?
Two things help: press the crust firmly into the pan before baking, and chill the bars for at least 4 hours before slicing. Use a hot, dry knife and wipe it clean between each cut. Patience is the secret ingredient here.
Can I use a different cookie for the crust?
Sure! Graham crackers work in a pinch, but you’ll lose that spicy warmth that makes these bars special. Speculoos or ginger thins are great substitutes. Just avoid anything with chocolate—it’ll overpower the pumpkin.
Pin This Recipe!
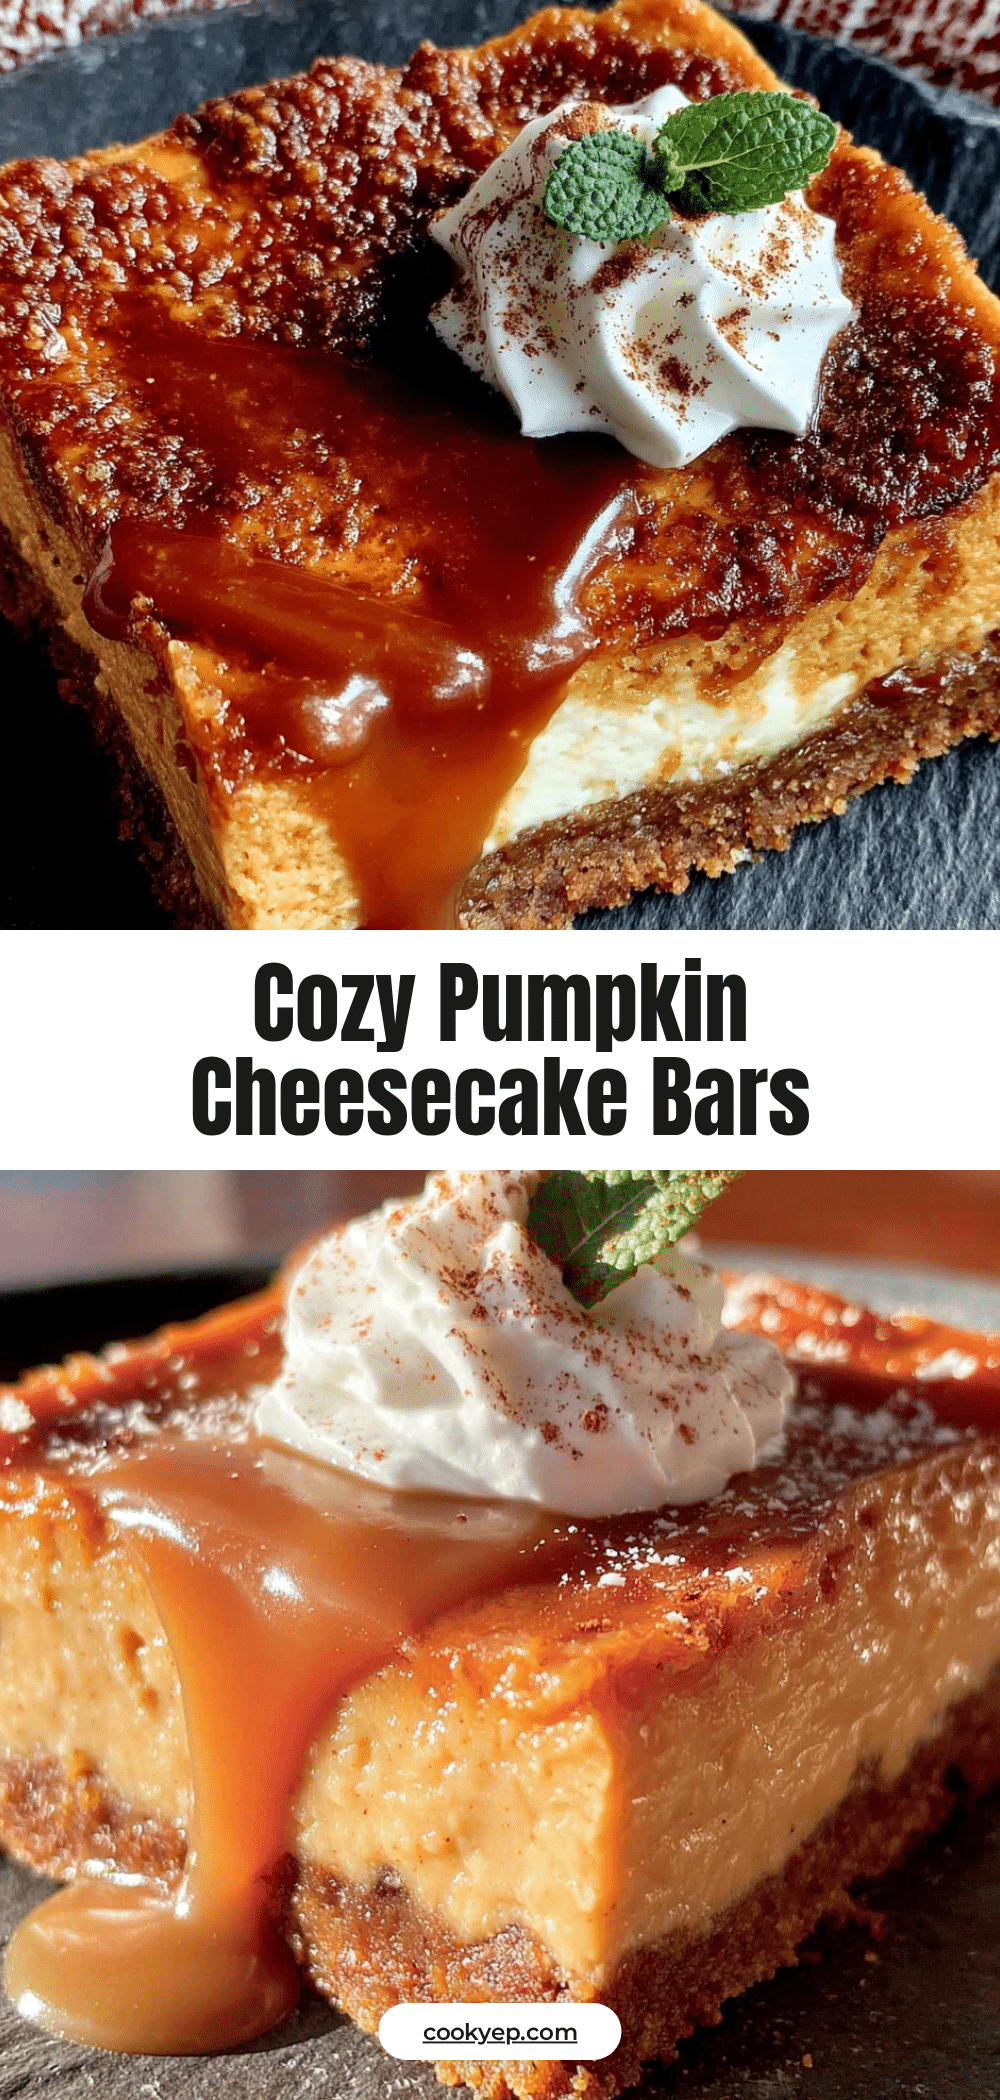
Cozy Pumpkin Cheesecake Bars with Gingersnap Crust
These pumpkin cheesecake bars feature a spicy gingersnap crust and a creamy pumpkin cheesecake filling with a tangy cream cheese swirl. They’re the perfect fall dessert, easy to make ahead, and always a crowd-pleaser.
- Prep Time: 30 minutes
- Cook Time: 45 minutes
- Total Time: 5 hours 15 minutes (includes chilling time)
- Yield: 16 servings 1x
- Category: Dessert
- Cuisine: American
Ingredients
- 2 cups (about 200g) gingersnap cookie crumbs (from about 30 cookies; I recommend Anna’s or Mi-Del for that perfect spice kick)
- 1/4 cup (50g) granulated sugar
- 6 tablespoons (85g) unsalted butter, melted
- Pinch of salt (optional, but it balances the sweetness)
- 16 ounces (450g) cream cheese, softened to room temperature (Philadelphia works best for that creamy texture)
- 3/4 cup (150g) granulated sugar
- 1/2 cup (110g) packed light brown sugar
- 1 cup (245g) pumpkin puree (not pumpkin pie filling—make sure it’s 100% pure pumpkin)
- 3 large eggs, room temperature
- 1 teaspoon vanilla extract
- 1 1/2 teaspoons pumpkin pie spice (or 1 teaspoon cinnamon + 1/2 teaspoon ginger + 1/4 teaspoon nutmeg + pinch of cloves)
- 1/2 teaspoon ground cinnamon
- 1 tablespoon all-purpose flour (helps prevent cracking)
- 4 ounces (113g) cream cheese, softened
- 2 tablespoons granulated sugar
- 1/2 teaspoon vanilla extract
- 1 tablespoon milk (any kind works)
Instructions
- Preheat your oven to 350°F (175°C). Line your 9×9 pan with parchment paper, leaving a little overhang on two sides—this is your handle for lifting the bars out later.
- Make the crust: In a food processor, pulse the gingersnaps until they’re fine crumbs. You want about 2 cups. Transfer to a medium bowl, stir in the sugar and salt, then pour in the melted butter. Mix with a fork until every crumb is moistened. Press this mixture firmly into the bottom of your prepared pan. I use the bottom of a measuring cup to really pack it down. Bake for 10 minutes, then set aside to cool slightly while you make the filling.
- Start the filling: In a large bowl, beat the softened cream cheese with an electric mixer on medium speed until smooth—about 2 minutes. Scrape down the sides of the bowl. Add both sugars and beat until fluffy, another 2 minutes. Don’t rush this step; you want it light and airy.
- Add the pumpkin and eggs: Mix in the pumpkin puree until combined. It’ll look a little streaky at first, that’s fine. Add the eggs one at a time, beating on low after each addition—just until the yolk disappears. Overmixing at this stage can make the cheesecake puff up and crack. Stir in the vanilla, pumpkin pie spice, cinnamon, and flour. Mix on low for about 30 seconds until everything is smooth.
- Make the swirl (if using): In a small bowl, beat the remaining 4 ounces of cream cheese with the sugar, vanilla, and milk until smooth. It should be pourable but not runny.
- Assemble: Pour the pumpkin cheesecake filling over the warm crust. Smooth the top with a spatula. Drop spoonfuls of the cream cheese swirl mixture on top—about 6 to 8 dollops. Use a butter knife or skewer to swirl them into the pumpkin layer. Don’t over-swirl or you’ll lose the contrast. I like to do a figure-eight motion just a few times.
- Bake: Place the pan in the center of the oven and bake for 40 to 45 minutes. The edges should look set and slightly puffed, but the center will still jiggle a little when you gently shake the pan. That’s okay—it’ll firm up as it cools. If the top starts browning too fast around minute 30, tent loosely with foil.
- Cool completely: Let the bars cool on a wire rack for about 1 hour. Then transfer to the refrigerator and chill for at least 4 hours—overnight is even better. This is the hardest part, I know. But cold cheesecake bars slice so much cleaner.
- Slice and serve: Use the parchment overhang to lift the entire block onto a cutting board. Run a sharp knife under hot water, wipe it dry, and make your cuts. Clean the knife between each slice for those Instagram-worthy edges.
Notes
Don’t overmix the filling to avoid cracks. Use room temperature ingredients for best texture. Press the crust firmly to prevent crumbling. Chill for at least 4 hours before slicing for clean cuts. Use a hot knife for perfect slices. For a gluten-free version, use gluten-free gingersnaps and gluten-free all-purpose flour. For a dairy-free version, use plant-based cream cheese and butter. The bars can be stored in the refrigerator for up to 5 days or frozen for up to 3 months.
Nutrition
- Serving Size: 1 bar
- Calories: 285
- Sugar: 22
- Sodium: 200
- Fat: 16
- Saturated Fat: 9
- Carbohydrates: 30
- Fiber: 1
- Protein: 5
Keywords: pumpkin cheesecake bars, gingersnap crust, fall dessert, Thanksgiving dessert, cheesecake bars, pumpkin dessert, easy cheesecake bars