My neighbor showed up at my door holding a grocery bag with a sheepish grin. She’d ordered a bushel of Hatch green chiles online without checking the quantity first. “I have fifteen pounds of these things and no plan,” she said, practically shoving the bag into my hands. The kitchen smelled like roasted peppers for three days straight, and honestly, I wasn’t mad about it.
I stood there staring at that mountain of chiles, wondering what on earth I was going to do with them all. The freezer was already packed, and my family was getting tired of seeing roasted chiles on everything. That’s when it hit me — why not turn them into something creamy and comforting? Something that would use up a good chunk of those peppers and make everyone happy at the same time.
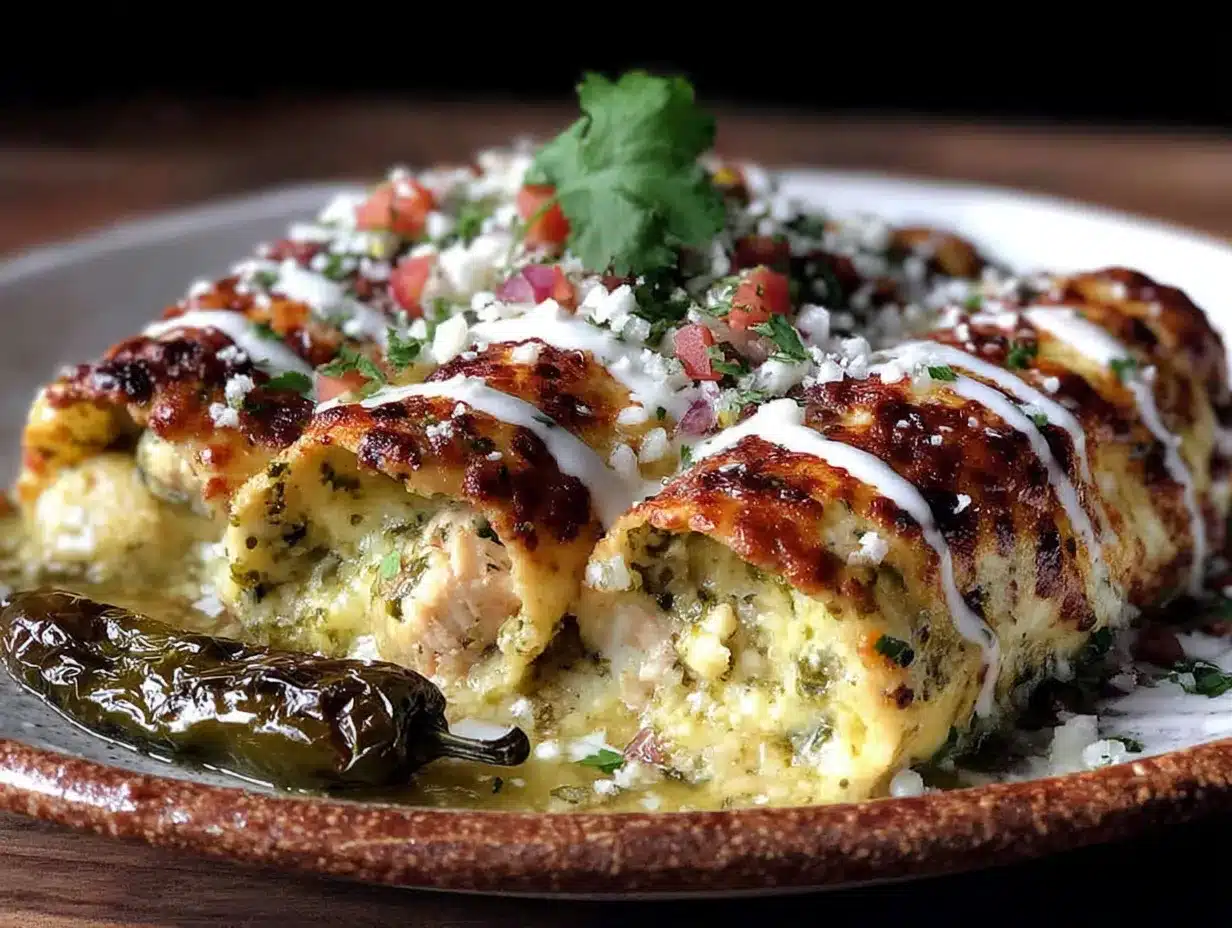
These Creamy Hatch Green Chili Chicken Enchiladas came together in a moment of necessity and turned into something I genuinely crave now. The smokiness of the roasted chiles mixed with that velvety sour cream sauce creates this thing that’s hard to describe. It’s rich without being heavy, spicy without being overwhelming, and it somehow tastes even better the next day. I’ve made this recipe at least a dozen times since that afternoon, and it’s never let me down.
Why You’ll Love This Recipe
Let me tell you why these enchiladas are different from every other version you’ve tried. I’ve tested this recipe multiple times, tweaking the sauce ratio and the filling balance until everything clicked perfectly. Here’s what makes it special:
- Quick & Easy : Comes together in under 45 minutes, perfect for busy weeknights when you need something satisfying without spending hours in the kitchen
- Simple Ingredients : No fancy grocery trips needed — you likely already have most of these items in your kitchen, especially if you’ve been roasting chiles
- Perfect for Batch Cooking : Great for meal prep, potlucks, or feeding a crowd without breaking a sweat
- Crowd-Pleaser : Even picky eaters go back for seconds, and I’ve watched people who claim they don’t like green chile devour an entire pan
- Unbelievably Creamy : The sauce is the star here — it’s silky, tangy, and clings to every single bite
What sets this recipe apart is the technique. Instead of using canned enchilada sauce, you’re building flavor from scratch with roasted chiles, cream cheese, and sour cream. The result is a sauce that actually tastes like something, not just a generic red or green goop from a can. It’s the kind of dish that makes you close your eyes after the first bite because it’s just that good.
These enchiladas are comfort food reimagined — faster, creamier, and with that unmistakable smoky kick from the Hatch chiles. Perfect for impressing guests without stress, or turning a simple Tuesday dinner into something memorable.
What Ingredients You Will Need
This recipe uses simple, wholesome ingredients to deliver bold flavor and satisfying texture without the fuss. Most of these are pantry staples or easy to find at any grocery store during Hatch chile season.
For the Creamy Green Chile Sauce
- 2 tablespoons unsalted butter (adds richness and helps create the roux base)
- 2 tablespoons all-purpose flour (thickens the sauce to the perfect consistency)
- 1 cup chicken broth (low-sodium preferred, so you can control the salt)
- 1 cup sour cream (full-fat works best for creaminess, but Greek yogurt works too)
- 4 ounces cream cheese, softened (this is the secret to that velvety texture)
- 1 cup roasted Hatch green chiles, chopped (mild or hot, depending on your preference)
- 1/2 teaspoon garlic powder
- 1/2 teaspoon cumin
- Salt and pepper to taste
For the Filling
- 3 cups cooked chicken, shredded (rotisserie chicken is perfect here)
- 1 cup shredded Monterey Jack cheese
- 1/2 cup sour cream
- 1/2 cup roasted Hatch green chiles, chopped
- 1/4 cup chopped fresh cilantro
- 1/2 teaspoon onion powder
- Salt and pepper to taste
For Assembly
- 8-10 flour tortillas (8-inch size works best; corn tortillas are great for gluten-free)
- 1 1/2 cups shredded Monterey Jack cheese (for topping)
- Fresh cilantro for garnish
I recommend using Hatch chiles from New Mexico if you can find them — the flavor is unmatched. During peak season (August through September), many grocery stores roast them fresh in-store. Outside of that window, look for frozen roasted Hatch chiles, which work just as well. If you can’t find Hatch specifically, Anaheim chiles are a decent substitute, though the flavor won’t be quite as bold.
For the chicken, I usually grab a rotisserie chicken from the store to save time. But if you have leftover crispy herb crusted roast chicken from a Sunday dinner, that works beautifully too. The extra herbs in that recipe actually complement the green chile flavor wonderfully.
Equipment Needed
You don’t need anything fancy to make these enchiladas, which is part of why I love this recipe. Here’s what you’ll need:
- 9×13 inch baking dish (glass or ceramic works best for even heating)
- Medium saucepan for the sauce
- Large mixing bowl for the filling
- Whisk (a wooden spoon works too, but a whisk gives you a smoother sauce)
- Cutting board and knife for chopping chiles and cilantro
- Measuring cups and spoons
- Spatula for spreading the sauce
- Cheese grater (buying pre-shredded is fine, but freshly grated melts better)
If you don’t have a 9×13 dish, you can use two smaller baking dishes or even a cast iron skillet. The cooking time might vary slightly, so keep an eye on it. And honestly, if you’re roasting your own chiles, you’ll need a baking sheet and some tongs — but the store-bought roasted ones save you that step entirely.
Preparation Method
Let me walk you through this step by step. I’ve made these enchiladas enough times to know where things can go wrong, so I’ll share those little tricks along the way.
Step 1: Preheat and Prep
Preheat your oven to 375°F (190°C). Lightly grease your 9×13 baking dish with butter or cooking spray. This prevents sticking and makes cleanup a breeze. Trust me on this one — I learned the hard way that skipping this step leads to a stuck-on mess.
Step 2: Make the Creamy Green Chile Sauce
In a medium saucepan over medium heat, melt the butter. Once it’s bubbly (about 1 minute), whisk in the flour and cook for 1-2 minutes until it smells slightly nutty. This is your roux, and it’s the foundation of a smooth sauce. Slowly pour in the chicken broth while whisking constantly to prevent lumps. Bring it to a gentle simmer — you’ll see it start to thicken after about 3 minutes.
Reduce the heat to low and stir in the sour cream, softened cream cheese, chopped Hatch chiles, garlic powder, and cumin. Whisk until everything is smooth and the cream cheese has fully melted. This should take about 3-4 minutes. The sauce should be thick enough to coat the back of a spoon but still pourable. Season with salt and pepper to taste, then set it aside.
Step 3: Prepare the Filling
In a large mixing bowl, combine the shredded chicken, 1 cup Monterey Jack cheese, 1/2 cup sour cream, 1/2 cup chopped Hatch chiles, cilantro, and onion powder. Mix everything together until well combined. Taste it and add salt and pepper as needed. The filling should be moist but not watery — if it seems too wet, add a little more cheese to absorb the extra moisture.
Step 4: Assemble the Enchiladas
Spread about 1/2 cup of the green chile sauce evenly across the bottom of your prepared baking dish. This prevents the tortillas from sticking and adds flavor to the bottom layer.
Take a tortilla and place about 1/3 cup of the filling down the center. Roll it up tightly and place it seam-side down in the dish. Repeat with the remaining tortillas, arranging them snugly in a single layer. Don’t worry if they’re touching — that’s actually perfect because they’ll hold each other in place.
Step 5: Top and Bake
Pour the remaining sauce evenly over the rolled enchiladas, making sure to cover the ends so they don’t dry out. Sprinkle the remaining 1 1/2 cups of Monterey Jack cheese over the top. Bake for 20-25 minutes, until the cheese is melted and bubbly and the edges are just starting to brown. If you want a slightly golden top, switch to broil for the last 2 minutes — but watch it closely so it doesn’t burn.
Step 6: Rest and Serve
Let the enchiladas rest for 5 minutes after removing them from the oven. This allows the sauce to set slightly so you get clean slices instead of a soupy mess. Garnish with fresh cilantro and serve hot.
Cooking Tips & Techniques
I’ve burned, broken, and botched my fair share of enchiladas over the years. Here’s what I’ve learned so you don’t have to make the same mistakes.
Don’t overfill the tortillas. I know it’s tempting to stuff them to the brim, but too much filling makes them impossible to roll and they’ll burst open during baking. About 1/3 cup per tortilla is the sweet spot. If you’re using smaller tortillas, adjust accordingly.
Warm your tortillas before rolling. Cold tortillas crack and tear. Pop them in the microwave for 20-30 seconds wrapped in a damp paper towel, or warm them one by one in a dry skillet for about 15 seconds per side. This makes them pliable and easy to work with.
Make the sauce ahead of time. The sauce actually gets better after sitting in the fridge for a day. The flavors meld together and the chile heat mellows out. I often make the sauce the night before and just reheat it gently before assembling.
Use room temperature cream cheese. Cold cream cheese will give you lumpy sauce no matter how hard you whisk. Let it sit on the counter for 30 minutes before you start cooking. If you forget, cut it into small cubes and microwave it for 10-15 seconds.
Toast your cumin. This is a little trick that makes a big difference. Add the cumin to the butter after it melts and let it cook for about 30 seconds before adding the flour. It wakes up the flavor and makes it taste more complex.
Variations & Adaptations
One of the best things about this recipe is how flexible it is. Here are some variations I’ve tried and loved:
Make it vegetarian. Swap the chicken for black beans, corn, and sautéed mushrooms. The mushrooms add that meaty texture that holds up beautifully against the creamy sauce. I’ve also used roasted sweet potatoes and black beans for a heartier version.
Go low-carb or keto. Use low-carb tortillas or turn this into a casserole by layering everything in the dish without rolling. Skip the flour in the roux and use a low-carb thickener like xanthan gum instead. The sauce is naturally keto-friendly since it’s cream-based.
Add more heat. If you like things spicy, use hot Hatch chiles and add a diced jalapeño to the filling. You can also sprinkle some crushed red pepper flakes on top before baking. My brother-in-law swears by adding a dash of cayenne to the sauce.
Make it dairy-free. Use dairy-free cream cheese, sour cream, and cheese alternatives. The sauce might be slightly thinner, but it still tastes great. I’ve tested this with cashew-based sour cream and it worked surprisingly well.
Try different proteins. Shredded pork, ground beef, or even tofu all work wonderfully. I once made these with leftover tender slow cooker BBQ pulled pork and it was incredible — the smoky sweetness of the pork paired perfectly with the green chile sauce.
If you’re looking for a lighter side dish to go alongside, the fresh quinoa and kale power salad balances out the richness of these enchiladas beautifully.
Serving & Storage Suggestions
These enchiladas are best served hot, straight out of the oven, with a generous sprinkle of fresh cilantro on top. I like to serve them with a dollop of extra sour cream and a squeeze of lime juice — that little bit of acidity cuts through the richness perfectly.
For sides, you can’t go wrong with Mexican rice, refried beans, or a simple green salad with avocado. If you’re hosting a party, these enchiladas pair wonderfully with a refreshing sparkling citrus ginger mojito mocktail for a complete fiesta spread.
Storage: Leftover enchiladas keep well in the refrigerator for up to 4 days. Store them in an airtight container, and the flavors actually get better as they meld together overnight. The sauce will thicken as it cools, so don’t be alarmed if it looks different the next day.
Freezing: These freeze beautifully. Assemble the enchiladas but don’t bake them. Cover the dish tightly with plastic wrap and then aluminum foil. Freeze for up to 3 months. When you’re ready to eat, thaw overnight in the refrigerator and bake as directed, adding about 10 minutes to the cooking time since you’re starting from cold.
Reheating: The best way to reheat individual portions is in the microwave for 1-2 minutes. For a whole dish, cover with foil and reheat in a 350°F oven for about 15-20 minutes. The microwave is faster, but the oven keeps the tortillas from getting soggy.
Nutritional Information & Benefits
Here’s an approximate nutritional breakdown per serving (based on 8 servings):
- Calories: 485
- Protein: 32g
- Fat: 28g
- Carbohydrates: 28g
- Fiber: 2g
- Sugar: 4g
- Sodium: 680mg
These enchiladas are a good source of protein from the chicken and cheese, which helps keep you full and satisfied. The Hatch green chiles are rich in vitamin C and capsaicin, which has anti-inflammatory properties. The calcium from the cheese and sour cream supports bone health, while the garlic and cumin add antioxidants to the mix.
If you’re watching your sodium, use low-sodium chicken broth and go easy on the added salt. You can also use reduced-fat cheese and sour cream to cut down on calories and fat without sacrificing too much flavor. I’ve made this recipe both ways, and honestly, the full-fat version is noticeably creamier — but the lighter version still hits the spot.
For those with dietary restrictions, this recipe contains dairy and gluten. As mentioned earlier, both can be substituted with suitable alternatives for a dairy-free or gluten-free version.
Conclusion
These Creamy Hatch Green Chili Chicken Enchiladas have become a staple in my kitchen for good reason. They’re the kind of recipe that feels special enough for company but easy enough for a Tuesday night when you just need something comforting and good. The smoky kick from the Hatch chiles, the velvety sauce, the melted cheese — every bite hits just right.
I love that this recipe is forgiving. You can swap ingredients, adjust the heat level, or make it ahead of time, and it still turns out delicious. It’s the kind of dish that makes you look like a hero in the kitchen without actually doing anything complicated.
Give these enchiladas a try, and don’t be afraid to make them your own. Add more chiles if you like it hot, throw in some black beans for extra texture, or top them with avocado and pickled onions. I’d love to hear how yours turn out — drop a comment below and let me know what variations you tried. And if you’re looking for more easy dinner ideas, browse the rest of our recipes for inspiration.
Happy cooking, friends!
Frequently Asked Questions
Can I use canned green chiles instead of Hatch?
Absolutely. Canned green chiles work in a pinch, though they won’t have the same smoky depth as roasted Hatch chiles. If you’re using canned, look for fire-roasted varieties for the closest flavor. You’ll need about one 7-ounce can for the sauce and another for the filling.
How do I prevent my enchiladas from getting soggy?
The key is not to oversaturate the tortillas. A thin layer of sauce on the bottom of the dish is enough — you don’t need to drown them. Also, letting the enchiladas rest for 5 minutes after baking helps the sauce set rather than turning everything into a soupy mess.
Can I make these enchiladas ahead of time?
Yes! Assemble the enchiladas completely, cover them tightly, and refrigerate for up to 24 hours before baking. You may need to add 5-10 minutes to the baking time since you’re starting from cold. This is actually my preferred method for dinner parties — everything is ready to go, and I just pop it in the oven.
What if I can’t find Hatch chiles at all?
Anaheim chiles are the closest substitute in terms of flavor and heat level. Poblano chiles work too, though they’re milder and have a slightly different flavor profile. You can also use a mix of canned green chiles and a diced jalapeño for a similar effect.
How spicy are these enchiladas?
That depends entirely on the chiles you use. Mild Hatch chiles give you a gentle warmth without any real heat. Hot Hatch chiles will definitely make your nose run. If you’re unsure, start with mild and add heat gradually — you can always stir in some cayenne or diced jalapeño to kick things up a notch.
Pin This Recipe!

Creamy Hatch Green Chili Chicken Enchiladas

These creamy Hatch green chili chicken enchiladas feature a velvety sour cream sauce with smoky roasted chiles, tender chicken, and melted cheese. An easy, crowd-pleasing dinner that comes together in under 45 minutes.
- Prep Time: 15 minutes
- Cook Time: 25 minutes
- Total Time: 40 minutes
- Yield: 8 servings 1x
- Category: Main Course
- Cuisine: Mexican
Ingredients
- 2 tablespoons unsalted butter
- 2 tablespoons all-purpose flour
- 1 cup low-sodium chicken broth
- 1 cup sour cream (full-fat preferred)
- 4 ounces cream cheese, softened
- 1 cup roasted Hatch green chiles, chopped (for sauce)
- 1/2 teaspoon garlic powder
- 1/2 teaspoon cumin
- Salt and pepper to taste
- 3 cups cooked chicken, shredded
- 1 cup shredded Monterey Jack cheese (for filling)
- 1/2 cup sour cream (for filling)
- 1/2 cup roasted Hatch green chiles, chopped (for filling)
- 1/4 cup chopped fresh cilantro
- 1/2 teaspoon onion powder
- Salt and pepper to taste (for filling)
- 8–10 flour tortillas (8-inch)
- 1 1/2 cups shredded Monterey Jack cheese (for topping)
- Fresh cilantro for garnish
Instructions
- Preheat oven to 375°F (190°C). Lightly grease a 9×13-inch baking dish with butter or cooking spray.
- Make the sauce: In a medium saucepan over medium heat, melt the butter. Whisk in the flour and cook for 1-2 minutes until fragrant. Slowly pour in the chicken broth while whisking constantly. Bring to a gentle simmer and cook until thickened, about 3 minutes.
- Reduce heat to low. Stir in 1 cup sour cream, softened cream cheese, 1 cup chopped Hatch chiles, garlic powder, and cumin. Whisk until smooth and cream cheese is fully melted, about 3-4 minutes. Season with salt and pepper. Set aside.
- Prepare the filling: In a large bowl, combine shredded chicken, 1 cup Monterey Jack cheese, 1/2 cup sour cream, 1/2 cup chopped Hatch chiles, cilantro, and onion powder. Mix well. Season with salt and pepper.
- Spread about 1/2 cup of the sauce evenly over the bottom of the prepared baking dish.
- Place about 1/3 cup of filling down the center of each tortilla. Roll tightly and place seam-side down in the dish. Repeat with remaining tortillas, arranging them snugly in a single layer.
- Pour remaining sauce evenly over the rolled enchiladas, covering the ends. Sprinkle remaining 1 1/2 cups Monterey Jack cheese on top.
- Bake for 20-25 minutes, until cheese is melted and bubbly and edges are lightly browned. For a golden top, broil for the last 2 minutes, watching closely.
- Let enchiladas rest for 5 minutes before serving. Garnish with fresh cilantro and serve hot.
Notes
For best results, use room temperature cream cheese to avoid lumps. Warm tortillas before rolling to prevent cracking. The sauce can be made a day ahead and refrigerated. To freeze, assemble unbaked enchiladas, cover tightly, and freeze for up to 3 months. Thaw overnight in the refrigerator before baking, adding 10 minutes to the cooking time.
Nutrition
- Serving Size: 1 enchilada
- Calories: 485
- Sugar: 4
- Sodium: 680
- Fat: 28
- Saturated Fat: 16
- Carbohydrates: 28
- Fiber: 2
- Protein: 32
Keywords: Hatch green chile enchiladas, creamy chicken enchiladas, green chile chicken enchiladas, easy enchilada recipe, New Mexican enchiladas


