Crushed candy canes flying everywhere across the counter, chocolate smeared from my wrist to my elbow, and the timer beeping like a frantic robot—this is how the best holiday recipe of my life was born. I was supposed to be making a fancy layered dessert for a cookie swap, but I had completely forgotten about it until an hour before I needed to leave. Half a bag of semi-sweet chips, a white chocolate bar I found shoved in the back of the pantry, and three sad-looking candy canes that had been rattling around since last December. Honestly, I almost just grabbed a box of store-bought cookies and called it a day.
But then I looked at that white chocolate and remembered how much I love that salty-sweet-crunchy combo. I melted everything in a rush, spread it thin on a baking sheet, and tossed the crushed candy cane pieces on top. I didn’t even wait for it to set completely before I started breaking it into jagged little pieces. And standing there, eating a warm, melty shard off the parchment paper, I realized I had accidentally stumbled onto something perfect. These Easy Peppermint Bark Chocolate Bites are now the thing I bring to every holiday party, and people always ask for the recipe before they even finish their first piece.
There is no stress here. No double-boilers or tempering chocolate like a pastry chef. This is the kind of treat that looks like you spent hours on it, but really, you just melted, spread, and sprinkled. That is my favorite kind of cooking—the kind that makes you look like a hero with almost zero effort. And honestly, after that first frantic batch, I knew I would never go back to store-bought.
Why You’ll Love This Recipe
Let me tell you why these Easy Peppermint Bark Chocolate Bites have become my go-to holiday recipe. I have tested this about six times now (rough job, I know), and every single batch gets devoured faster than I can wrap them up.
- Incredibly Quick: From start to finish, you are looking at about 15 minutes of active work. The hardest part is waiting for the chocolate to set.
- Simple Ingredients: You only need three main things—semi-sweet chocolate, white chocolate, and candy canes. Chances are, you already have most of this in your kitchen.
- Perfect for Gifting: This is the ultimate homemade gift. Pack them in a cute tin or a mason jar, and you have a present that feels thoughtful without breaking the bank.
- Crowd-Pleaser: Kids love the crunch, adults love the nostalgia, and everyone loves that it is not too sweet. I have never seen a plate of these last longer than ten minutes at a party.
- No Special Equipment: You do not need a double boiler, a candy thermometer, or any fancy gadgets. Just a microwave and a baking sheet.
What really makes this recipe different from all the other peppermint bark recipes out there? It is the texture. I use a specific ratio of chocolate layers that gives you a clean snap when you bite into it, and I crush the candy canes into both fine dust and chunky pieces. That way, you get peppermint flavor in every single bite, not just the ones that happen to land on a big chunk. It is a small tweak, but it makes a world of difference.
This is the kind of recipe that makes you feel like you have your life together during the chaos of the holidays. It is simple enough to make with kids, impressive enough to bring to a work party, and delicious enough that you will end up eating half the batch before you give it away.
What Ingredients You Will Need
This recipe uses just a handful of simple ingredients, but each one plays a specific role in creating that perfect peppermint bark experience. Here is everything you need and why it matters.
- Semi-Sweet Chocolate Chips (12 ounces): This is the base layer. I prefer semi-sweet because it is not too bitter and not too sweet—it balances out the white chocolate layer beautifully. Ghirardelli or Guittard are my go-to brands for consistent melting. If you use chocolate bars instead of chips, chop them finely so they melt evenly.
- White Chocolate Chips or Chopped White Chocolate (12 ounces): The second layer adds that creamy, vanilla-like sweetness that makes peppermint bark so addictive. Do not use white melting wafers or almond bark—they have a waxy texture and do not taste as good. Real white chocolate contains cocoa butter and will give you a much better flavor and mouthfeel.
- Candy Canes or Peppermint Candies (6-8 regular-sized candy canes): You want about ½ cup of crushed candy. I like to use a mix of finely crushed and coarsely crushed pieces. The fine dust sticks to the chocolate and infuses every bite with peppermint flavor, while the bigger chunks give you that satisfying crunch. Avoid using pre-crushed peppermint—it is often too powdery and loses its texture.
- Optional: Coconut Oil or Vegetable Shortening (1 teaspoon): This is my secret weapon for getting that glossy, snappy finish on the chocolate. Stirring a tiny bit of coconut oil into each chocolate layer as it melts helps the chocolate set up with a beautiful shine and a clean break. It also makes the chocolate a little more forgiving if you accidentally overheat it.
- Optional: Flaky Sea Salt (a pinch): I know this sounds weird for a sweet treat, but a tiny sprinkle of flaky salt on top of the white chocolate layer before it sets really makes the flavors pop. It cuts through the sweetness and makes the peppermint taste brighter. Maldon is my favorite brand for this.
That is literally it. No heavy cream, no butter, no corn syrup. Just chocolate, peppermint, and a little bit of patience while it sets. You can find everything at any grocery store, which is part of why I love making this recipe on a whim.
Equipment Needed
You do not need a fully stocked kitchen to make these Easy Peppermint Bark Chocolate Bites. Here is what you will need.
- Baking Sheet (half-sheet size): A standard 13×18 inch baking sheet works perfectly. Line it with parchment paper or a silicone baking mat for easy removal.
- Microwave-Safe Bowls (2 medium-sized): You need separate bowls for melting the semi-sweet and white chocolate. Glass or ceramic bowls work best because they heat evenly.
- Rubber Spatula: For spreading the chocolate into an even layer. A small offset spatula is even better if you have one.
- Ziploc Bag or Rolling Pin: For crushing the candy canes. I put the candy canes in a Ziploc bag and smash them with a rolling pin. It is messy but satisfying. You can also use a food processor, but be careful not to over-process into powder.
- Sharp Knife or Bench Scraper: For cutting or breaking the bark into pieces once it is set. I prefer breaking it by hand for that rustic, homemade look.
If you do not have a microwave, you can melt the chocolate using a double boiler on the stovetop. Just make sure the bowl does not touch the water, and stir constantly. It takes a few extra minutes but works perfectly fine.
Preparation Method
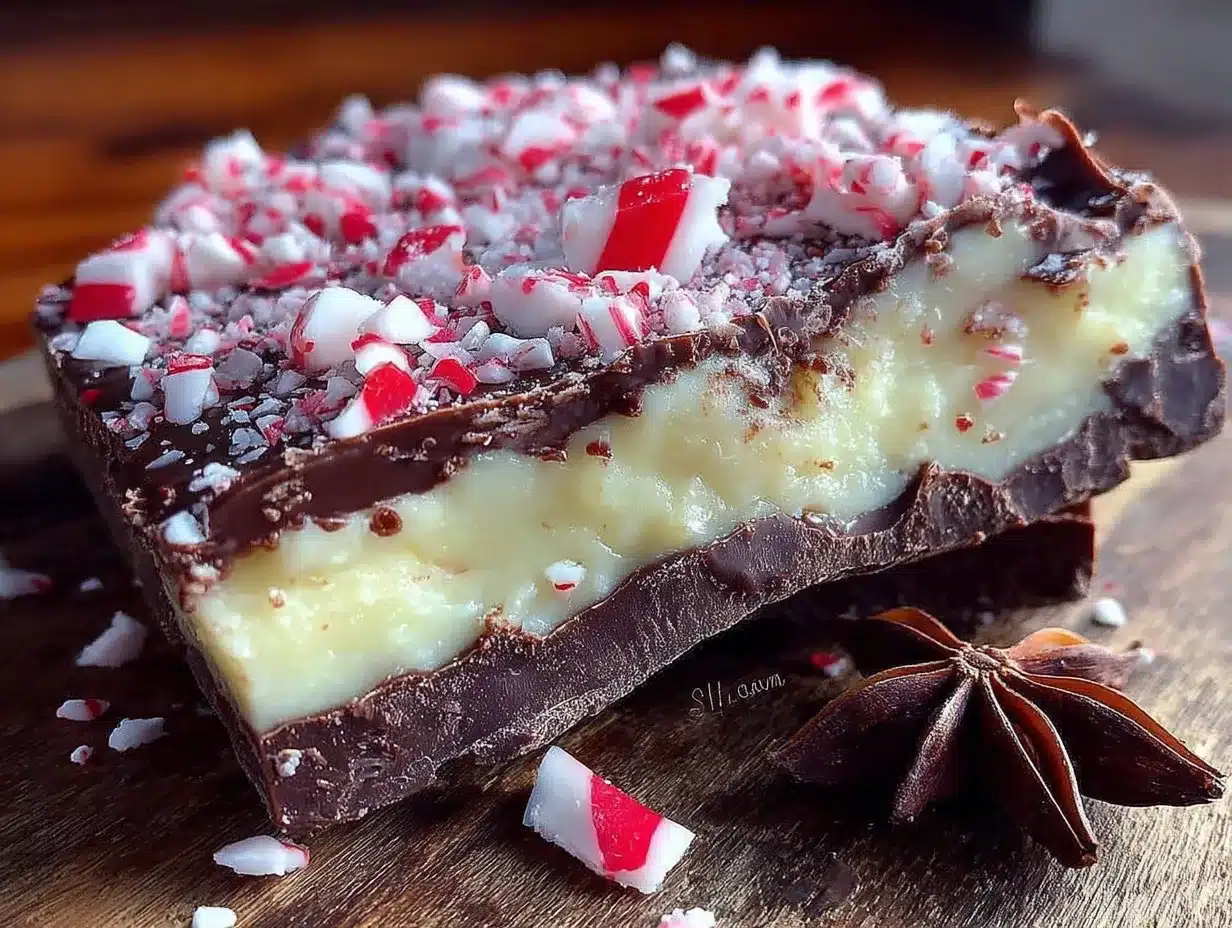
- Prep Your Candy Canes (5 minutes): Unwrap 6-8 candy canes and place them in a sturdy Ziploc bag. Seal it tight, then use a rolling pin or the bottom of a heavy pan to crush them into a mix of fine dust and small chunks. You want some pieces about the size of a pea and some that are almost powdery. Set this aside.
- Line Your Baking Sheet (1 minute): Cut a piece of parchment paper to fit your baking sheet, leaving a little overhang on the sides. This makes it easy to lift the bark out later. If you have a silicone baking mat, that works even better.
- Melt the Semi-Sweet Chocolate (3 minutes): Pour 12 ounces of semi-sweet chocolate chips into a microwave-safe bowl. Microwave in 30-second intervals, stirring well after each interval, until the chocolate is smooth and fully melted. Be careful not to overheat it—chocolate burns easily and becomes grainy. If you are using the coconut oil trick, stir in ½ teaspoon now.
- Spread the First Layer (2 minutes): Pour the melted semi-sweet chocolate onto the center of your lined baking sheet. Use your spatula to spread it into a thin, even rectangle, about ¼ inch thick. It does not have to be perfect—rustic edges are part of the charm. Try to keep the thickness consistent so the bark breaks evenly later.
- Set the First Layer (15-20 minutes): Place the baking sheet in the refrigerator and let the semi-sweet chocolate set until it is firm to the touch but not rock hard. This usually takes about 15 minutes. Do not leave it in too long, or the next layer will not stick properly.
- Melt the White Chocolate (3 minutes): While the first layer is setting, melt your white chocolate in a separate microwave-safe bowl. Use the same 30-second interval method. White chocolate is more delicate than dark chocolate, so be extra careful not to overheat it. If it seizes or becomes lumpy, you can stir in ½ teaspoon of coconut oil to smooth it out.
- Spread the Second Layer (2 minutes): Once the semi-sweet layer is set, pour the melted white chocolate over it. Gently spread it into an even layer, trying to cover the dark chocolate completely. Work quickly so the white chocolate does not start setting before you finish spreading.
- Add the Peppermint Topping (2 minutes): Immediately sprinkle the crushed candy canes evenly over the white chocolate layer. Press them down very gently with your fingertips or the back of a spoon so they stick. If you are using flaky sea salt, sprinkle a tiny pinch over the top now.
- Final Set (30-45 minutes): Return the baking sheet to the refrigerator and let the bark set completely. It should be firm and snappy when you touch it. If you are in a hurry, you can pop it in the freezer for 15-20 minutes, but watch it carefully so the chocolate does not get too cold and brittle.
- Break Into Pieces (2 minutes): Once fully set, lift the parchment paper out of the baking sheet and place the bark on a cutting board. Use your hands to break it into irregular pieces, or use a sharp knife to cut it into cleaner squares. I prefer the rustic broken look—it feels more homemade and inviting.
Your Easy Peppermint Bark Chocolate Bites are ready to eat immediately, but they get even better after sitting at room temperature for about 10 minutes. The texture softens just slightly, making the chocolate melt on your tongue while the peppermint stays crunchy.
Cooking Tips & Techniques
I have made this recipe more times than I can count, and I have definitely learned a few things the hard way. Here are my best tips for perfect peppermint bark every time.
Do not rush the melting process. I know it is tempting to blast the chocolate on high power for a minute straight, but that is how you end up with burnt, grainy chocolate that seizes into a lumpy mess. Low and slow is the way to go. Those 30-second intervals feel annoying, but they save your chocolate every single time.
Watch the humidity. Chocolate is sensitive to moisture. If your kitchen is steamy from boiling pasta or running the dishwasher, your chocolate might seize up and turn into a thick, clumpy paste. Make sure your bowls are completely dry before you start, and avoid making this recipe on a rainy day if you can help it.
Crush candy canes strategically. I learned this one the messy way. If you crush all your candy canes into fine powder, you lose that satisfying crunch. If you leave them all in big chunks, they fall off the bark when you break it. The trick is to have a mix of textures. I crush about two-thirds of the candy canes into a fine dust and leave the rest in small chunks, then mix them together before sprinkling.
Let the bark come to room temperature before serving. Fresh out of the fridge, the bark is very hard and might feel a little waxy on your teeth. Let it sit out for 5-10 minutes, and the chocolate softens into that perfect melt-in-your-mouth texture. This is especially important if you are serving it to guests.
Use a sharp knife if you want clean edges. For gift-giving, I sometimes cut the bark into neat squares using a large chef’s knife. Run the knife under hot water, dry it off, and make one clean cut. Wipe the blade clean between cuts for the neatest edges. If you are just snacking, breaking it by hand is faster and more fun.
Variations & Adaptations
One of the best things about this recipe is how easy it is to adapt. Here are some of my favorite variations.
Dark Chocolate Version: If you prefer a less sweet bark, swap the semi-sweet chocolate for dark chocolate (60-70% cacao). The bitterness of the dark chocolate pairs beautifully with the sweet white chocolate and mint. I actually prefer this version for myself—it feels a little more sophisticated.
Milk Chocolate Twist: For a creamier, sweeter bark, use milk chocolate instead of semi-sweet. This version is a huge hit with kids. Just keep in mind that milk chocolate is softer, so the bark might not snap as cleanly when you break it.
Peppermint + Chocolate Chip: Before sprinkling the candy canes, scatter a handful of mini chocolate chips over the white chocolate layer. The extra chocolate chunks add another layer of texture and make each bite a little different. I tried this on a whim one year, and now it is my husband’s favorite version.
Gluten-Free and Vegan Adaptations: This recipe is naturally gluten-free as written, which is great. To make it vegan, simply use dairy-free dark chocolate and vegan white chocolate. Many brands now make excellent vegan white chocolate that melts beautifully. Just check the labels to make sure.
Spiced Peppermint Bark: Add a pinch of cinnamon or a tiny dash of cayenne pepper to the semi-sweet chocolate layer before spreading. The warmth of the spice complements the cool mint in a way that is surprisingly addictive. I discovered this by accident when I sneezed near my chocolate bowl, and honestly, it was a happy accident.
Serving & Storage Suggestions
These Easy Peppermint Bark Chocolate Bites are versatile enough for any holiday occasion. Here is how to serve and store them.
Serving: Arrange the bark pieces on a festive platter or in a decorative tin. They look beautiful layered with other holiday treats like cookies or fudge. Serve at room temperature for the best texture and flavor. If you are hosting a party, set them out about 15 minutes before guests arrive so they have time to soften slightly.
Pairing Suggestions: These bites are wonderful alongside a cup of hot cocoa, a peppermint mocha, or a strong cup of coffee. The bitterness of coffee cuts through the sweetness of the chocolate beautifully. For a non-caffeinated option, try them with a warm mug of spiced apple cider. If you want to go all out, serve them with a refreshing sparkling citrus ginger mojito mocktail for a fun holiday drink pairing.
Storage: Store the bark in an airtight container at room temperature for up to two weeks. Yes, it really lasts that long—if you can resist eating it all. Layer the pieces between sheets of parchment paper to prevent them from sticking together. Do not store the bark in the refrigerator long-term, as the chocolate can develop a white bloom (fat separation) that looks unappetizing, though it is still safe to eat.
Freezing: Peppermint bark freezes beautifully. Place the pieces in a single layer in a freezer-safe container or Ziploc bag, separated by parchment paper. Freeze for up to three months. Thaw at room temperature for about 15 minutes before serving. I always make a double batch and stash one in the freezer for last-minute holiday emergencies.
Gifting: This is one of the best homemade gifts you can give. Pack the bark in a festive tin, a mason jar, or a cellophane bag tied with a ribbon. Attach a little tag with the recipe name and a note that says “Made with love.” People genuinely appreciate homemade gifts, and this one is so simple that you can make several batches in one afternoon.
Nutritional Information & Benefits
Let’s be honest—peppermint bark is a treat, not a health food. But that does not mean it is devoid of any redeeming qualities. Here is a rough nutritional breakdown for a serving size of about 1 ounce (roughly a 2-inch piece of bark).
- Calories: Approximately 150-170 calories per serving
- Fat: 9-11 grams (mostly from cocoa butter in the chocolate)
- Carbohydrates: 18-20 grams
- Sugar: 15-17 grams
- Protein: 2-3 grams
- Fiber: 1-2 grams
Dark chocolate, especially if you use the dark chocolate variation, contains antioxidants called flavonoids that can support heart health. Peppermint has been used for centuries to aid digestion and freshen breath. So while this is definitely a dessert, it is not completely devoid of benefits. Plus, there is something to be said for the mental health boost that comes from making and sharing something beautiful with people you love.
If you are watching your sugar intake, you can use sugar-free chocolate and crushed sugar-free peppermint candies. The texture will be slightly different, but the flavor is still excellent.
Potential allergens to note: This recipe contains dairy (in the chocolate) and may contain traces of soy and nuts depending on the brands you use. Always check labels if you are serving someone with allergies.
Conclusion
These Easy Peppermint Bark Chocolate Bites have become a non-negotiable part of my holiday season. They are the recipe I turn to when I need something impressive but I am short on time, low on energy, and running on fumes. They are the gift I give to neighbors, teachers, and coworkers without stressing about whether it looks professional enough. And honestly, they are the treat I make just for myself on a quiet December evening when I want something sweet and cozy.
The beauty of this recipe is that it is forgiving. It does not demand precision or perfection. You can use whatever chocolate you have on hand, crush the candy canes as fine or as chunky as you like, and break the bark into whatever shape feels right. Every batch turns out a little different, and that is part of the charm.
I would love to hear how your batch turns out. Did you add a special twist? Did you use dark chocolate instead of semi-sweet? Did your kids help crush the candy canes and make a huge mess? (That is my favorite part, by the way.) Drop a comment below and share your version. And if you loved this recipe, consider sharing it with a friend who needs a little holiday cheer. Happy snacking, and may your holidays be full of chocolate, peppermint, and joy!
Frequently Asked Questions
Can I use chocolate bars instead of chocolate chips?
Absolutely. Just chop the chocolate bars into small, even pieces before melting so they melt uniformly. Chocolate chips are designed to hold their shape, so they actually take a little longer to melt than chopped chocolate bars. Either works great.
Why did my white chocolate seize up and turn lumpy?
White chocolate is more delicate than dark or milk chocolate because it has a lower cocoa butter content. It seizes when it gets too hot or when even a drop of water gets into the bowl. To fix it, stir in a teaspoon of coconut oil or vegetable shortening and whisk vigorously. If that does not work, you may need to start over with fresh chocolate.
How do I crush candy canes without making a huge mess?
Put the unwrapped candy canes in a sturdy Ziploc bag, squeeze out all the air, and seal it tight. Place the bag on a cutting board and cover it with a kitchen towel. Then go to town with a rolling pin or the bottom of a heavy pan. The towel absorbs the impact and keeps the crushed candy from flying everywhere.
Can I make this recipe without a microwave?
Yes. Use a double boiler instead. Fill a small saucepan with an inch of water, bring it to a simmer, and place a heatproof bowl on top. Make sure the bottom of the bowl does not touch the water. Add the chocolate and stir constantly until melted. This method takes a few extra minutes but gives you more control over the temperature.
How far in advance can I make peppermint bark?
You can make it up to two weeks in advance if stored properly in an airtight container at room temperature. For longer storage, freeze it for up to three months. Just make sure it is completely set before you pack it away, and layer the pieces between parchment paper to prevent sticking.
Pin This Recipe!

Easy Peppermint Bark Chocolate Bites: Best Holiday Treat

Crushed candy canes and melted chocolate come together in this quick and easy peppermint bark recipe that looks impressive but requires almost zero effort. Perfect for holiday gifting or snacking.
- Prep Time: 15 minutes
- Cook Time: 5 minutes
- Total Time: 1 hour 5 minutes
- Yield: 12 servings 1x
- Category: Dessert
- Cuisine: American
Ingredients
- 12 ounces semi-sweet chocolate chips
- 12 ounces white chocolate chips or chopped white chocolate
- 6–8 regular-sized candy canes (about ½ cup crushed)
- 1 teaspoon coconut oil or vegetable shortening (optional)
- Flaky sea salt (optional)
Instructions
- Prep your candy canes: Unwrap 6-8 candy canes and place them in a sturdy Ziploc bag. Seal tight, then use a rolling pin or heavy pan to crush them into a mix of fine dust and small chunks. Set aside.
- Line your baking sheet: Cut a piece of parchment paper to fit your baking sheet, leaving a little overhang on the sides.
- Melt the semi-sweet chocolate: Pour 12 ounces of semi-sweet chocolate chips into a microwave-safe bowl. Microwave in 30-second intervals, stirring well after each, until smooth and fully melted. If using coconut oil, stir in ½ teaspoon now.
- Spread the first layer: Pour the melted semi-sweet chocolate onto the center of your lined baking sheet. Use a spatula to spread it into a thin, even rectangle, about ¼ inch thick.
- Set the first layer: Place the baking sheet in the refrigerator and let the semi-sweet chocolate set until firm to the touch, about 15-20 minutes.
- Melt the white chocolate: While the first layer sets, melt the white chocolate in a separate microwave-safe bowl using the same 30-second interval method. Be careful not to overheat.
- Spread the second layer: Once the semi-sweet layer is set, pour the melted white chocolate over it. Gently spread into an even layer, covering the dark chocolate completely.
- Add the peppermint topping: Immediately sprinkle the crushed candy canes evenly over the white chocolate layer. Press down gently with your fingertips or the back of a spoon. If using flaky sea salt, sprinkle a tiny pinch on top.
- Final set: Return the baking sheet to the refrigerator and let the bark set completely, about 30-45 minutes. For a quicker set, use the freezer for 15-20 minutes.
- Break into pieces: Once fully set, lift the parchment paper out of the baking sheet. Use your hands to break the bark into irregular pieces, or use a sharp knife for cleaner squares.
Notes
For best texture, let the bark sit at room temperature for 5-10 minutes before serving. Store in an airtight container at room temperature for up to two weeks, or freeze for up to three months. To make vegan, use dairy-free dark chocolate and vegan white chocolate.
Nutrition
- Serving Size: 1 ounce (about a 2-i
- Calories: 160
- Sugar: 16
- Sodium: 20
- Fat: 10
- Saturated Fat: 6
- Carbohydrates: 19
- Fiber: 1
- Protein: 2
Keywords: peppermint bark, chocolate bites, holiday treat, easy dessert, homemade gift, candy cane, white chocolate, semi-sweet chocolate


