“You have to make that apple bread again.” My sister said it through a mouthful of the last slice, and honestly, I wasn’t even surprised. I’d been testing this recipe for weeks, trying to get that perfect balance of tender crumb, jammy apple pockets, and that crackly vanilla glaze on top. The first version was too dry. The second one fell apart when I sliced it. But this one—this one made her stop mid-sentence and just close her eyes for a second. That’s when I knew I had something worth sharing.
This small-batch apple fritter bread started as a solution to a problem I think a lot of us face. You want that warm, cinnamon-scented, bakery-style treat without committing to a full loaf that sits around for days. A full-sized apple bread is great for a crowd, but for a quiet Sunday morning or a Tuesday afternoon coffee break? It’s just too much. I wanted something that felt special but didn’t leave me with half a loaf going stale on the counter.
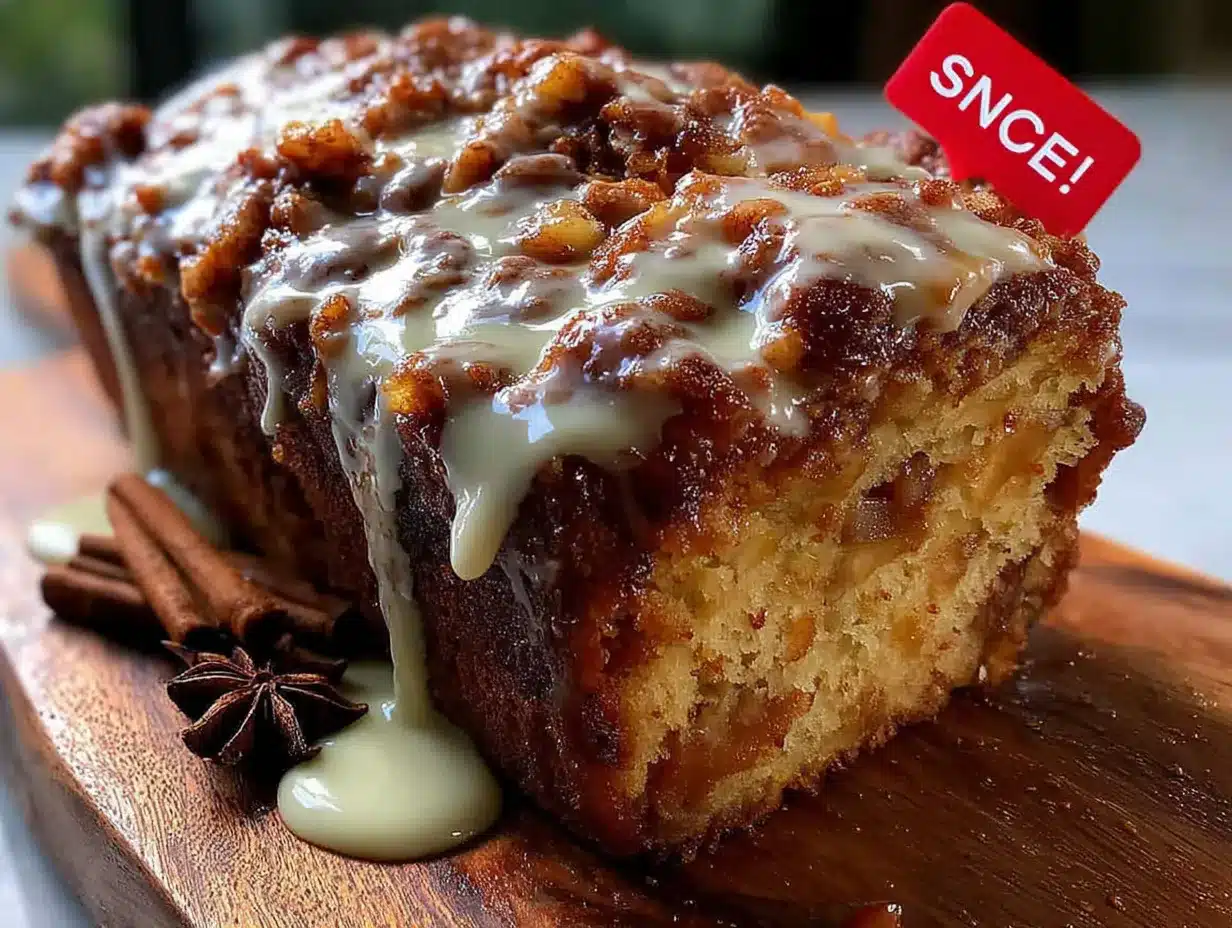
The idea came from a classic apple fritter—you know, the kind with those crispy, craggy edges and soft, apple-studded insides. I thought, why not turn that into a bread? Something easier to make, less messy than frying, but with all the same cozy flavors. The first time I pulled this out of the oven, the whole kitchen smelled like a fall bakery. The glaze dripped down the sides in these beautiful white streaks, and when I cut into it, there were those perfect little pockets of tender apple. It was exactly what I wanted.
This isn’t a fussy recipe. It doesn’t require a stand mixer or any fancy techniques. It’s the kind of thing you can throw together on a whim, and it’ll make you feel like you actually have your life together. And honestly, isn’t that the best kind of recipe?
Why You’ll Love This Recipe
Let me tell you why this small-batch apple fritter bread has become my go-to fall treat. First off, it’s incredibly easy. You don’t need any special equipment—just a couple of bowls, a whisk, and a loaf pan. The batter comes together in about ten minutes, and then the oven does the rest. It’s perfect for those days when you want something homemade but don’t have hours to spend in the kitchen.
- Small-Batch Perfection: This recipe makes exactly one 8×4-inch loaf. It’s enough for a few generous slices without overwhelming you with leftovers. No waste, no guilt.
- Simple Ingredients: You probably already have most of these in your pantry. Flour, sugar, butter, an egg, an apple, and some basic spices. No trips to specialty stores required.
- Incredible Texture: The bread is tender and moist with little pockets of soft, jammy apple throughout. The streusel topping adds a buttery crunch, and the vanilla glaze ties it all together.
- Versatile: It works for breakfast, brunch, an afternoon snack, or even dessert. Serve it warm with a cup of coffee or a scoop of vanilla ice cream.
- Crowd-Pleaser: I’ve brought this to work, to family gatherings, and to friend’s houses. It always gets devoured. People can’t believe it’s made from scratch in a single loaf pan.
What makes this recipe different from other apple breads is the fritter inspiration. Instead of just mixing apples into the batter, I layer them in a way that creates those concentrated pockets of fruit. The streusel topping adds that signature fritter crunch, and the glaze gives it that bakery-style finish. It’s not just another apple bread—it’s the one you’ll want to make again and again.
Honestly, this bread is the kind of thing that makes you feel warm and cozy from the inside out. It’s comfort food at its finest, but it’s not overly heavy or sweet. The apples keep it fresh, the cinnamon keeps it cozy, and the glaze keeps it special. It’s perfect for a quiet morning when you want to treat yourself, or for sharing with someone you love.
What Ingredients You Will Need
This recipe uses simple, wholesome ingredients to create something that tastes far more complicated than it is. Most of these are pantry staples, which makes this the perfect last-minute baking project.
- All-Purpose Flour (1 cup / 120g): This gives the bread its structure. I use unbleached all-purpose flour for the best texture. If you want to experiment, you can substitute up to half of it with whole wheat pastry flour for a slightly nuttier flavor.
- Granulated Sugar (⅓ cup / 65g): Adds sweetness and helps create a tender crumb. You can reduce this slightly if you prefer a less sweet bread, but keep in mind the apples will also add their own sweetness.
- Light Brown Sugar (¼ cup / 50g, packed): This is my secret for a moist, flavorful bread. The molasses in the brown sugar adds depth and complements the cinnamon and apples beautifully. I always use light brown sugar for this, but dark brown sugar would work in a pinch for a more intense flavor.
- Baking Powder (1 teaspoon): The leavening agent that helps the bread rise. Make sure it’s fresh—if it’s been sitting in your pantry for more than six months, it might be time for a new can.
- Ground Cinnamon (1 teaspoon): The star spice here. It pairs perfectly with the apples and gives the bread that classic fall flavor. I use Ceylon cinnamon for a milder, sweeter taste, but Cassia cinnamon works just fine.
- Salt (¼ teaspoon): Don’t skip this. Salt enhances all the other flavors and balances the sweetness. I use fine sea salt for baking.
- Unsalted Butter (¼ cup / 57g, melted and slightly cooled): Adds richness and moisture. I prefer unsalted butter so I can control the salt level. If you only have salted butter, reduce the added salt to ⅛ teaspoon.
- Large Egg (1, room temperature): Binds the ingredients together and adds structure. A room-temperature egg incorporates more easily into the batter, resulting in a smoother texture.
- Vanilla Extract (1 teaspoon): Adds warmth and depth. I use pure vanilla extract, not imitation. It makes a noticeable difference in the final flavor.
- Milk (⅓ cup / 80ml, room temperature): Adds moisture and helps create a tender crumb. Whole milk works best, but 2% or even oat milk will work in a pinch.
- Apple (1 medium, about 150g): The star of the show. You want an apple that holds its shape during baking. I love using Honeycrisp for its sweet-tart flavor and firm texture. Granny Smith is also excellent for a tarter contrast. Avoid soft apples like McIntosh or Red Delicious, as they’ll turn to mush.
For the Streusel Topping
- All-Purpose Flour (2 tablespoons / 15g): The base of the streusel.
- Light Brown Sugar (2 tablespoons / 25g, packed): Adds sweetness and that caramel-like flavor.
- Ground Cinnamon (½ teaspoon): For extra spice.
- Unsalted Butter (1 tablespoon / 14g, cold, cut into small cubes): The cold butter is key for a crumbly streusel. Keep it in the fridge until you’re ready to use it.
For the Vanilla Glaze
- Powdered Sugar (½ cup / 60g): The base of the glaze. Sift it if it’s lumpy.
- Vanilla Extract (½ teaspoon): For that classic vanilla flavor.
- Milk (1-2 tablespoons / 15-30ml): To thin the glaze to the perfect drizzling consistency.
I recommend using a brand of butter like Kerrygold for its rich flavor, but any good-quality unsalted butter will work. For the apples, if you’re in a pinch, you can use a firm pear instead—it’s a lovely variation. And for the milk, any dairy or non-dairy milk works, just keep in mind that richer milks produce a more tender crumb.
Equipment Needed
You don’t need a fully stocked bakery to make this bread. Here’s what you’ll need:
- 8×4-inch Loaf Pan: This is the perfect size for a small batch. If you only have a 9×5-inch pan, the bread will be shorter and bake a bit faster. Adjust your baking time accordingly.
- Mixing Bowls: You’ll need one large bowl for the dry ingredients and one medium bowl for the wet ingredients. Any size will do.
- Whisk: For combining the dry ingredients and mixing the wet ingredients.
- Spatula or Wooden Spoon: For folding the ingredients together. I prefer a silicone spatula because it’s gentle on the batter.
- Paring Knife and Cutting Board: For peeling and chopping the apple.
- Measuring Cups and Spoons: For accuracy. I cannot stress this enough—baking is a science, and precise measurements matter.
- Pastry Cutter or Fork: For cutting the cold butter into the streusel topping. If you don’t have a pastry cutter, two knives or even your fingertips will work. Just work quickly so the butter doesn’t soften.
- Wire Rack: For cooling the bread completely before glazing. This is crucial for a neat glaze application.
- Parchment Paper: Lining the loaf pan makes for easy removal and cleanup. I always use parchment paper with a slight overhang on the long sides.
I’ve made this bread with a cheap loaf pan from the grocery store and it turned out just fine. You don’t need expensive equipment. The most important thing is that your oven is properly calibrated. I learned that the hard way after a few batches came out too dark on the bottom. An oven thermometer is a small investment that makes a big difference.
Preparation Method
Alright, let’s get baking. This recipe is straightforward, but I’ll walk you through each step with the details that matter.
- Preheat and Prep: Preheat your oven to 350°F (175°C). Line your 8×4-inch loaf pan with parchment paper, leaving a little overhang on the two long sides. This will help you lift the bread out later. Lightly grease the parchment with a bit of butter or non-stick spray.
- Prepare the Apple: Peel, core, and dice your apple into small cubes, about ¼ to ½ inch in size. You want them small enough to distribute evenly through the batter but not so small that they disappear. I aim for about 1 cup of diced apple. Toss the diced apple with 1 tablespoon of the all-purpose flour from the recipe. This helps prevent the apple pieces from sinking to the bottom of the loaf during baking. Set them aside.
- Make the Streusel: In a small bowl, combine the 2 tablespoons of flour, 2 tablespoons of brown sugar, and ½ teaspoon of cinnamon. Add the cold, cubed butter. Use a pastry cutter or your fingertips to work the butter into the dry ingredients until the mixture resembles coarse crumbs with some pea-sized butter pieces. It should look like wet sand. Pop this in the fridge while you make the batter.
- Mix the Dry Ingredients: In a large bowl, whisk together the 1 cup of all-purpose flour, ⅓ cup of granulated sugar, ¼ cup of packed brown sugar, 1 teaspoon of baking powder, 1 teaspoon of cinnamon, and ¼ teaspoon of salt. Make sure there are no lumps, especially from the brown sugar.
- Mix the Wet Ingredients: In a separate medium bowl, whisk together the melted and slightly cooled butter, the room-temperature egg, 1 teaspoon of vanilla extract, and ⅓ cup of milk. Whisk until everything is well combined and smooth. It should look pale and slightly frothy.
- Combine Wet and Dry: Pour the wet ingredients into the dry ingredients. Use your spatula to fold them together gently. Mix just until no streaks of flour remain. A few small lumps are fine—overmixing will make the bread tough. The batter will be thick and slightly shaggy. That’s okay.
- Layer the Batter and Apples: Pour half of the batter into the prepared loaf pan and spread it into an even layer. It will be thick, so use your spatula to coax it into the corners. Sprinkle half of the floured diced apples over the batter. Pour the remaining batter on top and spread it gently. Top with the remaining diced apples, pressing them lightly into the batter.
- Add the Streusel: Take the streusel out of the fridge and sprinkle it evenly over the top of the batter. Don’t press it in—just let it sit on top. It will create that beautiful, crunchy topping as it bakes.
- Bake: Place the pan in the preheated oven and bake for 45 to 55 minutes. The bread is done when a toothpick inserted into the center comes out clean or with just a few moist crumbs. The top should be golden brown and the streusel should look crispy. If the top is browning too quickly after 30 minutes, tent the pan loosely with aluminum foil.
- Cool: Let the bread cool in the pan on a wire rack for about 15 minutes. Then, use the parchment overhang to lift the bread out of the pan and transfer it to the wire rack to cool completely. This is important—if you try to glaze it while it’s still warm, the glaze will melt and soak into the bread instead of sitting prettily on top.
- Make the Glaze: Once the bread is completely cool, make the glaze. In a small bowl, whisk together the ½ cup of powdered sugar and ½ teaspoon of vanilla extract. Add milk, 1 tablespoon at a time, whisking until you reach a smooth, pourable consistency. It should be thick enough to coat the back of a spoon but thin enough to drizzle.
- Glaze and Serve: Drizzle the glaze over the cooled bread. Let it set for about 10 minutes before slicing. The glaze will harden slightly, creating that beautiful crackly finish. Slice and enjoy!
Cooking Tips & Techniques
I’ve made this bread more times than I can count, and I’ve learned a few things along the way. Here are my best tips for success.
Don’t Overmix the Batter. This is the number one mistake people make with quick breads. When you combine the wet and dry ingredients, mix just until they come together. Overmixing develops the gluten, which will make your bread tough and dense instead of tender and light. You want a few small lumps in the batter. Trust me.
Room Temperature Ingredients Matter. I know it’s tempting to use cold milk straight from the fridge, but room temperature ingredients emulsify better, creating a smoother, more uniform batter. Take your egg and milk out of the fridge about 30 minutes before you start. If you forget, you can place the egg in a bowl of warm water for 5 minutes, and microwave the milk for about 15 seconds.
Check Your Oven Temperature. Ovens can be off by as much as 25 degrees. I learned this the hard way after a batch came out burnt on the outside and raw in the middle. An oven thermometer is a cheap and easy fix. Place it in the center of the oven and adjust your temperature setting accordingly.
Use a Sharp Knife for Slicing. Once the bread is fully cooled and glazed, use a serrated knife to slice it. A dull knife will squish the bread and ruin the beautiful crumb. Gently saw back and forth for clean slices.
Let It Cool Completely. This is the hardest part, I know. The smell is incredible, and you just want to dig in. But if you cut into the bread while it’s still warm, it will be gummy and may fall apart. Patience is a virtue, especially when it comes to glazing. A warm loaf will turn your beautiful glaze into a puddle.
Toast Leftover Slices. If you have any leftovers (which is rare in my house), toast them lightly. The heat revives the texture and makes the streusel crunchy again. It’s almost better than fresh.
Variations & Adaptations
This recipe is a great base for experimentation. Here are a few variations I’ve tried and loved.
- Apple Pear Fritter Bread: Swap half of the apple for a firm, ripe pear. The pear adds a delicate sweetness and a slightly different texture. I love using Bosc or Anjou pears for this. It’s a lovely twist that feels a bit more sophisticated.
- Caramel Apple Fritter Bread: After the bread cools but before you add the vanilla glaze, drizzle about 2 tablespoons of good-quality caramel sauce over the top. Let it set for a few minutes, then add the vanilla glaze on top. The combination of caramel and apple is a classic for a reason.
- Spiced Walnut Apple Fritter Bread: Add ¼ cup of chopped walnuts to the streusel topping. Toast the walnuts first for a deeper flavor. You can also fold ¼ cup of chopped walnuts into the batter along with the apples for extra crunch.
- Gluten-Free Option: Substitute the all-purpose flour with a good quality 1-to-1 gluten-free baking flour blend. I’ve used Bob’s Red Mill 1-to-1 Baking Flour with great results. The texture will be slightly different—a bit more tender—but still delicious. Make sure your baking powder is also gluten-free.
- Dairy-Free Option: Use a plant-based butter (like Miyoko’s) and a dairy-free milk (like oat milk or almond milk). The texture might be slightly less tender, but it will still be delicious. I’ve made it with oat milk and it worked beautifully.
I once tried adding dried cranberries to the batter along with the apples. It was a happy accident—I was making my cranberry orange sauce for Thanksgiving and had a handful left over. The tartness of the cranberries was a wonderful contrast to the sweet apples. It’s a variation I keep coming back to.
Serving & Storage Suggestions
This bread is incredibly versatile when it comes to serving. It’s perfect on its own, but here are a few ways to take it to the next level.
Serving: Serve the bread at room temperature or slightly warm. If you want to warm it up, pop a slice in the toaster or microwave for about 15 seconds. A dollop of lightly sweetened whipped cream or a scoop of vanilla ice cream turns it into a decadent dessert. For breakfast, a slice with a cup of hot coffee is pure heaven. I also love serving it alongside a cozy bowl of tomato basil soup for a sweet and savory lunch combo.
Storage: Store any leftover bread in an airtight container at room temperature for up to 3 days. The glaze will soften slightly, but the bread will stay moist. Do not refrigerate it, as the cold will dry it out. If you live in a humid climate, the streusel might lose some of its crunch after a day. You can revive it by toasting a slice.
Freezing: This bread freezes beautifully. Let it cool completely, but do not glaze it. Wrap the unglazed loaf tightly in plastic wrap, then in a layer of aluminum foil. Freeze for up to 3 months. When you’re ready to enjoy it, thaw it overnight in the refrigerator or at room temperature for a few hours. Once thawed, make the glaze and drizzle it over the top. It will taste just as fresh as the day you baked it.
Make-Ahead: You can prepare the streusel topping up to 3 days in advance and store it in the refrigerator. You can also dice the apple and toss it with flour a few hours ahead, just keep it in the fridge so it doesn’t brown.
Nutritional Information & Benefits
While this is a treat, it’s made with simple, recognizable ingredients. Here’s a rough estimate of the nutritional information per slice (based on 8 slices):
| Nutrient | Amount per Slice |
|---|---|
| Calories | 280 |
| Total Fat | 11g |
| Saturated Fat | 7g |
| Cholesterol | 45mg |
| Sodium | 180mg |
| Total Carbohydrates | 42g |
| Dietary Fiber | 2g |
| Sugars | 26g |
| Protein | 4g |
Apples are a great source of fiber and vitamin C. Cinnamon has anti-inflammatory properties. And while this isn’t a health food, it’s a far cry from the preservatives and artificial ingredients you’d find in a store-bought pastry. I love that I know exactly what’s in it—real butter, real apples, real vanilla. That’s a comfort in itself.
For those with dietary restrictions, this recipe can be adapted as noted above. It’s not suitable for a low-carb or keto diet due to the flour and sugar, but it can be made gluten-free or dairy-free with simple substitutions.
Conclusion
This small-batch apple fritter bread is the kind of recipe that feels like a hug in food form. It’s warm, cozy, and full of those classic fall flavors that make you want to curl up with a good book. The tender crumb, the jammy apple pockets, the crunchy streusel, and that sweet vanilla glaze—it all comes together in a way that’s simple but special.
I love that it’s small-batch. It means you can make it for yourself on a quiet weekend, or share it with a friend without feeling like you’re committing to a week of apple bread. It’s the perfect size for two people to enjoy over a couple of days, or for one person to savor with a little self-control (or not—no judgment here).
I encourage you to make this your own. Swap in pears, add some walnuts, drizzle it with caramel. The base recipe is solid, but the possibilities are endless. And when you take that first bite, warm from the oven with the glaze still slightly soft, I think you’ll understand why my sister couldn’t stop talking about it.
If you make this bread, I’d love to hear about it. Leave a comment below and let me know how it turned out, or tag me in your photos on social media. Did you try a variation? What kind of apple did you use? Your feedback and creativity are what make this community so wonderful. Happy baking!
Frequently Asked Questions
Can I use a different type of apple?
Absolutely. The best apples for baking are firm and hold their shape. Honeycrisp, Granny Smith, Fuji, and Braeburn are all excellent choices. Avoid soft apples like McIntosh or Red Delicious, as they will break down and become mushy during baking.
Can I double this recipe?
Yes, you can easily double this recipe to make a larger loaf or two small loaves. If you double it, use a 9×5-inch loaf pan and increase the baking time by about 10-15 minutes. Keep an eye on it and test for doneness with a toothpick.
Why did my bread sink in the middle?
A sunken middle is usually a sign of overmixing the batter or underbaking. Overmixing develops too much gluten, which can cause the bread to rise quickly and then collapse. Make sure you mix just until combined. Also, ensure your oven is at the correct temperature and bake until a toothpick inserted in the center comes out clean.
Can I make this without a loaf pan?
If you don’t have a loaf pan, you can bake this batter in a greased 8×8-inch square baking pan. The baking time will be shorter—start checking at about 25 minutes. The bread will be thinner, but just as delicious. You can also bake it in a muffin tin for apple fritter muffins, baking for about 18-22 minutes.
How do I know when the bread is done?
The best way to test for doneness is with a toothpick or a thin skewer. Insert it into the center of the bread. If it comes out clean or with just a few moist crumbs, the bread is done. If it comes out with wet batter, it needs more time. The top should also be golden brown and the edges should be pulling away from the sides of the pan slightly.
Pin This Recipe!
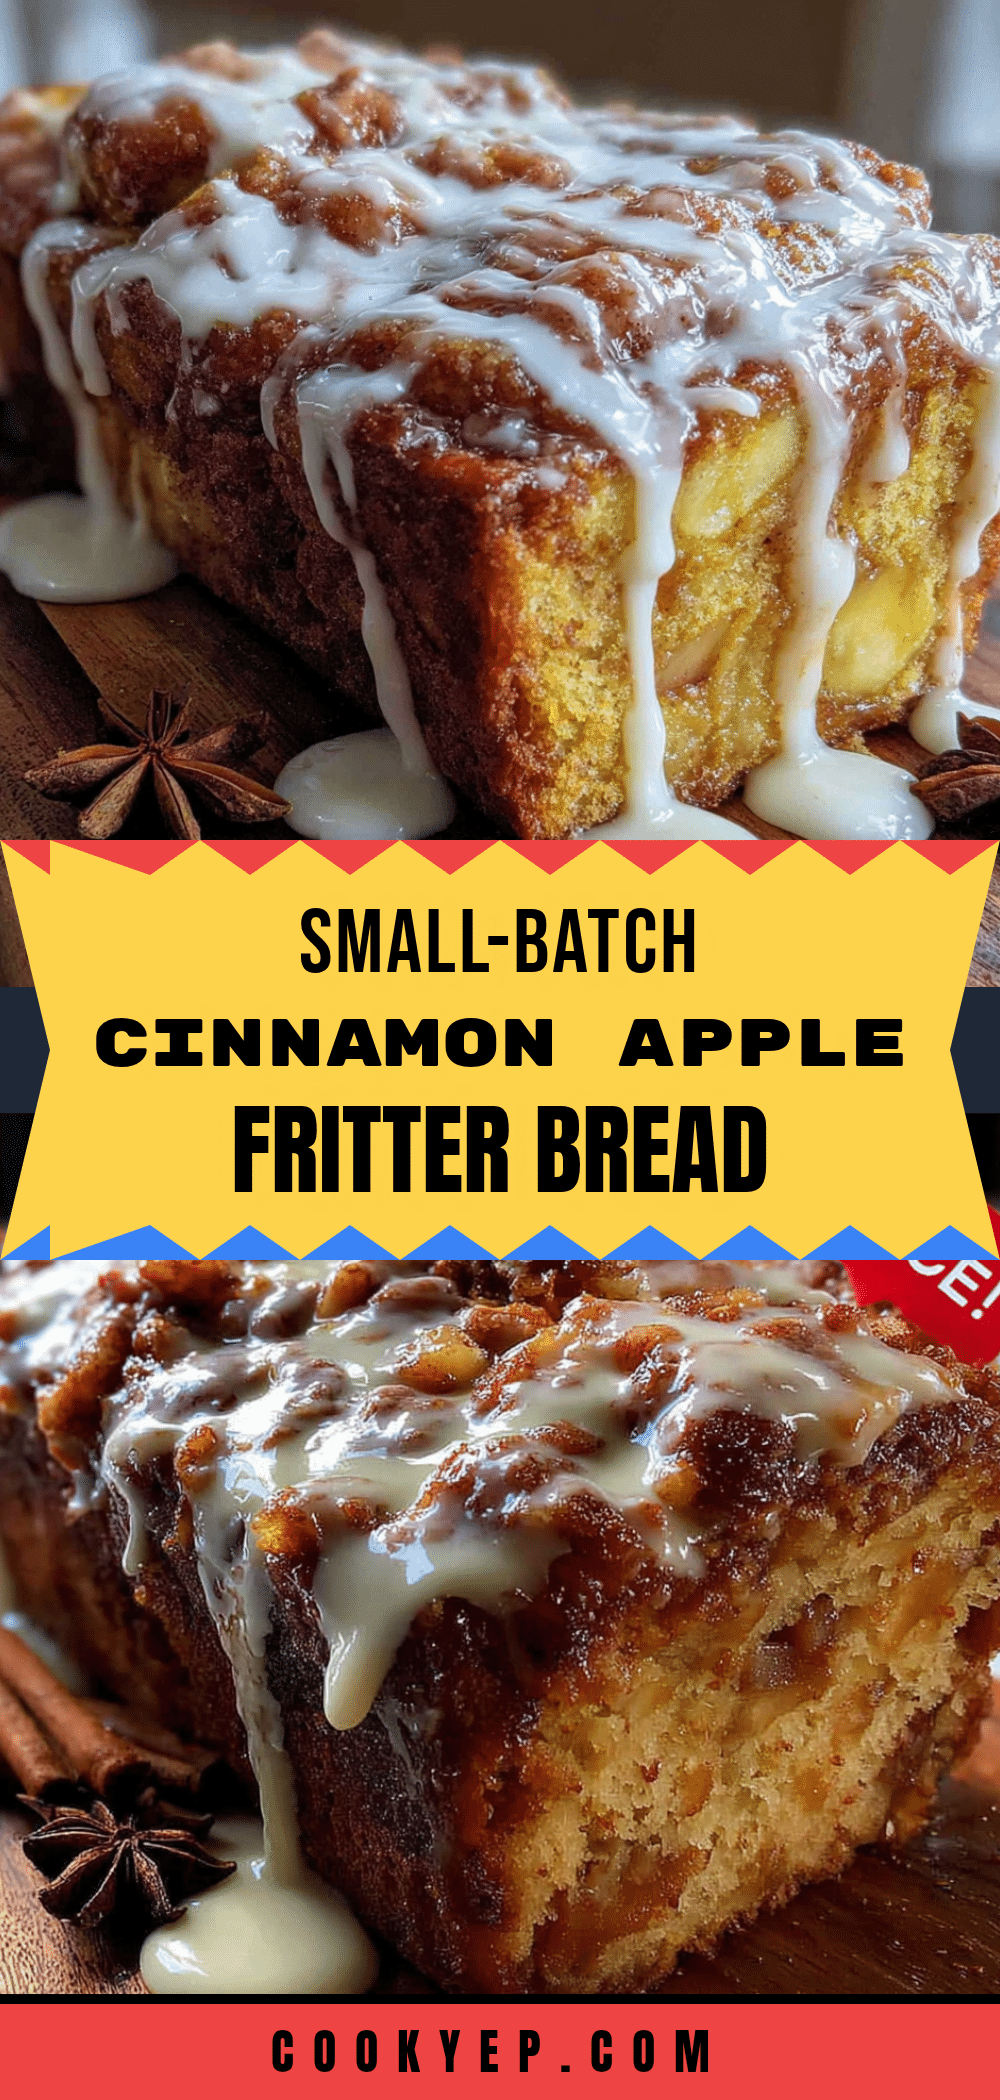
Easy Small-Batch Apple Fritter Bread with Vanilla Glaze

This small-batch apple fritter bread is tender and moist with jammy apple pockets, a buttery streusel topping, and a crackly vanilla glaze. Perfect for a quiet morning or a cozy afternoon treat, it’s easy to make with simple ingredients.
- Prep Time: 15 minutes
- Cook Time: 50 minutes
- Total Time: 1 hour 5 minutes
- Yield: 8 servings 1x
- Category: Dessert
- Cuisine: American
Ingredients
- 1 cup (120g) all-purpose flour
- ⅓ cup (65g) granulated sugar
- ¼ cup (50g) packed light brown sugar
- 1 teaspoon baking powder
- 1 teaspoon ground cinnamon
- ¼ teaspoon salt
- ¼ cup (57g) unsalted butter, melted and slightly cooled
- 1 large egg, room temperature
- 1 teaspoon vanilla extract
- ⅓ cup (80ml) milk, room temperature
- 1 medium apple (about 150g), peeled, cored, and diced (about 1 cup)
- 1 tablespoon all-purpose flour (for tossing with apple)
- For the streusel topping:
- 2 tablespoons (15g) all-purpose flour
- 2 tablespoons (25g) packed light brown sugar
- ½ teaspoon ground cinnamon
- 1 tablespoon (14g) cold unsalted butter, cut into small cubes
- For the vanilla glaze:
- ½ cup (60g) powdered sugar
- ½ teaspoon vanilla extract
- 1–2 tablespoons (15-30ml) milk
Instructions
- Preheat oven to 350°F (175°C). Line an 8×4-inch loaf pan with parchment paper, leaving overhang on the long sides. Lightly grease the parchment.
- Peel, core, and dice the apple into ¼ to ½-inch cubes. Toss with 1 tablespoon flour and set aside.
- Make the streusel: In a small bowl, combine 2 tablespoons flour, 2 tablespoons brown sugar, and ½ teaspoon cinnamon. Add cold butter cubes and cut in with a pastry cutter or fingertips until mixture resembles coarse crumbs. Refrigerate until needed.
- In a large bowl, whisk together 1 cup flour, ⅓ cup granulated sugar, ¼ cup packed brown sugar, 1 teaspoon baking powder, 1 teaspoon cinnamon, and ¼ teaspoon salt.
- In a separate medium bowl, whisk together melted butter, egg, 1 teaspoon vanilla extract, and ⅓ cup milk until smooth and slightly frothy.
- Pour wet ingredients into dry ingredients. Fold gently with a spatula until just combined (a few lumps are fine). Do not overmix.
- Pour half the batter into the prepared loaf pan and spread evenly. Sprinkle half the floured diced apples over the batter. Pour remaining batter on top and spread gently. Top with remaining apples, pressing lightly into the batter.
- Sprinkle streusel evenly over the top. Do not press in.
- Bake for 45-55 minutes, until a toothpick inserted in the center comes out clean or with a few moist crumbs. If top browns too quickly, tent with foil after 30 minutes.
- Cool in pan on a wire rack for 15 minutes. Use parchment to lift bread out and transfer to rack to cool completely.
- Make the glaze: In a small bowl, whisk together powdered sugar, ½ teaspoon vanilla extract, and enough milk (1-2 tablespoons) to reach a pourable consistency.
- Drizzle glaze over cooled bread. Let set for 10 minutes before slicing.
Notes
Use firm apples like Honeycrisp or Granny Smith. Do not overmix the batter. Let bread cool completely before glazing. Leftovers can be toasted to revive texture. Freeze unglazed loaf for up to 3 months.
Nutrition
- Serving Size: 1 slice
- Calories: 280
- Sugar: 26
- Sodium: 180
- Fat: 11
- Saturated Fat: 7
- Carbohydrates: 42
- Fiber: 2
- Protein: 4
Keywords: apple fritter bread, small batch, apple bread, fall baking, easy apple bread, vanilla glaze, streusel topping


