I want to make something creepy for the Halloween party, and I have everything in the pantry except the willpower to not eat the pretzels before I dip them. It’s a Tuesday night, the kids are buzzing with that pre-Halloween energy that feels like static electricity, and I’m staring at a bag of pretzel rods like they’re about to solve all my problems. Honestly, they might. I need a snack that looks like it crawled out of a witch’s cauldron but takes less time to make than it does to find a matching pair of socks in my house. That’s when it hits me—witch fingers. Not the gory, bloody kind, but the salty, chocolatey, almond-nailed kind that makes everyone at the party do a double-take before they shove three of them in their mouth.
The best part? These things are almost too easy. You melt some candy coating, you dip the pretzel rods, you stick an almond on the end, and boom—you’ve got a platter of witch fingers that look legitimately spooky. No baking, no complicated piping, no stress. I’ve made a million Halloween treats over the years, from no-bake Halloween Oreo truffle eyeballs to spiderweb cookies, but these pretzel rods always steal the show. They’re the kind of snack that makes people laugh and then immediately reach for another one. And that’s the whole point, isn’t it? Halloween should be fun, not a six-hour kitchen marathon.
So here’s the deal. This recipe is for anyone who wants to show up to the party with something that looks like you tried way harder than you actually did. No judgment—I’m right there with you. Let’s make some witch fingers.
Why You’ll Love This Recipe
I’ve tested this recipe about a dozen times (okay, maybe more, but the first few batches were “quality control” for science), and here’s what I’ve learned. These witch’s finger pretzel rods hit every single note you want in a Halloween snack. They’re salty, sweet, crunchy, and creepy in the best way possible. Here’s why they’ll become your go-to:
- Quick & Easy: From start to finish, you’re looking at about 15 minutes of active work. The hardest part is waiting for the chocolate to set. Perfect for last-minute party prep or a fun after-school project with the kids.
- Simple Ingredients: You need four things—pretzel rods, green candy melts, sliced almonds, and a little edible dust or gel food coloring for that warty witch look. That’s it. No trips to a specialty baking store.
- Perfect for Halloween Parties: These are the snack that gets photographed before it gets eaten. They fit right in with a spread of spiderweb sugar cookies or a bowl of creepy eyeball truffles.
- Crowd-Pleaser: Kids love them because they look gross. Adults love them because they taste amazing. It’s a win-win.
- Unbelievably Delicious: The combination of salty pretzel, sweet candy coating, and crunchy almond is honestly addicting. I’ve seen people eat six in a row without blinking.
What makes this recipe different from every other witch finger tutorial out there? It’s the little details. I use a specific technique for attaching the almond “fingernail” so it doesn’t fall off when you bite into it. I’ve also figured out the perfect way to get that mottled, warty skin texture without making a mess. This isn’t just another version—it’s the version I keep coming back to year after year because it works every single time.
Honestly, this recipe is the kind that makes you close your eyes after the first bite. It’s Halloween comfort food—creepy on the outside, delicious on the inside. Perfect for impressing guests without breaking a sweat.
What Ingredients You Will Need
This recipe uses simple, everyday ingredients to deliver maximum Halloween impact. No fancy stuff here—just pantry staples that come together in a seriously fun way. Let’s break it down.
For the Witch Fingers
- Pretzel rods (12-16 rods, depending on how many you want to make) – Look for thick, sturdy rods that won’t break easily when you dip them. I prefer the Snyder’s of Hanover brand because they’re consistently long and have a good salt crunch. Avoid the thin, fragile ones—they’ll snap in the melted coating.
- Green candy melts (10 ounces, about 1 ½ cups) – Wilton brand works great here. The bright green color gives that classic witchy vibe. You can also use white chocolate chips with green gel food coloring, but candy melts are smoother and set up faster. (Pro tip: if you go the white chocolate route, add a tiny bit of coconut oil to thin it out.)
- Sliced almonds (about ¼ cup) – These become the fingernails. Look for whole almond slices that are wide enough to cover the tip of the pretzel rod. Don’t use slivered almonds—they’re too skinny and look weird. You want the flat, oval-shaped slices.
- Edible dust or gel food coloring (optional, for the warty skin effect) – I use a mix of green and brown gel food coloring dabbed on with a toothpick for that realistic witch-hand texture. You can skip this if you want a cleaner look, but honestly, the warts make the illusion.
For Decoration (Optional but Fun)
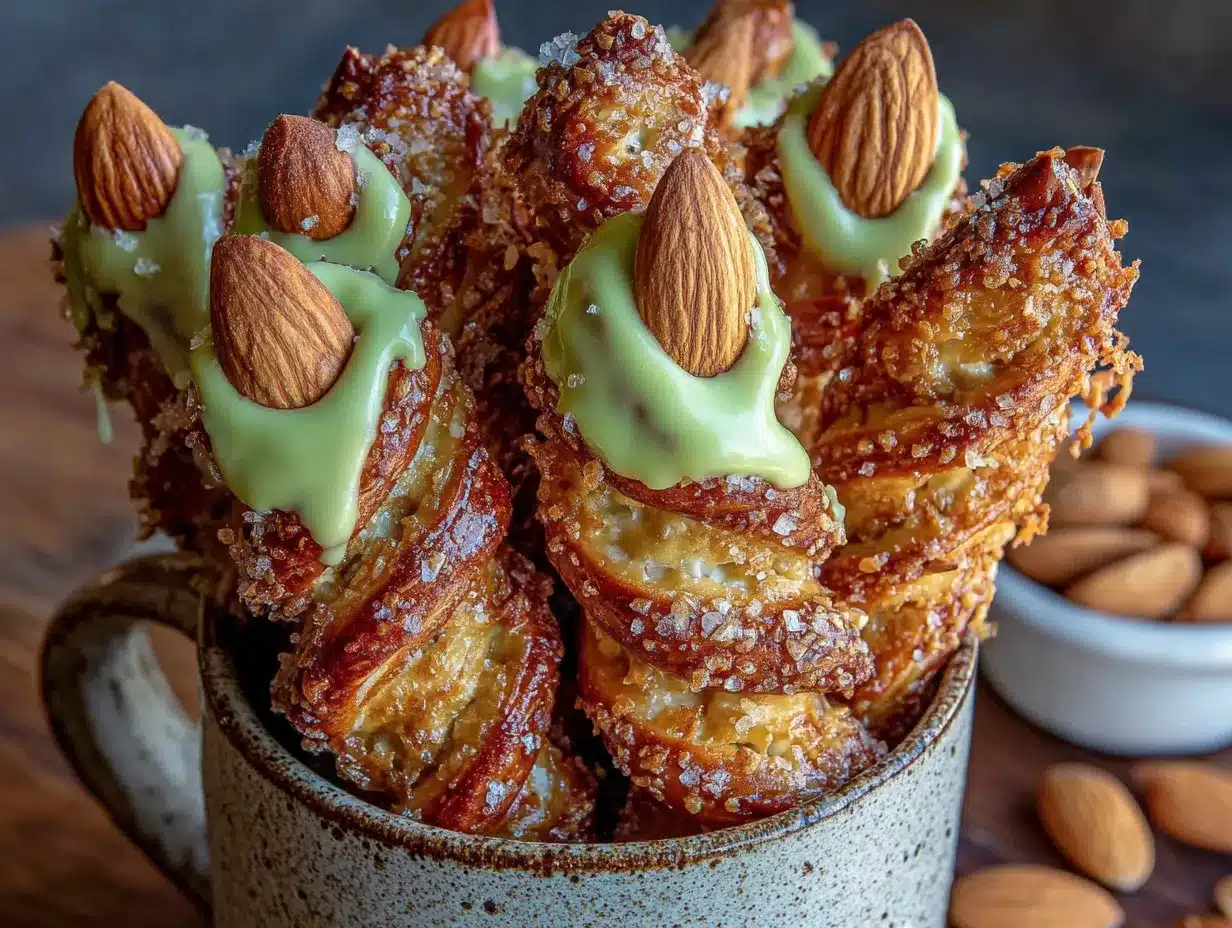
- Black or red decorating gel (for adding “blood” or dirt under the nails) – A tiny dot at the base of the almond gives it that creepy, just-crawled-out-of-the-garden vibe.
- Pretzel salt or coarse sea salt (for extra crunch on the coating) – Sprinkle it on while the coating is still wet.
Substitution guidance: If you’re dairy-free, use dairy-free white chocolate chips or vegan candy melts. If you can’t find sliced almonds, use whole almonds cut in half lengthwise—just make sure they’re flat enough to sit on the pretzel tip. For a nut-free version, use a small piece of dried apricot or a candy corn for the fingernail. It won’t look exactly the same, but it’ll still be cute.
Ingredient selection tip: Don’t skimp on the pretzel rods. I’ve tried making these with regular pretzel sticks, and they’re too short and thin. The rods give you that long, bony finger look that makes the whole thing work. Trust me on this one.
Equipment Needed
You don’t need a lot of fancy gear for this recipe, which is part of the beauty. Here’s what you’ll want to have on hand:
- Microwave-safe bowl (for melting the candy coating) – Glass or ceramic works best. Avoid plastic—it can hold onto odors and mess with the flavor.
- Spatula or spoon (for stirring) – A silicone spatula is ideal because it won’t scratch your bowl and it scrapes the sides clean.
- Parchment paper or silicone baking mat (for setting the finished pretzels) – Parchment paper is cheap and disposable. Silicone mats are reusable and non-stick. Either works.
- Baking sheet (to hold the parchment paper) – Any standard half-sheet pan will do.
- Toothpicks (for applying the warty texture and adjusting almonds) – I keep a few on hand for precision work.
- Small piping bag or zip-top bag (if you want to add extra decorative details) – Snip a tiny corner off the bag for controlled drizzling.
Budget-friendly tip: Don’t have a piping bag? Use a plastic sandwich bag with the corner snipped off. Works exactly the same. I’ve been doing that for years and it’s never let me down.
Maintenance note: If you use a silicone mat, wash it with warm soapy water and let it dry completely before storing. Candy coating can leave a residue if you don’t clean it right away.
Preparation Method
Alright, let’s get into the actual making of these creepy little snacks. I’ve broken this down step by step so you don’t miss a thing. Take your time—this is supposed to be fun, not stressful.
- Set up your workspace. Line a baking sheet with parchment paper or a silicone mat. This is where your finished witch fingers will rest while the coating sets. Make sure you have enough space to spread them out without touching each other. (Trust me, nothing’s worse than peeling apart two stuck-together witch fingers.)
- Melt the green candy melts. Pour the candy melts into a microwave-safe bowl. Microwave in 30-second intervals at 50% power, stirring between each interval. It usually takes about 1 ½ to 2 minutes total. Stir until completely smooth. If the mixture seems too thick, add ½ teaspoon of coconut oil or vegetable shortening and stir again. Don’t add water—it’ll seize the chocolate and ruin everything.
- Prepare the almonds. While the candy melts are cooling slightly, sort through your sliced almonds. Pick out the widest, flattest ones—these will become the fingernails. You want them to cover the tip of the pretzel rod like a real nail. Set them aside on a small plate.
- Dip the pretzel rods. Hold a pretzel rod by one end and dip the other end into the melted green coating. Submerge about two-thirds of the rod, leaving the top third undipped (this will be the “wrist” area). Lift it out and let the excess drip back into the bowl for a few seconds. Gently scrape the bottom of the rod against the rim of the bowl to remove any drips.
- Attach the almond fingernail. Immediately after dipping, place a sliced almond on the tip of the coated pretzel rod. Press it down gently so it sticks. The almond should extend slightly past the end of the pretzel to look like a nail. If it slides, hold it in place for 5-10 seconds until the coating starts to set. (This is the trickiest part—don’t rush it.)
- Create the warty texture. This is where the magic happens. While the coating is still wet, use a toothpick to dab small dots of green and brown gel food coloring onto the surface of the coating. Swirl them slightly to create a mottled, warty skin effect. Don’t overmix—you want it to look uneven and gross. That’s the whole point.
- Set the pretzels. Place each finished pretzel rod on the prepared baking sheet. Leave about an inch of space between each one. Let them sit at room temperature for about 20-30 minutes, or until the coating is completely firm. If you’re in a hurry, pop them in the fridge for 10 minutes. (Just don’t leave them in too long or condensation can form.)
- Add final details (optional). Once the coating is set, you can add extra creepy touches. Use a toothpick to dab a tiny bit of red decorating gel at the base of the almond nail to look like dirt or blood. Or pipe a small black spider on the “wrist” area for extra Halloween flair.
- Serve and enjoy. Arrange the witch fingers on a platter with the undipped ends facing inward, like a hand resting on the plate. Watch your guests’ faces as they realize what they’re eating. It never gets old.
Time estimate: Active prep takes about 15 minutes. Setting time is 20-30 minutes. Total time from start to serving: about 45 minutes. Perfect for a quick party prep.
Troubleshooting tip: If your almond fingernails keep falling off, the coating might be too thick. Try warming it up slightly (10 seconds in the microwave) to thin it out. Alternatively, you can dip the almond in the coating before attaching it—that extra stickiness helps it stay put.
Cooking Tips & Techniques
I’ve made these witch fingers more times than I care to admit, and I’ve learned a few things the hard way. Here’s what I wish someone had told me before my first batch turned into a green, almond-less disaster.
Temperature matters. If your candy melts are too hot, they’ll be runny and won’t coat the pretzel evenly. If they’re too cold, they’ll be thick and lumpy. The sweet spot is when the mixture is smooth and flows off the spoon like thick cream. Let it cool for 2-3 minutes after microwaving before you start dipping.
Work in small batches. Don’t try to dip all 16 pretzel rods at once. Melt half the candy coating, dip 6-8 rods, then melt the rest. This keeps the coating at the right consistency and prevents it from hardening while you’re still working.
The almond nail trick. I learned this after my third batch of fingerless pretzels: dip the flat side of the almond slice into the melted coating before pressing it onto the pretzel. It creates a stronger bond and the nail won’t pop off when someone bites into it. Game changer.
Multitasking strategy. While the first batch of dipped pretzels is setting, prep your decorating station. Set out your toothpicks, gel colors, and extra almonds. This way, when the second batch is ready, you can decorate them immediately while the coating is still wet.
Common mistake to avoid. Don’t twist the pretzel rod when you’re pulling it out of the coating. It creates air bubbles and uneven coverage. Dip straight in, pull straight out, and let the excess drip off naturally. Your fingers will look way more professional.
Consistency tip. If you’re making these for a party, make them the night before. They keep perfectly at room temperature in an airtight container for up to 3 days. The coating stays firm and the pretzels stay crunchy. Just don’t stack them—lay them in a single layer with parchment paper between each row.
Variations & Adaptations
One of the best things about this recipe is how easy it is to customize. Here are some variations I’ve tried and loved:
Spooky Mummy Pretzels
Skip the green coating and use white candy melts instead. After dipping, use a piping bag with melted dark chocolate to drizzle zigzag lines across the coated section, leaving a small gap for “eyes.” Add two tiny dots of black gel for the eyes. Instant mummy fingers. Perfect for a pumpkin spice snickerdoodle cookie bar.
Bloody Witch Fingers
Use red candy melts instead of green. After the coating sets, drizzle with a thin stream of dark red gel or melted red candy to look like dripping blood. This version is a hit at horror movie marathons.
Zombie Fingers
Use a mix of gray and green candy melts for a rotting zombie skin effect. Add tiny pieces of crushed Oreo cookie dust on top while the coating is wet for a “dirt” texture. It’s gross in the best way.
Nut-Free Version
Replace the almond fingernail with a dried apricot slice or a piece of fruit leather cut into a nail shape. It won’t be as crunchy, but it’ll still look creepy and taste delicious.
Gluten-Free Option
Use gluten-free pretzel rods. They’re available at most grocery stores and work exactly the same way. Just check the label to make sure they’re certified gluten-free if that’s important for your guests.
Serving & Storage Suggestions
Serving these witch fingers is half the fun. Arrange them on a black platter or a dark-colored board to make the green pop. I like to place them in a fan shape, with the almond nails pointing outward like a hand reaching up from the grave. Add a few fake spider webs or plastic spiders around the platter for extra atmosphere.
These pair beautifully with other Halloween treats. Serve them alongside a bowl of no-bake Halloween Oreo truffle eyeballs for a truly terrifying snack spread. For drinks, try a batch of cozy copycat gingerbread lattes if you’re hosting a Halloween movie night. The sweet and spicy latte balances the salty pretzels perfectly.
Storage is simple. Keep the witch fingers in an airtight container at room temperature for up to 3 days. If you stack them, place a piece of parchment paper between each layer to prevent sticking. Do not refrigerate them—the moisture in the fridge can make the pretzels go soft and ruin the crunch.
For longer storage, you can freeze them for up to 2 months. Place them in a single layer on a baking sheet and freeze for 1 hour, then transfer to a freezer-safe bag. Thaw at room temperature for 15 minutes before serving. The texture holds up surprisingly well.
Flavor development note: These actually taste better the next day. The coating sets fully and the flavors meld together. If you can resist eating them all on day one, you’ll be rewarded on day two.
Nutritional Information & Benefits
Let’s be real—these are a treat, not a health food. But here’s the estimated nutritional breakdown for one witch finger pretzel rod (based on a standard recipe making 16 rods):
| Nutrient | Amount per Serving |
|---|---|
| Calories | 145 |
| Total Fat | 7g |
| Saturated Fat | 4g |
| Carbohydrates | 19g |
| Sugar | 12g |
| Protein | 2g |
| Sodium | 210mg |
On the bright side, almonds are a great source of vitamin E and healthy fats. Pretzels provide a quick energy boost (hello, carbs), and the candy coating makes your taste buds do a happy dance. Is it a balanced meal? No. Is it a fun Halloween treat that brings people together? Absolutely.
Dietary considerations: This recipe contains gluten (pretzels), dairy (candy melts), and tree nuts (almonds). For a dairy-free version, use vegan candy melts. For gluten-free, swap in gluten-free pretzel rods. The nut-free version with dried fruit works well for those with allergies.
My personal take? I don’t make these for the nutritional value. I make them because they make people laugh, they’re fun to create with my kids, and they disappear faster than any other snack at the party. Sometimes food is about joy, not macros. And that’s okay.
Conclusion
So there you have it—easy witch’s finger pretzel rods that look like they came straight out of a haunted kitchen but take almost no effort to make. These are the kind of Halloween treats that make you look like a party-planning genius without actually having to be one. And honestly, isn’t that the best kind of recipe?
I love these because they’re more than just a snack. They’re a conversation starter. They’re the thing that makes people stop, laugh, and take a picture before they eat one. They’re the memory you make with your kids on a random Tuesday night in October when the Halloween excitement is bubbling over and you need something to channel all that energy into.
If you make these (and I really hope you do), don’t be afraid to get creative with the decorations. Add extra warts, make them extra bloody, or turn them into mummies. This recipe is a canvas—make it your own. And when you serve them at your next Halloween party, watch the looks on people’s faces. That moment of hesitation followed by a grin? That’s the magic right there.
I’d love to hear how yours turn out. Drop a comment below and tell me about your favorite Halloween treat traditions. Did you add extra warts? Did you make them bloody? Did the kids help? Share your creations—I read every single comment. And if you loved this recipe, pin it for later or share it with a friend who needs a last-minute Halloween snack idea. Happy haunting, friends.
Frequently Asked Questions
Can I make these witch finger pretzel rods ahead of time?
Absolutely. Make them up to 3 days in advance and store them in an airtight container at room temperature. They actually stay crunchy and the coating holds up perfectly. Just don’t refrigerate them—moisture can make the pretzels soft.
Why did my almond fingernails fall off?
This usually happens when the candy coating is too thick or too cold. Try warming the coating slightly (10 seconds in the microwave) and dip the flat side of the almond into the coating before attaching it. That extra stickiness makes all the difference.
Can I use regular chocolate chips instead of candy melts?
You can, but candy melts set up firmer and have a smoother finish. If you use chocolate chips, add ½ teaspoon of coconut oil to thin them out. White chocolate chips work great if you add green gel food coloring. Just know that chocolate chips won’t set as hard and may feel slightly tacky at room temperature.
How do I get that warty, bumpy texture on the witch fingers?
Use a toothpick to dab small dots of green and brown gel food coloring onto the wet coating. Swirl them gently without mixing completely. The uneven color creates that mottled, warty skin effect. You can also use a clean toothpick to create small bumps in the coating before it sets.
Can kids help make these?
Yes, and I highly recommend it. Kids can help dip the pretzels, attach the almonds, and add the warty texture with toothpicks. Just supervise the microwave step for safety. It’s a fantastic Halloween activity that keeps little hands busy and creates a snack they’re proud to share at the party.
Pin This Recipe!

Easy Witch’s Finger Pretzel Rods Best Halloween Snack
These creepy witch’s finger pretzel rods are a quick and easy Halloween snack made with pretzel rods, green candy melts, and sliced almonds. They look spooky but taste delicious, perfect for parties and last-minute prep.
- Prep Time: 15 minutes
- Cook Time: 0 minutes
- Total Time: 45 minutes
- Yield: 16 servings 1x
- Category: Snack
- Cuisine: American
Ingredients
- 12–16 pretzel rods
- 10 ounces (about 1 ½ cups) green candy melts
- ¼ cup sliced almonds
- Green and brown gel food coloring (optional, for warty texture)
- Black or red decorating gel (optional, for decoration)
- Pretzel salt or coarse sea salt (optional, for extra crunch)
Instructions
- Line a baking sheet with parchment paper or a silicone mat.
- Melt the green candy melts in a microwave-safe bowl in 30-second intervals at 50% power, stirring between each interval, until smooth (about 1 ½ to 2 minutes). If too thick, add ½ teaspoon coconut oil or vegetable shortening.
- Sort through sliced almonds and pick out the widest, flattest ones for fingernails.
- Hold a pretzel rod by one end and dip the other end into the melted coating, submerging about two-thirds of the rod. Let excess drip off and gently scrape the bottom against the bowl rim.
- Immediately place a sliced almond on the tip of the coated pretzel rod, pressing gently to stick. Hold for 5-10 seconds if needed.
- While coating is still wet, use a toothpick to dab small dots of green and brown gel food coloring onto the surface to create a warty texture. Swirl slightly without overmixing.
- Place each finished pretzel rod on the prepared baking sheet, leaving about an inch of space between them. Let set at room temperature for 20-30 minutes, or refrigerate for 10 minutes.
- Once set, add optional details like a tiny dot of red decorating gel at the base of the almond nail or a small black spider on the wrist area.
- Arrange on a platter with undipped ends facing inward and serve.
Notes
For a stronger almond nail bond, dip the flat side of the almond into the melted coating before attaching. Work in small batches to keep coating at the right consistency. Store in an airtight container at room temperature for up to 3 days. Do not refrigerate.
Nutrition
- Serving Size: 1 witch finger pretz
- Calories: 145
- Sugar: 12
- Sodium: 210
- Fat: 7
- Saturated Fat: 4
- Carbohydrates: 19
- Fiber: 1
- Protein: 2
Keywords: Halloween snack, witch fingers, pretzel rods, easy Halloween treat, no-bake, spooky snack


