The timer on the microwave hit zero with a loud, aggressive beep that I swear the whole living room heard. My husband yelled from the couch, “Is that the dip?” No, it was not the dip. It was the third consecutive bag of frozen popcorn that I had just burnt to a sad, smoky crisp. The big game was in the second quarter, the nachos were gone, and I was staring into the open fridge like it owed me money. I had a tube of cheap biscuit dough, a block of cheddar that was starting to sweat, and a bag of pretzel salt I bought for a different recipe I never actually made. Desperation, my friends, is the mother of invention. I rolled that dough into little ovals, stuffed them with cheese, gave them a baking soda bath, and threw them in the oven. Fifteen minutes later, I had a tray of shiny, salty, cheesy little footballs that disappeared faster than the half-time show. Honestly, they were the best accident I’ve ever had in the kitchen.
That day, I learned that you don’t need a perfect plan to win at snacking. You just need a little bit of creativity and a lot of cheese. These Game-Day Cheesy Pretzel Footballs are that happy accident turned into a reliable touchdown. They are the snack that saves the party, the one that gets grabbed before the wings, and the one people ask for by name the next time you host. Trust me on this one.
Why You’ll Love This Recipe
Let’s be real—football food is usually a battlefield of greasy napkins and questionable leftovers. These little pretzel footballs are different. They are the perfect balance of soft, chewy pretzel bread and molten, stretchy cheese. And they look exactly like a football! It’s the kind of detail that makes people smile before they even take a bite.
- Quick & Easy: From fridge to table in under 30 minutes. That’s faster than a commercial break, seriously.
- Simple Ingredients: You probably have most of these in your pantry right now. No weird flours or specialty yeast required.
- Perfect for Game Day: These are the ultimate finger food. No forks, no plates, just grab and dunk.
- Crowd-Pleaser: I have made these for parties where half the guests swore they “didn’t like pretzels.” They ate six each. Every single time.
- Unbelievably Delicious: The outside has that classic, shiny, salty pretzel crust, and the inside is a pocket of warm, melted cheddar. It’s next-level comfort food that feels fancy but isn’t.
What makes this recipe different is the technique. Instead of wrestling with complicated yeast dough, we use a quick baking soda bath that gives store-bought dough that authentic pretzel chew. It’s a little trick I picked up after ruining three batches of homemade dough (don’t ask). This version is foolproof. It is the kind of snack that makes you close your eyes after the first bite, not because it’s complicated, but because it’s so perfectly simple.
What Ingredients You Will Need
This recipe uses simple, wholesome ingredients to deliver that classic pretzel flavor and gooey cheese pull without the fuss. Most of these are pantry staples, which is perfect for last-minute cravings.
- Refrigerated Biscuit Dough (16.3 oz can): This is our secret weapon. I prefer the flaky layers kind, but any homestyle or buttermilk variety works great. Brands like Pillsbury Grands! are my go-to because they are sturdy enough to hold the cheese without tearing.
- Cheddar Cheese (4 oz, cut into 1/2-inch cubes): You want a sharp or medium cheddar for maximum flavor. Cut it into small cubes so they melt evenly inside the dough. Pre-shredded cheese won’t melt the same way, so stick with a block.
- Baking Soda (1/4 cup): This is the magic ingredient that gives the pretzels their dark, shiny crust and distinctive chew. Don’t skip it or substitute it—it’s non-negotiable for the real pretzel experience.
- Warm Water (4 cups): Used to dissolve the baking soda for the bath. It needs to be warm, not boiling, to help the baking soda dissolve properly.
- Egg (1 large): For the egg wash. This gives the pretzels that beautiful, glossy, golden-brown finish. (adds richness)
- Coarse Pretzel Salt: This is the finishing touch. You can find it near the spices or in the baking aisle. It’s larger and flakier than table salt, which gives that authentic pretzel crunch. (use kosher salt in a pinch)
- Unsalted Butter (2 tablespoons, melted): Brushing the baked pretzels with butter right out of the oven adds flavor and keeps the salt stuck to the surface. (adds richness)
- Optional for Dipping: Cheese sauce, spicy mustard, or honey mustard. I always have a bowl of warm queso on the side.
Equipment Needed
You don’t need a professional bakery setup for these, which is honestly my favorite part. Here is what you need:
- Baking Sheet: A standard half-sheet pan works perfectly. Line it with parchment paper or a silicone baking mat for easy cleanup.
- Large Pot or Dutch Oven: You need something big enough to hold 4 cups of water and a few pretzels at a time. I use my regular soup pot.
- Slotted Spoon or Spider Strainer: This is crucial for lifting the pretzels out of the hot baking soda bath without burning your fingers or tearing the dough.
- Pastry Brush: For the egg wash and the final butter brush. A silicone one is easier to clean.
- Sharp Knife or Bench Scraper: For cutting the biscuit dough if you need to trim edges, though honestly, I just use my hands.
- Small Bowl: For the egg wash.
If you don’t have a slotted spoon, a large fork can work, but it’s trickier. I learned that the hard way when one of my pretzels slipped back into the water and exploded like a cheesy bomb. Not fun.
Preparation Method
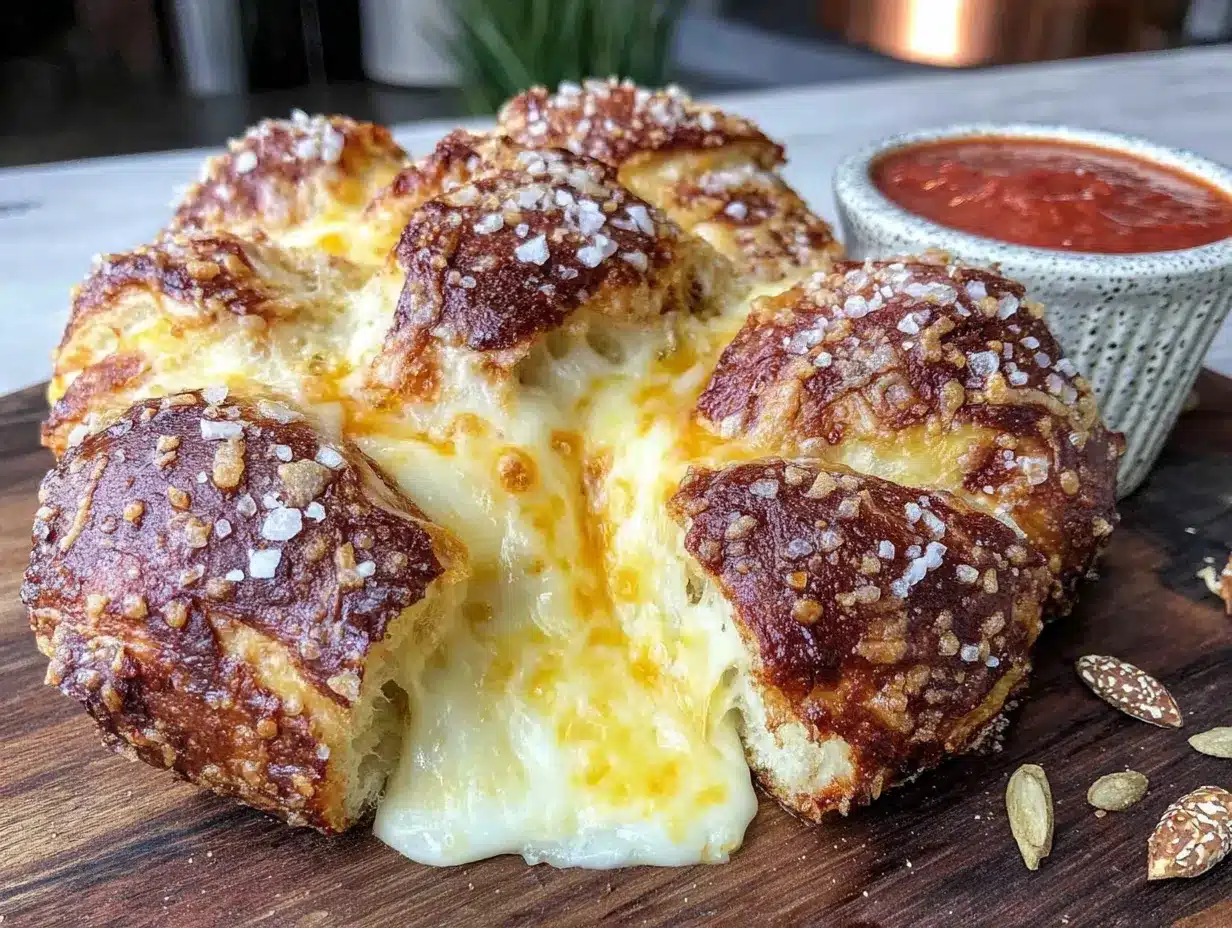
Alright, let’s get to the good part. Follow these steps, and you’ll have a tray of perfect pretzel footballs in no time.
- Preheat and Prep: Preheat your oven to 425°F (220°C). Line your baking sheet with parchment paper or a silicone mat. This is important because the egg wash can get sticky.
- Prepare the Baking Soda Bath: In your large pot, combine 4 cups of warm water and 1/4 cup of baking soda. Stir until the baking soda is mostly dissolved. It won’t fully dissolve, and that’s okay. Bring this mixture to a gentle simmer over medium heat. Do not let it boil vigorously, or it might foam over and make a mess on your stove. (I speak from experience.)
- Shape the Footballs: Open the can of biscuit dough. Separate the 8 biscuits. Take one biscuit and flatten it slightly into a rough oval about 3 inches wide. Place one cube of cheddar cheese in the center. Fold the dough over the cheese, pinching the seams tightly to seal. Roll it gently between your palms to form a football shape. Make sure there are no holes or cracks, or the cheese will leak out during baking. Repeat with the remaining dough and cheese.
- The Pretzel Bath: This is the step that makes them taste like real pretzels. Using your slotted spoon, gently lower 2-3 footballs into the simmering baking soda water. Let them sit for 30 seconds, then flip them over and let them sit for another 30 seconds. The dough will puff slightly and turn a pale yellow. Remove them with the slotted spoon, letting the excess water drip off, and place them on the prepared baking sheet. Leave a little space between each one.
- Egg Wash and Score: In your small bowl, beat the egg with 1 tablespoon of water. Using your pastry brush, brush the top of each pretzel football generously with the egg wash. This is what gives them that beautiful, dark brown shine. Next, use a sharp knife to cut a small “lacing” pattern on the top of each football. Make three small slanted cuts on each side of the center line, mimicking the stitches on a real football. This isn’t just for looks—it also helps the pretzel expand evenly.
- Sprinkle and Bake: Sprinkle each football generously with the coarse pretzel salt. Bake for 12-15 minutes, or until they are deep golden brown and puffed up beautifully. The kitchen will smell incredible at this point.
- Finish with Butter: As soon as they come out of the oven, brush the hot pretzels with the melted butter. This softens the crust slightly and makes the salt stick. Let them cool on the baking sheet for 5 minutes before serving. The cheese inside will be molten hot, so give them a minute to cool down unless you want to burn your tongue like I did the first time.
Cooking Tips & Techniques
I have made these probably twenty times now, and I’ve learned a few things the hard way so you don’t have to.
Seal the edges like your life depends on it. The first time I made these, I was lazy with the seams, and half of them turned into hollow, empty shells with cheese puddles on the baking sheet. Pinch the dough firmly, and if you see any thin spots, patch them with a little extra dough from the edge.
Don’t skip the baking soda bath. I know it sounds weird, and it feels like you’re ruining the dough, but this is the only way to get that authentic pretzel flavor and chewy crust. If you skip it, you just have cheesy biscuits, which are fine, but they aren’t pretzels.
Work in batches. The water will get cloudy and slimy after a few rounds. That’s normal. Just make sure the water stays at a gentle simmer. If it gets too hot, the baking soda can react and make the water overflow. I once had to clean baking soda water off my ceiling. True story.
Timing is everything. Have everything prepped before you start the bath. The dough sits in the water for a total of one minute, so you need to have your baking sheet and egg wash ready to go. Multitasking is the key to success here.
Variations & Adaptations
One of the best things about this recipe is how easy it is to change up. Here are a few ways I’ve played with it:
- Spicy Jalapeño Popper Version: Add a small slice of pickled jalapeño and a smear of cream cheese next to the cheddar cube before sealing. It gives you that spicy, creamy kick that is perfect for game day.
- Pepperoni Pizza Footballs: Swap the cheddar for a cube of mozzarella and tuck in a small piece of pepperoni. Dip them in marinara sauce for an instant win.
- Everything Bagel Seasoning: Instead of pretzel salt, sprinkle the footballs with everything bagel seasoning before baking. The sesame seeds and garlic add an amazing crunch.
- Gluten-Free Option: Use a gluten-free biscuit dough or pizza dough. The process is exactly the same, just make sure the dough is sturdy enough to hold the cheese.
- Air Fryer Adaptation: You can absolutely make these in an air fryer. After the baking soda bath, place them in the air fryer basket, brush with egg wash, and cook at 375°F (190°C) for 8-10 minutes, flipping halfway through. They get even crispier this way.
I personally love the jalapeño version. It reminds me of the stuffed pretzels we used to get at the county fair, but way better because they’re fresh out of the oven.
Serving & Storage Suggestions
These are best served warm, right after the butter has been brushed on. The cheese is perfectly stretchy, and the crust is still soft with a slight chew. I like to serve them on a big wooden board with a few bowls of dipping sauce in the middle. A spicy brown mustard is my personal favorite, but a simple baked spinach artichoke dip served in a bread bowl is also a fantastic pairing.
For a full game-day spread, I always put these next to a football charcuterie board. The salty, cheesy pretzels balance out the meats and cheeses perfectly. If you want something heartier, a bowl of slow cooker tailgate chili is the ultimate companion.
Storage: If you have leftovers (which is rare in my house), let them cool completely. Store them in an airtight container in the refrigerator for up to 3 days. The texture will soften slightly, but they are still delicious.
Reheating: The best way to reheat them is in the oven at 350°F (175°C) for 5-7 minutes, or in the air fryer at 350°F for 3-4 minutes. The microwave will make them rubbery, so avoid it if you can. The flavors actually meld together a bit overnight, so day-old pretzel footballs are still pretty amazing.
Nutritional Information & Benefits
Let’s be honest, these are a treat, not a health food. But knowing what’s in them helps you feel a little better about grabbing a second one.
Per serving (2 footballs, estimated):
- Calories: 290
- Fat: 14g
- Carbohydrates: 28g
- Protein: 10g
- Fiber: 1g
- Sugar: 4g
The cheddar cheese provides a good amount of calcium and protein, which helps keep you full longer. The dough gives you quick energy, which is perfect for a long afternoon of watching football. If you are looking for a lower-carb option, you can use a keto-friendly biscuit dough, though the texture will be a bit different.
These are not gluten-free by default, but they are easily adaptable. They are also nut-free and egg-free if you skip the egg wash and use milk instead. From a wellness perspective, I love that this snack feels indulgent but is made from simple, recognizable ingredients. No preservatives, no weird chemicals—just dough, cheese, and salt.
Conclusion
These Game-Day Cheesy Pretzel Footballs are more than just a snack. They are a conversation starter, a crowd-pleaser, and honestly, the easiest way to look like a hero in the kitchen without breaking a sweat. They capture everything I love about game-day cooking: they are fun, they are fast, and they disappear almost immediately.
I hope you make these for your next big game, your next party, or just a random Tuesday when you need a little comfort. Don’t be afraid to play with the fillings or the toppings. That’s the beauty of a recipe like this—it’s a template for your own creativity. If you try them, drop a comment below and let me know how they turned out. Did you add jalapeños? Did you dip them in something wild? I want to hear all about it. Until next time, happy snacking!
Frequently Asked Questions
Can I use homemade pizza dough instead of biscuit dough?
Absolutely! Homemade pizza dough works great. Just roll it out, cut it into small squares, and follow the same steps. The baking soda bath works on any wheat-based dough.
Why did my cheese leak out during baking?
This usually happens if the seams aren’t sealed tightly enough. Make sure you pinch the dough firmly and roll it smooth. Also, using a block of cheese cut into cubes rather than shredded cheese helps prevent leaks.
Can I freeze these pretzel footballs?
Yes! You can freeze them after they are baked and cooled. Place them in a single layer on a baking sheet, freeze for an hour, then transfer to a freezer bag. Reheat directly from frozen in the oven at 350°F for 10 minutes.
What is the best cheese to use for the filling?
Sharp cheddar is my favorite because it melts beautifully and has a strong flavor. You can also use Monterey Jack, pepper jack for spice, or mozzarella for a stretchier pull.
Do I have to use the baking soda bath?
Yes, if you want them to taste like real pretzels. The bath is what creates the dark, shiny crust and the chewy texture. Without it, you just have cheesy biscuits. They are still good, but they aren’t pretzels.
Pin This Recipe!
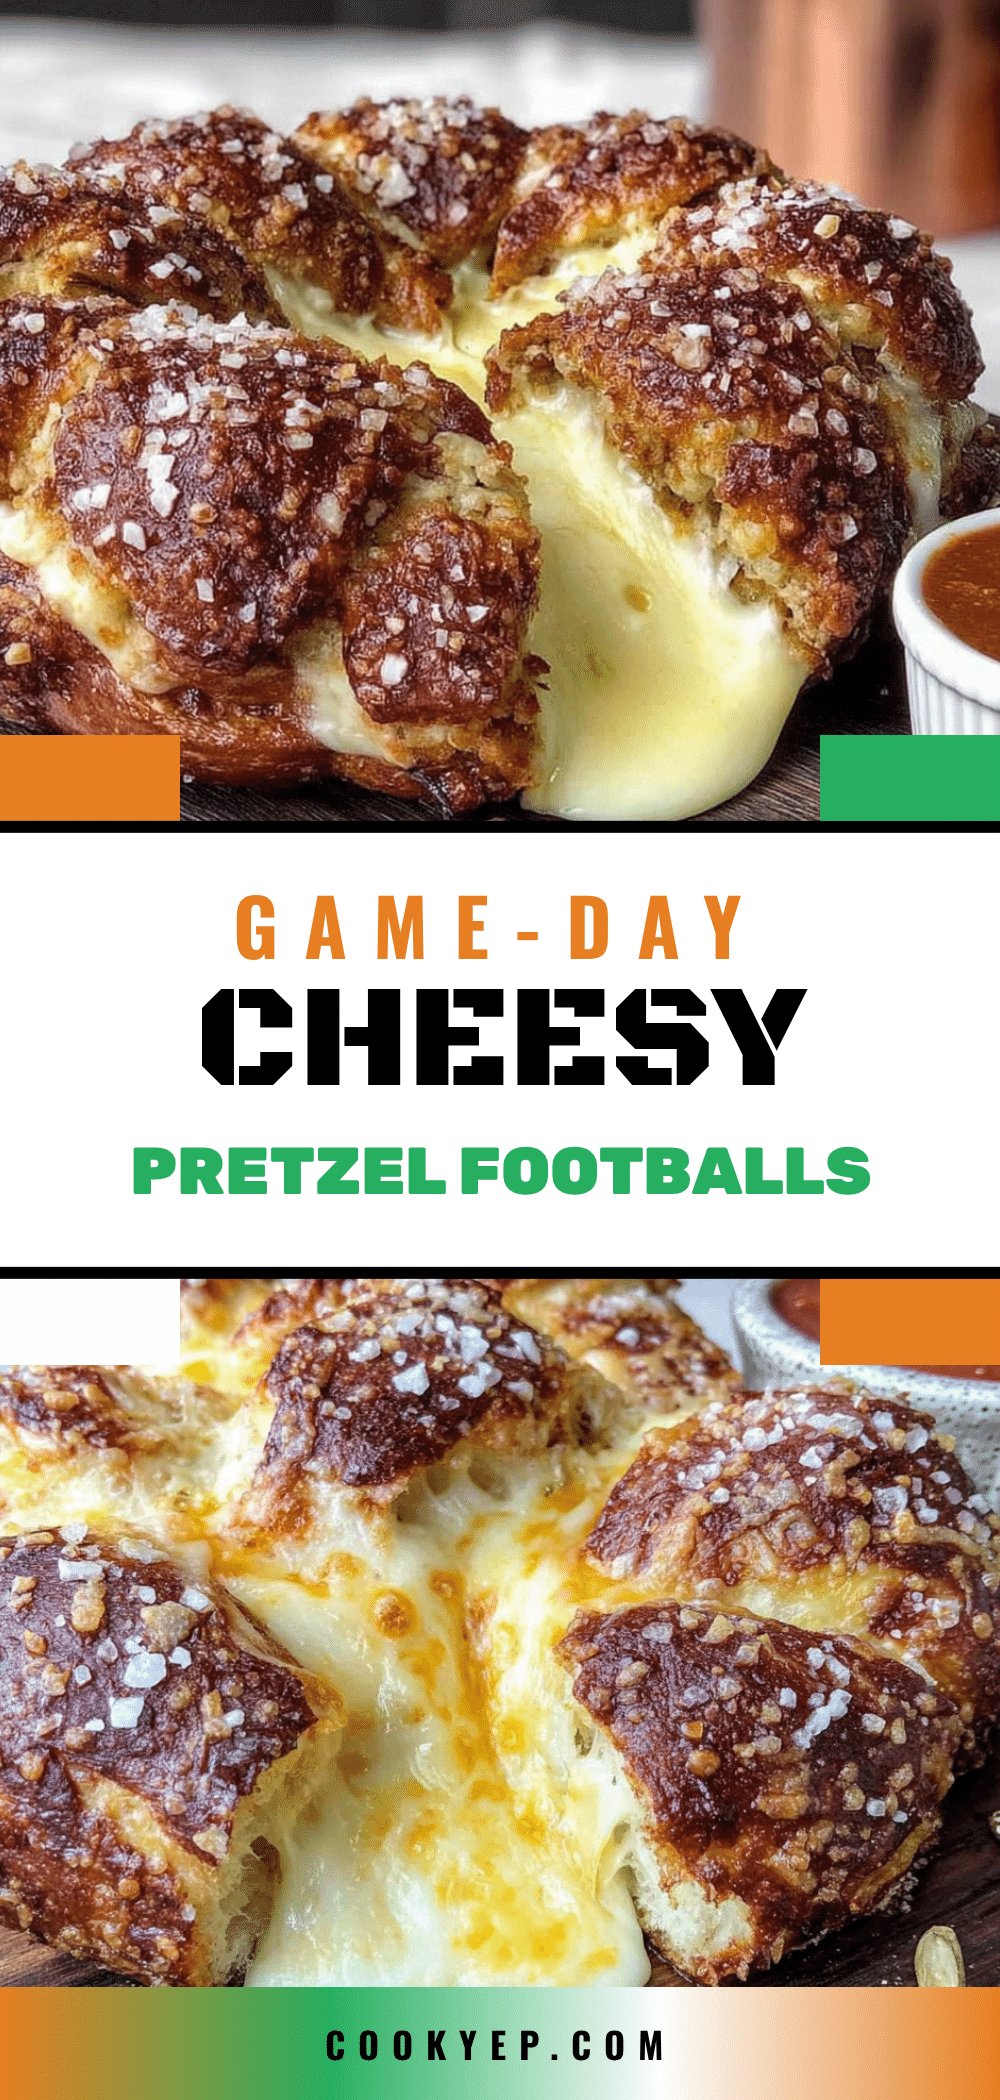
Game Day Cheesy Pretzel Footballs: Easy Baked Snack Recipe
These Game-Day Cheesy Pretzel Footballs are a happy accident turned into a reliable touchdown. They are the perfect balance of soft, chewy pretzel bread and molten, stretchy cheese, shaped like little footballs for a fun game-day snack.
- Prep Time: 15 minutes
- Cook Time: 15 minutes
- Total Time: 30 minutes
- Yield: 4 servings 1x
- Category: Appetizer
- Cuisine: American
Ingredients
- 1 can (16.3 oz) refrigerated biscuit dough (e.g., Pillsbury Grands!)
- 4 oz sharp or medium cheddar cheese, cut into 1/2-inch cubes
- 1/4 cup baking soda
- 4 cups warm water
- 1 large egg
- 1 tablespoon water (for egg wash)
- Coarse pretzel salt, to taste
- 2 tablespoons unsalted butter, melted
- Optional for dipping: cheese sauce, spicy mustard, or honey mustard
Instructions
- Preheat your oven to 425°F (220°C). Line a baking sheet with parchment paper or a silicone mat.
- In a large pot, combine 4 cups of warm water and 1/4 cup of baking soda. Stir until mostly dissolved. Bring to a gentle simmer over medium heat. Do not let it boil vigorously.
- Open the can of biscuit dough and separate the 8 biscuits. Flatten one biscuit into a rough oval about 3 inches wide. Place one cube of cheddar cheese in the center. Fold the dough over the cheese, pinching the seams tightly to seal. Roll gently between your palms to form a football shape. Repeat with remaining dough and cheese.
- Using a slotted spoon, gently lower 2-3 footballs into the simmering baking soda water. Let them sit for 30 seconds, then flip and let sit for another 30 seconds. Remove with the slotted spoon, letting excess water drip off, and place on the prepared baking sheet. Leave space between each.
- In a small bowl, beat the egg with 1 tablespoon of water. Brush the top of each pretzel football generously with the egg wash. Use a sharp knife to cut a small ‘lacing’ pattern on the top of each football (three small slanted cuts on each side of a center line).
- Sprinkle each football generously with coarse pretzel salt. Bake for 12-15 minutes, or until deep golden brown and puffed.
- As soon as they come out of the oven, brush the hot pretzels with the melted butter. Let them cool on the baking sheet for 5 minutes before serving.
Notes
Seal the edges tightly to prevent cheese from leaking. Don’t skip the baking soda bath for authentic pretzel flavor and texture. Work in batches and have everything prepped before starting the bath. For variations, try adding jalapeño and cream cheese, pepperoni and mozzarella, or everything bagel seasoning. Can be adapted for air fryer (375°F for 8-10 minutes, flipping halfway). Store leftovers in an airtight container in the refrigerator for up to 3 days. Reheat in oven at 350°F for 5-7 minutes or air fryer at 350°F for 3-4 minutes.
Nutrition
- Serving Size: 2 footballs
- Calories: 290
- Sugar: 4
- Sodium: 800
- Fat: 14
- Saturated Fat: 7
- Carbohydrates: 28
- Fiber: 1
- Protein: 10
Keywords: game day snacks, pretzel footballs, cheesy pretzels, easy appetizer, football party food, baked snack


