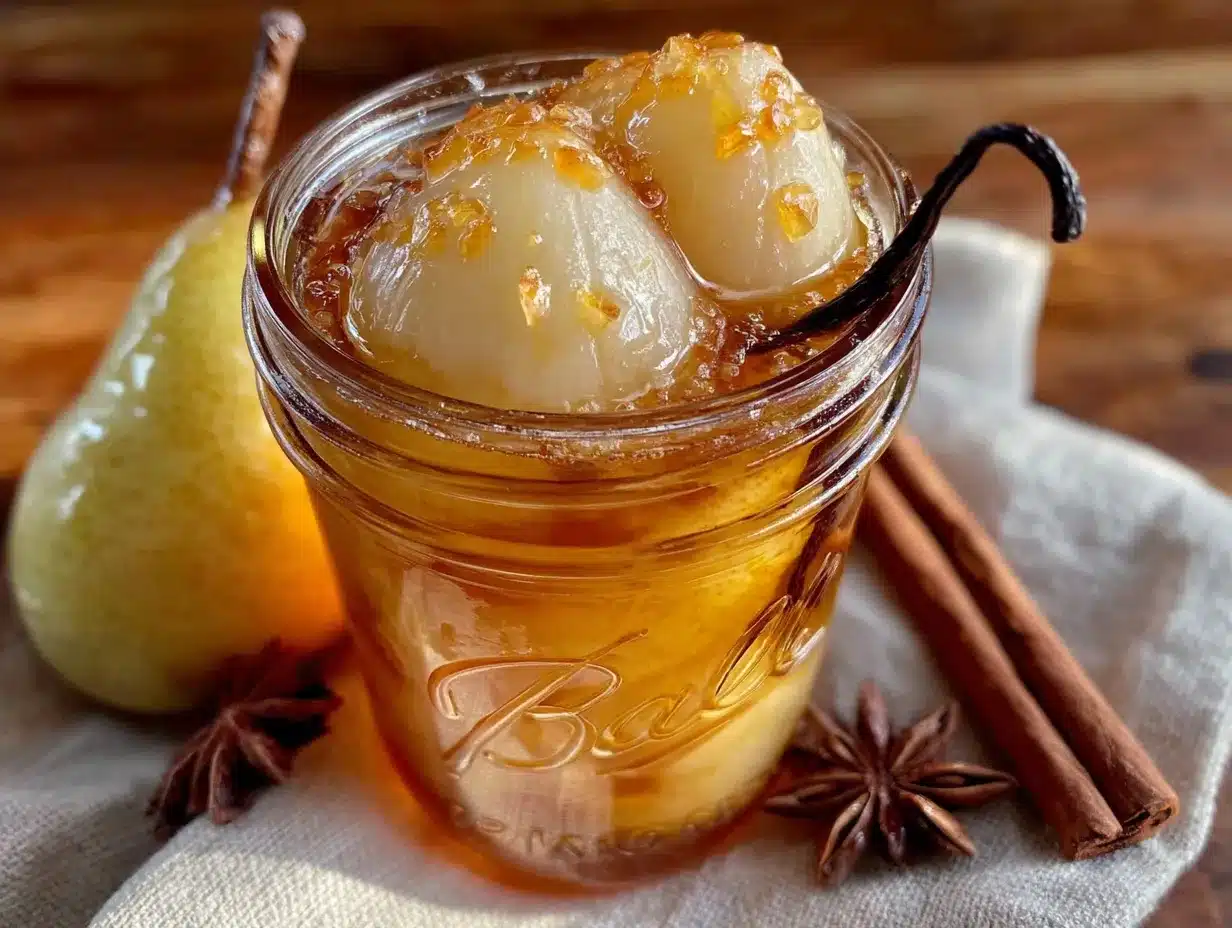
I opened the pantry last December and found three jars I’d completely forgotten about. Labeled in my own handwriting — “Bartlett pears, vanilla syrup, October.” That was two years ago. I stood there holding one, half-expecting to toss it. But I cracked the lid anyway, and the smell that came out — sweet, warm, with real vanilla bean specks floating in the syrup — stopped me cold. I ate that jar standing over the kitchen sink with a fork. Not my proudest moment. But honestly? It was the best thing I’d tasted all holiday season.
That’s the thing about homemade canned pears in vanilla syrup. They’re not flashy. They don’t demand attention. But when you pull a jar off the shelf in the middle of winter, you feel like you planned ahead for a version of yourself that deserves something special. I didn’t grow up canning. My grandmother did, sure, but I was always the one buying store-bought and calling it a day. Then a friend handed me a jar of her homemade pears one September, and I couldn’t go back. The texture was firm but tender. The syrup wasn’t cloying — just gently sweet with that unmistakable vanilla warmth. I asked for her method, tweaked it a few times, and now it’s the one recipe I make sure to double every single year.
This isn’t complicated. You don’t need a fancy setup or a lifetime of canning experience. You just need good pears, a vanilla bean (or extract — I’ve done both), and a little patience. The result is something that makes you look like you have your life together, even if you’re eating them straight from the jar at 10 p.m. on a Tuesday. Trust me. I know.
Why You’ll Love This Recipe
Let me tell you why this particular method has earned a permanent spot in my fall rotation. I’ve tested this recipe across three different seasons, with pears that ranged from perfectly ripe to slightly underripe, and I’ve dialed in the details so you don’t have to guess.
- Simple Ingredients : You only need pears, sugar, water, and vanilla. No obscure spices or specialty store runs. You probably have most of this in your kitchen right now.
- Beginner-Friendly Canning : If you’ve never canned anything before, this is the recipe to start with. The process is straightforward, and pears are forgiving. I messed up my first batch (under-processed by 5 minutes) and they were still delicious.
- Perfect for Gifting : A jar of homemade vanilla pears tied with a ribbon beats any store-bought gift. I gave them out last Christmas and got more texts than I did for the expensive cheese board I made.
- Year-Round Summer Taste : When it’s February and you’re craving something bright, opening a jar of these pears feels like a small miracle. The vanilla mellows over time and gets even better.
- Endlessly Versatile : Eat them plain, spoon over ice cream, layer into yogurt parfaits, or use them in baking. I’ve folded them into a batch of peach cobbler before and it worked beautifully.
This isn’t just another canning recipe. It’s the one that makes you feel capable in the kitchen, even if your only previous experience with preserving was watching a YouTube tutorial at 2 a.m. The syrup is balanced, the pears hold their shape, and every jar you open months from now will taste like you knew exactly what you were doing.
What Ingredients You Will Need
This recipe uses simple, honest ingredients. The magic comes from the quality of the pears and the vanilla, so don’t skimp there. Here’s what you’ll need:
For the Pears
- 6-7 pounds firm ripe pears (Bartlett or Bosc work best — Bartletts are softer and sweeter, Bosc hold their shape beautifully)
- 1/2 cup lemon juice (fresh-squeezed or bottled — I use bottled for consistency, but fresh works if you have it)
- Cold water (for the acidulated water bath)
For the Vanilla Syrup
- 4 cups water
- 2 cups granulated sugar (I use organic cane sugar, but regular white sugar is fine)
- 2 vanilla beans (split lengthwise) OR 2 tablespoons pure vanilla extract (added after cooking)
- 1/4 cup lemon juice (adds brightness and helps preserve color)
Ingredient Notes & Substitutions
- Pears : Look for pears that are ripe but still firm. If they yield easily to thumb pressure, they’re too soft for canning. Slightly underripe is actually better — they’ll soften during processing. I’ve used Anjou pears before and they work, but Bartlett is my go-to for that classic pear flavor.
- Vanilla : Real vanilla beans give the syrup those beautiful black specks and a deeper flavor. But honestly? I’ve made this with good-quality vanilla extract and it’s still fantastic. Just stir it in after you remove the syrup from heat so the alcohol doesn’t cook off completely.
- Sugar : You can reduce the sugar to 1 1/2 cups for a lighter syrup, but don’t go below that — the sugar helps preserve texture and flavor. Honey or maple syrup can be substituted, but it changes the flavor profile significantly. I tried honey once and it was good, but not the same.
- Lemon Juice : This isn’t just for flavor. The acid helps prevent the pears from discoloring and keeps the syrup clear. If you’re using bottled lemon juice, make sure it’s not the “from concentrate” kind with added preservatives.
Equipment Needed
You don’t need a full canning setup, but a few tools make the process smoother. Here’s what I use:
- Water bath canner or large stockpot (deep enough to cover jars by 1-2 inches of water)
- Canning jars (pint or quart size — I prefer pints for gifting, quarts for home use)
- New lids and screw bands (never reuse lids — they won’t seal properly)
- Jar lifter (trust me, you don’t want to fish hot jars out with tongs)
- Wide-mouth funnel (makes filling jars so much less messy)
- Large bowl (for the acidulated water bath)
- Paring knife or vegetable peeler (I use a Y-peeler — faster and less wrist strain)
- Clean kitchen towels
- Magnetic lid wand (optional but helpful for lifting lids from hot water)
If you don’t have a canner, a deep stockpot with a rack or even a folded kitchen towel in the bottom works. I used a pasta pot for my first two years of canning. It’s not fancy, but it gets the job done.
Preparation Method
This is where the magic happens. Take your time, set up your workspace, and don’t rush. Canning rewards patience.
Step 1: Prepare Your Canning Station
Wash your jars, lids, and bands in hot soapy water. Rinse well. Place the jars in your canner or stockpot, cover with water, and bring to a simmer (180°F). Keep them hot until you’re ready to fill. Place the lids in a small saucepan of hot water (not boiling) to soften the sealing compound. You want them hot but not bubbling.
Step 2: Make the Acidulated Water Bath
Fill a large bowl with cold water and add 1/2 cup lemon juice. This is your pear bath. As you peel and cut each pear, drop the pieces in immediately to prevent browning. I learned this the hard way — my first batch looked like sad, brownish mush before I even got to the syrup.
Step 3: Prepare the Pears
Peel the pears using a vegetable peeler. Cut them in half lengthwise and use a melon baller or small spoon to scoop out the core and seeds. If you prefer, you can leave them whole — just trim the blossom end and leave the stem on for a prettier presentation. I do a mix of both, depending on my mood. Slice any larger halves into quarters so they fit nicely in the jars. Drop each piece into the acidulated water as you go.
Step 4: Make the Vanilla Syrup
In a large saucepan, combine 4 cups water, 2 cups sugar, and 1/4 cup lemon juice. If using vanilla beans, split them lengthwise with a sharp knife and scrape the seeds into the pot. Drop the pods in too — they’ll infuse the syrup beautifully. Bring to a boil over medium-high heat, stirring occasionally until the sugar dissolves completely. Reduce heat and let it simmer for 5 minutes. If you’re using vanilla extract instead, wait until after you remove the syrup from heat.
Step 5: Pack the Jars
Remove a hot jar from the canner using your jar lifter. Drain the pear pieces and pack them tightly into the jar, leaving 1/2 inch of headspace at the top. Don’t cram them in — they need a little room. Ladle the hot vanilla syrup over the pears, covering them completely. Use a chopstick or bubble remover tool to gently release any trapped air bubbles. Wipe the rim of the jar with a clean, damp towel. Center a lid on the jar and screw on the band until fingertip-tight (not too tight — air needs to escape during processing).
Step 6: Process the Jars
Place the filled jars back into the canner, ensuring they’re covered by at least 1 inch of water. Bring to a full rolling boil, then start your timer. Process pint jars for 20 minutes, quart jars for 25 minutes. Adjust for altitude if you’re above 1,000 feet — add 5 minutes for every 1,000 feet. I live at 600 feet, so I don’t adjust, but check your elevation.
Step 7: Cool and Check Seals
After processing, turn off the heat and let the jars sit in the water for 5 minutes. Remove them carefully with your jar lifter and place them on a towel-lined counter, leaving at least an inch between jars. Don’t tighten the bands or touch the lids. Let them cool completely for 12-24 hours. You’ll hear the satisfying “pop” of the lids sealing as they cool. After cooling, press the center of each lid — it should be firm and not flex. Remove the bands and check the seal by lifting the jar by the lid alone. If it holds, you’re golden. Store any unsealed jars in the fridge and use within a week.
Cooking Tips & Techniques
I’ve made plenty of mistakes so you don’t have to. Here’s what I’ve learned:
- Don’t overcook the pears before canning : They’ll continue to soften during processing. If they’re already tender when you pack them, you’ll end up with pear mush. I blanched mine once for too long and ended up with pear sauce. Tasty, but not what I was going for.
- Use the ripest firm pears you can find : If they’re too hard, they’ll be crunchy and bland. If they’re too soft, they’ll fall apart. The sweet spot is when they yield slightly to gentle pressure but still feel solid. I buy mine a few days ahead and let them sit on the counter until they hit that perfect stage.
- Keep your workspace clean : Wipe those jar rims meticulously. A single sugar crystal or bit of pear can prevent a seal. I ruined three jars in my first batch because I got sloppy with the towel.
- Label everything : I use a permanent marker on the lid with the date and variety. You think you’ll remember, but come February, all jars look the same. I have a jar from 2021 that I’m still afraid to open because I can’t remember what’s in it.
- Don’t skip the lemon juice : It’s not just for flavor — the acidity helps preserve the pears and keeps the syrup from turning cloudy. Plus, it brightens the vanilla flavor in a way you don’t expect.
Variations & Adaptations
This recipe is a starting point, not a rulebook. Here are some ways I’ve played with it:
- Spiced Vanilla Pears : Add 1 cinnamon stick, 3 whole cloves, and a strip of orange peel to the syrup while it simmers. Strain before pouring into jars. I made this for a holiday gift basket and it smelled like Christmas in a jar.
- Vanilla-Maple Pears : Replace 1/2 cup of the sugar with 1/2 cup pure maple syrup. The maple flavor is subtle but adds a cozy depth. Perfect for fall canning.
- Low-Sugar Version : Use 1 cup sugar and 1/2 cup honey or agave. The texture will be slightly softer, but the flavor is still lovely. I’ve done this for friends watching their sugar intake and they loved it.
- Bourbon Vanilla Pears : Add 2 tablespoons of bourbon to each pint jar before pouring in the syrup. The alcohol mostly cooks off during processing, leaving a warm, smoky undertone. These are incredible over vanilla ice cream or in a bourbon sweet potato casserole.
- Different Fruits : This syrup works beautifully with peaches, nectarines, or even firm plums. Just adjust processing times — peaches need the same 20 minutes, plums need 15. I’ve done a mixed batch and it was gorgeous.
Serving & Storage Suggestions
These pears are incredibly versatile. Here’s how I use them:
- Straight from the jar : Cold, with a fork. Don’t judge me. It’s the best midnight snack.
- Over ice cream or yogurt : The syrup acts like a vanilla sauce. I drizzle it over Greek yogurt with granola for breakfast and feel fancy.
- In baking : Chop them up and fold into muffin batter, cake batter, or pancake mix. I’ve used them in a banana zucchini bread before and it added a lovely sweetness.
- With cheese : Serve alongside sharp cheddar, brie, or blue cheese on a cheese board. The sweetness cuts through the richness perfectly.
- In cocktails : Muddle a pear half with bourbon and a splash of the syrup for a quick, elegant drink.
Storage: Properly sealed jars can be stored in a cool, dark place for up to 12-18 months. Once opened, refrigerate and use within 2 weeks. The syrup will keep even longer, but the pears lose texture over time. I’ve had jars last two years and they were still good, but the pears were definitely softer. For best quality, aim to use them within a year.
Reheating: If you want them warm, simply heat the syrup and pears gently in a saucepan over low heat. Don’t boil — they’ll fall apart. I sometimes warm them with a splash of cream for a quick dessert that looks like I spent hours on it.
Nutritional Information & Benefits
Per serving (1/2 cup pears with syrup):
- Calories: 120
- Carbohydrates: 31g
- Sugar: 26g
- Fiber: 3g
- Vitamin C: 4% DV
- Potassium: 2% DV
Pears are a good source of dietary fiber, which supports digestive health. They also contain antioxidants like vitamin C and copper. The vanilla adds a touch of warmth without any significant calories. If you’re watching your sugar intake, the low-sugar variation is a great option. This recipe is naturally gluten-free, dairy-free, and vegan. The only potential allergen is the pears themselves (rare, but possible). As always, consult your healthcare provider for specific dietary needs.
Conclusion
I’ll be honest — canning can feel intimidating. There’s the equipment, the timing, the fear of botulism (which is real, but manageable with proper technique). But this recipe? It’s the one that made me fall in love with preserving. There’s something deeply satisfying about opening a jar of pears you canned yourself, months later, and tasting summer in the middle of winter. It’s not just about the pears — it’s about the feeling of having planned ahead, of knowing you can create something beautiful and lasting with your own two hands.
I’d love to hear how yours turn out. Did you add cinnamon? Use Bosc instead of Bartlett? Eat half the batch before they even made it into jars? (No judgment here.) Drop a comment below and let me know. And if you’re feeling generous, share this recipe with a friend who needs a little homemade sweetness in their life. Happy canning, friends.
Frequently Asked Questions
Can I use vanilla extract instead of vanilla beans?
Absolutely. Use 2 tablespoons of pure vanilla extract, stirring it into the syrup after you remove it from heat. The flavor won’t be as intense, but it’s still delicious. I’ve done both and honestly, my family couldn’t tell the difference in a blind taste test.
How long do homemade canned pears last?
Properly sealed and stored in a cool, dark place, they’ll last 12-18 months. I’ve kept jars for two years and they were still safe, but the texture was noticeably softer. For best quality, use within a year. Always check for signs of spoilage before eating — bulging lids, off smells, or mold mean toss it.
Do I have to peel the pears?
You don’t have to, but I recommend it. The peel can become tough and chewy during processing. If you leave it on, the syrup might also turn slightly cloudy. That said, I’ve made a batch with unpeeled red pears and they looked stunning — the red skins bled into the syrup and created a beautiful pink color. It’s a trade-off.
Can I water bath can these without a canner?
Yes. A deep stockpot with a rack or a folded kitchen towel in the bottom works perfectly. Just make sure the water covers the jars by at least 1 inch and that the pot is deep enough to allow for a rolling boil without splashing. I used a pasta pot for years before buying a proper canner.
What if my jars don’t seal?
Don’t panic. If a lid doesn’t seal within 24 hours, simply refrigerate that jar and use it within a week. You can also reprocess it with a new lid within 24 hours — just repeat the water bath process. I’ve had to do this twice, and both times the second seal worked perfectly.
Pin This Recipe!
Homemade Canned Pears in Vanilla Syrup
An easy recipe for canning pears in a gently sweet vanilla syrup. Perfect for beginners, these homemade pears capture the taste of summer and make wonderful gifts or a simple winter treat.
- Prep Time: 30 minutes
- Cook Time: 20 minutes (pints) or 25 minutes (quarts)
- Total Time: 1 hour (plus 12-24 hours cooling)
- Yield: 4-5 pints or 2-3 quarts 1x
- Category: Preserves
- Cuisine: American
Ingredients
- 6–7 pounds firm ripe pears (Bartlett or Bosc)
- 1/2 cup lemon juice (for acidulated water bath)
- Cold water (for acidulated water bath)
- 4 cups water (for syrup)
- 2 cups granulated sugar
- 2 vanilla beans (split lengthwise) OR 2 tablespoons pure vanilla extract
- 1/4 cup lemon juice (for syrup)
Instructions
- Wash jars, lids, and bands in hot soapy water. Place jars in canner or stockpot, cover with water, and bring to a simmer (180°F). Keep hot until ready to fill. Place lids in a small saucepan of hot water (not boiling) to soften sealing compound.
- Fill a large bowl with cold water and add 1/2 cup lemon juice to create an acidulated water bath.
- Peel pears using a vegetable peeler. Cut in half lengthwise and remove core and seeds with a melon baller or small spoon. Drop pieces into acidulated water immediately to prevent browning.
- In a large saucepan, combine 4 cups water, 2 cups sugar, and 1/4 cup lemon juice. If using vanilla beans, split lengthwise, scrape seeds into pot, and add pods. Bring to a boil over medium-high heat, stirring until sugar dissolves. Reduce heat and simmer for 5 minutes. If using vanilla extract, stir in after removing from heat.
- Remove a hot jar from canner using jar lifter. Drain pear pieces and pack tightly into jar, leaving 1/2 inch headspace. Ladle hot vanilla syrup over pears, covering completely. Use a chopstick to release air bubbles. Wipe jar rim with clean, damp towel. Center lid on jar and screw on band until fingertip-tight.
- Place filled jars back into canner, ensuring they are covered by at least 1 inch of water. Bring to a full rolling boil. Process pint jars for 20 minutes, quart jars for 25 minutes. Adjust for altitude if above 1,000 feet (add 5 minutes per 1,000 feet).
- After processing, turn off heat and let jars sit in water for 5 minutes. Remove with jar lifter and place on a towel-lined counter, leaving space between jars. Do not tighten bands or touch lids. Cool completely for 12-24 hours. Check seals by pressing center of each lid (should be firm and not flex). Remove bands and test seal by lifting jar by lid alone. Store sealed jars in cool, dark place. Refrigerate unsealed jars and use within a week.
Notes
Use firm ripe pears; slightly underripe is better. Don’t overcook pears before canning. Keep workspace clean to ensure seals. Label jars with date and variety. For best quality, use within a year. Check for spoilage before eating.
Nutrition
- Serving Size: 1/2 cup pears with s
- Calories: 120
- Sugar: 26
- Carbohydrates: 31
- Fiber: 3
Keywords: canned pears, vanilla syrup, homemade canning, pear recipe, water bath canning, vanilla pears, easy canning recipe


