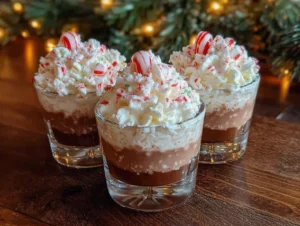
My friend Jenna wasn’t trying to impress anyone. I’d stopped by her place on a random Tuesday to drop off a book I’d borrowed, and the smell hit me before I even got through the doorway. It was this incredible mix of rich chocolate and cool peppermint, the kind of scent that makes you stop mid-sentence and just breathe in. I found her in the kitchen, casually spooning a dark, glossy mixture into those little plastic shot cups, and she looked up like I was the one being weird for reacting. “Oh, these?” she said, wiping a chocolate smear off her counter with her sleeve. “They’re just something I threw together for the game this weekend.” She said it like it was nothing, like she hadn’t just created the most irresistible thing I’d smelled in months. I mean, honestly, I stood there for a solid minute, just watching her work. She wasn’t measuring anything precisely, just tasting and adjusting, the whole process so effortless it almost felt private. That’s the thing about the best recipes, you know? They don’t come from a fancy test kitchen or a stressed-out host trying too hard. They come from someone who’s made something so many times they don’t even think about it anymore. Jenna handed me one to try, still warm from the pour, and I swear I closed my eyes. The chocolate was deep and smooth, the peppermint was cool without being medicinal, and the texture was this perfect jiggly-creamy thing I’d never experienced before. I asked her for the recipe right there, standing in her messy kitchen with a spoon in my hand, and she just shrugged and rattled it off from memory. Maybe you’ve been in that situation too, where you taste something and immediately know you’re going to be making it for years. That’s what these Party-Perfect Peppermint Chocolate Jello Shots are to me now. They’re the recipe I bring to every gathering, the one people ask about before they’ve even finished their first one, and the one that makes me feel like I’ve got a secret weapon in my hosting arsenal.
Why You’ll Love This Recipe
Let me tell you, I’ve made these jello shots for everything from casual Sunday football parties to my sister’s engagement dinner, and they never fail to steal the show. They’re the kind of dessert cocktail that makes people do a double-take, then reach for a second one before they’ve even finished their first. Here’s why you’ll keep coming back to this recipe:
- Crowd-Pleasing Flavor: The combination of rich chocolate and cool peppermint is a classic for a reason. It’s festive without being overwhelming, and it appeals to just about everyone.
- Make-Ahead Magic: These need to set in the fridge for a few hours, which means you can prep them the night before your party. No last-minute stress, no juggling hot pans while your guests are arriving.
- Perfect for Parties: They’re individual, portable, and easy to serve. No slicing, no plating, no fuss. Just grab and go.
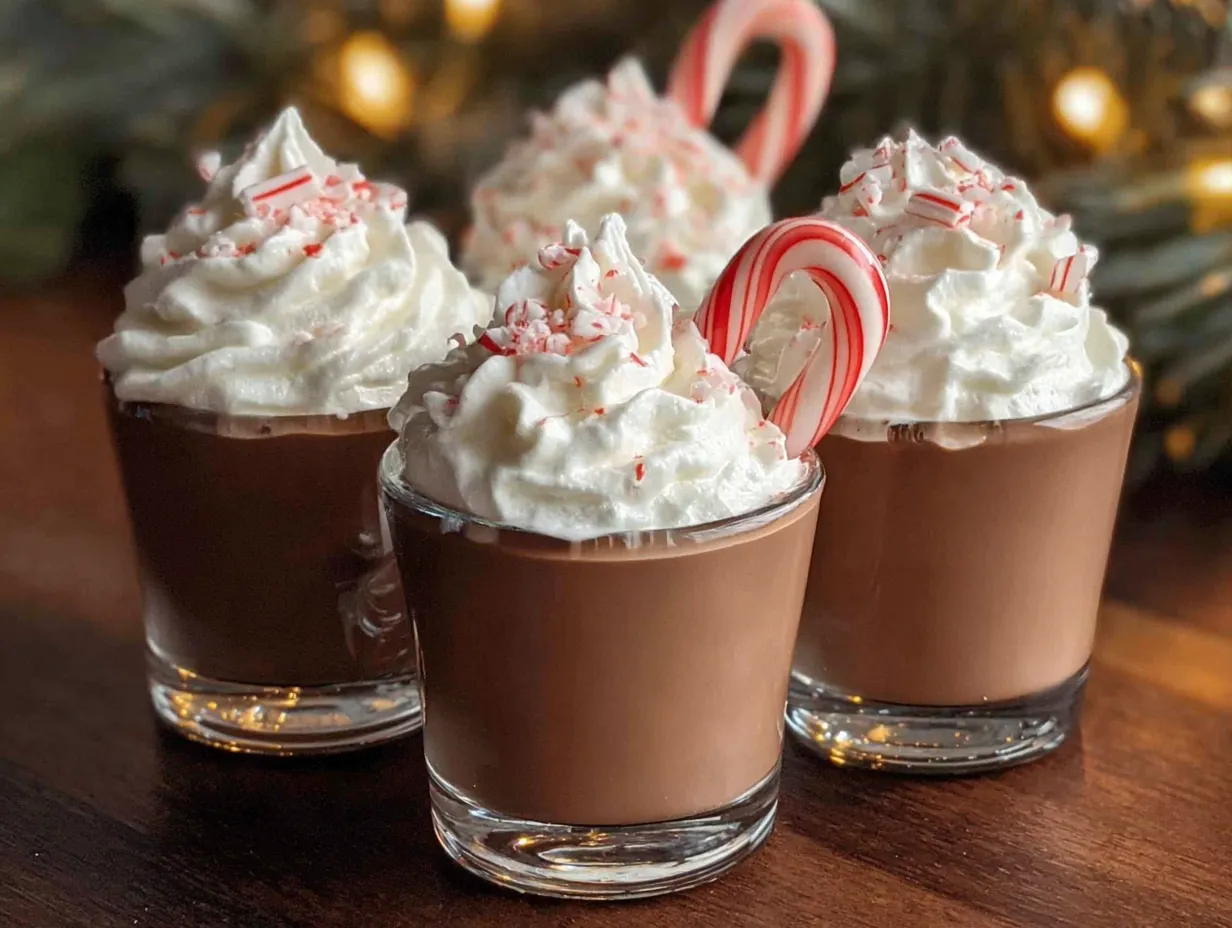
- Impressive Presentation: The layered look with the creamy white top and the dark chocolate bottom is genuinely beautiful. It looks like you spent way more time on them than you actually did.
- Simple Ingredients: You probably already have most of these in your pantry. No weird specialty items, no expensive liqueurs you’ll never use again.
What makes these different from other jello shots is the texture. Most jello shots are just, well, jiggly. But this recipe uses a combination of sweetened condensed milk and unflavored gelatin for the top layer, creating this creamy, almost pudding-like texture that contrasts perfectly with the firm, fudgy chocolate bottom. It’s not just a jello shot, it’s a little dessert experience. And honestly, it’s the kind of thing that makes you feel like a genius host without actually having to do much work. I’ve tested this recipe at least a dozen times, tweaking the ratios and trying different vodkas, and this version is the one that gets the most “oh wow” reactions. It’s comfort food with a kick, perfect for impressing your guests without breaking a sweat.
What Ingredients You Will Need
This recipe uses simple, mostly pantry-staple ingredients to create something that tastes surprisingly sophisticated. The magic is really in how they work together, so don’t be tempted to skip or swap too much on your first try. Here’s what you’ll need:
For the Chocolate Layer
- 1 box (3 ounces) chocolate gelatin dessert mix — I prefer Jell-O brand for the most consistent results, but any store brand will work fine. The dark chocolate flavor is key here, so avoid using sugar-free versions for this layer as they can have a slightly different texture.
- 1 cup boiling water — This dissolves the gelatin completely. Make sure it’s actually boiling, not just hot from the tap.
- 1/2 cup cold vodka — A good quality mid-range vodka works best. You don’t need top-shelf stuff here, but avoid the bottom-shelf plastic bottle vodkas. They can leave an unpleasant aftertaste that the peppermint won’t fully cover.
- 1/4 cup cold water — This helps cool the mixture down so the alcohol doesn’t evaporate too quickly.
For the Creamy Peppermint Layer
- 1 can (14 ounces) sweetened condensed milk — This is non-negotiable for the creamy texture. Don’t try to substitute evaporated milk or regular milk, it won’t set up the same way.
- 2 envelopes (about 2 tablespoons) unflavored gelatin — Knox brand is my go-to. This is what gives the top layer its structure without making it rubbery.
- 1/2 cup cold water — For blooming the gelatin.
- 1/2 cup boiling water — To dissolve the bloomed gelatin.
- 1/2 cup cold vodka — Again, use something you’d be happy to sip on its own.
- 1 teaspoon peppermint extract — Pure peppermint extract is best. Avoid peppermint oil, which is much stronger and can easily overpower everything. Start with 1 teaspoon and taste it before you pour. I’ve made the mistake of using a full tablespoon before, and let me tell you, it tasted like toothpaste. Not a good look for a party.
- Red food coloring (optional) — A few drops give the top layer a pretty pink hue that makes the peppermint flavor more visually obvious. I usually skip it, but if you’re going for a festive look, it’s a nice touch.
For Garnish (Optional but Recommended)
- Whipped cream — A tiny dollop on top makes these feel extra special.
- Crushed candy canes or peppermint candies — Adds a nice crunch and makes them look even more holiday-party ready.
- Chocolate shavings — A little sprinkle on top of the whipped cream ties it all together.
Equipment Needed
You don’t need anything fancy for these, which is part of their charm. Here’s what you’ll need to have on hand:
- 2-cup liquid measuring cup — This is perfect for mixing the gelatin because the spout makes pouring into the tiny cups so much easier. I’ve tried using a regular bowl, and let me tell you, you will spill. Trust me on this one.
- Small saucepan — For boiling water. You could also use an electric kettle if you have one.
- Whisk — A small whisk works best for getting the gelatin fully dissolved without lumps.
- 2-ounce plastic shot cups with lids — You can find these at any party supply store or online. A pack of 50 is usually under $10. I recommend getting the ones with lids because they stack so much easier in the fridge.
- A baking sheet or large tray — To hold the filled cups while they set in the fridge. This is crucial because those little cups are tippy, and you do not want to clean up spilled jello shot mixture from your fridge shelves.
- Measuring spoons — For the peppermint extract.
- Small bowl — For blooming the unflavored gelatin.
If you don’t have a liquid measuring cup with a spout, a clean pitcher or even a large spoon to transfer the mixture will work. It’s just a bit messier. And if you’re using disposable cups without lids, just cover the tray with plastic wrap. It’s not as neat, but it gets the job done.
Preparation Method
This recipe has two distinct layers, so you’ll be working in stages. Don’t rush it. The waiting time between layers is what gives these shots their beautiful, professional look. Here’s how to do it:
Step 1: Prepare Your Workspace
Before you start mixing anything, arrange your shot cups on a baking sheet or tray. I usually do about 20 to 24 cups per batch, but you can adjust depending on how many you need. Make sure they’re stable and not touching each other. This will save you so much hassle later.
Step 2: Make the Chocolate Layer
In your liquid measuring cup, empty the entire box of chocolate gelatin dessert mix. Pour in 1 cup of boiling water and whisk vigorously for about 2 minutes, until the powder is completely dissolved. You shouldn’t see any granules at the bottom. Add the 1/2 cup of cold vodka and the 1/4 cup of cold water, and whisk again until everything is combined. The mixture should be a deep, dark brown and smell intensely of chocolate. Let it cool for about 5 minutes at room temperature. If it’s too hot when you pour it, it can slightly melt the plastic cups or cause condensation later.
Step 3: Fill the Chocolate Layer
Carefully pour the chocolate mixture into each shot cup, filling them about halfway. I use a small ladle or just pour directly from the measuring cup spout. Don’t fill them more than halfway, you need room for the creamy top layer. Once all cups are filled, carefully transfer the baking sheet to the refrigerator. Let them set for at least 1 hour, or until the chocolate layer is firm to the touch. I usually leave them for 90 minutes to be safe. Patience is key here. If the bottom layer isn’t fully set, the top layer will mix in and you’ll lose that beautiful two-tone effect.
Step 4: Bloom the Unflavored Gelatin
While the chocolate layer is setting, you can prep the peppermint layer. In a small bowl, sprinkle the 2 envelopes of unflavored gelatin over the 1/2 cup of cold water. Don’t stir it, just let it sit. This is called blooming, and it allows the gelatin to absorb the water and dissolve evenly later. Let it sit for about 5 to 10 minutes. It will look like a thick, solid mass. That’s exactly what you want.
Step 5: Make the Creamy Peppermint Layer
In your clean liquid measuring cup (or a clean bowl), pour the entire can of sweetened condensed milk. In a small saucepan, bring the 1/2 cup of water to a boil. Once boiling, pour it over the bloomed gelatin and whisk until the gelatin is completely dissolved. It should be a clear, slightly viscous liquid. Pour this gelatin mixture into the sweetened condensed milk and whisk until smooth. Add the 1/2 cup of cold vodka and the 1 teaspoon of peppermint extract. Whisk again. Taste it. Seriously, dip a clean spoon in and taste it. The peppermint should be present but not overwhelming. If you want it stronger, add another 1/4 teaspoon. If you’re using red food coloring, add a few drops now and stir until you get a pale pink color you like.
Step 6: Assemble the Shots
Take the baking sheet with the set chocolate layer out of the fridge. The chocolate should be firm and slightly jiggly but not liquid. Pour the creamy peppermint mixture on top of each chocolate layer, filling the cups almost to the top. Leave just a tiny bit of space for a garnish if you’re adding one. Work quickly but carefully, as the peppermint mixture will start to set as it cools. Once all cups are filled, return the baking sheet to the refrigerator. Let them set for at least 4 hours, but overnight is even better. The longer they set, the firmer and cleaner the layers will be.
Step 7: Garnish and Serve
Just before serving, add a small dollop of whipped cream to each shot, if desired. Sprinkle with crushed candy canes or chocolate shavings. The garnish not only looks gorgeous but also adds a little textural contrast. Serve them cold, straight from the fridge. They’ll hold their shape for about 30 minutes at room temperature, but they’re best enjoyed chilled.
Cooking Tips & Techniques
I’ve made these shots more times than I can count, and I’ve definitely learned a few things the hard way. Here are my best tips for getting them perfect every time:
Don’t skip the blooming step for the unflavored gelatin. I know it seems fussy, but if you just dump the powder into hot liquid, you’ll end up with lumps that never dissolve. The texture will be grainy instead of silky smooth. I learned this lesson when I was rushing to make a batch for a New Year’s party, and the top layer turned out with these weird little gelatin globs. Not my finest moment.
Use a liquid measuring cup with a spout for pouring. This might seem like a small thing, but it makes a huge difference when you’re filling 20+ tiny cups. I’ve tried using a regular bowl and a ladle, and I ended up with chocolate mixture all over my counter. The spout gives you so much more control.
Let the chocolate layer cool before pouring. If you pour boiling hot gelatin into plastic cups, they can warp or even melt. I let mine sit for at least 5 minutes after mixing. The mixture should be warm but not hot to the touch.
Patience is your friend between layers. I can’t stress this enough. The chocolate layer needs to be fully set before you add the peppermint layer. If it’s even slightly liquid, the two layers will mix and you’ll end up with a muddy brown color instead of a clean two-tone look. Give it at least an hour, preferably 90 minutes.
Taste your peppermint layer before pouring. Peppermint extract can vary wildly in strength between brands. What’s perfectly minty with one brand might be overpowering with another. Taste it, adjust it, and then pour. I once used a new brand of extract and didn’t taste it first, and the shots came out tasting like mouthwash. My friends were polite about it, but I could tell.
Plan your timing. These need at least 4 hours to set, but overnight is ideal. I usually make them the day before a party, which means I can just pull them out of the fridge when guests arrive and focus on other things. It’s a huge stress reliever.
Variations & Adaptations
One of the best things about this recipe is how adaptable it is. Here are some variations I’ve tried and loved:
White Chocolate Peppermint: Swap the chocolate gelatin for white chocolate pudding mix. The flavor is sweeter and more delicate, and the two creamy layers look stunning together. Just keep in mind that white chocolate sets a little softer, so you might need an extra 30 minutes of chilling time.
Mocha Madness: Add 1 teaspoon of instant espresso powder to the chocolate layer along with the boiling water. It deepens the chocolate flavor and adds a subtle coffee note that pairs beautifully with the peppermint. I did this for a friend’s birthday party, and it was the first batch to disappear.
Dairy-Free Version: Use a can of full-fat coconut milk instead of sweetened condensed milk. The texture will be slightly less creamy, but it still sets up nicely. You might need to add an extra 1/2 teaspoon of unflavored gelatin to compensate for the lower sugar content. I’ve tested this for a friend with a dairy allergy, and it worked surprisingly well.
Extra Boozy: If you’re making these for an adults-only crowd, you can increase the vodka by up to 1/4 cup in each layer. Just reduce the cold water by the same amount. Keep in mind that more alcohol means a slightly softer set, so you’ll need to chill them for longer. I’d say at least 6 hours for a firmer texture.
Peppermint Patty Twist: For an even more decadent version, add a layer of crushed chocolate sandwich cookies at the bottom of each cup before pouring the chocolate layer. It creates a crunchy, cookie crust that’s absolutely divine. I did this for a Super Bowl party, and people were literally scraping the cups with their fingers to get every last crumb.
Serving & Storage Suggestions
These shots are best served cold, straight from the fridge. I like to arrange them on a large platter or tray, grouped together for a beautiful, cohesive look. If you’re garnishing them with whipped cream and crushed candy canes, do that right before serving so the whipped cream doesn’t deflate.
For a party, I usually set up a little jello shot station with the shots on a tray, a bowl of extra crushed candy canes, and a can of whipped cream. Guests can garnish their own, which is always a fun interactive element.
These pair beautifully with other chocolate desserts, like brownies or chocolate chip cookies. For drinks, they go well with coffee, hot chocolate, or even a bold red wine. I once served them alongside a dark chocolate mousse, and the combination was incredible.
Storage: Keep the shots in their cups with the lids on in the refrigerator. They’ll stay good for up to 5 days, though the texture is best within the first 2 to 3 days. After that, the gelatin can start to break down slightly, making them a bit softer.
Freezing: I don’t recommend freezing these. The texture becomes icy and grainy when thawed, and the layers can separate. If you need to make them far in advance, just prepare them up to 2 days ahead and keep them refrigerated.
Reheating: These are meant to be served cold, so no reheating needed. If they’ve been sitting out for a while and have softened, just pop them back in the fridge for 30 minutes to firm up again.
Nutritional Information & Benefits
Let’s be honest, these are a treat. They’re not health food, and that’s okay. But here’s a rough estimate of what you’re looking at per shot (assuming 24 shots per batch):
- Calories: Approximately 110-130 calories per shot
- Fat: 2-3 grams (mostly from the sweetened condensed milk)
- Carbohydrates: 15-18 grams (mainly from sugar)
- Protein: 2-3 grams (from the gelatin and milk)
- Alcohol content: About 0.5 ounces of vodka per shot
On the plus side, the gelatin provides a small amount of protein and collagen, which is good for your skin and joints. The peppermint extract can aid digestion, which is always helpful at a party where you might be eating and drinking a bit more than usual. And honestly, sometimes you just need a little treat that makes you feel good. These shots are about celebration and connection, not nutrition. They’re the little something special you bring to a gathering to make people smile, and that has its own kind of value.
If you’re watching your sugar intake, you could try using sugar-free chocolate gelatin and a reduced-sugar sweetened condensed milk alternative, but the texture will be different. I’ve tested it, and it’s okay, but not nearly as luscious.
Conclusion
These Party-Perfect Peppermint Chocolate Jello Shots are truly something special. They’re the kind of recipe that makes you look like a rockstar host without requiring hours of complicated work. The combination of rich chocolate and cool peppermint is timeless, the two-tone presentation is stunning, and the make-ahead convenience means you can actually enjoy your own party instead of being stuck in the kitchen.
I love that this recipe came from a completely casual moment, from a friend who wasn’t trying to impress anyone. It reminds me that the best recipes often come from the most unassuming places. And every time I make these shots, I think of Jenna’s messy kitchen and her casual shrug, and I smile.
I’d love to hear how these turn out for you! Have you tried any fun variations? Do you have a favorite garnish or a special occasion you’re planning to make them for? Drop a comment below and let me know. And if you share a photo on social media, tag me so I can see your beautiful creations. Happy hosting, and cheers to good friends and great food!
Frequently Asked Questions
Can I use a different type of alcohol instead of vodka?
Absolutely! Vodka is great because it’s neutral and doesn’t compete with the flavors, but you can use white rum, unflavored moonshine, or even a peppermint schnapps for an extra minty kick. Just keep in mind that flavored alcohols will change the taste, so adjust your extract accordingly.
How far in advance can I make these?
You can make them up to 2 days before your party. They need at least 4 hours to set, but overnight is ideal. After 2 days, the texture can start to soften slightly, so I wouldn’t push it much beyond that.
Can I make these without alcohol?
Yes! Simply replace the vodka with an equal amount of cold water or cold milk for the creamy layer. They’ll set up just the same, and they’ll still taste delicious. They’re great for family gatherings where kids might be around.
Why did my layers mix together?
This usually happens when the bottom chocolate layer isn’t fully set before you add the top layer. Make sure you give the chocolate layer at least an hour, preferably 90 minutes, in the fridge. It should be firm to the touch, not jiggly.
Can I use a different flavor of gelatin for the bottom layer?
Of course! Strawberry, raspberry, or even cherry would work well with the peppermint top layer. Just keep in mind that the flavor combination will be different. I’ve tried strawberry peppermint, and it was surprisingly good, like a chocolate-free version of a peppermint patty.
Pin This Recipe!
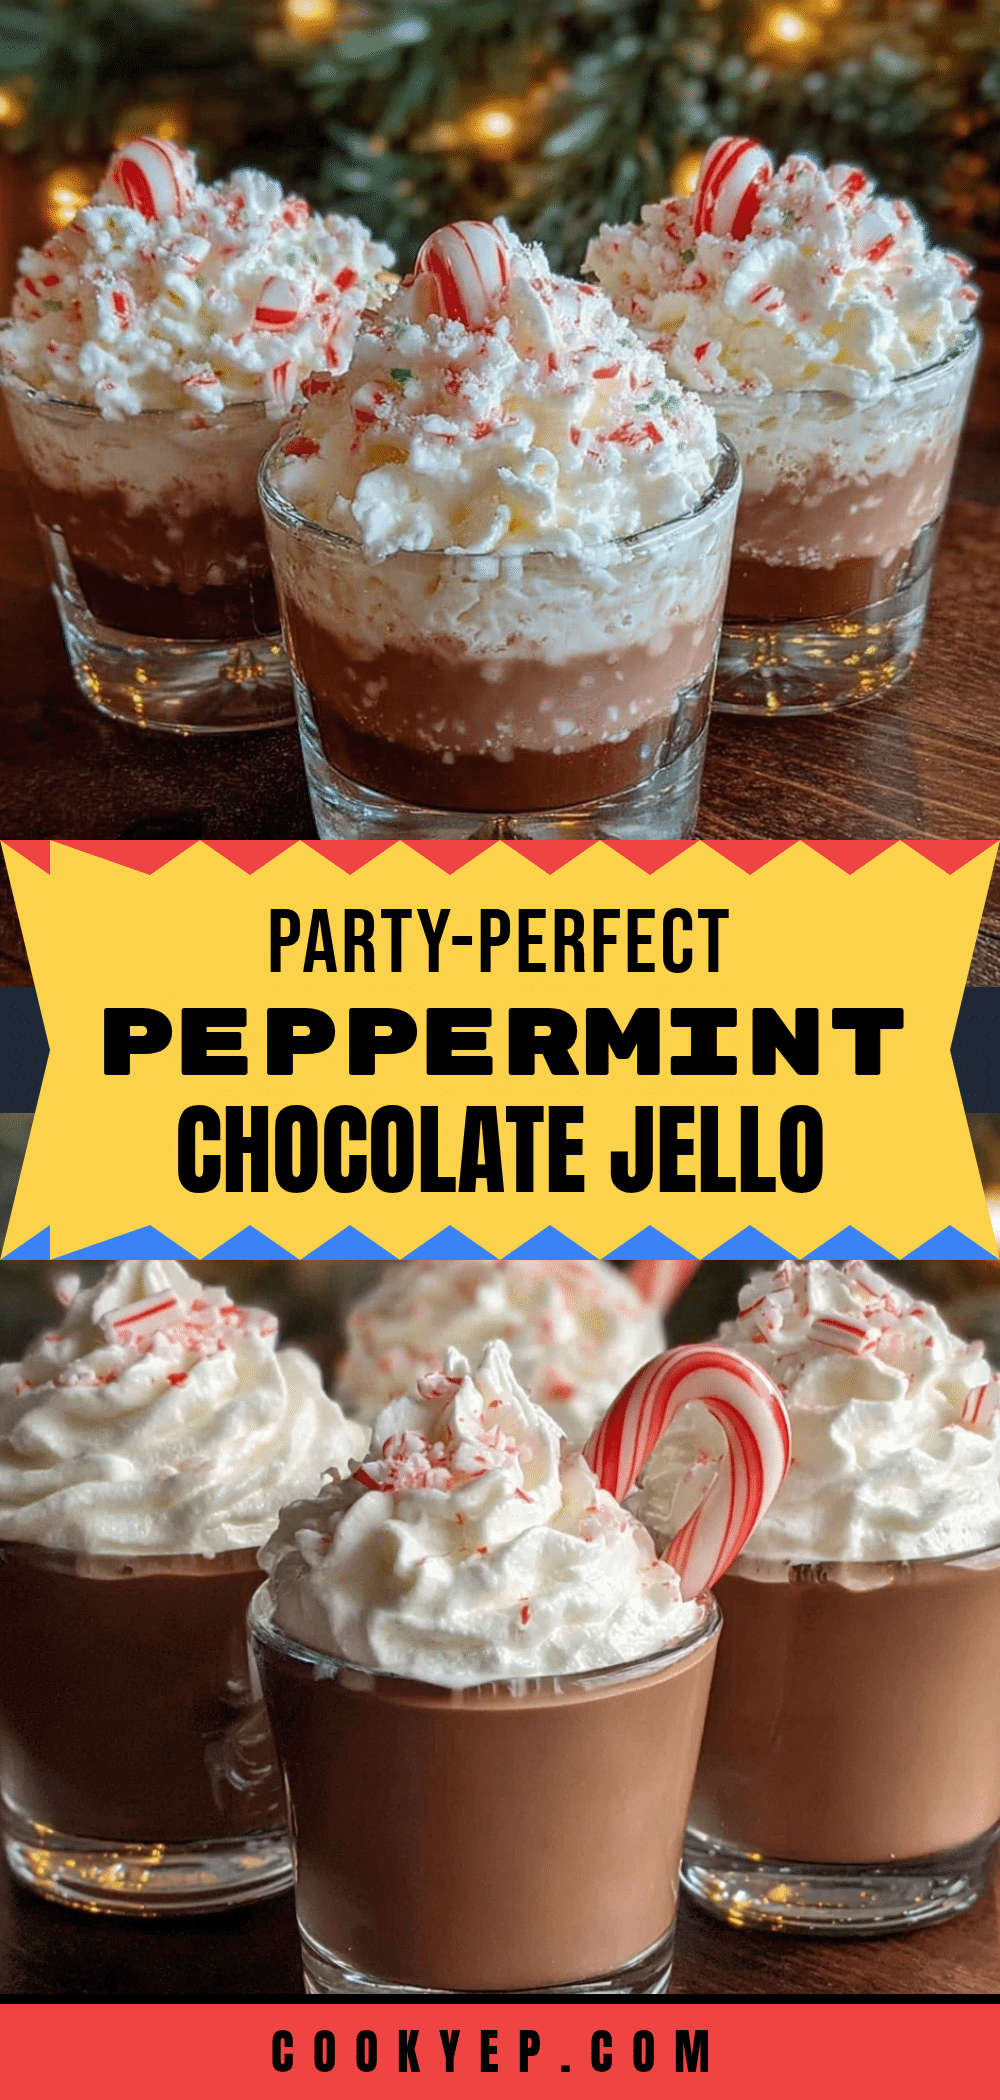
Party Perfect Peppermint Chocolate Jello Shots
These layered jello shots combine a rich chocolate bottom with a creamy peppermint top for a festive, make-ahead dessert cocktail that’s perfect for any gathering.
- Prep Time: 20 minutes
- Cook Time: 0 minutes
- Total Time: 4 hours 20 minutes (includes setting time)
- Yield: 20-24 servings 1x
- Category: Dessert
- Cuisine: American
Ingredients
- 1 box (3 ounces) chocolate gelatin dessert mix
- 1 cup boiling water
- 1/2 cup cold vodka
- 1/4 cup cold water
- 1 can (14 ounces) sweetened condensed milk
- 2 envelopes (about 2 tablespoons) unflavored gelatin
- 1/2 cup cold water
- 1/2 cup boiling water
- 1/2 cup cold vodka
- 1 teaspoon peppermint extract
- Red food coloring (optional)
- Whipped cream (for garnish, optional)
- Crushed candy canes or peppermint candies (for garnish, optional)
- Chocolate shavings (for garnish, optional)
Instructions
- Arrange 20-24 shot cups on a baking sheet or tray.
- In a liquid measuring cup, empty the chocolate gelatin mix. Add 1 cup boiling water and whisk for 2 minutes until dissolved. Add 1/2 cup cold vodka and 1/4 cup cold water, whisk to combine. Let cool 5 minutes.
- Pour chocolate mixture into each cup, filling halfway. Refrigerate for at least 1 hour (90 minutes preferred) until firm.
- In a small bowl, sprinkle unflavored gelatin over 1/2 cup cold water. Let bloom for 5-10 minutes.
- In a clean liquid measuring cup, pour the sweetened condensed milk. In a small saucepan, bring 1/2 cup water to a boil. Pour over bloomed gelatin and whisk until dissolved. Add to condensed milk and whisk. Add 1/2 cup cold vodka and 1 teaspoon peppermint extract, whisk. Taste and adjust. Add food coloring if desired.
- Remove baking sheet from fridge. Pour peppermint mixture over set chocolate layer, filling almost to the top. Return to fridge and let set for at least 4 hours, preferably overnight.
- Just before serving, garnish with whipped cream, crushed candy canes, and/or chocolate shavings. Serve cold.
Notes
Don’t skip the blooming step for unflavored gelatin. Use a liquid measuring cup with a spout for easy pouring. Let chocolate layer cool before pouring into cups. Patience between layers is crucial for clean two-tone effect. Taste peppermint layer before pouring. Plan timing: these need at least 4 hours to set, overnight is ideal.
Nutrition
- Serving Size: 1 shot
- Calories: 120
- Sugar: 15
- Sodium: 50
- Fat: 2.5
- Saturated Fat: 1.5
- Carbohydrates: 16
- Protein: 2.5
Keywords: jello shots, peppermint, chocolate, party dessert, layered jello shots, holiday dessert, make-ahead dessert