There used to be a tiny bakery on a side street in Portland, Oregon, called “The Little No-Wheat Bakery” that made the most incredible pumpkin pie bar. When they closed their doors back in 2017, I honestly felt a little lost. I mean, it sounds dramatic, but finding a gluten-free dessert that actually tasted like the real thing was such a rare win. After nine tries — and one particularly sad batch that turned into pumpkin-flavored gravel — I finally got it. These gluten-free pumpkin pie bars are my love letter to that bakery.
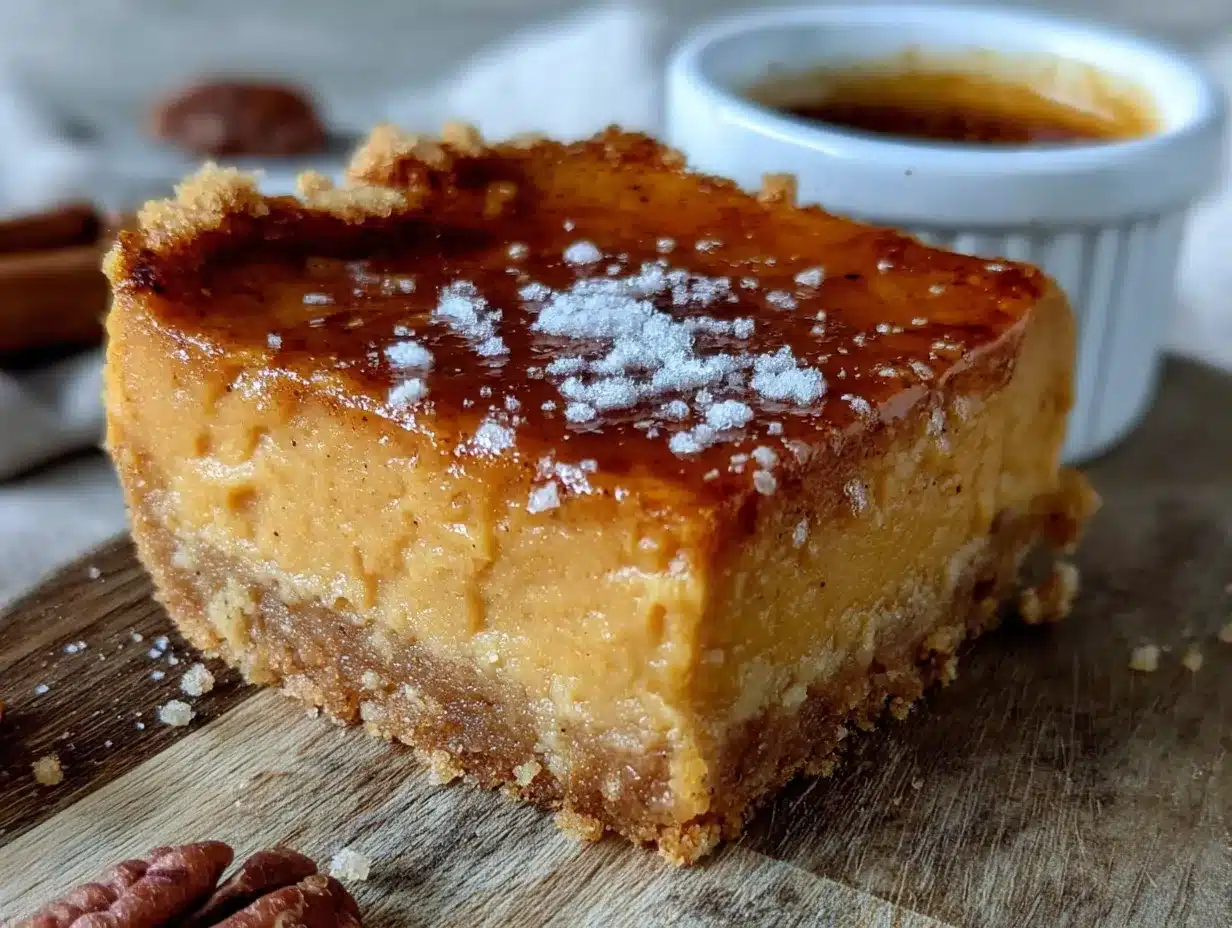
The first time I made these, I was so nervous. I had a friend coming over who is a total pumpkin pie purist, and I was convinced she would sniff out the gluten-free flour and give me that polite smile. But after she took a bite, she just closed her eyes and didn’t say a word for a full ten seconds. That silence was the best compliment I could have asked for. These bars have a buttery, shortbread-like crust that holds together perfectly — no crumbling disasters — and a creamy, spiced pumpkin filling that sets up just like a classic pie.
What makes this recipe special is the texture. You know that feeling when you bite into a gluten-free dessert and it is either gritty or gummy? Not here. The combination of oat flour and almond flour creates a crust that is tender and sturdy, while the filling uses a little cornstarch to get that perfect sliceable custard. Maybe you have been let down by gluten-free desserts before. I have been there too. But these bars are the real deal. They are the kind of dessert you bring to a Friendsgiving and no one even asks if they are gluten-free — they just ask for the recipe.
Why You’ll Love This Recipe
I have tested this recipe more times than I care to admit, and I can tell you with full confidence that it works. It is not just another gluten-free dessert that you tolerate — it is the one you crave. Here is why these gluten-free pumpkin pie bars will become your new fall favorite:
- Quick & Easy: The entire process takes about 45 minutes of active time, plus chilling. No rolling dough, no fussy pie crust crimping. Just press, pour, and bake.
- Simple Ingredients: You likely already have oat flour and almond flour in your pantry if you bake gluten-free. No weird gums or hard-to-find starches here.
- Perfect for Fall Gatherings: Great for Thanksgiving, Friendsgiving, or a cozy Sunday afternoon when you want something that smells like autumn.
- Crowd-Pleaser: I have served these to gluten-free and gluten-eating friends alike, and they disappear every single time.
- Unbelievably Delicious: The buttery crust and silky pumpkin filling create a texture combination that is pure comfort.
What sets this recipe apart is the crust. Instead of the usual crumbly mess, I use a press-in crust made from oat flour and almond flour that stays together beautifully. The filling is not overly sweet — it lets the pumpkin and warm spices shine. Honestly, this is comfort food reimagined. It is faster than a traditional pie, naturally gluten-free, and it gives you that same soul-soothing satisfaction without the stress. Perfect for impressing guests without breaking a sweat.
What Ingredients You Will Need
This recipe uses simple, wholesome ingredients to deliver that classic pumpkin pie flavor with a perfectly sturdy crust. Most of these are pantry staples if you bake gluten-free regularly.
For the Crust
- 1 ½ cups oat flour (certified gluten-free if needed) — gives the crust a tender, slightly nutty flavor. I prefer Bob’s Red Mill for consistency.
- 1 cup almond flour — adds richness and helps the crust hold together without being greasy. (Use finely ground almond flour, not almond meal.)
- ¼ cup coconut sugar (or packed light brown sugar) — for a hint of sweetness in the crust.
- ½ teaspoon salt — balances the sweetness.
- ½ cup cold unsalted butter, cut into small cubes — you can also use a vegan butter stick for a dairy-free option.
- 1 large egg yolk — helps bind the crust together.
- 1 teaspoon vanilla extract — for warmth and depth.
For the Pumpkin Filling
- 1 can (15 oz) pumpkin puree — not pumpkin pie filling. Make sure it is 100% pure pumpkin. I like Libby’s for its consistent texture.
- ¾ cup coconut sugar (or packed light brown sugar) — I find coconut sugar gives a deeper, caramel-like sweetness.
- 2 large eggs, room temperature — for structure and richness.
- 1 cup full-fat canned coconut milk (or heavy cream) — for a creamy, luscious filling. Coconut milk adds a subtle richness without a strong coconut taste.
- 2 tablespoons cornstarch — this is the key to a sliceable filling without eggs. Arrowroot powder also works.
- 2 teaspoons pumpkin pie spice — or make your own with cinnamon, ginger, nutmeg, and cloves.
- ½ teaspoon salt — enhances all the flavors.
Optional Toppings
- Whipped cream or coconut whipped cream — for serving.
- A light dusting of cinnamon — just before serving.
Equipment Needed
You do not need a ton of fancy gadgets for this recipe, which is part of why I love it. Here is what you will need:
- 9×9-inch square baking pan — glass or metal works fine. I prefer a metal pan for even browning on the crust. If you only have an 8×8, the bars will be slightly thicker and need a few extra minutes of baking time.
- Parchment paper — essential for easy removal. Leave an overhang on two sides so you can lift the bars out cleanly.
- Food processor — for making the crust. You can also use a pastry cutter or your fingers, but the food processor makes it quick and even. I have a Cuisinart that I have had for years, and it handles the cold butter beautifully.
- Large mixing bowls — one for the crust, one for the filling.
- Whisk — for the filling. A hand whisk works perfectly.
- Rubber spatula — for scraping every last bit of filling into the pan.
- Measuring cups and spoons — accurate measurements matter in gluten-free baking.
If you do not have a food processor, you can cut the cold butter into the oat flour and almond flour using a pastry blender or even two forks. It takes a little more elbow grease, but it works. Just make sure the butter stays cold.
Preparation Method
Let me walk you through this step by step. Trust me, if I can nail this after nine tries, you will get it on your first.
Step 1: Prep Your Pan and Preheat
Preheat your oven to 350°F (175°C). Line your 9×9-inch baking pan with parchment paper, leaving an overhang on two opposite sides. This makes lifting the bars out so much easier later. Lightly grease the parchment with a little butter or cooking spray.
Step 2: Make the Crust
In a food processor, combine 1 ½ cups oat flour, 1 cup almond flour, ¼ cup coconut sugar, and ½ teaspoon salt. Pulse a few times to mix. Add the ½ cup cold butter cubes and pulse until the mixture looks like coarse meal with some pea-sized butter pieces remaining. You want those little butter chunks — they create flakiness.
Add 1 large egg yolk and 1 teaspoon vanilla extract. Pulse again until the dough starts to clump together. It should feel like slightly damp sand that holds together when you squeeze it. If it seems too dry, add 1 tablespoon of cold water and pulse once more.
Press the dough evenly into the prepared pan. Use the bottom of a measuring cup or a flat glass to get it nice and even. Prick the crust all over with a fork — this prevents puffing. Bake for 15 minutes, until it is lightly golden and set. Set aside to cool slightly while you make the filling.
Step 3: Make the Pumpkin Filling
In a large bowl, whisk together 1 can (15 oz) pumpkin puree, ¾ cup coconut sugar, 2 large eggs, 1 cup full-fat coconut milk, 2 tablespoons cornstarch, 2 teaspoons pumpkin pie spice, and ½ teaspoon salt. Whisk until completely smooth and no lumps remain. The mixture should be thick but pourable.
Here is a tip I learned the hard way: make sure your eggs and coconut milk are at room temperature. Cold ingredients can make the filling seize up and create a less smooth texture. I usually set them on the counter about 30 minutes before I start.
Step 4: Assemble and Bake
Pour the pumpkin filling over the pre-baked crust. Gently tilt the pan to spread it evenly, or use a spatula. Bake at 350°F (175°C) for 35–40 minutes, until the edges are set and the center jiggles just slightly when you gently shake the pan. It will continue to set as it cools.
I remember the first time I made this, I was so worried about underbaking that I left it in for an extra 10 minutes. The edges got a little too firm, and the center cracked. Learn from my mistake: take it out when the center still has a slight wobble. It will firm up beautifully as it cools.
Step 5: Cool and Chill
Let the bars cool completely in the pan on a wire rack. Once they are at room temperature, transfer the pan to the refrigerator and chill for at least 4 hours, or overnight. This step is non-negotiable. Chilling allows the filling to fully set so you can slice clean bars. I usually make these the day before I plan to serve them.
After chilling, use the parchment overhang to lift the entire block out of the pan. Place it on a cutting board and slice into 16 squares. For the cleanest cuts, wipe your knife clean between each slice.
Cooking Tips & Techniques
Over the course of those nine trials, I learned a few things that make a real difference. Let me share them so you do not have to repeat my mistakes.
Keep the butter cold. This is the number one rule for a flaky, tender crust. If the butter warms up too much, the crust will be dense and greasy. If your kitchen is warm, pop the crust in the fridge for 15 minutes before baking.
Do not overmix the crust. Once the dough starts clumping, stop. Overworking it develops gluten in the oat flour and makes the crust tough. We want it tender, not chewy.
Watch the baking time carefully. Every oven runs a little differently. Start checking at 30 minutes. The edges should be set and slightly puffed, but the center should still have a gentle jiggle. If you see cracks forming on the surface, the bars are overbaking.
Use a sharp knife for slicing. A dull knife will drag through the filling and mess up your clean edges. Run the knife under hot water, dry it off, and slice. Wipe clean between each cut.
Let it chill fully. I know it is tempting to cut into these bars while they are still warm, but trust me on this. Warm pumpkin filling is runny and messy. The 4-hour chill is what gives you those beautiful, clean slices you see in the photos.
Variations & Adaptations
One of the best things about this recipe is how flexible it is. Here are a few ways I have adapted it over the years:
Dairy-Free Version: Use vegan butter sticks (I like Earth Balance) in the crust and full-fat canned coconut milk in the filling. It works perfectly and no one will know the difference.
Nut-Free Version: If you have a nut allergy, replace the almond flour with an equal amount of sunflower seed flour or more oat flour. The texture will be a little different — slightly denser — but still delicious. Sunflower seed flour can turn a little green when baked, so do not be alarmed.
Spiced-Up Version: Add ½ teaspoon of ground ginger and a pinch of cayenne pepper to the filling for a warming, slightly spicy kick. I tried this one Thanksgiving and it was a huge hit with the adults.
Maple Pumpkin Bars: Swap the coconut sugar in the filling for ½ cup pure maple syrup. Reduce the coconut milk to ¾ cup to compensate for the extra liquid. The maple flavor pairs beautifully with the pumpkin.
Chocolate Drizzle: Melt ¼ cup dark chocolate chips with 1 teaspoon coconut oil and drizzle over the chilled bars. It sounds indulgent, and it is, but the chocolate adds a lovely richness.
Serving & Storage Suggestions
These gluten-free pumpkin pie bars are best served cold, straight from the fridge. The filling is firm and creamy, and the crust stays perfectly crisp. I like to let them sit at room temperature for about 5 minutes before serving — just enough to take the chill off without losing the structure.
For serving, a dollop of whipped cream or coconut whipped cream is classic. A light dusting of cinnamon on top adds a beautiful finish. These bars are also fantastic with a scoop of vanilla ice cream if you are feeling extra indulgent.
Storage: Keep the bars in an airtight container in the refrigerator for up to 5 days. The flavors actually deepen after a day or two, so do not be afraid to make them ahead. I honestly think they taste even better on day two.
Freezing: These bars freeze beautifully. Slice them, place them on a baking sheet in a single layer, and freeze until solid. Then transfer the frozen slices to a freezer-safe bag or container. They will keep for up to 3 months. To serve, thaw in the refrigerator overnight or at room temperature for about 30 minutes.
Reheating: I do not recommend reheating these bars. They are designed to be served cold. If you really want a warm dessert, try them at room temperature, but avoid the microwave — it will make the crust soggy.
Nutritional Information & Benefits
These bars are not just delicious — they also offer some nutritional perks thanks to the wholesome ingredients. Here is an approximate breakdown per bar (based on 16 servings):
- Calories: 210
- Fat: 14g
- Carbohydrates: 20g
- Fiber: 3g
- Sugar: 11g
- Protein: 5g
Health Benefits: Pumpkin is packed with vitamin A, which supports eye health and immune function. Oat flour provides soluble fiber, which is great for heart health. Almond flour adds healthy fats and vitamin E. By using coconut sugar instead of refined sugar, you get a lower glycemic index sweetener. That said, these are still a dessert — enjoy them as a treat, not a health food.
Dietary Considerations: This recipe is naturally gluten-free and can easily be made dairy-free and nut-free. It is vegetarian. Please note that it contains eggs and almonds.
Conclusion
These gluten-free pumpkin pie bars are everything I wanted them to be: a perfect, nostalgic fall dessert that just happens to be gluten-free. They have that buttery crust, that silky pumpkin filling, and that warm spice flavor that makes autumn feel like a hug. Whether you are gluten-free by necessity or by choice, or you are just looking for an easy dessert that everyone will love, these bars deliver.
I hope you give them a try and make them your own. Maybe you will add extra spice, or a chocolate drizzle, or serve them with a giant scoop of ice cream. That is the beauty of a good recipe — it is just a starting point. I would love to hear how they turn out for you. Drop a comment below and let me know if you tried any variations, or just share your honest thoughts. Happy baking, friends!
Frequently Asked Questions
Can I use canned pumpkin pie filling instead of pumpkin puree?
No, I would not recommend it. Canned pumpkin pie filling already has sugar and spices added, which will throw off the sweetness and texture of this recipe. Stick with 100% pure pumpkin puree for the best results.
Can I make this recipe nut-free?
Yes, absolutely. Replace the almond flour with an equal amount of sunflower seed flour or additional oat flour. The texture will be slightly different — a bit denser — but it will still be delicious. Just be aware that sunflower seed flour can turn a little green when baked, which is totally normal and safe to eat.
Why is my crust crumbly?
A crumbly crust usually means there was not enough moisture or the butter was not distributed properly. Make sure your butter is cold and cut into small cubes before pulsing in the food processor. Also, the dough should hold together when you squeeze it in your hand. If it does not, add a tablespoon of cold water and pulse again.
Can I freeze these pumpkin pie bars?
Yes, they freeze wonderfully. Slice the bars, freeze them on a baking sheet until solid, then transfer to a freezer-safe bag or container. They will keep for up to 3 months. Thaw in the refrigerator overnight before serving.
How do I get clean, neat slices?
Patience is key. Make sure the bars are fully chilled — at least 4 hours, preferably overnight. Use a sharp knife and wipe it clean between each cut. For extra clean edges, run the knife under hot water, dry it, and then slice.
Pin This Recipe!
Perfect Gluten-Free Pumpkin Pie Bars: Easy Fall Dessert
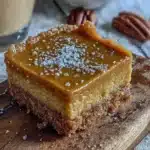
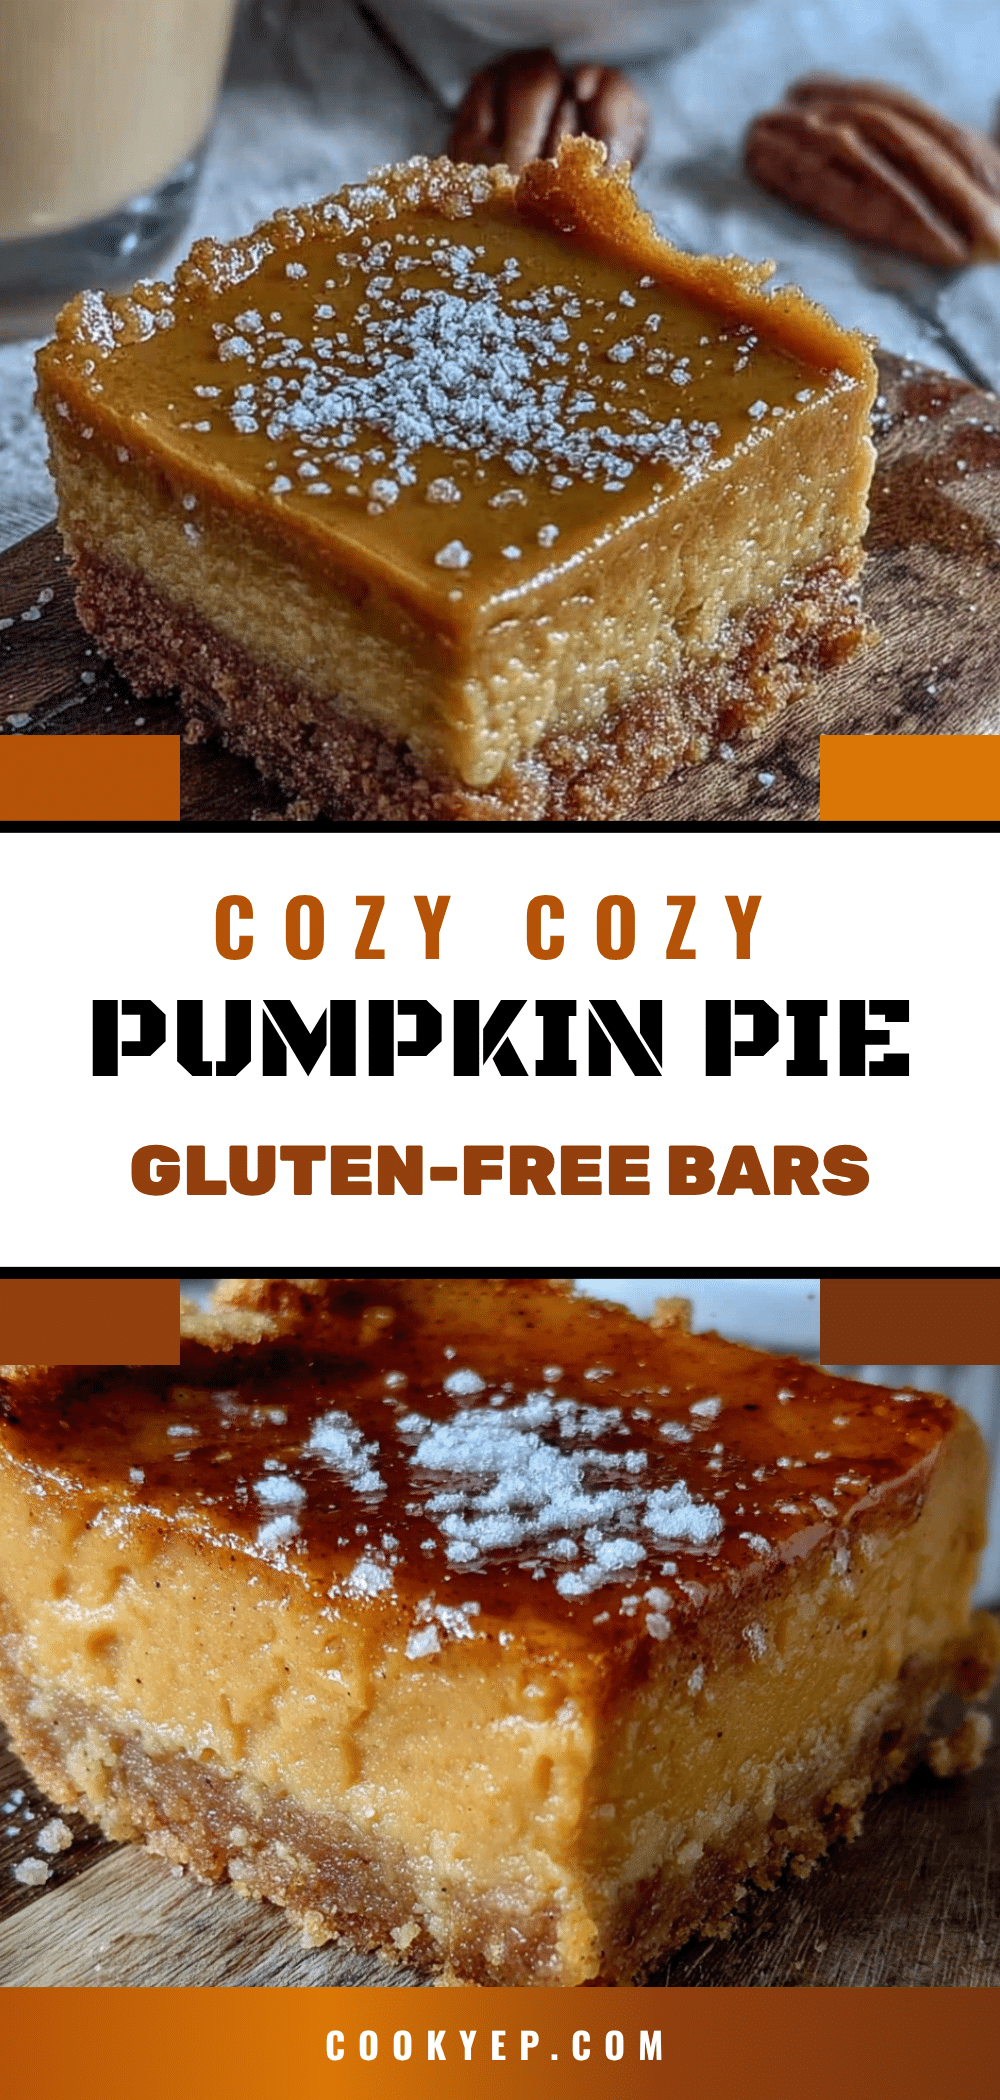
These gluten-free pumpkin pie bars feature a buttery, shortbread-like crust and a creamy, spiced pumpkin filling that sets up perfectly. They are the ultimate easy fall dessert that everyone will love, whether gluten-free or not.
- Prep Time: 45 minutes
- Cook Time: 35-40 minutes
- Total Time: 5 hours 20 minutes (including chilling)
- Yield: 16 bars 1x
- Category: Dessert
- Cuisine: American
Ingredients
- 1 ½ cups oat flour (certified gluten-free if needed)
- 1 cup almond flour (finely ground, not almond meal)
- ¼ cup coconut sugar (or packed light brown sugar)
- ½ teaspoon salt
- ½ cup cold unsalted butter, cut into small cubes
- 1 large egg yolk
- 1 teaspoon vanilla extract
- 1 can (15 oz) pumpkin puree (100% pure pumpkin)
- ¾ cup coconut sugar (or packed light brown sugar)
- 2 large eggs, room temperature
- 1 cup full-fat canned coconut milk (or heavy cream)
- 2 tablespoons cornstarch
- 2 teaspoons pumpkin pie spice
- ½ teaspoon salt
- Whipped cream or coconut whipped cream (optional, for serving)
- A light dusting of cinnamon (optional, for serving)
Instructions
- Preheat your oven to 350°F (175°C). Line a 9×9-inch baking pan with parchment paper, leaving an overhang on two opposite sides. Lightly grease the parchment with butter or cooking spray.
- Make the crust: In a food processor, combine 1 ½ cups oat flour, 1 cup almond flour, ¼ cup coconut sugar, and ½ teaspoon salt. Pulse to mix. Add the cold butter cubes and pulse until the mixture looks like coarse meal with some pea-sized butter pieces remaining.
- Add 1 large egg yolk and 1 teaspoon vanilla extract. Pulse until the dough starts to clump together. If it seems too dry, add 1 tablespoon of cold water and pulse once more.
- Press the dough evenly into the prepared pan. Use the bottom of a measuring cup or a flat glass to get it even. Prick the crust all over with a fork. Bake for 15 minutes, until lightly golden and set. Set aside to cool slightly.
- Make the filling: In a large bowl, whisk together 1 can (15 oz) pumpkin puree, ¾ cup coconut sugar, 2 large eggs, 1 cup full-fat coconut milk, 2 tablespoons cornstarch, 2 teaspoons pumpkin pie spice, and ½ teaspoon salt until completely smooth.
- Pour the pumpkin filling over the pre-baked crust. Gently tilt the pan to spread it evenly. Bake at 350°F (175°C) for 35–40 minutes, until the edges are set and the center jiggles just slightly when gently shaken.
- Let the bars cool completely in the pan on a wire rack. Once at room temperature, transfer the pan to the refrigerator and chill for at least 4 hours, or overnight.
- After chilling, use the parchment overhang to lift the entire block out of the pan. Place on a cutting board and slice into 16 squares. For cleanest cuts, wipe the knife clean between each slice.
Notes
Keep the butter cold for a flaky crust. Do not overmix the crust. Watch the baking time carefully; the center should still have a gentle jiggle when done. Chill fully before slicing for clean cuts. For dairy-free, use vegan butter and coconut milk. For nut-free, replace almond flour with sunflower seed flour or more oat flour.
Nutrition
- Serving Size: 1 bar
- Calories: 210
- Sugar: 11
- Fat: 14
- Carbohydrates: 20
- Fiber: 3
- Protein: 5
Keywords: gluten-free pumpkin pie bars, pumpkin bars, gluten-free dessert, fall dessert, pumpkin pie bars, easy pumpkin dessert