“You know what I want?” my husband said, flopping down on the couch after dinner. “That giant cookie you made that one time. But just for us.”
And that was it. I’d been trying to be good, portioning out dough and freezing the rest. But the idea of a warm, gooey, shareable cookie—one that didn’t leave us with a week’s worth of leftovers—was too good to pass up. So I got to work, scaling down my favorite recipe until it fit perfectly in our tiny 6-inch skillet. Honestly, this perfect small-batch skillet cookie for two has become our little Friday night ritual. It’s the kind of dessert that feels like a secret, a little indulgence that’s just for the two of you.
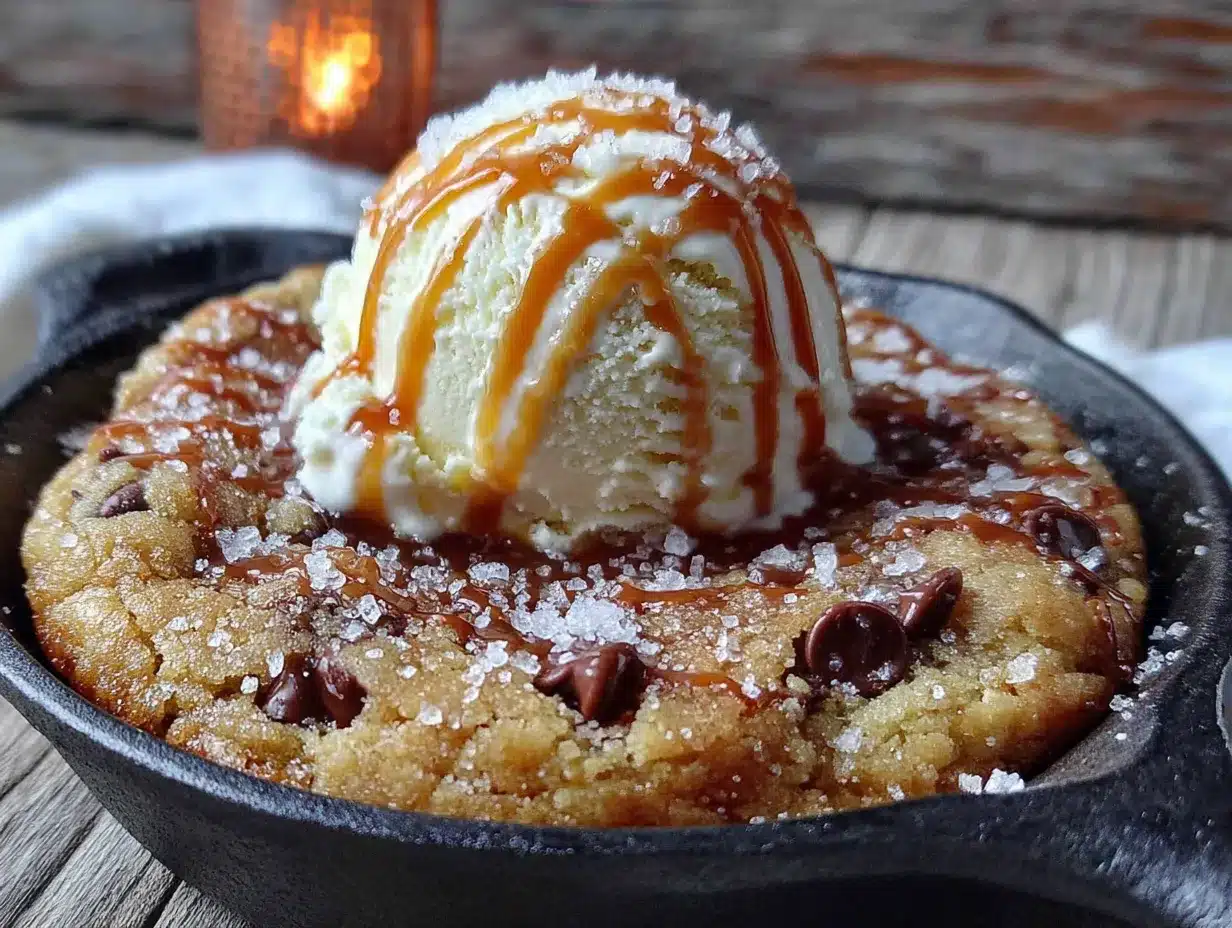
There’s something about eating a warm cookie straight from the skillet that feels special, even if it’s a Tuesday night. The edges get all crispy and caramelized, while the center stays soft and almost doughy. It’s that perfect contrast of textures, all in one pan. And the best part? You don’t have to share it with anyone else. This recipe was born from a craving and a tiny cast iron pan, and I think it’s exactly what you need tonight.
Why You’ll Love This Recipe
Let me tell you why this little skillet cookie is going to become your new favorite dessert. I’ve tested this recipe more times than I care to admit, tweaking the ratios until it was absolutely perfect. It’s not just another cookie recipe—it’s the one that finally solves the “dessert for two” problem.
- Quick & Easy: From start to finish, you’re looking at about 25 minutes. That’s faster than a trip to the store for a pint of ice cream.
- Simple Ingredients: You probably have everything you need in your pantry right now. No weird specialty ingredients or trips to a fancy grocery store.
- Perfect for Date Night: Whether it’s a cozy night in, a movie marathon, or just a Tuesday that needs a little something special, this cookie is the answer.
- Crowd-Pleaser: Even though it’s small, it packs a huge flavor punch. The combination of crispy edges and a soft, gooey center is universally loved.
- Unbelievably Delicious: The texture is next-level. You get that satisfying crunch on the outside and a melt-in-your-mouth center that’s pure comfort.
What makes this recipe different from all the others? It’s the technique. I’ve found that using a combination of melted butter and an extra egg yolk gives you that perfect chewy texture that lasts, even after the cookie cools a bit. It’s not just another version of a skillet cookie—it’s the best version, designed specifically for that 6-inch skillet. This is the kind of dessert that makes you close your eyes after the first bite, honestly. It’s comfort food reimagined: faster, smaller, but with the same soul-soothing satisfaction.
What Ingredients You Will Need
This recipe uses simple, humble ingredients to create something truly special. Here’s what you’ll need to grab from your pantry and fridge.
- Unsalted butter, melted: 4 tablespoons (½ stick). Melting the butter is key for that chewy texture. I like using Kerrygold for the rich flavor, but any good unsalted butter works.
- Granulated sugar: ¼ cup. This gives the cookie its sweetness and helps with those crispy edges.
- Light brown sugar, packed: ¼ cup. The molasses in brown sugar adds moisture and a deeper, almost caramel-like flavor. Don’t skip it!
- Large egg yolk: 1. Just the yolk, not the whole egg. This adds richness and tenderness without making the cookie cakey.
- Vanilla extract: ½ teaspoon. Pure vanilla extract makes a difference here. It enhances all the other flavors.
- All-purpose flour: ¾ cup. Spoon and level your flour—don’t scoop it directly from the bag, or you’ll end up with a dry cookie.
- Baking soda: ¼ teaspoon. This helps the cookie spread just the right amount.
- Salt: ¼ teaspoon. A little salt balances the sweetness. I use fine sea salt.
- Chocolate chips: ½ cup. Semi-sweet is my go-to, but you can use milk chocolate, dark chocolate, or even white chocolate chips. I’m partial to Ghirardelli for their consistent melt.
Ingredient Selection Tips: For the best texture, make sure your butter is fully melted but not hot. Let it cool for a minute or two after melting. If you’re using a salted butter, just reduce the added salt to a pinch. And for the chocolate chips, feel free to chop up a chocolate bar instead—you’ll get those lovely pools of melted chocolate throughout the cookie.
Substitution Guidance: You can swap the all-purpose flour with a gluten-free 1:1 blend if needed. For a dairy-free version, use a plant-based butter stick (not the spreadable kind in a tub). And if you don’t have light brown sugar, you can use ¼ cup of granulated sugar mixed with 1 teaspoon of molasses.
Equipment Needed
You don’t need a lot of fancy equipment for this recipe, which is part of its charm. Here’s what you’ll need:
- 6-inch cast iron skillet: This is the star of the show. It heats evenly and gives you those perfectly browned edges. If you don’t have one, a small oven-safe skillet or even a 5×5-inch baking dish will work. I got my little skillet at a thrift store for five bucks—best investment ever.
- Mixing bowls: One medium bowl for the wet ingredients and one small bowl for the dry. I use glass or ceramic bowls.
- Whisk: For combining the wet ingredients smoothly.
- Spatula or wooden spoon: For folding in the chocolate chips.
- Measuring cups and spoons: Accurate measurements are important for a small batch like this.
- Oven mitts: The skillet gets screaming hot, so don’t forget these!
Alternative Suggestions: If you don’t have a cast iron skillet, you can use a small oven-safe non-stick pan or even a ceramic ramekin. Just keep an eye on the baking time, as different materials conduct heat differently. For a budget-friendly option, a small disposable aluminum pan works in a pinch, though the edges won’t get quite as crispy.
Preparation Method
Alright, let’s make this cookie. It’s so simple, you’ll be amazed at how quickly it comes together.
- Preheat your oven to 350°F (175°C). Place your 6-inch cast iron skillet in the oven while it preheats. This is a little trick I learned—heating the skillet first gives you those extra-crispy, golden-brown edges right from the start. Be careful when you take it out later!
- Melt the butter. In a small microwave-safe bowl, melt the 4 tablespoons of unsalted butter. You can also do this on the stovetop. Let it cool for a minute or two—you don’t want it to cook the egg yolk.
- Combine the wet ingredients. In a medium mixing bowl, whisk together the melted butter, ¼ cup granulated sugar, and ¼ cup packed light brown sugar. Whisk until it’s smooth and slightly thickened, about 30 seconds. Then add the egg yolk and ½ teaspoon of vanilla extract. Whisk again until everything is well combined and glossy.
- Mix the dry ingredients. In a separate small bowl, whisk together ¾ cup all-purpose flour, ¼ teaspoon baking soda, and ¼ teaspoon salt. This ensures the baking soda is evenly distributed so your cookie rises evenly.
- Combine wet and dry. Pour the dry ingredients into the wet ingredients. Use a spatula to fold them together gently. Mix just until you see no more streaks of flour—overmixing can make the cookie tough. The dough will be thick and slightly sticky.
- Fold in the chocolate chips. Gently fold in ½ cup of chocolate chips. Reserve a few chips to press on top of the dough once it’s in the skillet—this makes it look pretty.
- Prepare the skillet. Carefully remove the hot skillet from the oven using your oven mitts. Place it on a heat-safe surface. Lightly spray the skillet with non-stick cooking spray or brush it with a little melted butter.
- Press the dough into the skillet. Using your spatula or your hands (lightly greased), press the cookie dough evenly into the skillet. It will seem like a thin layer, but it will puff up as it bakes. Press those reserved chocolate chips on top of the dough.
- Bake. Place the skillet in the oven and bake for 12-15 minutes. The edges should be golden brown and set, but the center will still look slightly soft and underdone. That’s exactly what you want—it will continue to cook from the residual heat of the skillet.
- Cool slightly. Let the cookie cool in the skillet on a wire rack for about 5-10 minutes. This allows it to set up just enough to scoop into without being a molten mess. Serve it warm, right from the skillet.
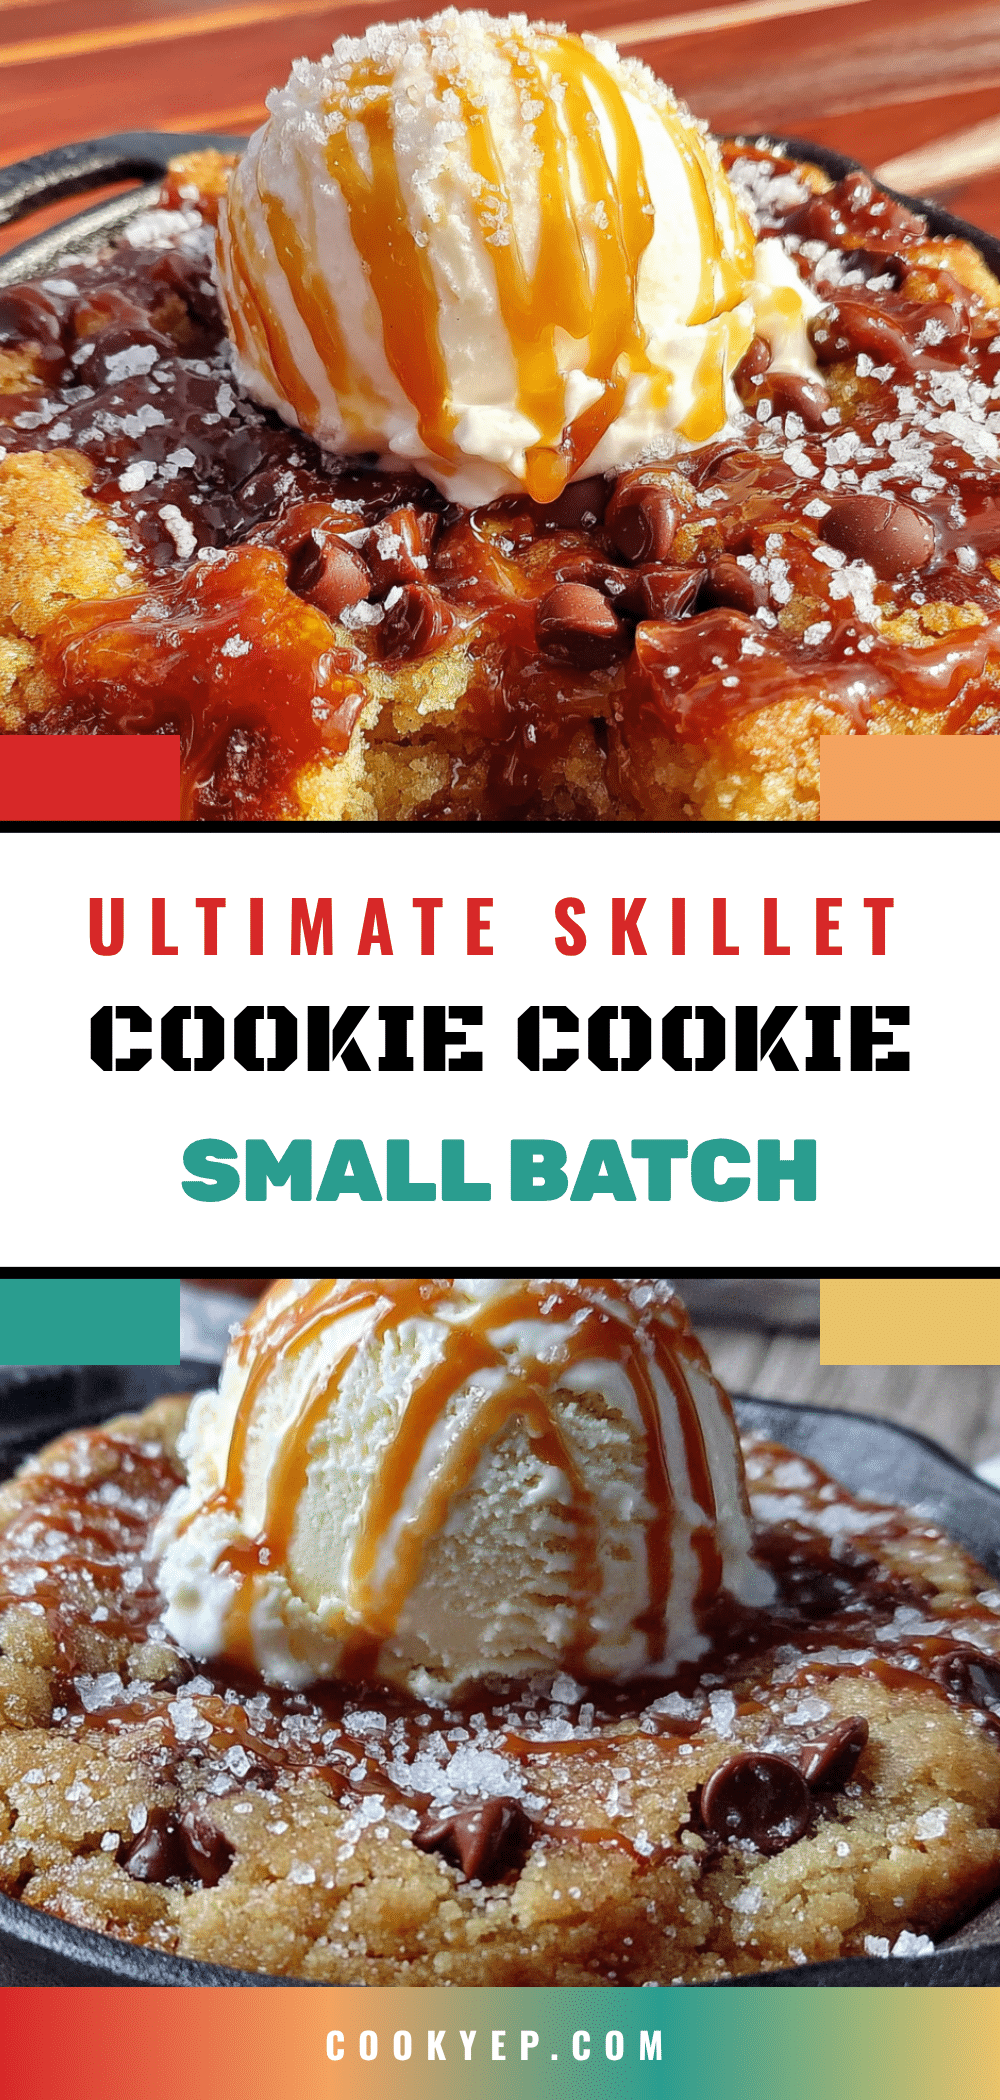
Personal Tip: If you want an extra gooey center, bake it for 12 minutes. For a more well-done cookie, go for 15. I usually aim for 13 minutes—it’s the sweet spot for my oven. And don’t forget a scoop of vanilla ice cream on top. The contrast between the warm cookie and cold ice cream is pure magic.
Cooking Tips & Techniques
I’ve made this cookie at least a dozen times, and I’ve learned a few things along the way. Here are some tips to help you nail it on your first try.
The Hot Skillet Trick: I mentioned this earlier, but it’s worth repeating. Preheating your skillet in the oven while it preheats is a game-changer. It gives you those perfectly browned, crispy edges that are the best part of a skillet cookie. Just remember to use an oven mitt when you take it out—it’s incredibly hot.
Don’t Overmix the Dough: This is the most common mistake I see. Once you add the flour, mix just until it’s incorporated. Overmixing develops the gluten, which can make your cookie tough and dense instead of tender and chewy. A few streaks of flour are okay; they’ll disappear as you fold.
The Egg Yolk Trick: Using just the egg yolk (and not the white) is what gives this cookie its rich, chewy texture. The white would add too much moisture and make it cakey. Save the egg white for your morning omelet or scramble—no waste!
Check Your Oven Temperature: Ovens can be finicky. If your cookie is browning too quickly on the edges but is still raw in the center, your oven might be running hot. Try reducing the temperature to 325°F (160°C) and baking for a few minutes longer. I learned this the hard way after a few burnt batches.
Let It Rest: I know it’s tempting to dig in right away, but letting the cookie cool for at least 5 minutes is crucial. It continues to set up as it cools, and if you try to scoop it too soon, you’ll end up with a puddle of cookie soup. Trust me on this one—I’ve made that mistake more than once.
Variations & Adaptations
This recipe is a fantastic base for all sorts of delicious variations. Here are a few of my favorites.
- Peanut Butter Chocolate Chip: Swap 2 tablespoons of the melted butter for 2 tablespoons of creamy peanut butter. Add it with the wet ingredients. The peanut butter adds a nutty richness that pairs perfectly with the chocolate.
- Double Chocolate: Replace 2 tablespoons of the all-purpose flour with 2 tablespoons of unsweetened cocoa powder. Use dark chocolate chips for an intensely chocolatey experience. This is my husband’s favorite version.
- M&M’s Cookie: Replace the chocolate chips with ½ cup of M&M’s. The candy shells add a fun crunch and a pop of color. Perfect for a movie night or a fun dessert for kids.
- S’mores Skillet Cookie: Press half the dough into the skillet, add a layer of mini marshmallows and a broken graham cracker, then top with the remaining dough. It’s like a campfire in a skillet.
- Gluten-Free Option: Use a 1:1 gluten-free all-purpose flour blend. I’ve had great results with Bob’s Red Mill. The texture is slightly more delicate, but it’s still delicious.
Seasonal Twist: In the fall, I love adding a teaspoon of pumpkin pie spice to the dry ingredients and using white chocolate chips and dried cranberries. It’s like a cozy autumn hug in a skillet. For a fun Halloween twist, you could add some candy corn or orange and black sprinkles, much like the spiderweb sugar cookie bars we make for Halloween parties.
Serving & Storage Suggestions
This cookie is best served warm, right from the skillet. It’s the ultimate shareable dessert for two. I like to place the hot skillet on a small wooden board or a trivet in the center of the table, with two spoons and a bowl of vanilla ice cream on the side. The contrast of temperatures is heavenly.
What to Serve With It: A scoop of vanilla bean ice cream is the classic pairing, but don’t stop there. Try it with a drizzle of caramel sauce, a dollop of whipped cream, or even a sprinkle of flaky sea salt. For a cozy night in, a warm mug of coffee or a glass of cold milk is all you need. If you’re feeling extra indulgent, a side of creamy caramel apple cheesecake dip would be a fun and delicious addition to a dessert spread.
Storage: If you somehow have leftovers (it’s rare in my house!), let the cookie cool completely in the skillet. Cover it tightly with plastic wrap or aluminum foil and store it at room temperature for up to 2 days. The texture will soften, but it’s still delicious.
Reheating: To bring back that warm, gooey texture, reheat the cookie in a 300°F (150°C) oven for about 5-7 minutes. You can also microwave individual portions for 15-20 seconds, but the edges won’t be as crispy. I prefer the oven method.
Freezing: You can freeze the unbaked dough. Press it into the skillet, wrap it tightly in plastic wrap and then foil, and freeze for up to 3 months. When you’re ready to bake, add about 5 minutes to the baking time. No need to thaw!
Nutritional Information & Benefits
Let’s be real—this is a dessert, and it’s meant to be enjoyed. But here’s a rough estimate of the nutritional information for the entire skillet cookie (assuming you’re sharing it with someone).
- Calories (per serving, half the cookie): Approximately 450-500
- Fat: 25g
- Carbohydrates: 60g
- Protein: 5g
- Sugar: 35g
Health Benefits of Key Ingredients: While it’s not a health food, there are some redeeming qualities. Dark chocolate (if you use it) contains antioxidants and can be good for your heart in moderation. Butter provides fat-soluble vitamins like A, D, and E. And hey, sharing a dessert with someone you love is good for your soul!
Dietary Considerations: This recipe contains gluten, dairy, and eggs. For a gluten-free option, use a 1:1 gluten-free flour blend. For a dairy-free option, use a plant-based butter stick. It’s easy to adapt to your needs.
My Personal Perspective: I believe in balance. This skillet cookie is a treat, and there’s nothing wrong with that. It’s about enjoying a small, perfect moment with someone you care about. That’s a kind of wellness, too.
Conclusion
This perfect small-batch skillet cookie for two is more than just a recipe—it’s a little ritual. It’s the dessert you make when you want something special without the fuss. It’s quick, it’s easy, and it tastes like you spent hours in the kitchen. The combination of crispy edges and a soft, gooey center is absolutely unbeatable.
I’d love for you to try this recipe and make it your own. Customize it with your favorite mix-ins, serve it with your favorite ice cream, and share it with someone you love. That’s what this cookie is all about. If you do make it, please come back and leave a comment below. Tell me what variations you tried, or just say hi. I read every single comment, and they honestly make my day. Don’t forget to share this recipe with a friend who needs a little dessert magic in their life. Happy baking!
Frequently Asked Questions
Can I use a regular 10-inch skillet instead of a 6-inch one?
You can, but the cookie will be much thinner and will bake much faster. You’ll need to reduce the baking time to about 8-10 minutes. The texture won’t be as thick and gooey in the center. For the best results, stick with a 6-inch skillet.
Can I make this cookie without a cast iron skillet?
Absolutely! You can use a small oven-safe non-stick pan, a ceramic ramekin, or even a small baking dish. Just keep an eye on the baking time, as different materials conduct heat differently. The edges might not get as crispy, but it will still be delicious.
Why did my cookie turn out cakey instead of chewy?
This usually happens if you overmix the dough or if you used a whole egg instead of just the yolk. The egg white adds too much moisture, making the cookie cakey. Also, make sure you’re using melted butter, not softened butter—melted butter is key for a chewy texture.
Can I double this recipe?
Yes, you can easily double the ingredients to make a larger cookie for a 10-inch skillet. Just increase the baking time to about 18-22 minutes. Keep an eye on it, and look for those golden-brown edges and a soft center.
How do I know when the cookie is done baking?
The edges should be golden brown and set, while the center will still look slightly soft and underdone. It might even look a little puffy. That’s exactly what you want. The residual heat from the skillet will continue to cook the center as it cools.
Pin This Recipe!
Perfect Small-Batch Skillet Cookie for Two

A warm, gooey, shareable skillet cookie for two with crispy edges and a soft center, ready in about 25 minutes. Perfect for date night or a cozy treat.
- Prep Time: 10 minutes
- Cook Time: 15 minutes
- Total Time: 25 minutes
- Yield: 2 servings 1x
- Category: Dessert
- Cuisine: American
Ingredients
- 4 tablespoons unsalted butter, melted
- 1/4 cup granulated sugar
- 1/4 cup light brown sugar, packed
- 1 large egg yolk
- 1/2 teaspoon vanilla extract
- 3/4 cup all-purpose flour
- 1/4 teaspoon baking soda
- 1/4 teaspoon salt
- 1/2 cup chocolate chips (semi-sweet recommended)
Instructions
- Preheat oven to 350°F (175°C). Place a 6-inch cast iron skillet in the oven to preheat.
- Melt the butter in a small microwave-safe bowl and let cool for 1-2 minutes.
- In a medium bowl, whisk together melted butter, granulated sugar, and brown sugar until smooth and slightly thickened, about 30 seconds. Add egg yolk and vanilla extract; whisk until glossy and well combined.
- In a separate small bowl, whisk together flour, baking soda, and salt.
- Pour dry ingredients into wet ingredients. Fold gently with a spatula until just combined (do not overmix).
- Fold in chocolate chips, reserving a few to press on top.
- Carefully remove hot skillet from oven. Lightly spray with non-stick cooking spray or brush with melted butter.
- Press dough evenly into the skillet. Press reserved chocolate chips on top.
- Bake for 12-15 minutes, until edges are golden brown and center is still slightly soft.
- Cool in skillet on a wire rack for 5-10 minutes. Serve warm.
Notes
For extra gooey center, bake 12 minutes; for more well-done, bake 15 minutes. Serve with vanilla ice cream. Dough can be frozen unbaked for up to 3 months.
Nutrition
- Serving Size: Half the cookie
- Calories: 450500
- Sugar: 35
- Fat: 25
- Carbohydrates: 60
- Protein: 5
Keywords: skillet cookie, small batch, cookie for two, chocolate chip, easy dessert, date night dessert