Brown butter bubbling on the stove and the timer just went off for the pumpkin I forgot to roast. That’s how this whole thing started. Half a can of pumpkin puree sitting in the fridge, a stick of butter that was about to go bad, and a serious craving for something that tasted like fall but didn’t require a trip to the store.
I had been testing pumpkin bread recipes for weeks, honestly. Most of them were fine. Fine is the enemy of good baking, you know? They were either too dense, too sweet, or that weird spongy texture that makes you wonder if you’re eating bread or a kitchen sponge. And don’t get me started on the ones that taste like a candle.
Then I got distracted one afternoon (shocking) and let the butter go a little too far past golden. The nutty smell hit me and I just went with it. Poured it straight into the pumpkin mixture without thinking twice. That accident turned into the best loaf I’ve ever pulled out of my oven.
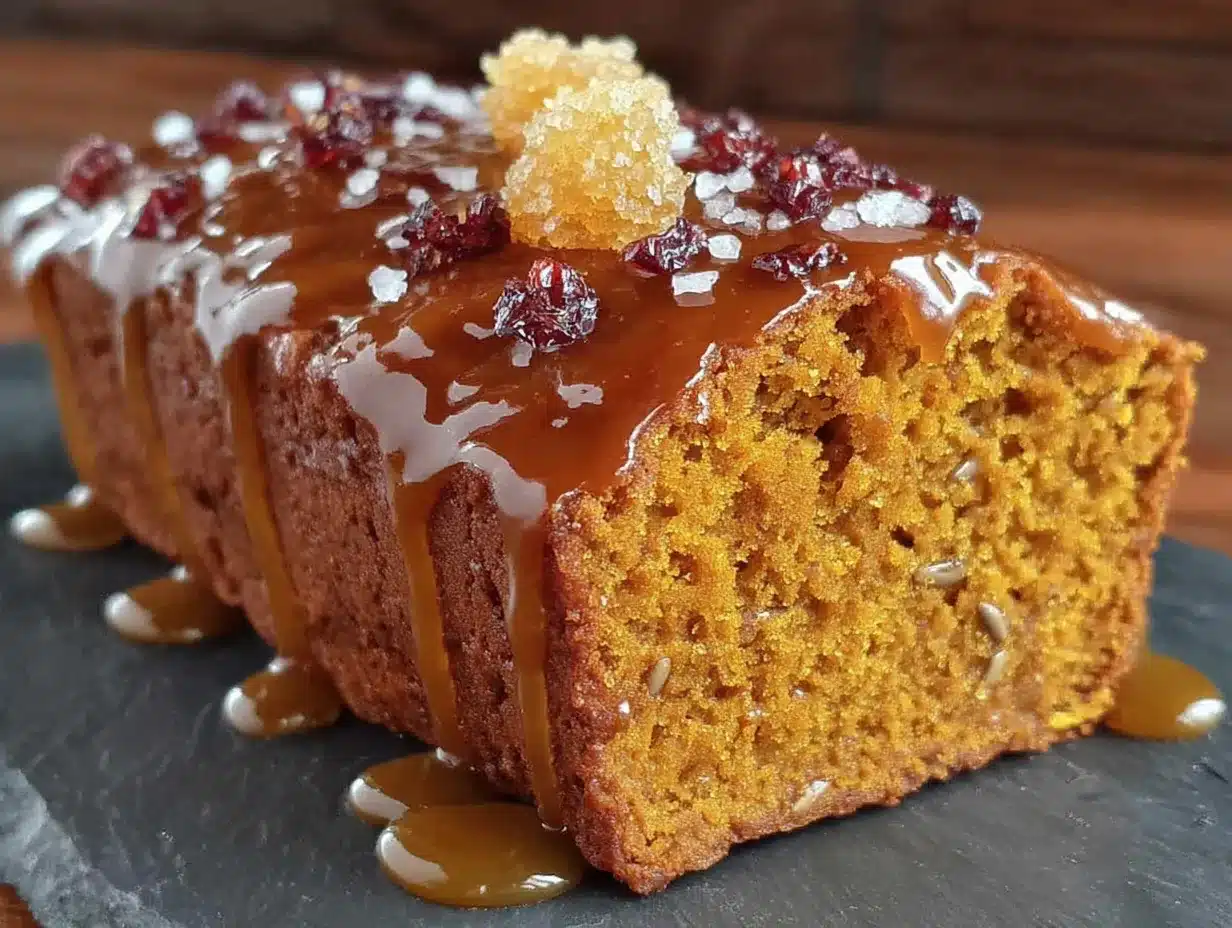
The maple glaze came later, after I realized the bread needed something to cut through all that richness. A little drizzle of maple syrup, some powdered sugar, and a pinch of salt. Simple. Perfect. The kind of thing that makes you wonder why you ever bothered with complicated recipes.
This brown butter pumpkin bread with maple glaze isn’t fancy. It’s not pretentious. It’s the bread you make when you want something that actually tastes like fall, not just smells like it. The kind you slice thick and eat with a cup of coffee while the leaves change outside.
Trust me on this one.
Why You’ll Love This Recipe
I’ve made this bread more times than I care to count. For brunches, for neighbors, for that one time I needed to bribe my kid’s teacher. Every single time, someone asks for the recipe. That’s not me bragging — that’s just what happens when you nail the balance between nutty brown butter and sweet pumpkin.
- Quick & Easy: From start to finish, you’re looking at about an hour. The brown butter takes five minutes, the mixing takes ten, and the oven does the rest. Perfect for those mornings when you realize you need a hostess gift in sixty minutes.
- Simple Ingredients: You probably have most of this stuff already. Butter, flour, sugar, eggs, pumpkin puree. The only “special” ingredient is maple syrup for the glaze, and honestly, if you don’t have that, honey works too.
- Perfect for Fall Gatherings: This bread shows up at every pumpkin patch trip, every Thanksgiving brunch, every cozy night in. It’s the edible equivalent of a chunky sweater and a crackling fire.
- Crowd-Pleaser: Kids love it because it’s sweet. Adults love it because the brown butter adds this sophisticated nuttiness that makes it feel special. Even my friend who “doesn’t like pumpkin bread” ate two slices. Two.
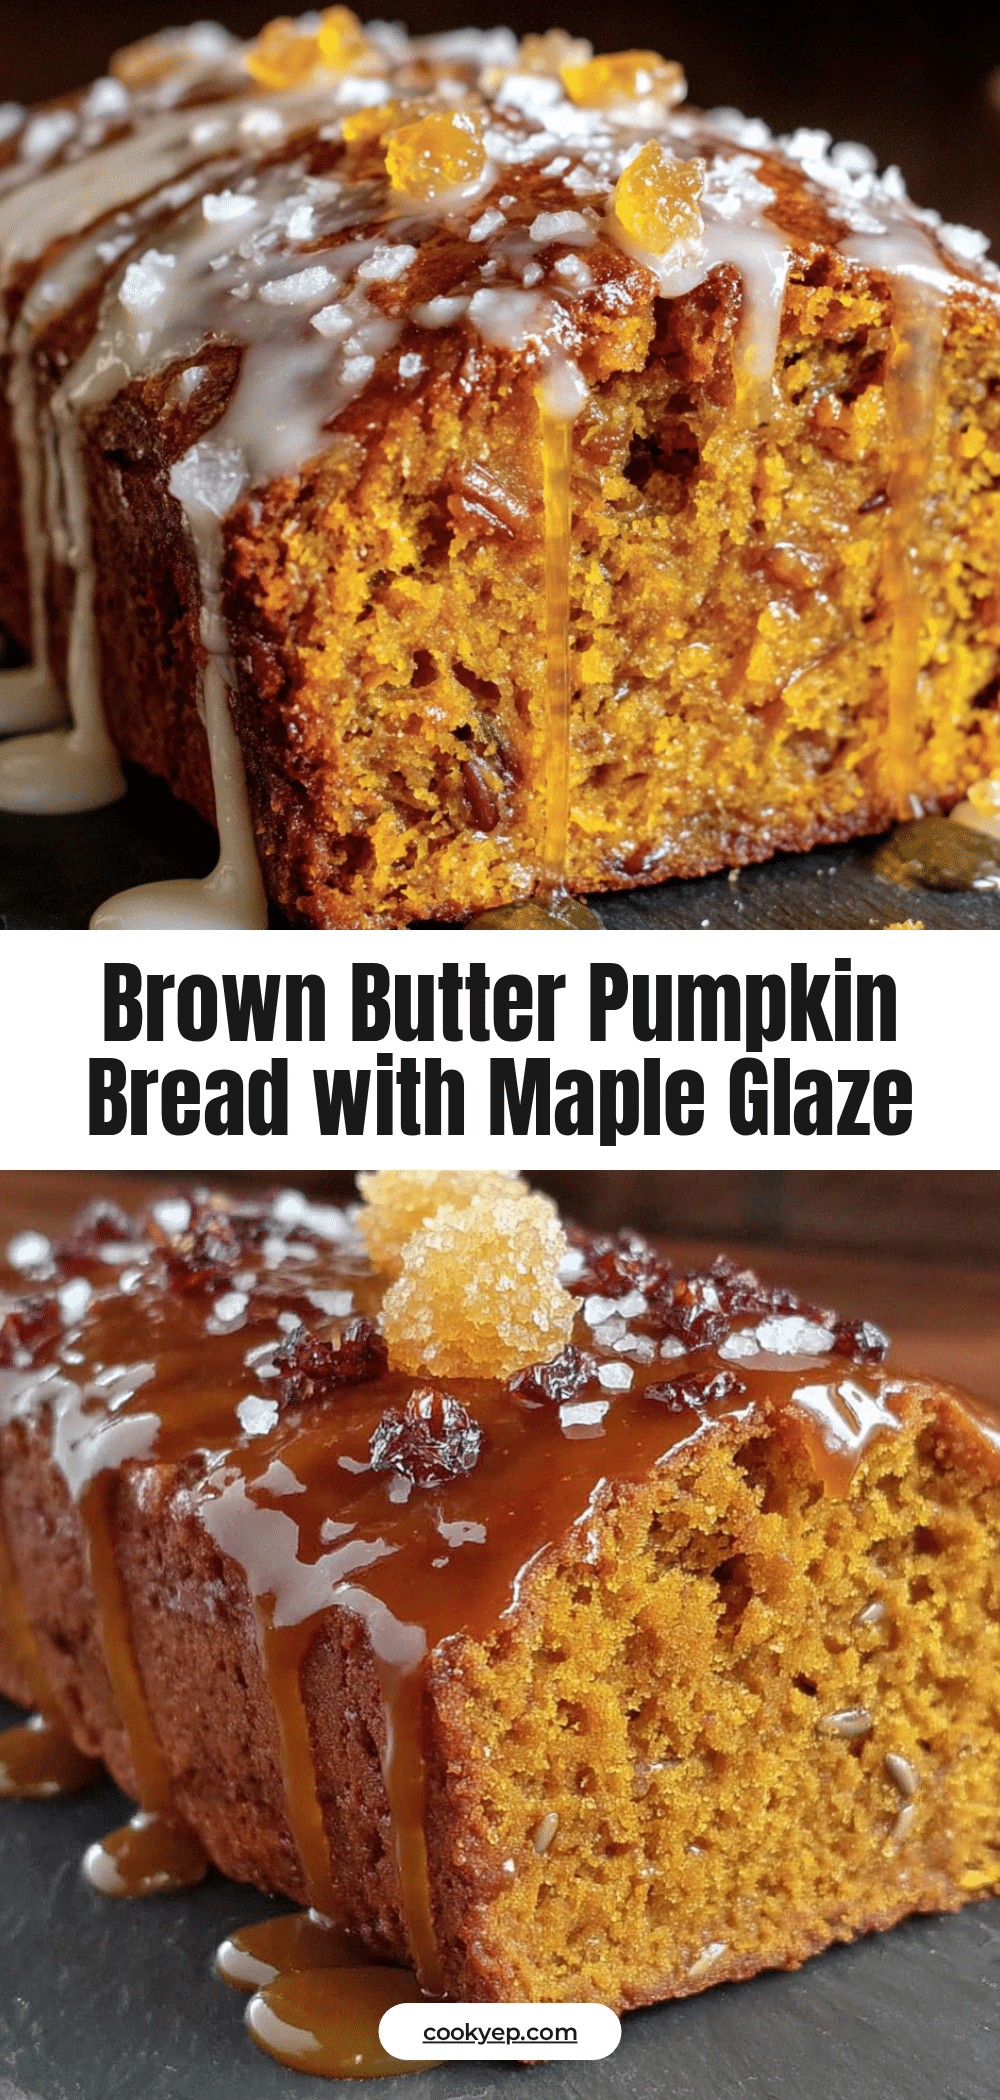
- Unbelievably Delicious: The texture is what gets me every time. Moist without being wet, tender without being crumbly. And that maple glaze on top? It seeps into the cracks and creates these little pockets of sweetness that make every bite different.
What makes this recipe different from the dozens of pumpkin breads out there is the brown butter. It’s not just a flavor — it’s a technique that transforms the whole loaf. The nutty, toasty notes from the butter complement the earthy sweetness of the pumpkin in a way that regular butter just can’t match. Plus, the maple glaze adds a subtle smokiness that ties everything together.
This is the kind of bread that makes you close your eyes after the first bite. It’s comfort food reimagined — familiar enough to feel like home, but special enough to feel like a treat.
What Ingredients You Will Need
This recipe uses simple, wholesome ingredients that come together to create something truly special. Most of these are pantry staples, which means you can whip up this bread whenever the craving strikes.
For the Brown Butter Pumpkin Bread
- Unsalted butter, ½ cup (1 stick or 113g) — This is the star of the show. I use unsalted so I can control the salt level. The butter gets browned on the stove until it turns golden and smells nutty. Don’t skip this step, it’s what makes the bread sing.
- Pumpkin puree, 1 cup (240g) — Make sure you’re using pure pumpkin puree, not pumpkin pie filling. The pie filling has added sugar and spices that will throw off the balance. I prefer Libby’s, but any brand works.
- Granulated sugar, ¾ cup (150g) — Regular white sugar adds sweetness and helps create that tender crumb.
- Brown sugar, ½ cup (100g), packed — Light or dark brown sugar both work. Dark brown sugar will give you a deeper, more molasses-y flavor. I usually go with light brown because that’s what I have on hand.
- Large eggs, 2, room temperature — Room temperature eggs incorporate better into the batter. If you forgot to take them out ahead of time, place them in a bowl of warm water for five minutes.
- Vanilla extract, 1 teaspoon — Pure vanilla extract is worth the splurge here. The imitation stuff has a chemical aftertaste that you’ll notice in the final bread.
- All-purpose flour, 1¾ cups (220g) — Spoon and level your flour. Scooping directly from the bag can pack in too much flour and make your bread dry.
- Baking soda, 1 teaspoon — This helps the bread rise and creates that light, tender texture.
- Baking powder, ½ teaspoon — A little extra lift never hurt anyone.
- Salt, ½ teaspoon — Salt enhances all the other flavors. Don’t skip it.
- Ground cinnamon, 2 teaspoons — The backbone of fall baking. I use Vietnamese cinnamon for its intense, sweet flavor.
- Ground nutmeg, ½ teaspoon — Freshly grated nutmeg makes a huge difference if you have whole nutmeg in your spice drawer.
- Ground ginger, ½ teaspoon — Adds a little warmth and bite.
- Ground cloves, ¼ teaspoon — A little goes a long way. Too much and your bread will taste like a holiday candle.
- Milk, ¼ cup (60ml) — Whole milk works best, but any milk you have will do. I’ve used oat milk and almond milk in a pinch with great results.
For the Maple Glaze
- Powdered sugar, 1 cup (120g) — Sift it if you want a super smooth glaze. I’m usually too impatient for that step.
- Pure maple syrup, 2 tablespoons — Real maple syrup, not pancake syrup. The flavor difference is night and day. I like Grade A Dark Amber for its robust flavor.
- Milk, 1-2 tablespoons — Start with one tablespoon and add more until you reach your desired consistency.
- Pinch of salt — This balances the sweetness and makes the maple flavor pop.
Equipment Needed
You don’t need a fancy kitchen to make this bread. Here’s what you’ll need:
- 9×5-inch loaf pan — The standard size for most quick breads. If you use an 8×4 pan, you’ll need to bake it a little longer.
- Parchment paper — Lining the pan makes removal a breeze. Leave some overhang on the long sides for easy lifting.
- Small saucepan — For browning the butter. A light-colored pan helps you see the color change.
- Large mixing bowl — For combining the wet and dry ingredients.
- Medium mixing bowl — For whisking the dry ingredients.
- Whisk — For smoothing out the dry ingredients and incorporating air.
- Rubber spatula — For folding the batter together without overmixing.
- Cooling rack — Essential for letting the bread cool evenly before glazing.
- Measuring cups and spoons — For accuracy. Baking is a science, after all.
- Kitchen scale (optional but recommended) — Weighing your ingredients is more accurate than measuring by volume. I resisted getting one for years, and now I can’t imagine baking without it.
I’ve made this bread in a glass loaf pan, a metal one, and even a ceramic dish that was close enough to the right size. They all worked. The metal pan gave me the crispiest edges, which I personally love. If you’re using glass, reduce the oven temperature by 25°F to prevent over-browning.
Preparation Method
Let me walk you through this step by step. I’ve made this bread so many times that I’ve got it down to a science. Follow these steps and you’ll have the best pumpkin bread of your life.
- Preheat your oven to 350°F (175°C). Position the rack in the center of the oven. Line your 9×5-inch loaf pan with parchment paper, leaving some overhang on the long sides. Lightly grease the exposed ends with butter or cooking spray.
- Brown the butter. Place the butter in a small saucepan over medium heat. Stir occasionally as it melts. The butter will start to foam and sizzle — that’s normal. Keep stirring. After about 3-4 minutes, you’ll see brown specks forming at the bottom of the pan and the butter will smell nutty and toasty. The moment it turns a golden amber color, remove it from the heat and pour it into a heat-safe bowl. Don’t walk away from the pan — brown butter can go from perfect to burnt in seconds. Trust me, I’ve learned this the hard way.
- Cool the brown butter. Let the brown butter cool for about 10 minutes. You want it warm but not hot. If you add it to the eggs while it’s still hot, you’ll end up with scrambled eggs in your pumpkin bread. Not ideal.
- Combine the wet ingredients. In a large mixing bowl, whisk together the pumpkin puree, both sugars, eggs, vanilla extract, and the cooled brown butter. Mix until smooth and well combined. The mixture will look glossy and smell incredible.
- Whisk the dry ingredients. In a separate medium bowl, whisk together the flour, baking soda, baking powder, salt, cinnamon, nutmeg, ginger, and cloves. Whisking aerates the flour and ensures the spices are evenly distributed.
- Add the dry ingredients to the wet. Pour the dry ingredients into the wet mixture. Add the milk. Fold everything together with a rubber spatula until just combined. A few streaks of flour are okay. Overmixing will make your bread tough and dense. Stop as soon as you don’t see any more dry flour.
- Pour the batter into the prepared pan. Use your spatula to spread it evenly. Give the pan a gentle tap on the counter to release any air bubbles.
- Bake for 50-60 minutes. Start checking at 50 minutes. Insert a toothpick into the center — if it comes out clean or with a few moist crumbs, it’s done. If the top is browning too quickly but the center isn’t done yet, tent the loaf with aluminum foil for the last 10-15 minutes.
- Cool in the pan for 15 minutes. This allows the bread to set and makes it easier to remove. Use the parchment paper overhang to lift the bread out of the pan.
- Transfer to a cooling rack. Let the bread cool completely before glazing. If you glaze it while it’s still warm, the glaze will melt right off and pool at the bottom. Patience, my friend.
- Make the maple glaze. In a small bowl, whisk together the powdered sugar, maple syrup, and 1 tablespoon of milk. Add more milk, one teaspoon at a time, until the glaze reaches a pourable consistency. It should be thick enough to coat the back of a spoon but thin enough to drizzle.
- Glaze the bread. Drizzle the glaze over the cooled bread. Let it set for about 10 minutes before slicing. The glaze will harden slightly and create that beautiful, crackly top.
Cooking Tips & Techniques
I’ve made every mistake in the book with this recipe so you don’t have to. Here’s what I’ve learned:
Don’t rush the brown butter. I know it’s tempting to crank up the heat, but medium heat is your friend. Low and slow gives you better control and more flavor. Watch for those brown specks — that’s the milk solids toasting, and that’s where all the flavor lives.
Room temperature ingredients matter. Cold eggs and cold milk can seize the brown butter and create a lumpy batter. Take everything out of the fridge 30 minutes before you start. If you forgot, place the eggs in a bowl of warm water for 5 minutes and microwave the milk for 10 seconds.
Measure your flour correctly. The most common mistake in baking is using too much flour. Spoon the flour into your measuring cup and level it off with a knife. Don’t scoop directly from the bag — you’ll end up with 20-30% more flour than the recipe calls for.
Check for doneness with a thermometer. If you have an instant-read thermometer, the internal temperature of the bread should be around 200-205°F when it’s done. This is more reliable than the toothpick test, especially if you’re new to baking.
Let it cool completely. I know it’s hard to wait. The smell alone is torture. But slicing into warm bread will give you gummy, crumbly slices. The bread continues to set as it cools. Trust the process.
Variations & Adaptations
This recipe is forgiving and adaptable. Here are some ways to make it your own:
Chocolate Chip Pumpkin Bread: Fold in ½ cup of chocolate chips (dark, milk, or semi-sweet) after adding the dry ingredients. The chocolate melts into little pockets of richness that pair beautifully with the brown butter. I’ve made this version more times than I can count, and it never disappoints. If you love this combo, you should definitely try my cozy pumpkin chocolate chip bread with maple glaze for another take on this classic.
Gluten-Free Version: Substitute the all-purpose flour with a 1:1 gluten-free baking flour blend. I’ve had great results with Bob’s Red Mill and King Arthur brands. Add an extra tablespoon of milk since gluten-free flours tend to absorb more liquid.
Dairy-Free Version: Use vegan butter for the brown butter (Miyoko’s works beautifully) and substitute the milk with oat milk or almond milk. The brown butter flavor will be slightly different but still delicious.
Nutty Pumpkin Bread: Fold in ½ cup of toasted walnuts or pecans after mixing. Toast them first in a dry pan for 3-4 minutes to bring out their oils and flavor. The crunch adds a lovely contrast to the soft bread.
Spiced Maple Glaze: Add ¼ teaspoon of cinnamon or pumpkin pie spice to the glaze for extra warmth. It’s a small change that makes a big difference.
Mini Loaves or Muffins: This recipe makes 4 mini loaves (bake for 30-35 minutes) or 12 muffins (bake for 18-22 minutes). Adjust the baking time accordingly and check for doneness early.
Serving & Storage Suggestions
This bread is versatile enough for any occasion. Here’s how to serve and store it:
Serving Temperature: Serve at room temperature or slightly warm. If you want to warm it up, pop individual slices in the microwave for 10-15 seconds or in a 300°F oven for 5 minutes. The glaze will soften and the bread will taste fresh-baked.
Presentation Ideas: Slice the bread thick — about 1-inch slices — and arrange them on a wooden board. Dust with a little extra cinnamon or drizzle with additional maple syrup for a gorgeous presentation. It’s perfect for brunch tables, holiday gatherings, or just a quiet morning with coffee.
What to Serve With It: A hot cup of coffee or tea is the obvious choice. For a more indulgent experience, serve it with a pat of salted butter or a dollop of whipped cream. If you’re feeling fancy, pair it with my cozy pumpkin chai latte with oat milk for the ultimate fall breakfast.
Storage: Store the bread in an airtight container at room temperature for up to 3 days. The glaze will soften slightly, but that’s part of the charm. If you live in a humid climate, store it in the refrigerator to prevent mold.
Freezing: This bread freezes beautifully. Wrap the cooled, unglazed loaf tightly in plastic wrap, then in aluminum foil. Freeze for up to 3 months. When you’re ready to eat it, thaw overnight in the refrigerator, bring to room temperature, and glaze before serving. I always keep one loaf in the freezer for unexpected guests or sudden cravings.
Flavor Development: Here’s a secret — this bread actually tastes better the next day. The flavors meld together and the texture becomes even more moist. If you can resist eating it the day you bake it, you’re in for a treat.
Nutritional Information & Benefits
Let’s be real — this is a treat. But it’s not without its redeeming qualities.
Estimated Nutritional Values (per slice, based on 10 slices):
- Calories: 320
- Fat: 14g
- Carbohydrates: 47g
- Fiber: 2g
- Sugar: 30g
- Protein: 4g
Health Benefits: Pumpkin is packed with vitamin A, which supports eye health and immune function. It’s also rich in fiber and antioxidants. The brown butter adds healthy fats that help your body absorb the fat-soluble vitamins in the pumpkin. The cinnamon and ginger have anti-inflammatory properties. So while this isn’t health food, it’s not empty calories either.
Dietary Considerations: This recipe contains dairy, eggs, and gluten. For a dairy-free version, see the variations section above. For a gluten-free version, use a 1:1 gluten-free flour blend. This bread is vegetarian-friendly.
Allergen Information: Contains wheat, dairy, and eggs. May contain traces of tree nuts if you add the walnut or pecan variation.
My Take: I believe in balance. This bread is meant to be enjoyed, not analyzed. Have a slice with your morning coffee, share it with friends, and don’t stress about the numbers. Life’s too short for guilt-ridden dessert.
Conclusion
This brown butter pumpkin bread with maple glaze is the recipe I turn to every single fall. It’s the one I make for new neighbors, for holiday parties, for those days when I need something warm and sweet to get through the season. It’s reliable, forgiving, and absolutely delicious.
I hope you make it your own. Add chocolate chips if that’s your thing. Swap the maple glaze for a cream cheese frosting. Double the recipe and freeze one loaf for later. The beauty of this bread is that it works with whatever you throw at it.
When you make it — and I hope you do — tag me or leave a comment below. I want to hear about your brown butter adventures. Did you burn it? (It happens.) Did you add too much cinnamon? (Is that even possible?) Did your family fight over the last slice? (Mine does every time.)
This isn’t just a recipe. It’s a little piece of fall that you can hold in your hands and share with the people you love. And honestly, that’s the best thing I can give you.
Happy baking, friends. 🍂
Frequently Asked Questions
Can I use pumpkin pie filling instead of pumpkin puree?
No, I wouldn’t recommend it. Pumpkin pie filling has added sugar and spices that will throw off the balance of this recipe. Stick with pure pumpkin puree for the best results. The spices in the pie filling are also different from what we’re using here, so the flavor won’t be quite right.
Why did my brown butter burn?
Brown butter can go from perfect to burnt in seconds. It usually happens when the heat is too high or you walk away from the pan. Keep the heat on medium, stir constantly, and watch for those brown specks. The moment you see them and smell that nutty aroma, pull it off the heat. If you do burn it, just start over — it’s only a few minutes and a stick of butter.
Can I make this bread without the maple glaze?
Absolutely. The bread is delicious on its own. The maple glaze adds sweetness and a beautiful presentation, but it’s not essential. You could also dust the bread with powdered sugar or leave it plain. If you want a different topping, try a cream cheese frosting or a simple cinnamon-sugar sprinkle.
How do I know when the bread is done baking?
Insert a toothpick into the center of the bread. If it comes out clean or with a few moist crumbs, it’s done. You can also use an instant-read thermometer — the internal temperature should be around 200-205°F. If the top is browning too quickly but the center isn’t done, tent the loaf with aluminum foil for the last 10-15 minutes of baking.
Can I double this recipe?
Yes! This recipe doubles beautifully. You can make two loaves at once, or make one now and freeze one for later. If you’re baking two loaves in the same oven, rotate the pans halfway through baking to ensure even cooking. The baking time may increase by 5-10 minutes, so start checking early.
Pin This Recipe!
Best Brown Butter Pumpkin Bread with Maple Glaze
This brown butter pumpkin bread with maple glaze is the ultimate fall treat. Nutty brown butter and sweet pumpkin come together in a moist, tender loaf topped with a simple maple glaze that seeps into every crack.
- Prep Time: 15 minutes
- Cook Time: 55 minutes
- Total Time: 1 hour 10 minutes
- Yield: 10 servings
- Category: Dessert
- Cuisine: American
Ingredients
- Unsalted butter, ½ cup (1 stick or 113g)
- Pumpkin puree, 1 cup (240g)
- Granulated sugar, ¾ cup (150g)
- Brown sugar, ½ cup (100g), packed
- Large eggs, 2, room temperature
- Vanilla extract, 1 teaspoon
- All-purpose flour, 1¾ cups (220g)
- Baking soda, 1 teaspoon
- Baking powder, ½ teaspoon
- Salt, ½ teaspoon
- Ground cinnamon, 2 teaspoons
- Ground nutmeg, ½ teaspoon
- Ground ginger, ½ teaspoon
- Ground cloves, ¼ teaspoon
- Milk, ¼ cup (60ml)
- Powdered sugar, 1 cup (120g)
- Pure maple syrup, 2 tablespoons
- Milk, 1-2 tablespoons (for glaze)
- Pinch of salt (for glaze)
Instructions
- Preheat your oven to 350°F (175°C). Position the rack in the center of the oven. Line your 9×5-inch loaf pan with parchment paper, leaving some overhang on the long sides. Lightly grease the exposed ends with butter or cooking spray.
- Brown the butter. Place the butter in a small saucepan over medium heat. Stir occasionally as it melts. The butter will start to foam and sizzle. Keep stirring. After about 3-4 minutes, you’ll see brown specks forming at the bottom of the pan and the butter will smell nutty and toasty. The moment it turns a golden amber color, remove it from the heat and pour it into a heat-safe bowl.
- Cool the brown butter. Let the brown butter cool for about 10 minutes. You want it warm but not hot.
- Combine the wet ingredients. In a large mixing bowl, whisk together the pumpkin puree, both sugars, eggs, vanilla extract, and the cooled brown butter. Mix until smooth and well combined.
- Whisk the dry ingredients. In a separate medium bowl, whisk together the flour, baking soda, baking powder, salt, cinnamon, nutmeg, ginger, and cloves.
- Add the dry ingredients to the wet. Pour the dry ingredients into the wet mixture. Add the milk. Fold everything together with a rubber spatula until just combined. A few streaks of flour are okay.
- Pour the batter into the prepared pan. Use your spatula to spread it evenly. Give the pan a gentle tap on the counter to release any air bubbles.
- Bake for 50-60 minutes. Start checking at 50 minutes. Insert a toothpick into the center — if it comes out clean or with a few moist crumbs, it’s done. If the top is browning too quickly but the center isn’t done yet, tent the loaf with aluminum foil for the last 10-15 minutes.
- Cool in the pan for 15 minutes. This allows the bread to set and makes it easier to remove. Use the parchment paper overhang to lift the bread out of the pan.
- Transfer to a cooling rack. Let the bread cool completely before glazing.
- Make the maple glaze. In a small bowl, whisk together the powdered sugar, maple syrup, and 1 tablespoon of milk. Add more milk, one teaspoon at a time, until the glaze reaches a pourable consistency.
- Glaze the bread. Drizzle the glaze over the cooled bread. Let it set for about 10 minutes before slicing.
Notes
Don’t rush the brown butter; medium heat is best. Room temperature ingredients matter for proper incorporation. Measure flour correctly by spooning and leveling. Check doneness with a toothpick or instant-read thermometer (200-205°F). Let bread cool completely before glazing to prevent glaze from melting off.
Nutrition
- Serving Size: 1 slice
- Calories: 320
- Sugar: 30
- Sodium: 280
- Fat: 14
- Saturated Fat: 8
- Carbohydrates: 47
- Fiber: 2
- Protein: 4
Keywords: pumpkin bread, brown butter, maple glaze, fall baking, quick bread, pumpkin recipe, autumn dessert