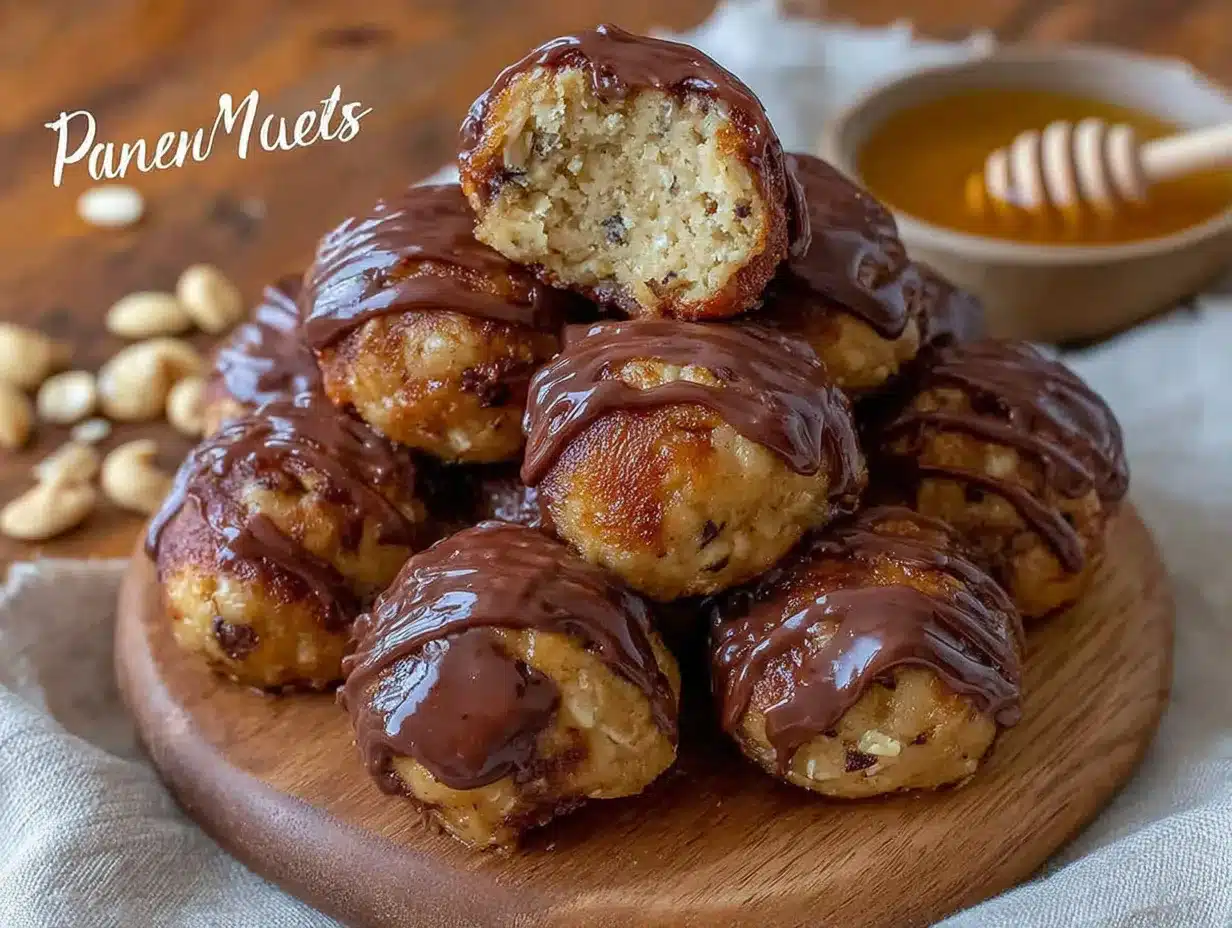
The tacky, slightly crumbly texture that gives way to a dense, fudgy chew — that’s the whole point of these peanut butter protein balls. I didn’t set out to make a healthy snack, honestly. I set out to stop buying the expensive, plastic-wrapped ones from the health food store that always felt a little too dry, a little too… earnest. You know the ones. They have the texture of sawdust packed with good intentions.
This started on a Tuesday afternoon when my usual 3 PM slump hit like a wall. I’d just finished a batch of Reese’s Peanut Butter Poke Cake for a weekend party, and the kitchen smelled like sugar and victory. I had peanut butter, oats, honey, chocolate chips, and a bag of protein powder staring at me from the pantry. I thought, Why not just mix it all together and see what happens? No food processor, no fancy equipment — just a bowl, a spoon, and a hope that it wouldn’t taste like a punishment.
The first batch was a little too sticky, so I added more oats. The second batch was too dry, so I drizzled in more honey. By the third try, I had that perfect texture — the kind that holds together but still feels soft and indulgent. My husband walked in, grabbed one, and said, “These are dangerous.” That’s when I knew I had something worth sharing. These little balls aren’t trying to be anything they’re not. They’re just honest, satisfying, and exactly what you need when you want something sweet that doesn’t come with a side of regret.
Why You’ll Love This Recipe
Let me tell you why these no-bake protein balls have become my most-requested snack. I’ve tested this recipe at least a dozen times — tweaking the ratios, swapping ingredients, even accidentally leaving them in the fridge for a week (they were still good, by the way). Here’s what makes them stand out from every other protein ball recipe I’ve tried:
- Only 5 Ingredients : No weird superfood powders, no obscure nut butters, no ingredients you have to order online. You probably have everything in your pantry right now.
- No-Bake & Ready in 10 Minutes : Seriously. From bowl to fridge in under ten minutes. No oven, no stovetop, no waiting for anything to cool.
- Perfect for Meal Prep : Make a batch on Sunday and grab them all week for breakfast, post-workout fuel, or that 3 PM snack attack.
- Kid-Approved & Adult-Loved : My niece calls them “cookie dough balls” and I don’t correct her. They taste that good.
- Customizable to Your Pantry : Don’t have chocolate chips? Use raisins. Want more protein? Add an extra scoop. This recipe is forgiving.
- Naturally Sweetened : Just honey (or maple syrup) — no refined sugar unless you count the chocolate chips, and I definitely don’t.
What makes these different from the dozens of other protein ball recipes out there? It’s the texture. Most recipes end up either too dry and crumbly or too sticky and wet. I obsessed over getting that perfect balance — the kind that holds its shape but melts slightly in your mouth. After making batch after batch (my family was very patient), I finally nailed it. These balls have a dense, fudgy interior with just enough chew from the oats and a pop of sweetness from the chocolate chips. They’re not dry, they’re not sticky — they’re just right.
Honestly, this recipe is the kind that makes you close your eyes after the first bite. It’s comfort food disguised as a health snack — satisfying, simple, and somehow exactly what you needed.
What Ingredients You Will Need
This recipe uses simple, wholesome ingredients to deliver big flavor without any fuss. Here’s what you’ll need — and a few notes from my kitchen trials:
For the Protein Balls
- 1 cup creamy peanut butter (use natural, no-stir peanut butter for best results — I prefer Jif Natural or Crazy Richard’s because they have the right consistency without separating too much. Avoid the super-runny natural brands or your balls might fall apart.)
- 1/3 cup honey (or maple syrup for a vegan option. The honey adds just the right sweetness and helps bind everything together. If you use maple syrup, the texture will be slightly softer — still delicious, just a heads up.)
- 1 cup old-fashioned rolled oats (not quick oats — the texture is better with rolled oats. Quick oats can turn the mixture into paste. Gluten-free certified oats work perfectly if needed.)
- 1/2 cup vanilla protein powder (I use Orgain Simple or Ghost Whey — but any protein powder works. Just note that plant-based protein powders tend to make the mixture drier, so you might need an extra tablespoon of honey. Chocolate protein powder is also amazing here.)
- 1/3 cup mini chocolate chips (semi-sweet or dark — I love Enjoy Life for allergen-friendly or Guittard for a richer flavor. Regular chocolate chips work too, but mini chips distribute more evenly.)
Optional Add-Ins (Not Required, But Fun)
- 1 tablespoon chia seeds (adds fiber and omega-3s — no need to adjust liquid)
- 1 tablespoon ground flaxseed (great for extra nutrition, but it can make the mixture a bit drier)
- Pinch of sea salt (if your peanut butter is unsalted, a pinch really balances the sweetness)
- 1/4 cup shredded coconut (for texture and a tropical twist)
Ingredient Selection Tip: Look for peanut butter that lists only peanuts (and maybe salt) as ingredients. The ones with added sugar and hydrogenated oils can make the balls greasy. I learned that the hard way when my first batch turned into a puddle in the fridge. Also, if you’re using a protein powder that’s already sweetened, you can reduce the honey slightly — I’d start with 1/4 cup and taste the mixture before adding more.
Equipment Needed
You don’t need a lot of fancy equipment for this recipe. Here’s what I actually used (and what you can substitute if you’re in a pinch):
- Large mixing bowl — Any bowl works, but I prefer a wide, shallow one for easier mixing. My go-to is a simple ceramic mixing bowl from Target.
- Rubber spatula or wooden spoon — The mixture gets thick, so a sturdy spoon is helpful. I’ve used everything from a silicone spatula to a wooden spoon — both work fine.
- Measuring cups and spoons — For accuracy, especially with the protein powder. Eyeballing it can lead to dry or sticky balls.
- Cookie scoop or tablespoon — For uniform balls. A 1.5-tablespoon cookie scoop is my favorite tool here. If you don’t have one, just use a regular tablespoon and roll with your hands.
- Parchment paper or silicone baking mat — To line the baking sheet or plate where the balls will chill. Not strictly necessary, but it makes cleanup easier.
- Baking sheet or large plate — To hold the balls while they chill in the fridge. Any flat surface that fits in your fridge works.
- Optional: Food processor — If you want a smoother texture (like a truffle), you can pulse the oats first. But I prefer the texture of whole oats, so I skip this step.
Budget-Friendly Tip: Don’t buy a fancy cookie scoop if you don’t have one. Just use your hands — the mixture is sticky, but a quick spray of cooking spray on your palms helps. Or wet your hands slightly with water. It’s a game changer.
Preparation Method
Alright, let’s get rolling — literally. This recipe comes together in about 10 minutes, and the hardest part is not eating all the dough before it hits the fridge.
Step 1: Combine the Wet Ingredients
In a large mixing bowl, add 1 cup creamy peanut butter and 1/3 cup honey. Stir them together until they’re fully combined. You’re looking for a smooth, glossy mixture with no streaks of honey. This should take about 30 seconds. If your peanut butter is cold from the fridge, microwave it for 10-15 seconds first — it mixes much easier when it’s softened.
Step 2: Add the Dry Ingredients
Add 1 cup rolled oats and 1/2 cup vanilla protein powder to the bowl. Stir everything together with a rubber spatula or wooden spoon. At first, it will look dry and crumbly — don’t panic. Keep mixing, pressing the mixture against the sides of the bowl as you go. After about a minute, it will start to come together. The texture should be thick, slightly sticky, and hold together when you press it between your fingers.
Step 3: Fold in the Chocolate Chips
Add 1/3 cup mini chocolate chips to the bowl. Fold them in gently until they’re evenly distributed. If the mixture feels too dry at this point, add 1 tablespoon of honey (or milk) and mix again. If it’s too sticky, add another tablespoon of oats. The mixture should be pliable but not wet — think play dough consistency.
Step 4: Roll Into Balls
Line a baking sheet or large plate with parchment paper. Using a cookie scoop or your hands, scoop out about 1.5 tablespoons of the mixture and roll it between your palms into a smooth ball. If the mixture sticks to your hands, lightly wet your palms with water or spray them with cooking spray. Place each ball on the prepared baking sheet. You should get about 16-18 balls, depending on size.
Step 5: Chill and Set
Place the baking sheet in the refrigerator for at least 30 minutes. This step is crucial — it firms up the balls and makes them hold their shape. If you skip this step, they’ll be too soft and might fall apart when you try to pick them up. After 30 minutes, they’re ready to eat. For a firmer texture, let them chill for an hour or overnight.
Sensory Cue: When you roll the balls, they should feel slightly tacky but not wet. If they feel greasy, you used too much peanut butter. If they feel like sand, you need a little more honey. Trust your hands — they know.
Cooking Tips & Techniques
After making these protein balls more times than I can count (and a few memorable failures), here’s what I’ve learned:
The Sticky Hands Solution
This is the number one complaint I hear. The mixture is sticky, and rolling it into balls can be frustrating. Here’s my trick: wet your hands with cold water before rolling each ball. Don’t dry them — just shake off the excess. The thin layer of water prevents the mixture from sticking to your palms. Alternatively, spray your hands with cooking spray. I’ve tried both, and honestly, the water method works better for me.
Texture Troubleshooting
If your mixture is too dry (crumbly, won’t hold together), add honey 1 teaspoon at a time until it comes together. If it’s too wet (sticky, almost runny), add oats 1 tablespoon at a time. The humidity in your kitchen, the brand of peanut butter, and the type of protein powder all affect the texture. My first batch using plant-based protein powder was a disaster — so dry it crumbled into dust. I added an extra tablespoon of honey and a splash of milk, and it saved the batch.
Don’t Overmix
Once you add the oats, mix just until everything is combined. Overmixing can break down the oats and make the texture mushy instead of chewy. You want to see distinct oat flakes in the finished balls — that’s part of the charm.
Chill Time Is Non-Negotiable
I know, I know — you want to eat them immediately. But trust me on this one. The 30-minute chill time allows the oats to absorb some moisture from the peanut butter and honey, which softens them slightly and helps everything bind together. Balls that haven’t been chilled are fragile and messy. Chilled balls are perfect.
Make Ahead & Freezer Tip
These freeze beautifully. Roll the balls, place them on a baking sheet, and freeze for 1 hour. Then transfer them to a freezer bag. They’ll keep for up to 3 months. I grab one straight from the freezer for a quick snack — they thaw in about 5 minutes at room temperature. Perfect for busy mornings when you need something to grab on your way out the door.
Variations & Adaptations
One of the best things about this recipe is how flexible it is. Here are some of my favorite variations:
Vegan Version
Swap the honey for maple syrup or agave nectar. Use a plant-based protein powder (like pea or brown rice protein). The texture will be slightly softer, so you might need to add an extra tablespoon of oats to compensate. I’ve made this version for my vegan friends and they always ask for the recipe.
Chocolate Lover’s Version
Use chocolate protein powder instead of vanilla, and swap the mini chocolate chips for white chocolate chips or chopped dark chocolate. The result is a double-chocolate treat that tastes dangerously like brownie batter. I may have eaten four of these in one sitting. No regrets.
Nut-Free Version
Swap the peanut butter for sunflower seed butter (like SunButter) or tahini. Both work beautifully — just note that sunflower seed butter can turn green when combined with baking soda (which isn’t in this recipe, so you’re safe). Tahini gives a slightly savory, nutty flavor that’s surprisingly good with chocolate chips.
Lower-Carb Version
Swap the oats for unsweetened shredded coconut or almond flour. Use a low-carb protein powder and sugar-free chocolate chips. The texture will be denser and less chewy, but still delicious. I’ve made this for a keto friend and she said it hit the spot perfectly.
Festive Holiday Version
Add 1/4 cup dried cranberries and 1/4 cup chopped pecans instead of chocolate chips. Roll the balls in crushed peppermint for a holiday twist. These are perfect for Christmas cookie trays or as a healthier option during the holiday season. I brought a batch to a holiday party and they disappeared faster than the cookies.
High-Protein Version
Add an extra 1/4 cup of protein powder and increase the honey by 1 tablespoon. You can also add 2 tablespoons of collagen peptides for an extra protein boost without affecting the flavor. These are my go-to post-workout snack — they pack about 8 grams of protein per ball.
Serving & Storage Suggestions
These protein balls are versatile enough to fit into any part of your day. Here’s how I serve and store them:
Serving Ideas
Serve them straight from the fridge for the best texture — firm, chewy, and satisfying. At room temperature, they soften slightly and become almost fudgy. Both versions are delicious, just different. I personally prefer them cold because they hold their shape better and feel more refreshing.
Pair them with a warm drink like a Cozy Copycat Gingerbread Latte for a cozy afternoon treat. Or serve them alongside a bowl of Cozy Tomato Basil Soup with Perfect Grilled Cheese Dippers for a balanced lunch — the sweet, nutty protein balls complement the savory soup beautifully.
For a breakfast on the go, grab 2-3 balls with a piece of fruit. For a post-workout snack, pair them with a glass of milk or a protein shake. They’re also perfect for lunchboxes — kids love them, and they hold up well in a bag without getting squished.
Storage Instructions
Refrigerator: Store the protein balls in an airtight container in the refrigerator for up to 2 weeks. Place a piece of parchment paper between layers to prevent sticking. They actually get better after a day or two — the flavors meld together and the texture becomes more uniform.
Freezer: For longer storage, freeze the balls on a baking sheet for 1 hour, then transfer to a freezer-safe bag or container. They’ll keep for up to 3 months. To thaw, leave them at room temperature for 5-10 minutes, or eat them straight from the freezer — they’re like little protein ice cream bites.
Room Temperature: I don’t recommend storing them at room temperature for more than a day or two, especially if you’re using natural peanut butter. They can become too soft and may spoil faster. If you’re taking them on a road trip or picnic, pack them in a cooler with an ice pack.
How Flavors Develop Over Time
Freshly made protein balls taste good, but day-old protein balls taste amazing. The oats absorb moisture from the peanut butter and honey, softening slightly and creating a more uniform, fudgy texture. The chocolate chips also firm up in the fridge, giving you those little pockets of sweetness. If you can resist eating them all on day one, you’ll be rewarded on day two.
Nutritional Information & Benefits
Here’s the nutritional breakdown for one protein ball (based on 16 servings, using the ingredients listed above):
- Calories: 145
- Protein: 7g
- Fat: 8g
- Carbohydrates: 14g
- Fiber: 2g
- Sugar: 8g (from honey and chocolate chips)
Health Benefits of Key Ingredients:
- Peanut Butter: Packed with healthy monounsaturated fats, protein, and vitamin E. It’s also a good source of magnesium, which supports muscle function and energy production.
- Rolled Oats: Rich in soluble fiber (beta-glucan), which helps lower cholesterol and keeps you feeling full longer. Oats also provide steady-release energy — perfect for sustained energy throughout the day.
- Honey: A natural sweetener with antioxidant properties. It also has antibacterial benefits and can help soothe a sore throat (bonus!).
- Protein Powder: Adds a concentrated protein boost without extra fat or carbs. Choose a high-quality brand with minimal additives for the best results.
Dietary Considerations: This recipe can be made gluten-free (use certified gluten-free oats), dairy-free (use dairy-free chocolate chips), and vegan (use maple syrup). It’s naturally egg-free and contains no refined sugar (except the chocolate chips, which you can swap for sugar-free chips).
Potential Allergens: Contains peanuts and oats. May contain traces of dairy and soy depending on the chocolate chips and protein powder used. Always check labels if you have allergies.
FAQs
Can I use crunchy peanut butter instead of creamy?
Absolutely! Crunchy peanut butter adds a lovely texture with little bits of peanut throughout. Just note that the balls might be slightly more crumbly since the peanut pieces create small air pockets. If you use crunchy, you might need to add an extra tablespoon of honey to help everything bind together.
My mixture is too dry. What did I do wrong?
Don’t worry — this is the most common issue. It usually happens when your peanut butter is too thick or your protein powder is very absorbent. Fix it by adding honey 1 teaspoon at a time, or add a splash of milk (dairy or plant-based). Mix thoroughly after each addition until the mixture holds together when pressed. I’ve saved many dry batches this way.
Can I make these without protein powder?
Yes! If you don’t have protein powder, you can substitute it with an equal amount of oat flour (just grind rolled oats in a blender) or unsweetened shredded coconut. The texture will be slightly different — less dense and more oat-forward — but still delicious. You can also just omit the protein powder and add an extra 1/2 cup of oats, though the balls will be less protein-rich.
How long do these protein balls last at room temperature?
In a cool, dry place, they’ll last about 2-3 days at room temperature. But I strongly recommend storing them in the fridge — they last much longer (up to 2 weeks) and the texture is better. If you’re taking them to work or on a hike, pack them in a cooler with an ice pack. Nobody wants a melted protein ball in their bag.
Can I double this recipe?
Absolutely! This recipe doubles beautifully. Just use a larger bowl and make sure you have enough space in your fridge for the extra balls. I often make a double batch on Sunday and freeze half for later. The recipe scales perfectly — no adjustments needed.
Conclusion
These 5-ingredient peanut butter protein balls are proof that healthy snacks don’t have to be complicated or boring. They’re quick, easy, and made with ingredients you probably already have in your kitchen. No baking, no fuss, no weird ingredients — just pure, satisfying goodness in every bite.
What I love most about this recipe is how adaptable it is. You can make it vegan, nut-free, high-protein, or low-carb — it always works. It’s the kind of recipe that becomes a staple in your weekly rotation, the one you make without even thinking because you know it by heart.
I’d love to hear how you customize these protein balls. Did you add coconut? Swap the chocolate chips for dried fruit? Use a different nut butter? Drop a comment below and let me know — your ideas might inspire someone else’s next batch. And if you loved this recipe, share it with a friend who needs a quick, healthy snack idea. Happy rolling!
Pin This Recipe!
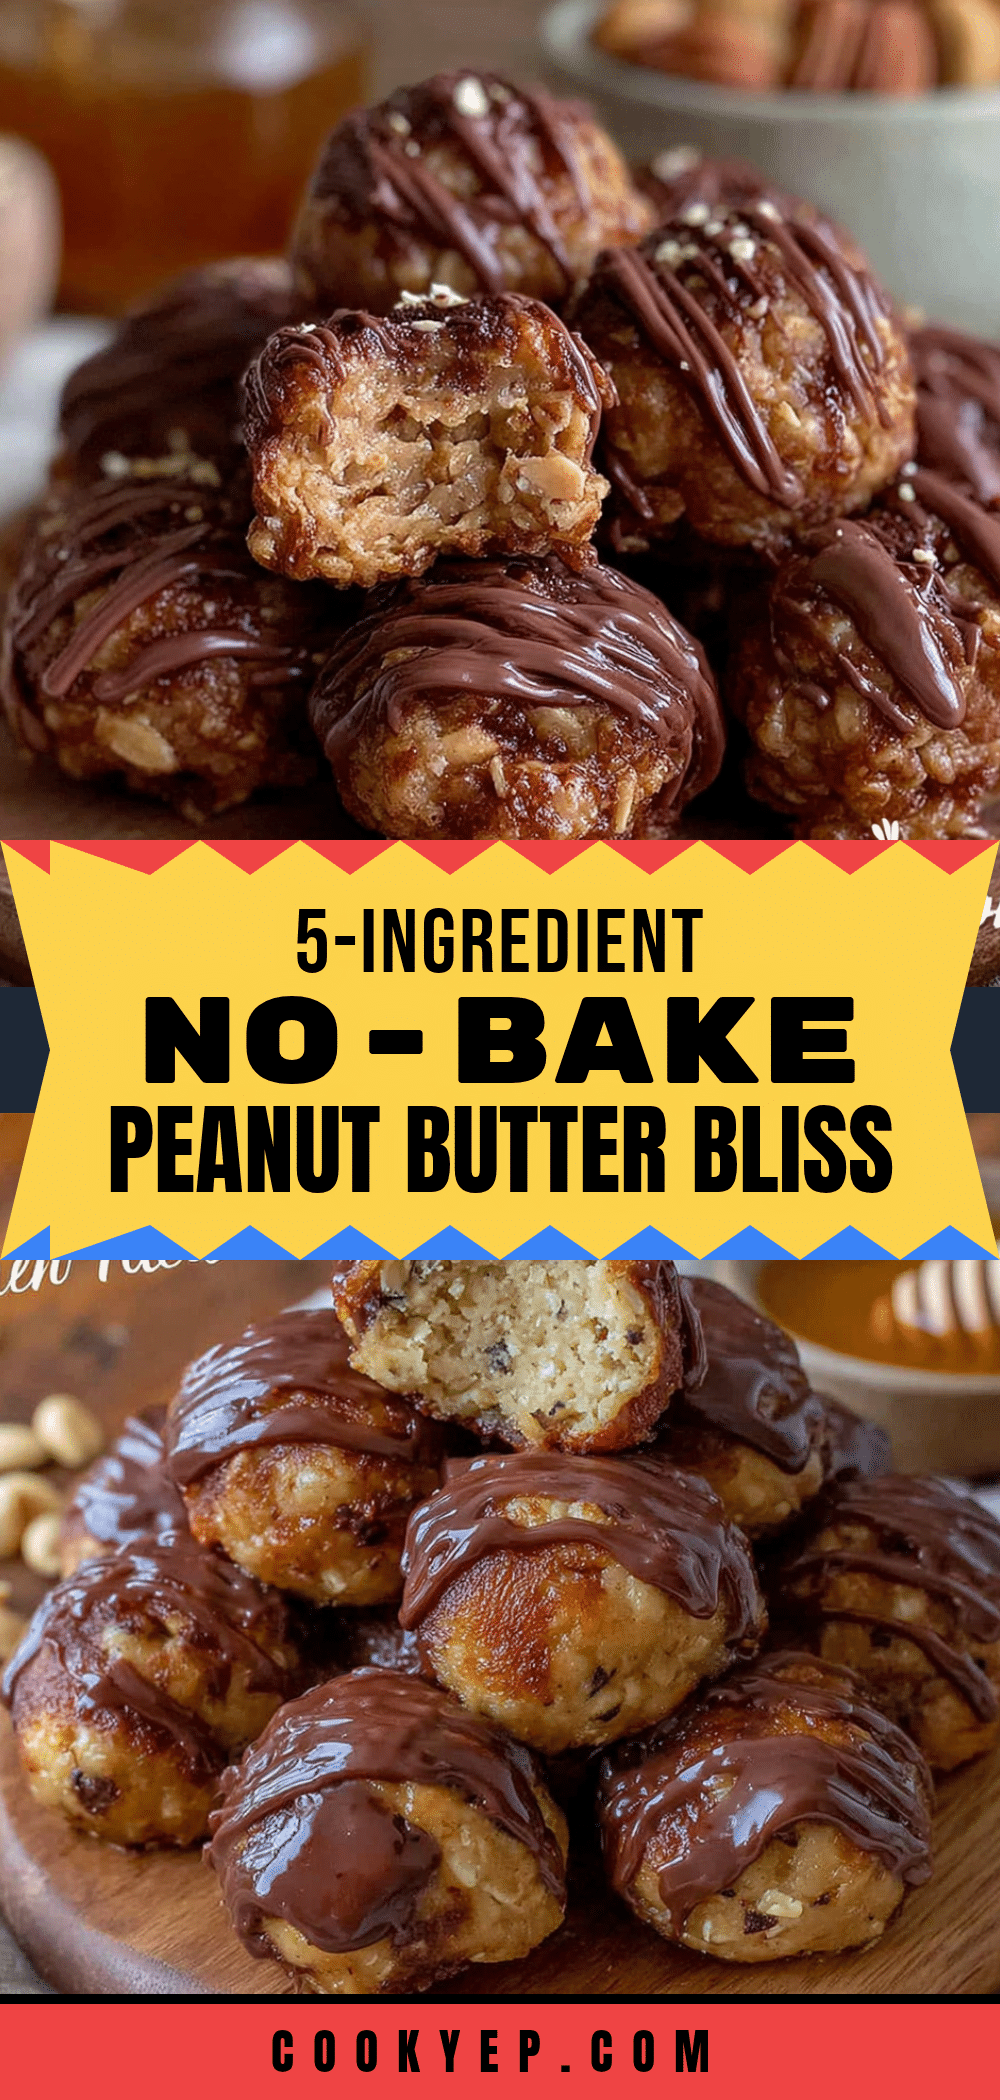
Easy 5-Ingredient Peanut Butter Protein Balls No-Bake Recipe
These no-bake peanut butter protein balls are made with just 5 simple ingredients and come together in 10 minutes. They’re dense, fudgy, and perfect for a quick snack or post-workout fuel.
- Prep Time: 10 minutes
- Cook Time: 0 minutes
- Total Time: 40 minutes (including chill time)
- Yield: 16-18 balls 1x
- Category: Snack
- Cuisine: American
Ingredients
- 1 cup creamy peanut butter (natural, no-stir preferred)
- 1/3 cup honey (or maple syrup for vegan)
- 1 cup old-fashioned rolled oats (not quick oats)
- 1/2 cup vanilla protein powder
- 1/3 cup mini chocolate chips (semi-sweet or dark)
Instructions
- In a large mixing bowl, combine 1 cup creamy peanut butter and 1/3 cup honey. Stir until smooth and glossy, about 30 seconds.
- Add 1 cup rolled oats and 1/2 cup vanilla protein powder. Mix until the mixture is thick, slightly sticky, and holds together when pressed.
- Fold in 1/3 cup mini chocolate chips until evenly distributed. If too dry, add 1 tablespoon honey; if too sticky, add 1 tablespoon oats.
- Line a baking sheet with parchment paper. Scoop about 1.5 tablespoons of mixture and roll into smooth balls. Place on prepared sheet.
- Refrigerate for at least 30 minutes to firm up. Serve chilled or at room temperature.
Notes
For best texture, chill for at least 30 minutes. If mixture is too sticky, wet hands with water before rolling. Store in refrigerator for up to 2 weeks or freeze for up to 3 months.
Nutrition
- Serving Size: 1 ball
- Calories: 145
- Sugar: 8
- Sodium: 50
- Fat: 8
- Saturated Fat: 2
- Carbohydrates: 14
- Fiber: 2
- Protein: 7
Keywords: peanut butter protein balls, no-bake protein balls, healthy snack, 5-ingredient recipe, gluten-free snack, high-protein snack


