I want a candy corn rice krispie treat right now, and I have everything except the patience to wait for marshmallows to melt slowly. This is a very specific, very urgent craving that hits me every single October without fail. I am standing in my kitchen, staring at a bag of candy corn I bought on impulse, and I am trying to convince myself that making these is a reasonable decision for a Tuesday afternoon.
Honestly, it is. Because these aren’t just regular rice krispie treats dressed up in orange and yellow. They are genuinely better. The candy corn melts down into the marshmallow mixture and creates this subtle honey-vanilla thing that plain marshmallows just don’t do on their own. The texture stays soft and chewy (not rock hard like some versions I have made), and the colors look like a sunset you can eat. It is the kind of snack that makes you feel like you have your life together, even when you are eating it over the sink at 3 PM.
I have made a lot of versions of these over the years. Some were too sticky. Some fell apart. Some looked like a science experiment gone wrong. But this version? This one works every single time. It uses the exact ratio of butter to marshmallow to candy corn that makes the treats hold together without being tough. And the best part? You don’t have to be a baker to pull it off. If you can melt butter, you can make these.
So here is the recipe that finally got me to stop buying the overpriced store-bought versions. Trust me, once you taste these fresh, you will never go back.
Why You Will Love This Recipe
I have tested this recipe at least a dozen times across three different kitchens, with different brands of marshmallows and different humidity levels, and it holds up every single time. Here is why these treats are worth your precious fall baking time.
- Quick and Easy: From start to finish, you are looking at about 15 minutes of active work. No oven required. No complicated techniques. Just a pot and a spatula.
- Simple Ingredients: You probably already have butter and marshmallows in your pantry right now. The only special purchase is a bag of candy corn, which is everywhere during September and October.
- Perfect for Halloween Parties: These treats travel well, they don’t melt, and kids absolutely lose their minds over them. I brought a batch to a Halloween pumpkin charcuterie board last year and they disappeared before the cheese did.
- Crowd-Pleaser: I have yet to meet a person who doesn’t like these. Even people who claim they don’t like candy corn end up eating three pieces.
- Unbelievably Delicious: The candy corn melts into the marshmallow mixture and creates this creamy, almost butterscotch-like flavor that makes regular rice krispie treats taste boring in comparison.
What makes this recipe different from the other versions floating around the internet is the ratio. Most recipes use too much candy corn, which makes the treats overly sweet and sticky. I dialed it back to the exact amount that adds flavor and color without turning your teeth into sugar sponges. It is the Goldilocks version, and it took me four failed batches to get there.
This is the kind of recipe that makes you feel like a fall hosting pro without any of the stress. It is nostalgic, it is fun, and it tastes like the best parts of October in every single bite.
What Ingredients You Will Need
This recipe keeps things simple. You only need five ingredients, and four of them are probably in your kitchen right now. The candy corn is the star here, so pick up a fresh bag if you can. Stale candy corn doesn’t melt as smoothly.
- 3 tablespoons unsalted butter (plus extra for greasing the pan). I use salted butter in a pinch and just skip the extra salt. Land O Lakes is my go-to, but any brand works.
- 1 bag (10 ounces) mini marshmallows. Jet-Puffed melts the most evenly in my experience. Do not use jumbo marshmallows unless you want to stand there stirring forever.
- 1 cup candy corn. Brach’s is the classic choice. The autumn mix with the little pumpkins works too, but separate them by color if you want that layered look.
- 6 cups crispy rice cereal. Kellogg’s Rice Krispies give the best snap, but any store brand works fine. Just make sure it is fresh and not stale.
- 1/4 teaspoon vanilla extract (optional but recommended). It rounds out the sweetness and makes the candy corn flavor pop.
For the layered look in the photos, you will want to separate your candy corn by color. This takes about five extra minutes but makes the final product look incredible. If you are short on time, just toss the whole bag in. The treats will still taste amazing, even if they are a little chaotic looking.
One note on substitutions: you can use vegan butter and vegan marshmallows to make these dairy-free. Dandies brand marshmallows work beautifully. The candy corn is naturally dairy-free, so you are good there. Just watch the melt time, vegan marshmallows take a little longer to smooth out.
Equipment Needed
You do not need a fancy kitchen to make these treats work. Here is what you will need.
- Large pot or Dutch oven. You need room to stir everything together without cereal flying everywhere. A 5-quart pot is perfect.
- Rubber spatula or wooden spoon. Silicone spatulas are my favorite because they scrape the sides clean, but a good old wooden spoon works just fine.
- 9×13 inch baking dish. This gives you thick, satisfying treats. An 8×8 dish works too, but your treats will be extra thick and might need a little more pressing time.
- Parchment paper or wax paper. Line your pan with this and you will thank yourself later. Nothing sticks, and cleanup takes ten seconds.
- Sharp knife. A serrated bread knife cuts through these cleanly without squishing them. Trust me on this one.
If you do not have a 9×13 dish, you can use a rimmed baking sheet. The treats will be thinner and crispier, which is actually a nice variation. I have done it both ways, and honestly, sometimes I prefer the thinner version because the edges get extra crunchy.
Preparation Method
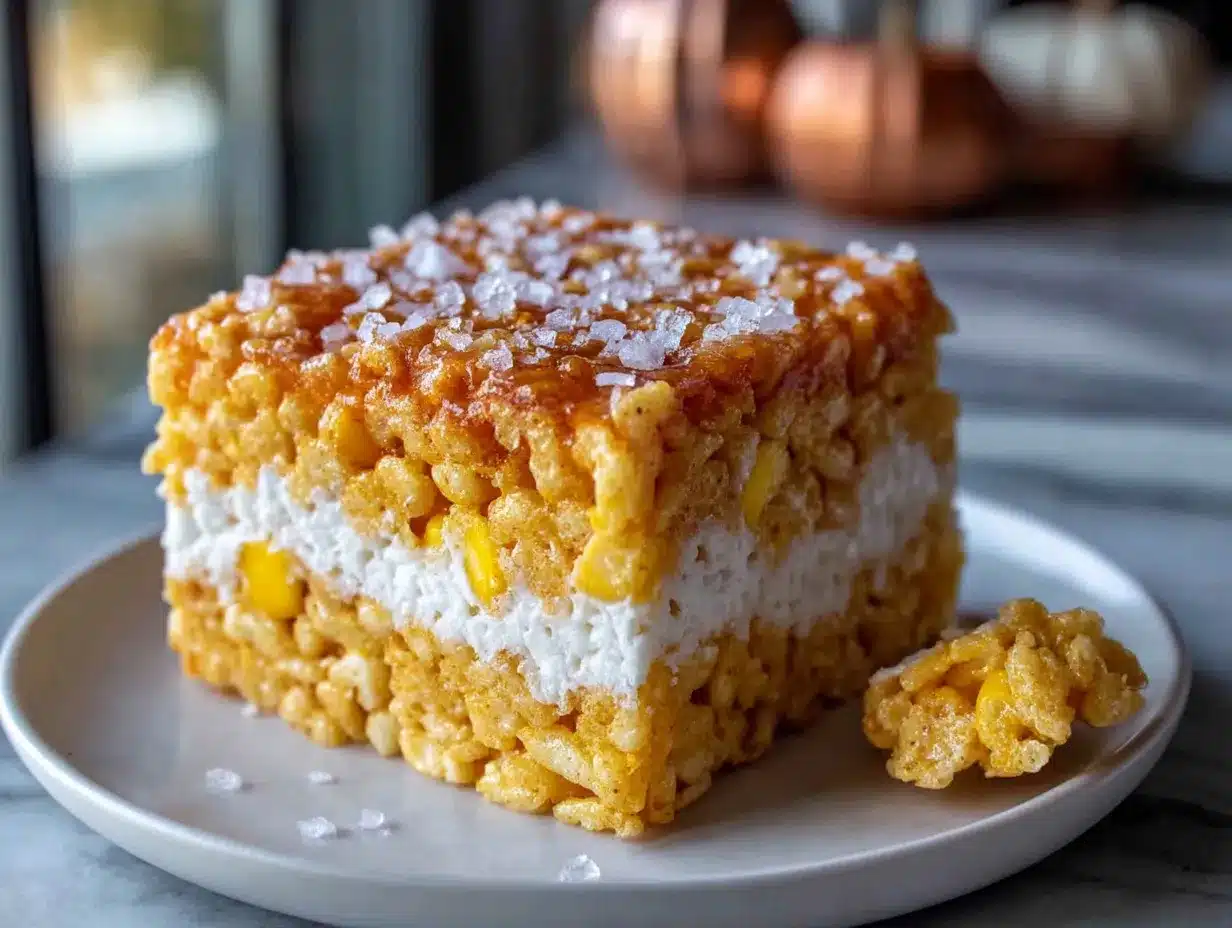
This is the part where the magic happens. Follow these steps and you will have perfect treats every single time. I have made every mistake in the book so you do not have to.
- Prep your pan. Grease a 9×13 inch baking dish with a thin layer of butter. Then line it with parchment paper, leaving some overhang on two sides. Grease the parchment too. This sounds excessive, but it guarantees zero sticking. Set the pan aside.
- Sort your candy corn (optional but worth it). If you want that beautiful layered look, separate the orange, yellow, and white pieces into three small bowls. This takes about five minutes. Put on a podcast and make it meditative.
- Melt the butter. Place your large pot over medium-low heat. Add the 3 tablespoons of butter and let it melt slowly. Do not rush this step. High heat will burn the butter and ruin the flavor. Swirl the pot occasionally to help it melt evenly.
- Add the marshmallows. Once the butter is fully melted, pour in the entire bag of mini marshmallows. Stir constantly with your rubber spatula. The marshmallows will puff up and then deflate. Keep stirring until they are completely smooth and velvety. This takes about 3 to 4 minutes.
- Add the candy corn. Pour in 1 cup of candy corn (or your sorted colors if you are layering). Stir until the candy corn is mostly melted. You will see streaks of orange and yellow swirling through the marshmallow. That is exactly what you want. A few tiny bits of unmelted candy corn are fine, they add little pockets of chewy sweetness.
- Stir in the vanilla. Add the 1/4 teaspoon of vanilla extract and give everything one final stir. The mixture should be glossy and thick. Turn off the heat.
- Add the cereal. Pour in the 6 cups of crispy rice cereal. Fold it into the marshmallow mixture gently but thoroughly. Do not stir like you are angry at it. Gentle folding keeps the cereal from breaking into tiny pieces. You want every kernel coated, but you also want some texture left.
- Press into the pan. Scrape the mixture into your prepared pan. Here is the trick: grease your hands with a little butter or cooking spray, then press the mixture down evenly. Do not use a spatula for pressing, it will stick and create a mess. Your hands are the best tool for this job. Press firmly but gently. You want an even layer, not a compressed brick.
- Add optional toppings. If you want extra candy corn on top, press a few pieces into the surface while the treats are still warm. This makes them look prettier and gives you that satisfying crunch on top.
- Cool completely. Let the treats sit at room temperature for at least 30 minutes. Do not put them in the refrigerator, they will get hard. Patience is hard, I know, but it pays off here.
- Cut and serve. Lift the treats out of the pan using the parchment overhang. Place them on a cutting board. Use a serrated knife to cut them into squares. Wipe the knife clean between cuts for the cleanest edges. I like 12 big squares, but you can do 16 smaller ones if you are feeding a crowd.
One thing I learned the hard way: if your treats are too sticky to cut, your marshmallow mixture was too hot when you added the cereal. Next time, let it cool for 30 seconds off the heat before folding in the cereal. It makes a huge difference.
Cooking Tips and Techniques
I have been making rice krispie treats since I was tall enough to reach the stove, and I have collected a few tricks along the way. Here is what I wish someone had told me years ago.
Low and slow is the rule. The biggest mistake people make is cranking up the heat to melt things faster. Do not do it. Medium-low heat gives you smooth, silky marshmallow. High heat gives you scorched, grainy marshmallow that tastes like regret. I learned this the hard way when I ruined a batch for a Halloween party and had to start over at 10 PM.
Grease everything. Your spatula, your hands, your knife, your pan. Marshmallow mixture sticks to everything like it has a personal vendetta against you. A light coating of butter or cooking spray on your tools makes the whole process so much less frustrating.
Work quickly but calmly. Once the cereal hits the marshmallow, you have about 60 seconds to get everything mixed and pressed before it starts setting up. Have your pan ready. Have your hands greased. Move with purpose, but do not panic. It is just sugar, you have got this.
Let them rest before cutting. I know you want to eat them immediately. I do too. But cutting into warm treats will give you ragged, sticky edges. Thirty minutes of patience gives you clean, beautiful squares that look like they came from a bakery.
Use fresh cereal. Stale cereal makes sad treats. If your box of Rice Krispies has been open for more than a few weeks, buy a fresh one. The texture difference is noticeable, and stale cereal does not hold up as well in the mixing process.
Variations and Adaptations
Once you master the basic recipe, you can play around with it. Here are some variations I have tried and loved.
Chocolate Drizzle Version: After the treats cool, melt 1/2 cup of chocolate chips with 1 teaspoon of coconut oil and drizzle it over the top. The chocolate and candy corn combination is surprisingly good. I made this for a spiderweb sugar cookie bars platter and it was the first thing to disappear.
Peanut Butter Twist: Stir 1/4 cup of creamy peanut butter into the marshmallow mixture right after the butter melts. It adds a savory note that balances the sweetness perfectly. If you are feeling extra, use crunchy peanut butter for texture.
Vegan and Dairy-Free: Use vegan butter and vegan marshmallows (Dandies brand works great). The candy corn is naturally vegan, so you are good there. The texture will be slightly different, chewier and a little denser, but still delicious.
Spiced Fall Version: Add 1/2 teaspoon of pumpkin pie spice to the marshmallow mixture along with the vanilla. It gives the treats a warm, cozy flavor that feels very autumn. I made this version for a cozy fall vegetable soup dinner and it was the perfect sweet ending.
Extra Crunchy: Swap 1 cup of the crispy rice cereal for 1 cup of crushed pretzels. The salty crunch is incredible against the sweet marshmallow. This is my personal favorite variation for movie nights.
Serving and Storage Suggestions
These treats are best served at room temperature. Cold treats get hard and lose their soft, chewy texture. If you made them ahead of time, let them sit out for about 15 minutes before serving.
For presentation, I like to stack them on a white platter with extra candy corn scattered around. It makes the colors pop and looks festive without much effort. You can also stick them on popsicle sticks for a fun, portable treat that kids love.
These pair beautifully with a cold glass of milk, a hot apple cider, or even a cozy slow cooker apple cider cocktail for an adults-only Halloween gathering. The sweetness of the treats balances the tartness of the cider perfectly.
Storage: Keep the treats in an airtight container at room temperature. They will stay fresh for up to 3 days. Do not refrigerate them, the cold air dries them out and makes them hard. If your kitchen is very humid, add a piece of bread to the container to absorb excess moisture. Replace the bread every day.
Freezing: These freeze surprisingly well. Wrap individual squares in plastic wrap, then place them in a freezer bag. They will keep for up to 3 months. Thaw at room temperature for about 30 minutes before eating. Do not microwave frozen treats, they will turn into a chewy mess.
One thing I have noticed: these treats taste even better on day two. The flavors meld together overnight, and the texture softens just a little. If you can resist eating them all on day one, you are in for a real treat on day two.
Nutritional Information and Benefits
Let us be real for a second. These are not health food. They are a fun, indulgent treat that belongs at parties and celebrations. But here is the breakdown if you are curious.
| Nutrient | Per Serving (1 square, 12 servings) |
|---|---|
| Calories | 210 |
| Total Fat | 5g |
| Saturated Fat | 3g |
| Carbohydrates | 42g |
| Sugar | 26g |
| Protein | 1g |
| Sodium | 115mg |
On the bright side, the crispy rice cereal does provide a small amount of iron and B vitamins. And the butter gives you a little vitamin A. But honestly, you are here for the joy, not the nutrition facts. These treats are about making memories, not meeting your daily micronutrient goals.
If you are watching your sugar intake, you can reduce the candy corn to 1/2 cup and add an extra 1/2 cup of cereal. The treats will be less sweet but still delicious. I have made this version for myself when I wanted a smaller sugar hit.
These treats are not gluten-free unless you use certified gluten-free crispy rice cereal. Regular Rice Krispies contain malt flavoring that comes from barley, which contains gluten. Look for the gluten-free version or a store brand that specifies gluten-free on the label.
Frequently Asked Questions
Can I use jumbo marshmallows instead of mini marshmallows?
You can, but they take longer to melt and are harder to get smooth. If you only have jumbo marshmallows, use 20 to 24 of them and be patient with the melting process. Stir constantly and keep the heat low.
Why are my rice krispie treats hard?
This usually happens when the marshmallow mixture gets too hot or when you press the treats too firmly into the pan. Keep the heat on medium-low and use a gentle hand when pressing. You want them compact, not compressed.
Can I make these ahead of time for a party?
Absolutely. Make them the day before and store them in an airtight container at room temperature. They actually taste better on day two. Just do not refrigerate them.
How do I cut clean squares without everything sticking?
Use a serrated knife and grease it lightly with butter or cooking spray. Wipe the blade clean between each cut. This gives you sharp, clean edges without the sticky mess.
Can I add other mix-ins to this recipe?
Yes. Mini chocolate chips, crushed pretzels, or even chopped nuts work great. Fold them in right after the cereal. Just keep the total add-in amount to about 1 cup so the treats still hold together.
Conclusion
These Easy Candy Corn Rice Krispie Treats are the kind of recipe that makes fall feel official. They are quick enough for a last-minute craving, pretty enough for a party platter, and simple enough that you can make them with kids without losing your mind. The candy corn melts into the marshmallow in a way that feels almost magical, creating a honey-vanilla flavor that is way better than anything you can buy at the store.
I love this recipe because it reminds me that not everything has to be complicated to be special. Sometimes the best treats are the ones that take fifteen minutes and a handful of ingredients. It is the kind of recipe that makes you look like a hero at a Halloween party without any of the stress.
I want to hear about your version. Did you add chocolate? Go heavy on the candy corn? Make a peanut butter twist? Drop a comment below and tell me how it turned out. And if you loved these, share the recipe with a friend who needs a little fall sweetness in their life. Happy baking, friends.
Pin This Recipe!
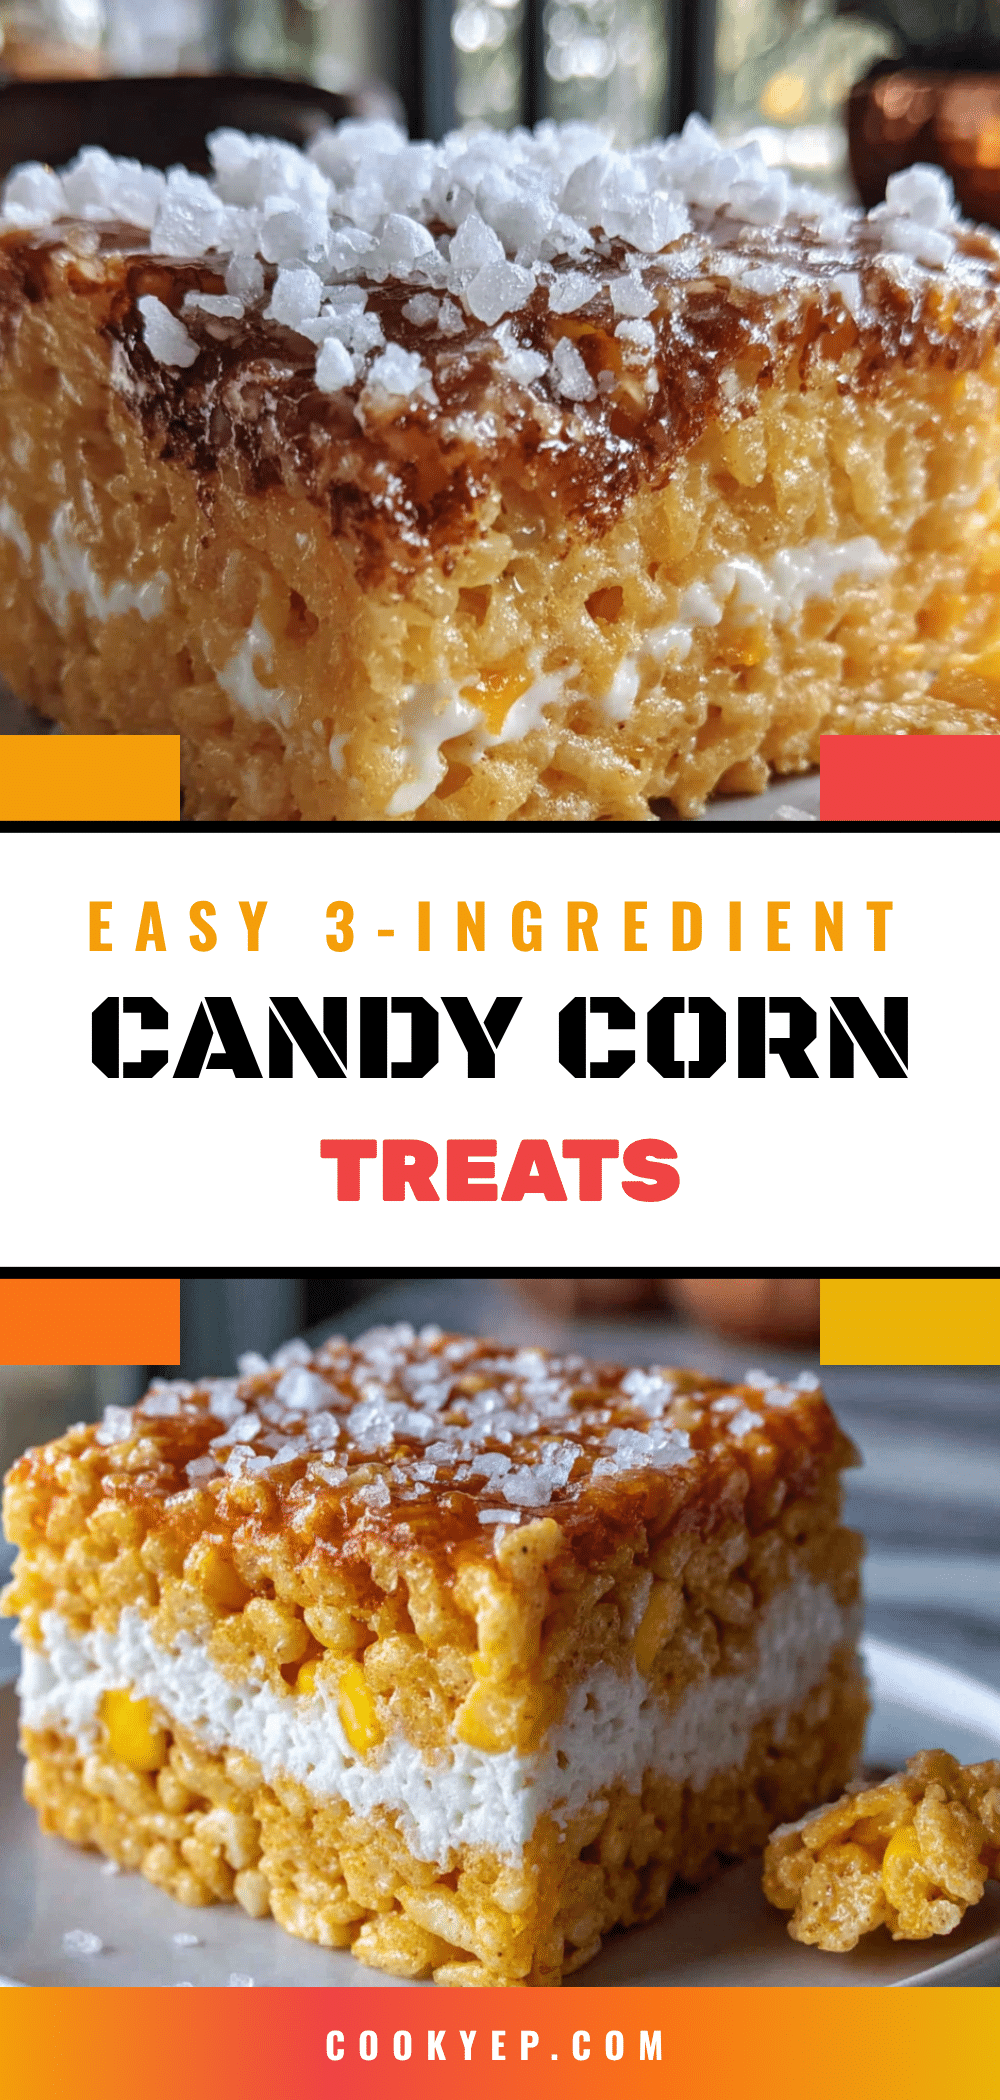
Easy Candy Corn Rice Krispie Treats: Best Fall Dessert
These Easy Candy Corn Rice Krispie Treats are the perfect fall dessert, combining the classic crispy rice cereal treat with the sweet, honey-vanilla flavor of melted candy corn. Quick to make with just five ingredients, they are a crowd-pleasing Halloween party snack that tastes like a sunset you can eat.
- Prep Time: 15 minutes
- Cook Time: 10 minutes
- Total Time: 25 minutes
- Yield: 12 servings 1x
- Category: Dessert
- Cuisine: American
Ingredients
- 3 tablespoons unsalted butter (plus extra for greasing the pan)
- 1 bag (10 ounces) mini marshmallows
- 1 cup candy corn
- 6 cups crispy rice cereal
- 1/4 teaspoon vanilla extract (optional but recommended)
Instructions
- Prep your pan. Grease a 9×13 inch baking dish with a thin layer of butter. Then line it with parchment paper, leaving some overhang on two sides. Grease the parchment too. Set the pan aside.
- Sort your candy corn (optional but worth it). If you want that beautiful layered look, separate the orange, yellow, and white pieces into three small bowls.
- Melt the butter. Place your large pot over medium-low heat. Add the 3 tablespoons of butter and let it melt slowly. Swirl the pot occasionally to help it melt evenly.
- Add the marshmallows. Once the butter is fully melted, pour in the entire bag of mini marshmallows. Stir constantly until they are completely smooth and velvety, about 3 to 4 minutes.
- Add the candy corn. Pour in 1 cup of candy corn (or your sorted colors if you are layering). Stir until the candy corn is mostly melted. A few tiny bits of unmelted candy corn are fine.
- Stir in the vanilla. Add the 1/4 teaspoon of vanilla extract and give everything one final stir. Turn off the heat.
- Add the cereal. Pour in the 6 cups of crispy rice cereal. Fold it into the marshmallow mixture gently but thoroughly.
- Press into the pan. Scrape the mixture into your prepared pan. Grease your hands with a little butter or cooking spray, then press the mixture down evenly.
- Add optional toppings. If you want extra candy corn on top, press a few pieces into the surface while the treats are still warm.
- Cool completely. Let the treats sit at room temperature for at least 30 minutes. Do not put them in the refrigerator.
- Cut and serve. Lift the treats out of the pan using the parchment overhang. Use a serrated knife to cut them into squares. Wipe the knife clean between cuts for the cleanest edges.
Notes
For best results, use low heat to melt marshmallows and avoid high heat which can scorch them. Grease your hands with butter or cooking spray before pressing the mixture into the pan to prevent sticking. Let treats cool completely at room temperature before cutting for clean edges. These treats taste even better on day two if stored in an airtight container at room temperature. Do not refrigerate as it makes them hard.
Nutrition
- Serving Size: 1 square
- Calories: 210
- Sugar: 26
- Sodium: 115
- Fat: 5
- Saturated Fat: 3
- Carbohydrates: 42
- Protein: 1
Keywords: candy corn rice krispie treats, fall dessert, Halloween treats, easy rice krispie treats, candy corn dessert, no-bake dessert, quick dessert


