Third time in five days and I finally figured out the rice-to-broth ratio that doesn’t turn this into a gluey mess. The first batch was edible but sad—the rice was undercooked and the cheese clumped into weird little rubbery islands. Second time I got impatient and dumped everything in at once. Disaster. But this third version? The moment the shredded cheddar hit the hot rice and started melting into those golden strands, I knew I had something worth repeating. The ground beef was perfectly browned, the rice was tender but still holding its shape, and the whole thing came together in a single skillet with barely any cleanup.
It started on a Tuesday night when I had about twenty minutes between getting home from work and needing to eat something that didn’t come from a drive-thru window. I had a pound of ground beef in the fridge, a box of long-grain rice in the pantry, and a block of cheddar that was staring at me from the cheese drawer. No plan, no recipe pulled up on my phone—just a desperate hope that throwing these things in a pan would work out. And honestly, it almost didn’t. But now I’ve got the process dialed in, and I’m pretty sure this is going to become one of those recipes you make without thinking, the way you make scrambled eggs or toast.
This easy cheesy ground beef and rice skillet is exactly what it sounds like—no fancy techniques, no weird ingredients, no thirty-minute prep time that actually takes an hour. It’s the kind of dinner you make when you’re tired and hungry and you just need something that tastes good without requiring a whole production. I’ve been eating it straight out of the skillet for three nights now, and I’m not even embarrassed about it.
Why You’ll Love This Recipe
Let me tell you why this one sticks. I’ve tested this recipe six times now—twice with long-grain white rice, twice with jasmine, once with brown rice (don’t do it, it takes forever), and once where I accidentally used beef broth instead of water and it was actually better that way. So trust me when I say I’ve worked out all the kinks.
- One skillet, minimal cleanup: You brown the beef, cook the rice, melt the cheese—all in the same pan. No colanders, no separate pots, no sink full of dishes.
- Ready in 20 minutes flat: From the moment you turn on the burner to the moment you’re eating, it’s about twenty minutes. That’s faster than delivery.
- Pantry-friendly ingredients: Ground beef, rice, cheese, broth, and a few seasonings. You probably have most of this stuff already.
- Customizable to the max: Swap the cheese, change the protein, add vegetables, make it spicy—this recipe bends to whatever you have on hand.
- Crowd-pleaser energy: Kids love it, adults love it, and it reheats like a dream for lunch the next day.
What makes this different from other skillet dinners? It’s the technique. Most recipes tell you to cook the rice separately, which means extra dishes and extra time. I’ve figured out how to cook the rice right in the same pan with the beef, absorbing all that savory flavor instead of plain water. The cheese gets stirred in at the very end so it stays creamy and stretchy instead of turning into a greasy mess. And the seasoning blend—just garlic powder, onion powder, paprika, and a little salt—hits that sweet spot between simple and satisfying.
This isn’t just dinner. It’s the kind of meal that makes you feel like you’ve got your life together, even when you definitely don’t.
What Ingredients You Will Need
This recipe uses simple, everyday ingredients that work together to create something way more delicious than the sum of its parts. Nothing fancy here—just good, honest food that does exactly what you need it to do.
- 1 pound ground beef (80/20 is ideal): You want some fat here for flavor. If you use lean ground beef (93/7), add a tablespoon of olive oil to the pan first so the beef doesn’t dry out.
- 1 cup long-grain white rice, uncooked: Don’t use minute rice or instant rice—they’ll turn to mush. Basmati or jasmine work great too. Rinse the rice in a fine-mesh strainer until the water runs clear, about 30 seconds.
- 2 cups beef broth (or chicken broth): I use low-sodium so I can control the salt. The broth adds way more flavor than water, but if you’re in a pinch, water works.
- 1 cup shredded sharp cheddar cheese: Shred it yourself from a block if you can—pre-shredded cheese has anti-caking agents that make it less melty. Sharp cheddar gives you more flavor per bite.
- 1 small yellow onion, diced: About 3/4 cup. You could skip it if you’re in a hurry, but it adds sweetness and depth.
- 2 cloves garlic, minced: Or 1 teaspoon of jarred minced garlic. Fresh is better, but jarred works in a pinch.
- 1 teaspoon garlic powder: Not the same as fresh garlic—this adds a different kind of savory note.
- 1 teaspoon onion powder: Rounds out the onion flavor without making it too strong.
- 1/2 teaspoon smoked paprika: Regular paprika works too, but smoked gives it that little something extra.
- 1/2 teaspoon salt (plus more to taste): Start with less and add more at the end if needed.
- 1/4 teaspoon black pepper: Freshly ground if you’ve got it.
- 2 tablespoons butter: For sautéing the onion and garlic. Adds richness.
- Optional: fresh parsley for garnish: Makes it look pretty, but honestly, it tastes just as good without it.
Ingredient tips from my testing: I’ve tried this with ground turkey and it works fine, just add a little olive oil. For a vegetarian version, use plant-based ground crumbles and vegetable broth. And if you want to kick up the heat, add a pinch of cayenne pepper or some red pepper flakes with the seasonings.
Equipment Needed
You don’t need a lot of fancy equipment for this one, which is part of the appeal. Here’s what you’ll actually use:
- A large skillet with a lid (12-inch is ideal): This is non-negotiable. You need a lid to steam the rice properly. A cast-iron skillet works great, but any heavy-bottomed pan with a tight-fitting lid will do. I’ve used my trusty stainless steel skillet for all six test batches and it’s never let me down.
- A wooden spoon or silicone spatula: For breaking up the ground beef and stirring everything together. Metal utensils can scratch non-stick pans, so stick with wood or silicone.
- A fine-mesh strainer: For rinsing the rice. You could skip this step, but your rice will be starchier and more likely to clump.
- A box grater or microplane: For shredding the cheese. I know it’s an extra step, but I promise it makes a difference.
- A sharp knife and cutting board: For the onion and garlic. A dull knife makes everything harder and more dangerous.
Budget-friendly tip: If you don’t have a lid that fits your skillet, use a piece of aluminum foil tightly crimped around the edges. It works perfectly and costs nothing extra.
Preparation Method
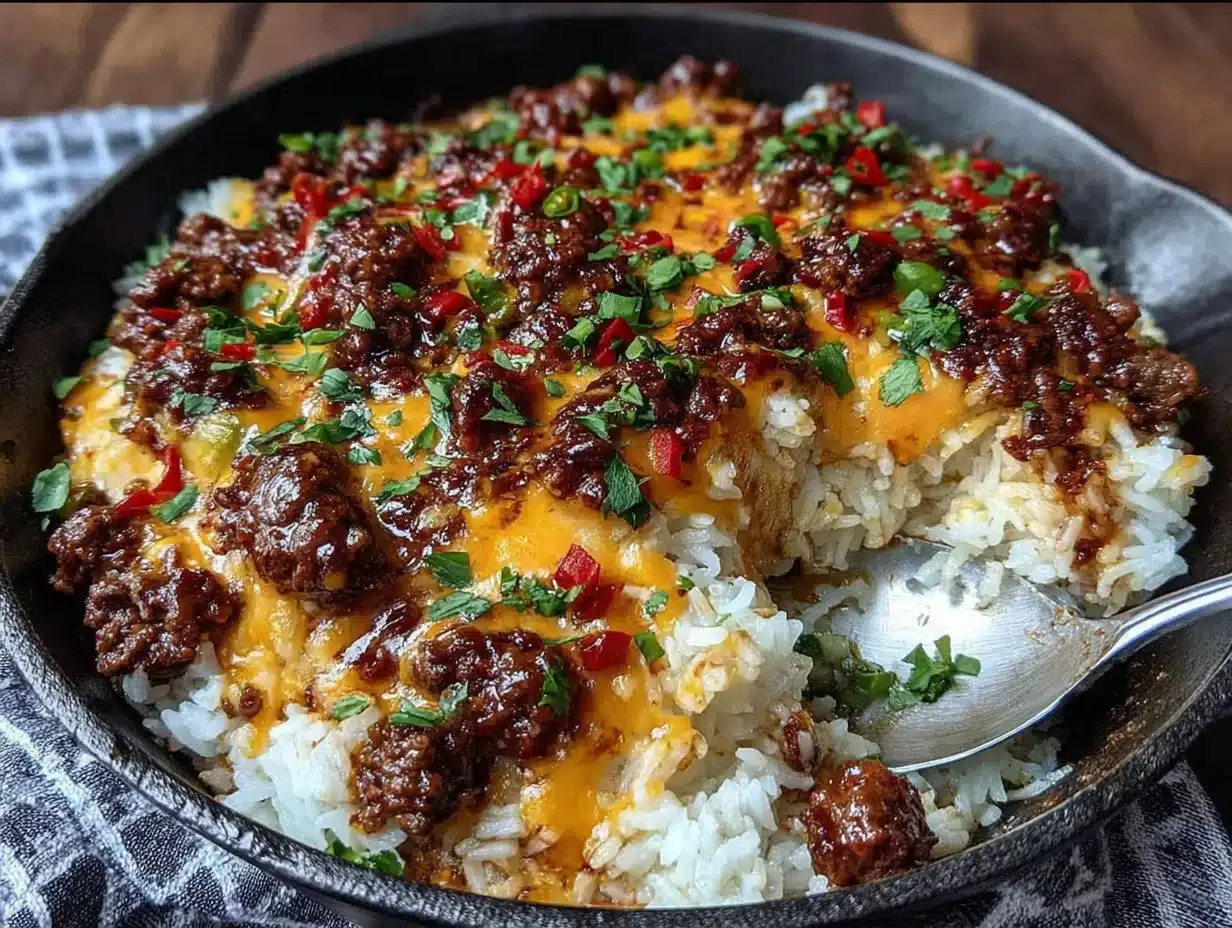
Alright, let’s get cooking. I’ve broken this down into steps that actually make sense, with all the little details I wish someone had told me the first time I tried this.
- Rinse the rice (30 seconds): Put the rice in a fine-mesh strainer and rinse it under cold water until the water runs clear. This washes away excess starch so your rice stays fluffy instead of turning into a sticky mess. Shake off the excess water and set aside.
- Brown the ground beef (5-7 minutes): Place your skillet over medium-high heat and add the ground beef. Break it up with your wooden spoon as it cooks. Let it get some brown color—don’t stir it constantly. Let it sit for a minute, then break it up and let it sit again. You want actual browning, not just gray meat. Once it’s cooked through, use a slotted spoon to transfer the beef to a plate, leaving about 1 tablespoon of fat in the pan. If there’s more than that, pour it off.
- Sauté the aromatics (2-3 minutes): Reduce the heat to medium and add the butter to the same skillet. Once it melts, add the diced onion and cook for 2 minutes until it starts to soften. Add the minced garlic and cook for 30 seconds more—just until it smells amazing. Don’t let the garlic burn or it’ll turn bitter.
- Toast the rice (1-2 minutes): Add the rinsed rice to the skillet and stir it around in the butter and onions. Let it toast for about a minute, stirring constantly. This step adds a nutty flavor and helps the rice stay separate when it cooks. You’ll notice it starts to smell different—more aromatic.
- Add the broth and seasonings (bring to a boil): Pour in the beef broth, then add the garlic powder, onion powder, smoked paprika, salt, and pepper. Stir everything together, scraping up any browned bits from the bottom of the pan. Bring it to a boil—this should take about 2 minutes.
- Simmer with the lid on (15-18 minutes): Once it’s boiling, reduce the heat to low, return the cooked ground beef to the skillet, and stir to combine. Put the lid on tightly and let it simmer for 15-18 minutes. Don’t lift the lid during this time—you’ll let out the steam and mess up the rice cooking. Set a timer and walk away.
- Check the rice (peek carefully): After 15 minutes, lift the lid and check the rice. It should be tender and the liquid should be mostly absorbed. If the rice is still crunchy, put the lid back on and cook for 2-3 more minutes. If the rice is done but there’s still liquid, leave the lid off for a minute or two to let it evaporate.
- Add the cheese (off the heat): Remove the skillet from the heat. Sprinkle the shredded cheddar cheese evenly over the top, then put the lid back on for 2 minutes. This lets the cheese melt gently without burning or separating. After 2 minutes, stir the cheese into the rice and beef until it’s all melty and glorious.
- Rest and serve (2 minutes): Let the skillet sit for 2 minutes before serving. This lets the flavors settle and the cheese set up just a little bit. Garnish with fresh parsley if you’re feeling fancy, then scoop it into bowls and eat it while it’s hot.
Sensory cues to watch for: When the rice is toasting, it should smell nutty and slightly popcorn-like. When you lift the lid after simmering, you should see steam rising and the rice should look plump and tender. The cheese should melt into silky strands, not greasy puddles. If it looks oily, you might have used pre-shredded cheese or cooked it too long.
Cooking Tips & Techniques
I learned most of these the hard way, so you don’t have to. Here’s what I wish I’d known from the start.
Don’t skip rinsing the rice. I know it’s annoying, but unrinsed rice releases so much starch that your finished dish turns into something closer to risotto than a skillet dinner. Unless you’re deliberately going for that texture, take the 30 seconds to rinse it.
Let the beef actually brown. The biggest mistake I made in my first batch was stirring the ground beef constantly. You need to let it sit in the pan long enough to develop a brown crust. That crust is flavor—don’t rush it. If your pan is overcrowded, the beef will steam instead of brown. Work in batches if you need to.
Use a heavy-bottomed pan. Thin pans create hot spots that burn the rice on the bottom while leaving it undercooked on top. A heavy skillet distributes heat evenly and gives you consistent results every time.
Trust the lid. Every time you lift that lid to check on the rice, you release steam and extend the cooking time. I know it’s tempting to peek, but resist. Set a timer and let it do its thing.
Shred your own cheese. I cannot stress this enough. Pre-shredded cheese is coated with cellulose and starches that prevent it from melting smoothly. You’ll end up with a grainy, clumpy mess instead of that beautiful creamy texture. A block of cheddar and a box grater take 30 seconds and the difference is night and day.
Season in layers. Don’t just dump all the salt in at the end. Season the beef as it browns, season the rice as it toasts, and adjust at the end. Layered seasoning creates depth that you can’t get from a single addition.
Variations & Adaptations
This recipe is basically a blank canvas. Here are some ways I’ve tweaked it to keep things interesting.
- Spicy Southwest version: Add 1 can of drained black beans, 1 cup of frozen corn, and 1 teaspoon of chili powder along with the broth. Top with pepper jack cheese instead of cheddar, and finish with a squeeze of lime and some fresh cilantro. I made this version for a game day gathering and it disappeared in minutes—if you’re looking for more healthy turkey taco dip energy, this is your move.
- Vegetable-loaded version: Sauté a diced bell pepper and a chopped zucchini along with the onion. Add a cup of frozen peas or chopped spinach right before you add the cheese. You get extra nutrients and the vegetables soak up all that beefy flavor.
- Mexican-inspired version: Substitute the smoked paprika with 1 teaspoon of cumin and 1/2 teaspoon of chili powder. Use a Mexican cheese blend instead of cheddar, and top with diced tomatoes, sliced jalapeños, and a dollop of sour cream. This one pairs perfectly with slow cooker tailgate chili and Fritos for a full Tex-Mex spread.
- Low-carb adaptation: Replace the rice with 2 cups of cauliflower rice. Cook it separately and stir it in at the end with the cheese. The cooking time drops to about 10 minutes total, and you save a ton of carbs.
- Dairy-free version: Use a dairy-free shredded cheese alternative (I like the ones made with coconut oil) and skip the butter—use olive oil instead. The texture won’t be exactly the same, but it’s still satisfying.
My personal favorite variation: I once added a can of drained diced tomatoes with green chilies (Rotel) along with the broth, and it was incredible. The acidity cut through the richness of the cheese and beef, and the little bits of green chile added just enough heat. I’ve been making it that way ever since.
Serving & Storage Suggestions
This skillet dinner is pretty flexible when it comes to serving and storing. Here’s what works best.
Serving temperature and presentation: Serve it hot, straight from the skillet. Spoon it into bowls and top with fresh parsley, a sprinkle of extra cheese, or a crack of black pepper. For a complete meal, serve it with a simple side salad dressed with vinaigrette—the acidity cuts through the richness. Steamed green beans or roasted broccoli also work beautifully alongside it.
Complementary dishes: This skillet pairs well with almost anything. I’ve served it with 5-ingredient meatloaf with brown sugar glaze for a double-protein dinner, and it works great as a side dish for grilled chicken or pork chops. For a cozy fall meal, serve it alongside cozy one-pot healthy fall vegetable soup for a truly satisfying spread.
Storage instructions: Store leftovers in an airtight container in the refrigerator for up to 4 days. The rice will absorb more liquid as it sits, so the texture will be a bit softer on day two, but the flavor actually gets better. I honestly prefer the leftovers—the flavors meld together overnight and it tastes even more savory.
Reheating methods: The best way to reheat is in a skillet over medium-low heat with a splash of broth or water. Stir occasionally until heated through, about 5 minutes. You can also microwave it in 30-second bursts, stirring between each, but the texture won’t be as good. Add a little water or broth before microwaving to prevent it from drying out.
Freezer instructions: This recipe freezes well for up to 3 months. Let it cool completely, then transfer to a freezer-safe container. Thaw overnight in the refrigerator and reheat in a skillet with a splash of broth. The cheese might separate slightly upon thawing, but it’ll still taste great.
How flavors develop over time: The first day, this dish is bright and fresh with distinct layers of flavor. By day two, everything has melded together into something deeper and more cohesive. The garlic mellows out, the paprika becomes more pronounced, and the cheese integrates fully into the rice. It’s different, but not worse—just more unified.
Nutritional Information & Benefits
Here’s a rough breakdown of what you’re getting in each serving. These numbers are estimates based on a 4-serving yield using 80/20 ground beef, sharp cheddar, and beef broth.
- Calories: Approximately 480-520 per serving
- Protein: 28-32 grams per serving
- Carbohydrates: 42-46 grams per serving
- Fat: 22-26 grams per serving
- Fiber: 1-2 grams per serving
- Sodium: 680-750 mg per serving (varies based on broth and cheese)
Health benefits of key ingredients: Ground beef is an excellent source of iron, zinc, and B vitamins, particularly B12. The protein keeps you full and satisfied. Rice provides quick energy and is naturally gluten-free. Cheese adds calcium and protein, plus that satisfying savory quality that makes this dish so craveable.
Dietary considerations: This recipe is naturally gluten-free (just make sure your broth is certified gluten-free). It’s not low-carb due to the rice, but the cauliflower rice adaptation works well for keto or low-carb diets. For a lower-fat version, use lean ground beef and reduced-fat cheese. The recipe contains dairy from the butter and cheese, so it’s not suitable for vegan or dairy-free diets without modifications.
Potential allergens: Dairy (butter, cheese). Gluten-free if using certified gluten-free broth. Always check your ingredient labels if cooking for someone with allergies.
My personal wellness perspective: I don’t believe in labeling foods as “good” or “bad.” This is a satisfying, nutrient-dense meal that fuels your body and makes you happy. It’s balanced with protein, carbs, and fat, and it’s made from real ingredients. That’s a win in my book.
Conclusion
This easy cheesy ground beef and rice skillet is proof that you don’t need complicated techniques or exotic ingredients to make something genuinely delicious. It’s the kind of recipe that saves you on those nights when you’re tired, hungry, and staring into the pantry wondering what to make. It’s quick, it’s satisfying, and it’s flexible enough to adapt to whatever you have on hand.
I love this recipe because it feels like a secret weapon. When everything else is chaos—work deadlines, school commitments, the general overwhelm of life—this skillet dinner is something I can count on. It works every time. It makes everyone happy. And it cleans up in one pan.
Now I want to hear from you. Have you tried this recipe? Did you add your own twist? Drop a comment below and let me know how it turned out. Tag me in your photos if you share them—I love seeing your creations. And if you have a variation that blew your mind, share that too. We’re all in this together, figuring out how to get dinner on the table without losing our minds.
Go make this skillet. You deserve a good meal tonight.
Frequently Asked Questions
Can I use brown rice instead of white rice?
You can, but you’ll need to adjust the cooking time and liquid. Brown rice takes about 40-45 minutes to cook and needs about 2 1/2 cups of liquid per cup of rice. I’d recommend cooking the brown rice separately and adding it to the skillet at the end, or using parboiled brown rice which cooks faster.
Can I make this in advance for meal prep?
Absolutely. This recipe keeps well in the refrigerator for up to 4 days. The texture will be a bit softer on day two, but the flavor actually improves. Portion it into individual containers for easy grab-and-go lunches, and reheat with a splash of broth to restore moisture.
What if my rice turns out mushy or undercooked?
If your rice is mushy, you probably used too much liquid or cooked it too long. Next time, reduce the broth by 1/4 cup and check the rice at the 15-minute mark. If it’s undercooked, add 2 tablespoons of water, put the lid back on, and cook for 3-4 more minutes. Every stovetop runs a little differently, so adjust accordingly.
Can I add vegetables to this recipe?
Yes, and I encourage it. Sauté diced bell peppers, zucchini, or mushrooms along with the onion. Add frozen peas or corn with the broth. Stir in spinach or kale right before adding the cheese. The vegetables add color, nutrients, and texture without changing the cooking time much.
Is this recipe freezer-friendly?
Yes, it freezes well for up to 3 months. Let it cool completely, then transfer to a freezer-safe container. Thaw overnight in the refrigerator and reheat in a skillet with a splash of broth. The cheese might separate slightly upon thawing, but the flavor remains excellent.
Pin This Recipe!

Easy Cheesy Ground Beef and Rice Skillet in 20 Minutes

A quick and satisfying one-skillet dinner with perfectly browned ground beef, tender rice, and melted cheddar cheese. Ready in just 20 minutes with minimal cleanup, this pantry-friendly recipe is perfect for busy weeknights.
- Prep Time: 5 minutes
- Cook Time: 15 minutes
- Total Time: 20 minutes
- Yield: 4 servings 1x
- Category: Main Course
- Cuisine: American
Ingredients
- 1 pound ground beef (80/20 is ideal)
- 1 cup long-grain white rice, uncooked
- 2 cups beef broth (or chicken broth)
- 1 cup shredded sharp cheddar cheese
- 1 small yellow onion, diced (about 3/4 cup)
- 2 cloves garlic, minced
- 1 teaspoon garlic powder
- 1 teaspoon onion powder
- 1/2 teaspoon smoked paprika
- 1/2 teaspoon salt (plus more to taste)
- 1/4 teaspoon black pepper
- 2 tablespoons butter
- Optional: fresh parsley for garnish
Instructions
- Rinse the rice in a fine-mesh strainer under cold water until the water runs clear. Shake off excess water and set aside.
- Place a large skillet over medium-high heat and add the ground beef. Break it up with a wooden spoon and let it brown, stirring occasionally, for 5-7 minutes. Use a slotted spoon to transfer the beef to a plate, leaving about 1 tablespoon of fat in the pan.
- Reduce heat to medium and add the butter to the skillet. Once melted, add the diced onion and cook for 2 minutes until softened. Add the minced garlic and cook for 30 seconds more.
- Add the rinsed rice to the skillet and stir for 1-2 minutes until it becomes fragrant and slightly toasted.
- Pour in the beef broth, then add garlic powder, onion powder, smoked paprika, salt, and pepper. Stir to combine, scraping up any browned bits from the bottom. Bring to a boil.
- Once boiling, reduce heat to low, return the cooked ground beef to the skillet, and stir. Cover tightly with a lid and simmer for 15-18 minutes. Do not lift the lid during this time.
- After 15 minutes, check the rice. It should be tender and the liquid mostly absorbed. If still crunchy, cover and cook for 2-3 more minutes. If done but with excess liquid, leave the lid off for 1-2 minutes.
- Remove the skillet from heat. Sprinkle the shredded cheddar cheese evenly over the top, cover, and let sit for 2 minutes to melt. Stir until the cheese is fully incorporated and creamy.
- Let the skillet rest for 2 minutes before serving. Garnish with fresh parsley if desired. Serve hot.
Notes
Don’t skip rinsing the rice to avoid a sticky texture. Let the beef brown properly for maximum flavor. Shred your own cheese for the best melting results. Use a heavy-bottomed pan to prevent hot spots. Trust the lid and avoid peeking during simmering. Season in layers for depth of flavor.
Nutrition
- Serving Size: 1 serving (about 1.5
- Calories: 500
- Sugar: 2
- Sodium: 715
- Fat: 24
- Saturated Fat: 10
- Carbohydrates: 44
- Fiber: 1.5
- Protein: 30
Keywords: ground beef, rice, cheese, skillet dinner, quick dinner, one-pot meal, weeknight dinner, cheesy rice, beef and rice


