The pears were rock hard. I’d grabbed them at the store thinking, “They’ll soften on the counter,” and then promptly forgot about them for three days. Meanwhile, a bag of cranberries sat in the fridge, tart and unyielding, and I was staring down the barrel of a chilly Tuesday evening with nothing but a vague craving for something warm and sweet. That’s when I stopped trying to force the pears into a pie they weren’t ready for and just… chopped them up anyway. Honestly, the best desserts often start with a little bit of stubbornness and a whole lot of “let’s just see what happens.”
I tossed those firm pears into a baking dish with the cranberries, a shower of warm spices, and a generous handful of brown sugar. The topping came together in a bowl—butter, oats, flour, a whisper of cinnamon—and I crumbled it over the fruit with my fingers, the way my grandma used to do. It looked rustic, a little messy, and completely unpretentious. Thirty minutes later, the kitchen smelled like a hug. The pears had softened into buttery pockets of sweetness, the cranberries had burst into jammy, tart jewels, and the crisp topping was golden and shatteringly good.
It was one of those quiet victories—a recipe born not from a perfect plan, but from making the best of what I had. And honestly? It turned out better than anything I could have planned. That’s the kind of cooking I love most: the kind that starts with a problem and ends with a second helping. This Cozy Spiced Pear and Cranberry Crisp is now my go-to for fall nights when I need something comforting without a lot of fuss. It’s simple, honest, and exactly what a cold evening needs.
Why You’ll Love This Recipe
This isn’t just another fruit crisp. It’s the one that makes you pause mid-bite and just… breathe. There’s a reason it’s become my most-requested fall dessert, and it goes way beyond the fact that it’s easy to throw together.
- Quick & Easy: From start to finish, this crisp is on the table in about 45 minutes. Most of that is hands-off oven time, so you can get dinner going or just pour yourself a glass of wine.
- Simple Ingredients: No fancy trips to a specialty store. Pears, cranberries, oats, butter, sugar, and spices—you probably have most of this in your pantry right now.
- Perfect for Fall Gatherings: Whether it’s a casual Thanksgiving, a Friendsgiving potluck, or just a cozy night in, this dessert fits right in. It’s the kind of thing that feels special without being fussy.
- Crowd-Pleaser: I’ve served this to kids who swore they didn’t like fruit desserts and adults who asked for the recipe before they finished their first bite. It’s that good.
- Unbelievably Delicious: The contrast between the tender, spiced pears and the tart, pop-in-your-mouth cranberries, all under a buttery, crunchy oat topping—it’s next-level comfort food.
What makes this recipe different from the rest? It’s the balance. Most crisps go too heavy on the sugar or too light on the spice. I’ve tested this one until the flavors sing together perfectly. The pears bring a subtle honeyed sweetness, the cranberries cut through with acidity, and the topping is crunchy without being dry. It’s the kind of dessert that feels like a warm blanket on a chilly night. Honestly, it’s the dessert you make when you want to impress without the stress.
What Ingredients You Will Need
This recipe uses simple, wholesome ingredients to deliver bold flavor and satisfying texture without the fuss. Most of these are fall pantry staples, and the ones that aren’t are easy to find at any grocery store. Here’s what you’ll need:
For the Fruit Filling
- Pears (4-5 medium, about 2 lbs): You want ripe but firm pears. Bosc or Anjou work beautifully—they hold their shape during baking but soften into buttery sweetness. Bartlett pears are also great but can get a bit softer, so keep an eye on them.
- Fresh or frozen cranberries (1 cup): Fresh cranberries are ideal in the fall, but frozen work perfectly too—just don’t thaw them first. They add that essential tart pop that cuts through the sweet pears.
- Granulated sugar (¼ cup): Just enough to coax the natural sweetness out of the fruit without making it cloying.
- Light brown sugar (2 tablespoons): Adds a deeper, molasses-like sweetness that pairs beautifully with the warm spices.
- Cornstarch (1 tablespoon): Helps thicken the fruit juices as they bake, so you get a luscious, syrupy filling instead of a watery one.
- Fresh lemon juice (1 tablespoon): Brightens all the flavors and keeps the pears from browning. Don’t skip it!
- Ground cinnamon (1 teaspoon): The backbone of the warm spice blend.
- Ground ginger (½ teaspoon): Adds a gentle warmth and a little zing.
- Ground nutmeg (¼ teaspoon): Just a whisper for that cozy, autumnal depth.
- Vanilla extract (1 teaspoon): Round out the flavors and makes everything taste more, well, like dessert.
For the Crisp Topping
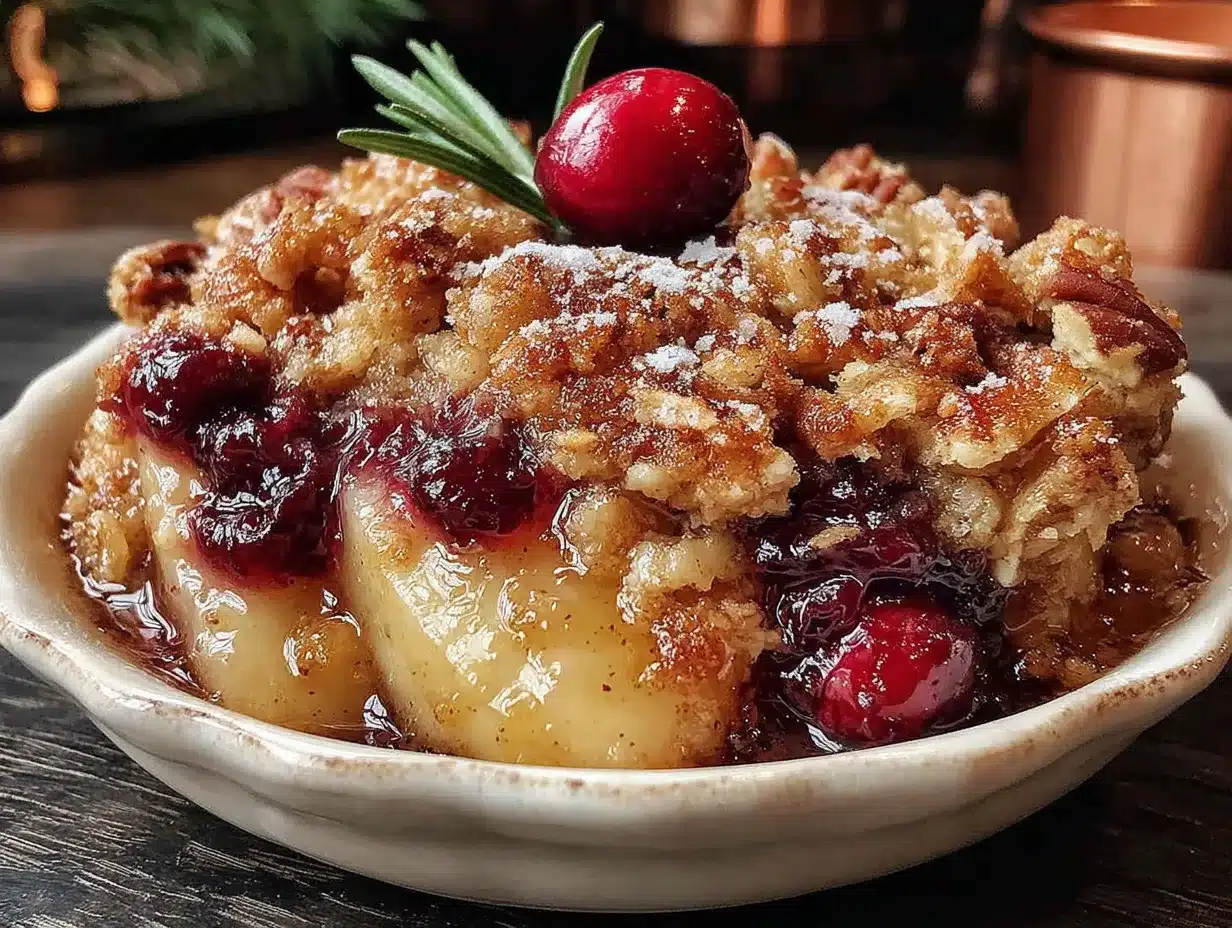
- Old-fashioned rolled oats (1 cup): Don’t use quick oats—they’ll turn mushy. Rolled oats give the topping that perfect chewy-crunchy texture.
- All-purpose flour (¾ cup): Provides structure to the topping. For a gluten-free version, use a 1:1 gluten-free baking flour blend.
- Light brown sugar (½ cup, packed): This is what gives the topping its caramel-like flavor and helps it crisp up beautifully.
- Ground cinnamon (½ teaspoon): More warmth, because you can never have too much cinnamon in a fall dessert.
- Salt (¼ teaspoon): A small but mighty ingredient that balances the sweetness and enhances every other flavor.
- Unsalted butter (½ cup, cold, cut into small cubes): Cold butter is the secret to a shatteringly crisp topping. It creates little pockets of steam as it melts, resulting in that irresistible crumbly texture.
- Chopped pecans or walnuts (½ cup, optional): Adds a lovely nutty crunch. I love walnuts here—they feel extra cozy and seasonal. Feel free to leave them out if you prefer a nut-free crisp.
Equipment Needed
One of the best things about this recipe is that it doesn’t require any fancy gadgets. Here’s what you’ll need:
- 8×8-inch baking dish (or similar 2-quart dish): A square dish works perfectly. You can also use a 9-inch pie plate or a small cast-iron skillet for a prettier presentation straight from the oven.
- Large mixing bowl: For combining the fruit filling ingredients.
- Medium mixing bowl: For mixing the crisp topping.
- Pastry cutter or two forks: To cut the cold butter into the flour mixture. You can also use your fingers—just work quickly so the butter doesn’t warm up.
- Chef’s knife and cutting board: For prepping the pears. A good, sharp knife makes all the difference.
- Measuring cups and spoons: Standard kitchen essentials. For accuracy, especially with the cornstarch and spices, use proper measuring spoons.
- Vegetable peeler (optional): I like to leave the peels on my pears for extra texture and nutrients, but if you prefer a smoother filling, go ahead and peel them.
That’s it! No stand mixer, no food processor—just good old-fashioned elbow grease. Honestly, I love recipes that don’t require me to drag out every appliance I own. It makes the whole process feel more, well, cozy.
Preparation Method
Alright, let’s get to the good part. This recipe comes together in a few simple steps, and I’ll walk you through each one so you feel confident from start to finish.
- Preheat your oven to 375°F (190°C). Get this going first so it’s nice and hot when you’re ready to bake. While it heats, you can prep the rest.
- Prep the pears. Wash your pears well. I like to leave the skin on for a bit of texture and color, but you can peel them if you prefer. Cut each pear in half lengthwise, then remove the core and stem with a small spoon or knife. Dice the pears into roughly ½-inch chunks. They don’t need to be perfect—just bite-sized pieces that will soften evenly.
- Make the fruit filling. In a large mixing bowl, combine the diced pears, fresh (or frozen) cranberries, granulated sugar, brown sugar, cornstarch, lemon juice, cinnamon, ginger, nutmeg, and vanilla extract. Stir gently until everything is evenly coated. The fruit will look glossy and smell incredible already. Pour the fruit mixture into your prepared 8×8-inch baking dish and spread it into an even layer.
- Make the crisp topping. In a medium mixing bowl, whisk together the rolled oats, all-purpose flour, packed brown sugar, cinnamon, and salt. Add the cold, cubed butter. Use a pastry cutter, two forks, or your fingertips to work the butter into the dry ingredients until the mixture looks like coarse crumbs with some pea-sized butter pieces remaining. If you’re using nuts, stir them in now. The key here is to not overwork the butter—you want those little chunks to melt in the oven and create steam pockets, which is what gives the topping its signature crunch.
- Assemble and bake. Sprinkle the crisp topping evenly over the fruit filling. Don’t press it down—just let it sit loosely on top. Place the dish on a baking sheet to catch any bubbly overflow (trust me on this one). Bake for 30-35 minutes, or until the filling is bubbling up around the edges and the topping is golden brown and firm to the touch. If the topping is browning too quickly, tent the dish loosely with foil for the last 10 minutes.
- Cool before serving. This is the hardest part, I know. Let the crisp cool on a wire rack for at least 15 minutes before serving. This allows the filling to set up so it’s not too runny. The aroma wafting through your kitchen will be pure torture, but it’s worth the wait.
Pro tip: While the crisp cools, you can whip up a batch of creamy apple cinnamon overnight oats for tomorrow’s breakfast—that same cozy spice vibe, ready when you wake up.
Cooking Tips & Techniques
Over the years, I’ve made this crisp more times than I can count, and I’ve learned a few things the hard way. Here are my best tips to ensure yours turns out perfect every single time.
Don’t skip the cornstarch. I know it’s tempting to think the fruit will thicken on its own, but without cornstarch, you’ll end up with a soupy mess. It’s a small ingredient that makes a huge difference.
Keep your butter cold. This is the number one rule for a crispy topping. If your butter warms up and gets absorbed into the flour, you’ll end up with a dense, doughy layer instead of a crunchy crumble. If your kitchen is warm, pop the topping in the fridge for 10 minutes before baking.
Watch your pears. The biggest mistake I ever made was using overripe pears. They turned to mush during baking, and the whole crisp had a weird, baby-food texture. Stick with firm-but-ripe pears, and you’ll get those lovely tender-but-intact chunks.
Let it rest. I know I said this already, but it’s worth repeating. Letting the crisp cool for at least 15 minutes allows the juices to thicken into a beautiful syrup. If you dig in too soon, you’ll have a delicious but messy puddle on your plate. Patience is a virtue, especially when dessert is involved.
Bake on a sheet pan. This is a lesson I learned the messy way. Fruit crisps love to bubble over, and scrubbing caramelized sugar off the bottom of your oven is no one’s idea of a good time. Place your baking dish on a lined baking sheet before it goes in the oven. You’ll thank me later.
Variations & Adaptations
One of the things I love most about this recipe is how flexible it is. Here are a few ways to make it your own:
Dietary Swaps: For a gluten-free version, swap the all-purpose flour with a 1:1 gluten-free baking blend. The topping will still be wonderfully crunchy. To make it dairy-free, use cold coconut oil or a plant-based butter stick in place of regular butter. Just make sure it’s cold!
Seasonal Twists: In the fall, stick with pears and cranberries—it’s a match made in heaven. But in the summer, try swapping the pears for ripe peaches or nectarines and the cranberries for fresh blueberries. The same spiced topping works beautifully with almost any fruit.
Flavor Variations: Feeling adventurous? Add a tablespoon of bourbon or dark rum to the fruit filling for a grown-up kick. Or swap the ginger and nutmeg for a teaspoon of pumpkin pie spice for a more traditional fall flavor. I once added a pinch of cardamom to the topping, and it was absolutely divine—like a chai latte in crisp form.
Individual Servings: This recipe works great as individual crisps. Divide the fruit filling among 4-6 small ramekins, top with the crumble, and bake for about 20 minutes. They’re perfect for dinner parties or when you want to feel extra fancy.
Serving & Storage Suggestions
This crisp is glorious on its own, but a little something extra can take it over the top. Here’s how I like to serve it:
Serving Temperature: Warm is the way to go. The contrast between the warm, tender fruit and a cold, creamy topping is pure magic.
What to Serve With It: A generous scoop of vanilla ice cream is the classic choice, and for good reason. The cold creaminess balances the warm spices perfectly. If you’re feeling extra indulgent, try a drizzle of salted caramel sauce or a dollop of lightly sweetened whipped cream. For a lighter option, a spoonful of Greek yogurt works beautifully too.
Storage: Leftover crisp can be stored in the refrigerator, covered, for up to 4 days. The topping will lose some of its crunch over time, but it’s still delicious.
Reheating: The best way to revive leftover crisp is in the oven. Pop it in a 350°F (175°C) oven for 10-15 minutes, or until warmed through and the topping crisps back up. You can use the microwave in a pinch, but the topping will be soft rather than crunchy.
Freezing: This crisp freezes beautifully. Assemble it completely but don’t bake it. Wrap the dish tightly in plastic wrap and then foil, and freeze for up to 3 months. When you’re ready to bake, you can bake it straight from frozen—just add about 15-20 minutes to the baking time. It’s the perfect make-ahead dessert for holiday hosting.
Nutritional Information & Benefits
While this is definitely a treat, it does have some redeeming qualities. Here’s a rough estimate of the nutritional information per serving (based on 8 servings):
| Nutrient | Amount Per Serving |
|---|---|
| Calories | ~350 |
| Total Fat | 15g |
| Saturated Fat | 8g |
| Carbohydrates | 55g |
| Fiber | 6g |
| Sugar | 35g |
| Protein | 4g |
Health Benefits: Pears are a fantastic source of dietary fiber, which is great for digestion. Cranberries are packed with antioxidants and vitamin C, which support immune health—perfect for the cold and flu season. The oats in the topping provide soluble fiber, which can help lower cholesterol. So while this is definitely a dessert, you can feel a little bit good about it too!
Dietary Considerations: This recipe can easily be made gluten-free and dairy-free with the substitutions mentioned above. It’s naturally nut-free if you skip the optional pecans or walnuts.
Potential Allergens: This recipe contains wheat (gluten) and dairy. It may contain tree nuts if you add the optional nuts.
Conclusion
This Cozy Spiced Pear and Cranberry Crisp is more than just a dessert—it’s a feeling. It’s the warmth of a crackling fire, the scent of cinnamon in the air, the comfort of a quiet evening at home. It’s the kind of recipe that makes you slow down and savor the moment, one spoonful at a time.
I’d love for you to make this your own. Maybe you’ll add a little extra ginger, or swap the pears for apples, or serve it with a scoop of your favorite ice cream. Whatever you do, I hope it brings you the same cozy joy it brings me every single time.
If you make this recipe, I’d love to hear about it! Leave a comment below, share a photo on Pinterest, or tag me in your creation. Your feedback and adaptations inspire me, and I can’t wait to see what you come up with. Until next time, happy baking!
Frequently Asked Questions
Can I use canned pears for this recipe?
I really don’t recommend it. Canned pears are already soft and packed in syrup, so they’ll turn mushy during baking and make the filling overly sweet. Fresh, firm pears are the way to go for the best texture and flavor.
Can I make this crisp ahead of time?
Absolutely! You can assemble the crisp (without baking it) up to 24 hours in advance. Just cover it and store it in the refrigerator. When you’re ready to bake, you may need to add 5-10 minutes to the baking time since you’re starting from cold.
Why is my crisp topping not crunchy?
There are a couple of common culprits. First, your butter might have been too warm when you mixed it in. Make sure it’s cold straight from the fridge. Second, you might have overmixed the topping, which develops the gluten and makes it dense. Mix just until it comes together in coarse crumbs.
Can I use quick oats instead of rolled oats?
You can, but I wouldn’t recommend it. Quick oats are more finely chopped and will absorb more liquid, resulting in a softer, less crunchy topping. Rolled oats give you that perfect chewy-crunchy texture that makes a crisp so satisfying.
How do I know when the crisp is done baking?
You’re looking for two key signs. First, the filling should be bubbling up around the edges of the dish—that tells you the fruit is cooked and the cornstarch has done its job. Second, the topping should be golden brown and feel firm to the touch. If it’s still pale or soft, give it a few more minutes.
Pin This Recipe!
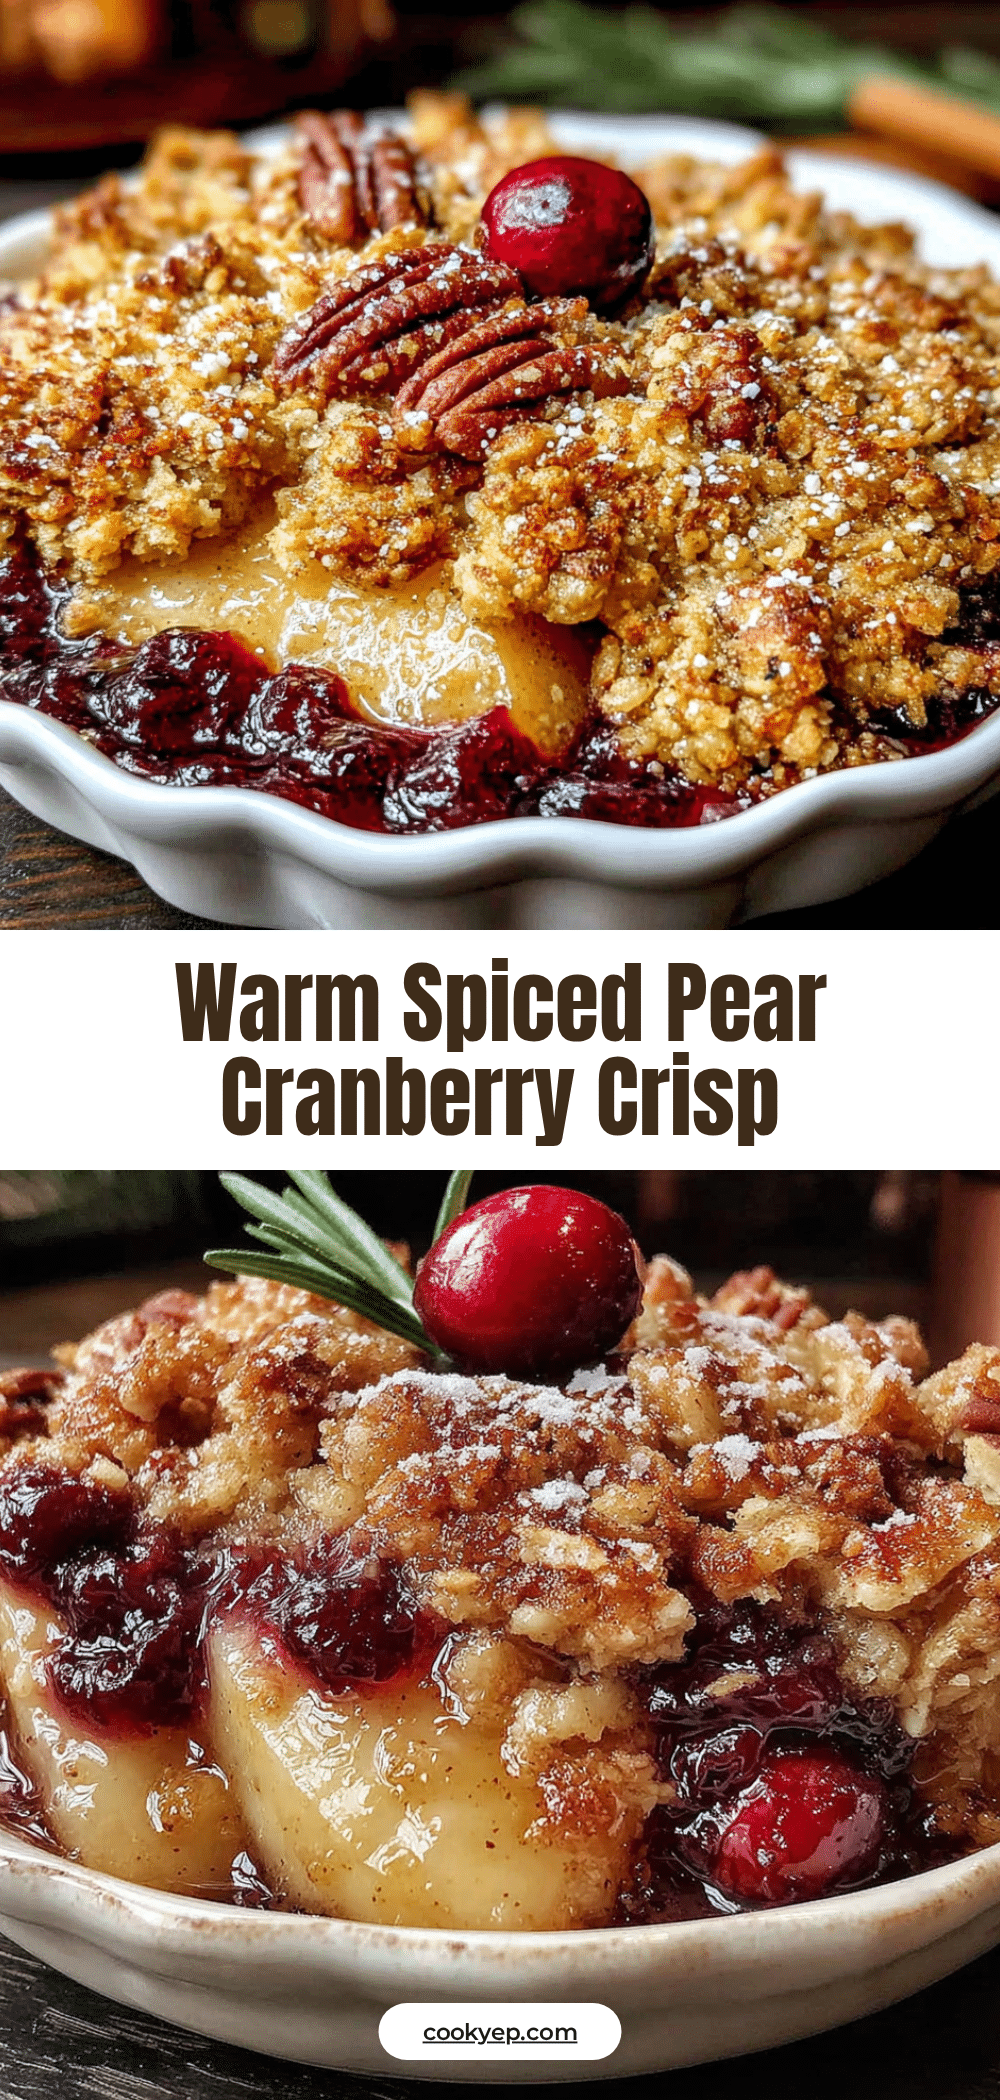
Easy Cozy Spiced Pear & Cranberry Crisp
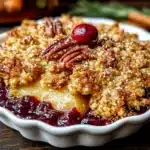
A warm, comforting fall dessert featuring tender spiced pears and tart cranberries under a buttery, crunchy oat topping. Simple to make and perfect for cozy nights or holiday gatherings.
- Prep Time: 15 minutes
- Cook Time: 30 minutes
- Total Time: 45 minutes
- Yield: 8 servings 1x
- Category: Dessert
- Cuisine: American
Ingredients
- 4–5 medium pears (about 2 lbs), diced (Bosc or Anjou recommended)
- 1 cup fresh or frozen cranberries
- 1/4 cup granulated sugar
- 2 tablespoons light brown sugar
- 1 tablespoon cornstarch
- 1 tablespoon fresh lemon juice
- 1 teaspoon ground cinnamon
- 1/2 teaspoon ground ginger
- 1/4 teaspoon ground nutmeg
- 1 teaspoon vanilla extract
- 1 cup old-fashioned rolled oats
- 3/4 cup all-purpose flour
- 1/2 cup light brown sugar, packed
- 1/2 teaspoon ground cinnamon
- 1/4 teaspoon salt
- 1/2 cup unsalted butter, cold and cut into small cubes
- 1/2 cup chopped pecans or walnuts (optional)
Instructions
- Preheat your oven to 375°F (190°C).
- Wash the pears. Leave the skin on or peel if desired. Cut each pear in half lengthwise, remove the core and stem, then dice into 1/2-inch chunks.
- In a large mixing bowl, combine the diced pears, cranberries, granulated sugar, brown sugar, cornstarch, lemon juice, cinnamon, ginger, nutmeg, and vanilla extract. Stir gently until evenly coated. Pour the fruit mixture into an 8×8-inch baking dish and spread into an even layer.
- In a medium mixing bowl, whisk together the rolled oats, all-purpose flour, packed brown sugar, cinnamon, and salt. Add the cold, cubed butter. Use a pastry cutter, two forks, or your fingertips to work the butter into the dry ingredients until the mixture resembles coarse crumbs with some pea-sized butter pieces remaining. If using nuts, stir them in now.
- Sprinkle the crisp topping evenly over the fruit filling. Do not press it down. Place the dish on a baking sheet to catch any overflow. Bake for 30-35 minutes, or until the filling is bubbling around the edges and the topping is golden brown and firm. If the topping browns too quickly, tent loosely with foil for the last 10 minutes.
- Let the crisp cool on a wire rack for at least 15 minutes before serving to allow the filling to set.
Notes
For a gluten-free version, use a 1:1 gluten-free baking flour blend. For dairy-free, use cold coconut oil or plant-based butter. Let the crisp cool for at least 15 minutes to allow the filling to set. Bake on a sheet pan to catch any overflow. Store leftovers covered in the refrigerator for up to 4 days. Reheat in a 350°F oven for 10-15 minutes to restore crunch.
Nutrition
- Serving Size: 1 serving
- Calories: 350
- Sugar: 35
- Sodium: 150
- Fat: 15
- Saturated Fat: 8
- Carbohydrates: 55
- Fiber: 6
- Protein: 4
Keywords: pear cranberry crisp, fall dessert, fruit crisp, easy dessert, spiced pear crisp, cranberry crisp, oat topping