That warm, spiced smell—the one that wraps around you before you even reach the kitchen doorway—still takes me straight to my grandmother’s tiny apartment on a gray November afternoon. She wasn’t much for baking by the book, you know. She measured things with her heart and her hands, and somehow, everything turned out perfect. I remember standing on a wobbly stool, watching her dump a whole can of pumpkin into a bowl that looked way too small, and thinking there was no way this would work. But then she’d fold in a handful of chocolate chips, and the whole place would smell like cinnamon and nutmeg and something I can only describe as home. These fluffy one-bowl pumpkin chocolate chip muffins are my attempt to bottle up that exact feeling, minus the wobbly stool and the mess.
Honestly, I’ve tested this recipe about a dozen times. The first batch came out dense and sad—like little hockey pucks with chocolate chips. Not good. But I kept tweaking, kept messing up, until I landed on this version. The key? Not overmixing the batter. It sounds simple, but it took me way too long to learn. Now, these muffins are so light they practically float off the plate. And the best part? Just one bowl. No fancy stand mixer, no multiple dishes to wash. Just a bowl, a whisk, and about ten minutes of your time. That’s the kind of baking I can get behind.
Why You’ll Love This Recipe
Let me tell you why these muffins have become my go-to for everything from lazy Sunday mornings to last-minute bake sales. They’re not just good—they’re the kind of muffin that makes people ask for the recipe before they’ve even finished the first bite.
- One Bowl, Zero Fuss: I mean it. You mix the wet ingredients, add the dry, fold in the chocolate chips, and you’re done. No separate bowls for flour and sugar, no sifting, no nonsense. Perfect for when you’re craving something warm but don’t want to face a mountain of dishes.
- Incredibly Fluffy Texture: These muffins are light and tender, not dense or gummy. The secret is using a combination of oil and a touch of buttermilk, which keeps them moist without weighing them down. They practically melt in your mouth.
- Perfectly Spiced, Not Overpowering: The pumpkin flavor is there, but it’s subtle. The cinnamon, nutmeg, and ginger play backup, creating that warm, cozy fall vibe without screaming “pumpkin spice” at you. It’s balanced, like a good conversation.
- Simple Ingredients You Already Have: No trips to specialty stores. You probably have a can of pumpkin in your pantry from that one time you thought you’d make a pie (we’ve all been there). Everything else is standard baking stuff.
- Crowd-Pleaser for All Ages: I brought these to a family gathering last month, and my three-year-old nephew ate three. Three! Meanwhile, my aunt, who swears she doesn’t like pumpkin, asked for the recipe. These muffins have a way of winning people over.
- Freezer-Friendly for Busy Mornings: Make a double batch, freeze half, and you’ve got breakfast sorted for weeks. Just pop one in the microwave for 15 seconds, and it tastes fresh out of the oven. Honestly, it’s a lifesaver on hectic weekday mornings.
I’ve been developing recipes for years, and I can tell you with confidence: this is my best version of pumpkin chocolate chip muffins. It’s the one I come back to again and again, the one that never fails. There’s something deeply satisfying about pulling a tray of these out of the oven, watching the chocolate chips glisten, and knowing you created something that simple that brings so much joy.
What Ingredients You Will Need
This recipe uses simple, wholesome ingredients to deliver bold flavor and satisfying texture without the fuss. Most of these are pantry staples, which is exactly how I like it. Here’s what you’ll need:
For the Muffins
- 1 ¾ cups (220g) all-purpose flour – Spoon and level it into your measuring cup. Scooping directly can pack the flour, making your muffins dense. I’ve learned this the hard way.
- 1 cup (200g) granulated sugar – Adds sweetness and helps with that tender crumb. You can reduce it to ¾ cup if you prefer less sweet muffins.
- 1 teaspoon baking soda – This is your leavening agent. Make sure it’s fresh, or your muffins won’t rise properly. I always check the date on mine.
- ¼ teaspoon baking powder – A little extra lift. Don’t skip it, even though it’s a small amount.
- 2 teaspoons ground cinnamon – The star of the spice show. I use cinnamon from Vietnam if I can find it—it’s more aromatic.
- ½ teaspoon ground nutmeg – Freshly grated is best, but pre-ground works perfectly fine. Just make sure it hasn’t been sitting in your spice rack for three years.
- ½ teaspoon ground ginger – Adds a little warmth and zing. You can omit it if you’re not a fan, but I think it rounds out the flavor nicely.
- ½ teaspoon salt – Balances the sweetness and enhances all the other flavors. Don’t skip it, even if you’re watching your sodium.
- 1 cup (240g) pumpkin puree – Not pumpkin pie filling! Make sure you grab the 100% pure pumpkin. I use Libby’s, but any brand works. If you’re feeling ambitious, you can roast your own pumpkin, but honestly, canned is just fine.
- ½ cup (120ml) vegetable oil – Keeps the muffins moist without making them greasy. You can use melted coconut oil or canola oil instead.
- ½ cup (120ml) buttermilk – This is the secret to fluffy muffins. The acid in the buttermilk reacts with the baking soda, giving you a beautiful rise. No buttermilk? No problem. Just add ½ tablespoon of lemon juice or vinegar to regular milk and let it sit for 5 minutes.
- 2 large eggs – Room temperature is best. If you forgot to take them out of the fridge, place them in a bowl of warm water for 5 minutes.
- 1 teaspoon vanilla extract – Pure vanilla, not imitation. It makes a difference. I always have a bottle of Nielsen-Massey in my pantry.
- 1 cup (175g) semi-sweet chocolate chips – I prefer Ghirardelli for their rich flavor and good melt. You can use dark chocolate chips, milk chocolate, or even white chocolate if that’s your thing.
Optional Topping
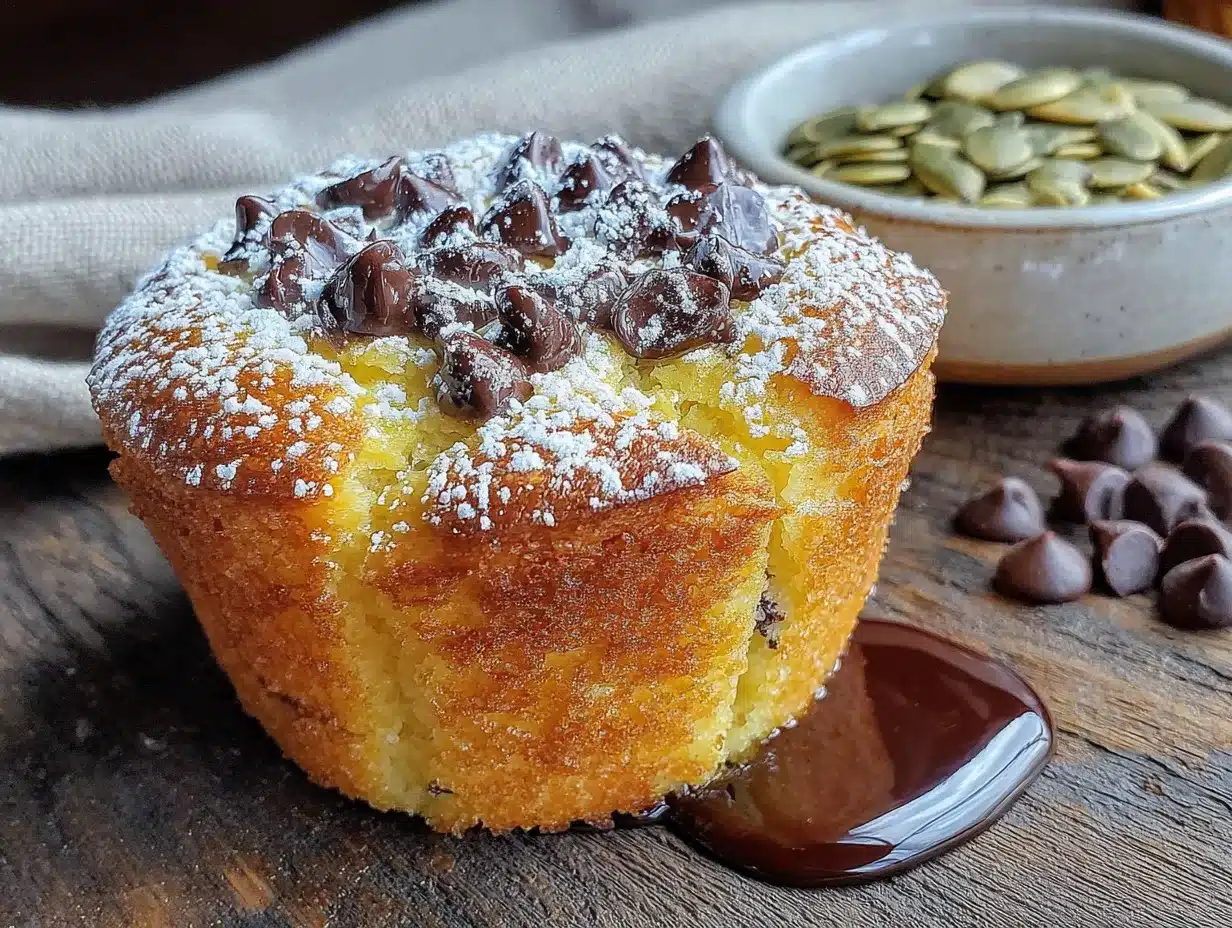
- ¼ cup (45g) turbinado sugar – Sprinkling this on top before baking gives the muffins a lovely crunchy crust. Regular granulated sugar works too, but turbinado adds that extra something special.
I always tell my readers to use the best quality ingredients they can afford, especially the vanilla and chocolate chips. It really does show in the final result. But honestly, even with basic supermarket brands, these muffins turn out fantastic. I’ve tested it with store-brand everything, and they were still devoured in minutes.
Equipment Needed
You don’t need a fully stocked professional kitchen for this recipe. Here’s what I use:
- One large mixing bowl – Any bowl will do, but I prefer a wide, shallow one. It makes mixing easier and reduces the chance of flour flying everywhere.
- Whisk – For combining the wet and dry ingredients. A fork works in a pinch, but a whisk gives you a smoother batter.
- Rubber spatula – Essential for folding in the chocolate chips without overmixing. I have a red one that’s been with me for years, and it’s perfect for scraping every last bit of batter.
- 12-cup muffin tin – Standard size. If you’re making jumbo muffins, adjust the baking time accordingly.
- Paper liners – I like the parchment-style liners because they don’t stick. But if you’re out, just grease the tin well with butter or cooking spray.
- Measuring cups and spoons – For accuracy. I cannot stress this enough. Baking is a science, and eyeballing it can lead to sad, flat muffins.
- Kitchen scale (optional but recommended) – Weighing your flour is the most accurate way to measure. I use a simple digital scale, and it’s made a world of difference in my baking.
- Cooling rack – Lets air circulate around the muffins so they don’t get soggy on the bottom. If you don’t have one, you can use a clean dish towel laid flat.
I’ve made these muffins with a cheap muffin tin from the dollar store, and they still turned out great. Don’t let fancy equipment hold you back. Use what you have, and if you’re missing something, get creative. That’s what real home cooking is all about.
Preparation Method
Alright, let’s get baking. This is the easy part. Follow these steps, and you’ll have a tray of fluffy, chocolate-studded muffins in no time.
- Preheat your oven to 375°F (190°C). Line a 12-cup muffin tin with paper liners or grease it well. I always do this first so the oven is ready when I am. It saves time and prevents that frantic last-minute scramble.
- In your large mixing bowl, whisk together the flour, sugar, baking soda, baking powder, cinnamon, nutmeg, ginger, and salt. Make sure everything is evenly distributed. I like to use a fork to break up any clumps of brown sugar if I’m using it, but since we’re using granulated here, it’s pretty straightforward. The smell of the spices at this stage is already intoxicating.
- Make a well in the center of the dry ingredients. Pour in the pumpkin puree, vegetable oil, buttermilk, eggs, and vanilla extract. Don’t stir yet. Just let everything sit there for a second while you gather your whisk.
- Whisk the wet ingredients into the dry until just combined. This is the most critical step. Stop mixing as soon as you no longer see streaks of flour. A few lumps are perfectly fine. Overmixing develops gluten, which makes muffins tough and dense. Trust me, I’ve made that mistake more times than I care to admit. The batter will be thick, but that’s normal.
- Gently fold in the chocolate chips using your rubber spatula. Use a folding motion—cut down through the center, scrape along the bottom, and bring the batter up and over. About 10 to 12 folds should do it. You want the chips evenly distributed, not smashed into submission.
- Divide the batter evenly among the 12 muffin cups. I use a ¼-cup measuring cup or a large cookie scoop to get consistent portions. Fill each cup about ¾ full. If you want taller, domed tops, fill them slightly fuller—almost to the rim. But be careful, they might overflow a bit.
- Sprinkle the tops with turbinado sugar if using. This step is optional, but I highly recommend it. That little crunch on top is pure magic. Plus, it makes the muffins look bakery-worthy.
- Bake for 18 to 22 minutes, or until a toothpick inserted into the center comes out clean or with a few moist crumbs. My oven runs a little hot, so I usually check at 18 minutes. The muffins should be golden brown on top and spring back when lightly touched. If the toothpick comes out with wet batter, give them another 2 minutes and check again.
- Let the muffins cool in the pan for 5 minutes. This allows them to set and makes them easier to remove. After 5 minutes, transfer them to a wire rack to cool completely. If you leave them in the pan too long, the bottoms can get soggy. I learned that lesson the hard way.
- Serve warm or at room temperature. Honestly, there’s nothing better than a warm muffin with a pat of butter melting into it. But they’re just as delicious the next day, if they last that long.
One more thing—if you’re making these for a crowd, you can easily double the recipe. Just use two bowls or one really big one. The baking time stays about the same, but you might need to rotate the pans halfway through for even baking.
Cooking Tips & Techniques
Over the years, I’ve picked up a few tricks that make these muffins even better. Here are my top tips, straight from my kitchen to yours:
Don’t Overmix the Batter: I know I’ve said this already, but it’s worth repeating. Stir until the flour just disappears. Lumps are your friend. Overmixing is the number one reason muffins turn out tough and dense. I once mixed a batch for a full minute because I was distracted by a podcast, and they came out like little rocks. Learn from my mistake.
Room Temperature Ingredients Matter: Cold eggs and cold buttermilk can make the batter seize up and prevent the muffins from rising properly. Take them out of the fridge about 30 minutes before you start baking. If you’re short on time, place the eggs in a bowl of warm water for 5 minutes and microwave the buttermilk for 10 seconds. It’s a small step that makes a big difference.
Use a Cookie Scoop for Even Muffins: A #20 or #24 cookie scoop (about 3 tablespoons) gives you perfectly portioned muffins every time. No more guessing, no more uneven baking. Plus, it’s faster than using a spoon. I found mine at a kitchen supply store for under ten bucks, and it’s one of my most-used tools.
Check Your Oven Temperature: Ovens can be liars. I’ve had ovens that run 25 degrees hotter than the dial says. An inexpensive oven thermometer will save you from burnt bottoms and undercooked centers. It’s a game-changer.
Let the Muffins Cool in the Pan: That 5-minute rest is crucial. It allows the structure to set, so the muffins don’t fall apart when you try to remove them. But don’t leave them in there too long, or the steam will make the bottoms soggy. Set a timer if you have to.
For Extra Fluffy Muffins, Let the Batter Rest: This is a pro tip I picked up from a pastry chef friend. After mixing, let the batter sit at room temperature for 15 to 20 minutes before baking. This allows the flour to fully hydrate and the gluten to relax, resulting in an even lighter texture. It’s not essential, but if you have the time, it’s worth trying.
I’ve had my fair share of baking failures—collapsed muffins, burnt edges, sunken centers. But each mistake taught me something. The key is to keep experimenting and not take it too seriously. Even the imperfect muffins are still pretty delicious.
Variations & Adaptations
One of the best things about this recipe is how versatile it is. Here are some of my favorite ways to change it up:
Gluten-Free Version: Substitute the all-purpose flour with a 1:1 gluten-free baking flour blend. I’ve had great results with Bob’s Red Mill and King Arthur. The texture is slightly different—a bit more delicate—but still delicious. Just don’t overmix, or they can get gummy.
Dairy-Free Version: Use a dairy-free milk (like oat or almond) mixed with a teaspoon of lemon juice to replace the buttermilk. And swap the chocolate chips for dairy-free ones. Enjoy Life makes great options. The muffins will still be moist and fluffy.
Lower Sugar Option: Reduce the granulated sugar to ¾ cup. You can also use a sugar substitute like monk fruit or coconut sugar, though the texture might be slightly different. I’ve tried it with coconut sugar, and the muffins were a little denser but still tasty.
Add Nuts or Seeds: Fold in ½ cup of chopped walnuts, pecans, or pepitas along with the chocolate chips. The crunch adds a lovely contrast to the soft muffin. I’m partial to pecans—they just feel so fall-appropriate.
Spice It Up: Add a pinch of cloves or allspice to the spice mix for a warmer, more complex flavor. Or try a teaspoon of pumpkin pie spice instead of the individual spices. It’s a shortcut that works beautifully.
Make Them Mini: Use a mini muffin tin and bake for 10 to 12 minutes. Perfect for parties, lunchboxes, or when you just want a little something sweet without committing to a full-sized muffin. I’ve made these for book club, and they were gone in minutes.
Turn Them Into Muffin Tops: Use a muffin top pan or just drop spoonfuls of batter onto a lined baking sheet. Bake for 10 to 12 minutes. You get all the best parts of a muffin—the domed top and the crunchy edge—without the bottom. It’s genius, honestly.
I once added a handful of dried cranberries along with the chocolate chips, and it was a happy accident. The tartness of the cranberries balanced the sweetness perfectly. Sometimes the best variations come from just throwing in whatever you have on hand.
If you love pumpkin treats, you should also try my recipe for cozy pumpkin chocolate chip bread with maple glaze. It’s like these muffins’ loaf-pan cousin, and it’s just as easy.
Serving & Storage Suggestions
These muffins are wonderful on their own, but here are a few ways to make them even more special:
Serving Temperature: Serve them warm, right out of the oven, for the ultimate experience. The chocolate chips will be melty and the muffin will be tender. If they’ve cooled down, pop one in the microwave for 10 to 15 seconds. It’s like magic.
Presentation Ideas: Arrange them on a pretty cake stand or a wooden board. Dust them with a little powdered sugar for a bakery-style look. Or serve them alongside a steaming mug of pumpkin chai latte with oat milk for the ultimate fall breakfast or snack.
What to Serve With Them: A pat of salted butter is classic and perfect. Cream cheese or apple butter are also fantastic. For a more indulgent treat, split a muffin in half, toast it, and spread with a little Nutella. Yes, it’s over the top, but sometimes that’s exactly what you need.
Storage Instructions: Store the muffins in an airtight container at room temperature for up to 3 days. To keep them extra moist, place a paper towel in the bottom of the container and another on top. They’ll stay soft and delicious.
Freezing Instructions: These muffins freeze like a dream. Let them cool completely, then place them in a single layer in a freezer-safe bag or container. They’ll keep for up to 3 months. To thaw, leave them at room temperature for about an hour, or microwave for 20 to 30 seconds. I always keep a stash in my freezer for busy mornings or unexpected guests.
Flavor Development: Honestly, these muffins taste even better the next day. The flavors have time to meld and deepen, and the texture becomes even more tender. If you can resist eating them all right away, you’ll be rewarded. But I totally understand if you can’t.
Nutritional Information & Benefits
While these muffins are definitely a treat, they also have some nutritional perks. Here’s a breakdown:
Estimated Nutritional Values (per muffin, based on 12 servings):
- Calories: 285
- Fat: 13g
- Carbohydrates: 39g
- Fiber: 2g
- Sugar: 22g
- Protein: 4g
Health Benefits: Pumpkin is packed with vitamin A, which is great for your eyes and immune system. It’s also a good source of fiber and antioxidants. The cinnamon in these muffins has anti-inflammatory properties and can help regulate blood sugar. And dark chocolate? It’s full of flavonoids, which are good for your heart. So while these aren’t health food, they’re not empty calories either.
Dietary Considerations: This recipe is vegetarian. It can easily be made gluten-free and dairy-free with the substitutions mentioned above. It’s also nut-free as written, but be sure to check your chocolate chips if allergies are a concern.
Potential Allergens: Contains wheat, dairy, and eggs. The chocolate chips may contain traces of soy and milk.
I believe in balance. These muffins are a wonderful way to enjoy the flavors of fall without feeling guilty. They’re made with real ingredients, and they bring genuine joy. That’s a win in my book.
Conclusion
These fluffy one-bowl pumpkin chocolate chip muffins are more than just a recipe—they’re a little piece of comfort you can create in your own kitchen. They’re easy enough for a beginner baker, but impressive enough to share with anyone. The combination of warm spices, tender crumb, and melty chocolate chips is truly irresistible.
I encourage you to make these your own. Add extra chocolate chips if you’re feeling indulgent. Swap in white chocolate for a different vibe. Top them with a cream cheese glaze if you want to go all out. The beauty of this recipe is that it’s forgiving and adaptable. It’s built to be played with.
I’d love to hear how they turn out for you. Leave a comment below and let me know if you tried any fun variations. Did you add nuts? Did you make them mini? Did your family devour them in record time? Share your stories—I read every single one. And if you snap a photo, tag me on social media. There’s nothing that makes my day like seeing my recipes come to life in your kitchens.
Happy baking, friends. Go make something delicious.
Frequently Asked Questions
Can I use fresh pumpkin instead of canned?
Yes, you can. Just make sure to roast or steam the pumpkin until tender, then puree it until smooth. You’ll need about 1 cup of puree. The texture might be slightly different—fresh pumpkin has more water content—but it works beautifully. Just drain any excess liquid before using.
Why did my muffins turn out dense?
This usually happens from overmixing the batter. Mix until the flour just disappears, even if there are a few lumps. Also, make sure your baking soda and baking powder are fresh. Expired leavening agents won’t give your muffins the lift they need.
Can I use whole wheat flour instead of all-purpose?
You can substitute up to half of the all-purpose flour with whole wheat flour. Using 100% whole wheat will result in denser, heartier muffins. I’ve tried it with a 50/50 blend, and they were still fluffy and delicious, just a little more rustic.
How do I get taller, domed muffin tops?
Fill the muffin cups almost to the rim—about ⅞ full. Also, try baking at 400°F (200°C) for the first 5 minutes, then reduce the temperature to 375°F (190°C) for the remaining time. The initial blast of heat creates steam, which pushes the batter up into a beautiful dome. It’s a trick from professional bakeries.
Can I make these muffins ahead of time?
Absolutely. You can make the batter up to 24 hours in advance and store it in the refrigerator. Let it come to room temperature before baking. Or bake the muffins completely and store them in an airtight container. They’ll stay fresh for up to 3 days at room temperature or 3 months in the freezer.
If you enjoyed these, you might also like my recipe for easy perfect chocolate chip pumpkin muffins—it’s a slightly different take with a few extra tips. And for a cozy fall breakfast, try my creamy apple cinnamon overnight oats. Both are perfect for the season.
Pin This Recipe!

Fluffy One-Bowl Pumpkin Chocolate Chip Muffins: Easy Recipe

These fluffy one-bowl pumpkin chocolate chip muffins are light, tender, and perfectly spiced. Made with simple ingredients in just one bowl, they’re the ultimate easy fall treat that tastes like home.
- Prep Time: 10 minutes
- Cook Time: 20 minutes
- Total Time: 30 minutes
- Yield: 12 muffins 1x
- Category: Dessert
- Cuisine: American
Ingredients
- 1 ¾ cups (220g) all-purpose flour
- 1 cup (200g) granulated sugar
- 1 teaspoon baking soda
- ¼ teaspoon baking powder
- 2 teaspoons ground cinnamon
- ½ teaspoon ground nutmeg
- ½ teaspoon ground ginger
- ½ teaspoon salt
- 1 cup (240g) pumpkin puree (not pumpkin pie filling)
- ½ cup (120ml) vegetable oil
- ½ cup (120ml) buttermilk
- 2 large eggs, room temperature
- 1 teaspoon vanilla extract
- 1 cup (175g) semi-sweet chocolate chips
- ¼ cup (45g) turbinado sugar (optional, for topping)
Instructions
- Preheat your oven to 375°F (190°C). Line a 12-cup muffin tin with paper liners or grease it well.
- In a large mixing bowl, whisk together the flour, sugar, baking soda, baking powder, cinnamon, nutmeg, ginger, and salt until evenly distributed.
- Make a well in the center of the dry ingredients. Pour in the pumpkin puree, vegetable oil, buttermilk, eggs, and vanilla extract. Do not stir yet.
- Whisk the wet ingredients into the dry until just combined. Stop mixing as soon as no streaks of flour remain. A few lumps are fine. Do not overmix.
- Gently fold in the chocolate chips using a rubber spatula, using a folding motion. About 10 to 12 folds should evenly distribute the chips.
- Divide the batter evenly among the 12 muffin cups, filling each about ¾ full. For taller domed tops, fill slightly fuller (almost to the rim).
- Sprinkle the tops with turbinado sugar if using.
- Bake for 18 to 22 minutes, or until a toothpick inserted into the center comes out clean or with a few moist crumbs. The muffins should be golden brown and spring back when lightly touched.
- Let the muffins cool in the pan for 5 minutes, then transfer to a wire rack to cool completely.
- Serve warm or at room temperature.
Notes
Do not overmix the batter; lumps are okay. Room temperature ingredients help the muffins rise properly. For extra fluffy muffins, let the batter rest for 15-20 minutes before baking. Store in an airtight container at room temperature for up to 3 days, or freeze for up to 3 months.
Nutrition
- Serving Size: 1 muffin
- Calories: 285
- Sugar: 22
- Sodium: 210
- Fat: 13
- Saturated Fat: 3
- Carbohydrates: 39
- Fiber: 2
- Protein: 4
Keywords: pumpkin chocolate chip muffins, one bowl muffins, fluffy pumpkin muffins, easy pumpkin muffins, fall baking, pumpkin spice muffins