My neighbor texted me a photo of her toddler holding a tiny muffin like it was a winning lottery ticket. The caption read: “He ate four. What did you put in these?” That moment, honestly, was the first time I realized these mini pumpkin chocolate chip muffins weren’t just another fall recipe I’d thrown together. They were something else—something that made a two-year-old stop mid-play and reach for another without being asked. And let’s face it, if a toddler approves, you know you’ve got a winner on your hands.
I’d been testing pumpkin recipes for weeks, trying to find that perfect balance between moist and fluffy, sweet but not cloying. The kitchen counter was a graveyard of half-eaten loaves and forgotten cookies. But these little guys? They disappeared. The secret isn’t anything fancy—just a few smart swaps and a technique that keeps them tender even after a month in the freezer. Honestly, I almost didn’t share this one because I wanted to keep it all for myself.
These aren’t just good for mini muffins. They’re the kind of recipe that makes you look forward to fall mornings, lazy afternoons, and those moments when you need a little something sweet without the guilt. I’ve made six batches since that text, and I’m not stopping anytime soon.
Why You’ll Love This Recipe
I’ve tested this recipe more times than I care to admit. Each batch taught me something new—how the pumpkin puree affects moisture, why the chocolate chips sink in some batches, and how to get that perfect domed top every single time. This version is the result of all that trial and error, and I can honestly say it’s the best I’ve ever made.
- Quick & Easy: From start to finish, you’re looking at about 25 minutes. That includes mixing, baking, and cooling. Perfect for those mornings when you need something fast but homemade.
- Simple Ingredients: No fancy flours or hard-to-find extracts. You probably have most of these in your pantry right now. The pumpkin puree and chocolate chips are the only things you might need to grab.
- Perfect for Fall Mornings: These muffins scream autumn without being overly spiced. They’re great for breakfast, snack time, or even a light dessert after a bowl of cozy fall harvest soup.
- Crowd-Pleaser: I’ve brought these to playdates, office potlucks, and family gatherings. They disappear every single time. Kids love the mini size, and adults love the flavor.
- Unbelievably Delicious: The texture is what gets me every time. They’re soft, tender, and just slightly dense in the best way. The chocolate chips add little pockets of melty goodness that make each bite feel special.
What makes this recipe different from the dozens of others out there? It’s the combination of brown butter (yes, it’s worth the extra step) and a technique that keeps them moist without being greasy. I also use a mix of all-purpose and whole wheat pastry flour, which adds a subtle nuttiness that pairs beautifully with the pumpkin. This isn’t just another pumpkin muffin recipe—it’s the one you’ll come back to again and again.
What Ingredients You Will Need
This recipe uses simple, wholesome ingredients that come together to create something truly special. Most are pantry staples, which makes these muffins perfect for spontaneous baking sessions. Here’s what you’ll need and why each one matters.
- Pumpkin puree (1 cup, 240g): Make sure you’re using 100% pure pumpkin, not pumpkin pie filling. I prefer Libby’s for its consistent texture and flavor. The pumpkin adds moisture, color, and a subtle earthy sweetness that forms the base of these muffins.
- Unsalted butter (1/2 cup, 113g): You’ll brown this butter for an extra layer of nutty flavor. It’s a small step that makes a huge difference. If you’re in a rush, you can use melted butter, but I really recommend taking the extra five minutes.
- Brown sugar (1/2 cup, 100g, packed): Light or dark brown sugar works here. Dark brown sugar adds more molasses flavor, which pairs beautifully with the pumpkin. Pack it firmly into the measuring cup for accuracy.
- Granulated sugar (1/4 cup, 50g): This adds sweetness without the molasses notes of brown sugar. The combination gives you a more complex sweetness.
- Large egg (1): Room temperature, please. A cold egg can seize the browned butter and affect the texture. Leave it on the counter for 30 minutes before starting.
- Vanilla extract (1 teaspoon): Pure vanilla extract is best. It enhances the warm flavors of the pumpkin and spices without overpowering them.
- All-purpose flour (3/4 cup, 90g): This provides structure. Spoon and level your flour for the most accurate measurement—don’t scoop directly from the bag.
- Whole wheat pastry flour (1/4 cup, 30g): This is my secret ingredient. It adds a subtle nuttiness and a bit of fiber without making the muffins dense. You can substitute with all-purpose flour if needed.
- Baking soda (1/2 teaspoon): This helps the muffins rise and gives them that nice domed top. Make sure it’s fresh—test it by dropping a bit into vinegar; it should fizz immediately.
- Baking powder (1/2 teaspoon): Works with the baking soda to create the perfect lift.
- Salt (1/4 teaspoon): Balances the sweetness and enhances all the other flavors. I use fine sea salt.
- Pumpkin pie spice (1 1/2 teaspoons): You can use store-bought or make your own with cinnamon, ginger, nutmeg, and cloves. I prefer using a good quality blend like McCormick or making my own for a fresher flavor.
- Cinnamon (1/2 teaspoon): Adds that classic warm spice note. I add a little extra because I love cinnamon.
- Semi-sweet chocolate chips (1/2 cup, 85g): I use Ghirardelli for the best melt and flavor. Mini chocolate chips work great here too, and they distribute more evenly in the small muffins.
For substitutions, you can use dairy-free butter and a flax egg for a vegan version. Gluten-free all-purpose flour blends also work well—just make sure they contain xanthan gum for structure.
Equipment Needed
You don’t need a professional kitchen to make these muffins, but having the right tools makes the process smoother and more enjoyable.
- Mini muffin pan: This is non-negotiable. A standard 24-cup mini muffin pan works perfectly. I love my Wilton non-stick pan—it releases the muffins easily and cleans up in seconds.
- Paper liners: Mini muffin liners are optional but recommended for easy removal and serving. If you don’t have them, grease the pan well with butter or non-stick spray.
- Mixing bowls: You’ll need two medium bowls—one for wet ingredients and one for dry. Glass or stainless steel works best.
- Whisk: For combining dry ingredients and ensuring no lumps remain.
- Rubber spatula: For folding the batter together gently. Overmixing is the enemy of tender muffins.
- Small saucepan: For browning the butter. A light-colored pan helps you see the color change more easily.
- Cookie scoop or tablespoon: A #60 cookie scoop (about 1 tablespoon) is perfect for filling mini muffin cups evenly. This ensures consistent sizing and baking time.
- Cooling rack: Allows air to circulate around the muffins so they cool evenly without getting soggy bottoms.
If you don’t have a mini muffin pan, you can use a standard 12-cup muffin pan and bake for 15-18 minutes. The yield will be about 8-10 regular-sized muffins. A good quality cookie scoop is worth the investment—I use mine for everything from meatballs to cookie dough.
Preparation Method
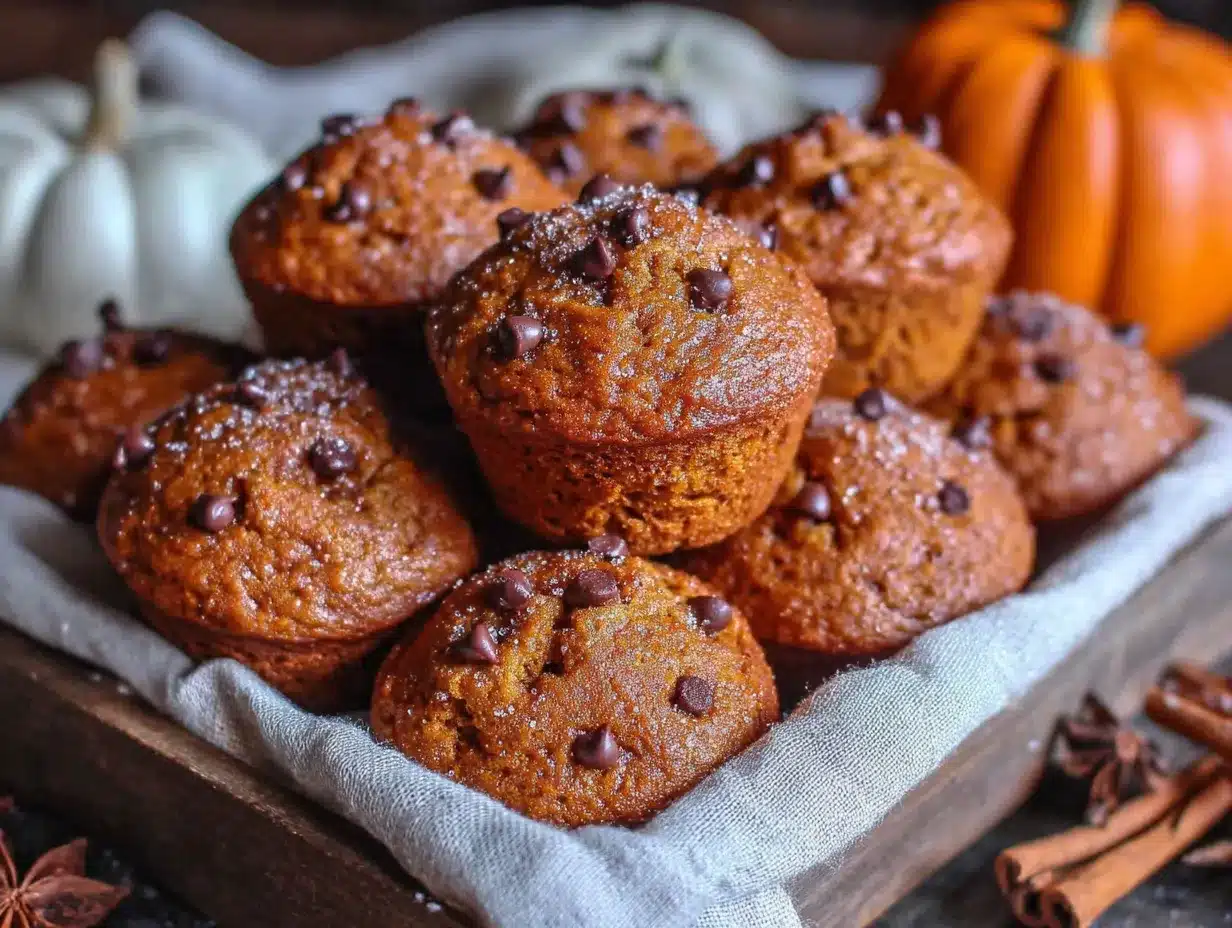
Let’s get baking. I’ve broken this down step by step so you can follow along easily. Take your time, especially with the butter browning—it’s the step that makes these muffins special.
- Preheat and prepare. Preheat your oven to 350°F (175°C). Line your mini muffin pan with paper liners or grease each cup thoroughly. Set the pan aside while you prepare the batter.
- Brown the butter. Place the butter in a small saucepan over medium heat. Stir frequently as it melts. The butter will foam, then the milk solids will start to turn golden brown. This takes about 5-7 minutes. Watch closely—once you see brown specks forming and smell a nutty aroma, remove it from the heat immediately. Pour it into a heatproof bowl to stop the cooking process. Let it cool for 5 minutes. (I’ve burned my fair share of butter, so trust me on this—don’t walk away.)
- Mix the wet ingredients. In a medium bowl, whisk together the browned butter, brown sugar, and granulated sugar until well combined. It will look like wet sand. Add the egg and vanilla extract, then whisk vigorously for about 30 seconds until the mixture is smooth and slightly thickened. Add the pumpkin puree and whisk until fully incorporated. The mixture will be thick and glossy.
- Combine the dry ingredients. In a separate bowl, whisk together the all-purpose flour, whole wheat pastry flour, baking soda, baking powder, salt, pumpkin pie spice, and cinnamon. Whisking ensures the leavening agents and spices are evenly distributed.
- Fold the batter together. Add the dry ingredients to the wet ingredients. Use a rubber spatula to fold gently—just until you no longer see streaks of flour. A few small lumps are okay. Overmixing will make the muffins tough. Gently fold in the chocolate chips, reserving a few to sprinkle on top if you’d like.
- Fill the muffin cups. Using your cookie scoop or a tablespoon, fill each mini muffin cup about three-quarters full. This gives them room to rise without overflowing. If you reserved some chocolate chips, press a few into the tops of the batter for a pretty presentation.
- Bake. Place the pan in the preheated oven and bake for 10-12 minutes. At 10 minutes, insert a toothpick into the center of a muffin. If it comes out clean or with a few moist crumbs, they’re done. If there’s wet batter, give them another minute or two. The tops should be golden and spring back when lightly touched.
- Cool properly. Let the muffins cool in the pan for 5 minutes. This allows them to set and makes removal easier. Then transfer them to a wire cooling rack to cool completely. If you skip this step, the bottoms can get soggy from trapped steam.
A note on timing: The entire process from start to finish takes about 25 minutes. The batter comes together in 10 minutes, bakes in 10-12, and cools in 5. That’s faster than a drive to the bakery.
Cooking Tips & Techniques
After making these muffins more times than I can count, I’ve learned a few things the hard way. Here are my best tips to ensure success every time.
- Don’t skip browning the butter. I know it’s an extra step, but it’s the secret to that deep, nutty flavor that makes these muffins unforgettable. The first time I skipped it, the muffins were good but not great. The browned butter version? Completely different league.
- Measure flour correctly. Spoon the flour into your measuring cup and level it off with a knife. Scooping directly from the bag can add up to 25% more flour, which makes muffins dry and dense. I learned this the hard way when my first batch came out like hockey pucks.
- Room temperature ingredients matter. Cold egg and cold pumpkin can seize the browned butter, leaving you with a lumpy batter. Leave everything on the counter for 30 minutes before starting. If you’re in a rush, place the egg in a bowl of warm water for 5 minutes.
- Don’t overmix. Once you add the dry ingredients, mix just until combined. Overmixing develops gluten, which makes muffins tough and chewy instead of tender. A few streaks of flour are perfectly fine—they’ll disappear as you scoop.
- Use a cookie scoop for even sizing. This ensures all muffins bake at the same rate. Uneven sizes mean some are overdone while others are underdone. A #60 scoop is perfect for mini muffins.
- Test for doneness early. Ovens vary, so start checking at 10 minutes. My old oven took 12 minutes, but my current one does the job in 10. The toothpick test is your best friend here.
- Cool completely before freezing. If you’re making these for the freezer (and I hope you are), let them cool completely on a wire rack. Warm muffins will create condensation in the freezer bag, leading to ice crystals and soggy muffins.
Variations & Adaptations
One of the best things about this recipe is how easily it adapts to different tastes and dietary needs. Here are some variations I’ve tried and loved.
- Dairy-Free Version: Substitute the butter with a high-quality vegan butter like Miyoko’s. The browning step still works beautifully with plant-based butter. Use dairy-free chocolate chips like Enjoy Life.
- Gluten-Free Option: Replace the all-purpose and whole wheat pastry flour with 1 cup of a good gluten-free all-purpose blend that contains xanthan gum. I’ve had great results with King Arthur Measure for Measure. The texture is slightly more delicate, but the flavor is spot on.
- Add Nuts: Fold in 1/4 cup of chopped pecans or walnuts along with the chocolate chips. Toast them first for extra flavor. This adds a lovely crunch that contrasts with the soft muffin texture.
- Spice It Up: Add a pinch of cayenne pepper or a teaspoon of fresh grated ginger for a spicy kick. The heat pairs surprisingly well with the sweet pumpkin and chocolate.
- Swap the Chips: Use white chocolate chips, butterscotch chips, or even chopped dark chocolate. Each variation gives the muffins a completely different personality. White chocolate and pumpkin is a surprisingly good combination.
- Make Them Vegan: Use a flax egg (1 tablespoon ground flaxseed mixed with 3 tablespoons water, let sit for 5 minutes) and vegan butter. The texture is slightly denser but still delicious.
I once made a batch with chopped crystallized ginger and dark chocolate chips for a holiday party. They were gone before the appetizers came out. Don’t be afraid to experiment—this recipe is forgiving.
Serving & Storage Suggestions
These muffins are incredibly versatile when it comes to serving. Here’s how I like to enjoy them and how to keep them fresh.
- Serving Temperature: I prefer them slightly warm. Pop one in the microwave for 10-15 seconds, and the chocolate chips get all melty and delicious. They’re also great at room temperature, especially packed in lunchboxes.
- Presentation: For brunch or a fall gathering, arrange them on a tiered stand with other mini treats like pumpkin spice snickerdoodle cookies. Dust with a little powdered sugar for a pretty finish.
- Pairing Suggestions: These muffins are perfect with a hot cup of coffee, chai tea, or a glass of cold milk. For a more indulgent breakfast, serve alongside scrambled eggs and fresh fruit. They also make a great companion to a bowl of tomato basil soup for a cozy lunch.
- Room Temperature Storage: Store in an airtight container at room temperature for up to 3 days. Place a paper towel at the bottom of the container to absorb excess moisture, and another on top to keep the muffins from getting soggy.
- Refrigerator Storage: They’ll keep in the fridge for up to a week. Let them come to room temperature or warm them slightly before serving for the best texture.
- Freezer Storage (The Best Part): These muffins freeze beautifully. Let them cool completely, then place them in a single layer in a freezer-safe bag or container. Remove as much air as possible before sealing. They’ll keep for up to 3 months. To thaw, leave them at room temperature for about 30 minutes, or microwave for 15-20 seconds. I always keep a stash in the freezer for busy mornings or unexpected guests.
- Reheating: Microwave for 10-15 seconds for that fresh-from-the-oven experience. You can also reheat them in a 300°F oven for 5 minutes if you’re doing a larger batch.
The flavors actually deepen after a day or two. I’ve found that the pumpkin and spice notes become more pronounced, making day-old muffins taste even better than fresh ones.
Nutritional Information & Benefits
While these muffins are definitely a treat, they do offer some nutritional benefits thanks to the pumpkin and whole wheat pastry flour.
- Estimated per mini muffin (based on 24 muffins): Calories: 98, Fat: 5g, Carbohydrates: 13g, Fiber: 1g, Sugar: 8g, Protein: 1.5g.
- Pumpkin Benefits: Pumpkin is packed with vitamin A (in the form of beta-carotene), which supports eye health and immune function. It’s also a good source of fiber, which helps keep you full and satisfied.
- Whole Wheat Pastry Flour: Adds a bit of fiber and nutrients compared to all-purpose flour alone. It has a milder flavor than regular whole wheat flour, so you get the benefits without the heavy texture.
- Dietary Considerations: These muffins can easily be made dairy-free, gluten-free, or vegan with the substitutions mentioned above. They’re not low-carb, but the portion size (mini!) makes them a reasonable indulgence.
- Allergen Notes: Contains wheat, dairy, and eggs. Can be adapted for common allergies.
I love that I can feel good about giving these to my family. They’re not health food by any stretch, but they’re made with real ingredients and no preservatives. That counts for something in my book.
FAQs
Can I use fresh pumpkin instead of canned?
Yes, but you’ll need to roast and puree it first. Fresh pumpkin has a higher water content, so you might need to drain it slightly by pressing it through a fine-mesh sieve or letting it sit in a paper towel-lined bowl for 15 minutes. Canned pumpkin is more consistent and convenient, which is why I usually reach for it.
Why did my muffins turn out dry?
This usually happens from overmixing the batter or overbaking. Measure your flour correctly (spoon and level), mix just until combined, and start checking for doneness at 10 minutes. Also, make sure you’re using pumpkin puree, not pumpkin pie filling, which has added sugar and thickeners.
Can I make these into regular-sized muffins?
Absolutely. Grease or line a standard 12-cup muffin pan and fill each cup about three-quarters full. Bake at 350°F for 15-18 minutes, or until a toothpick inserted in the center comes out clean. You’ll get about 8-10 regular muffins. Adjust the baking time based on your oven.
How do I keep the chocolate chips from sinking to the bottom?
Toss the chocolate chips with a tablespoon of the flour mixture before folding them into the batter. This coats them and helps them stay suspended. Also, make sure your batter isn’t too thin—the pumpkin puree should make it thick enough to support the chips.
Can I add cream cheese frosting to these?
You can, but I’d recommend it for a special occasion rather than everyday snacking. A simple cream cheese frosting (4 oz cream cheese, 2 tbsp butter, 1 cup powdered sugar, 1/2 tsp vanilla) would be delicious. Just keep in mind that frosted muffins don’t freeze as well. If you want to go all out, these would pair beautifully with the flavors in no-bake pumpkin cheesecake pie for a full dessert spread.
Conclusion
These mini pumpkin chocolate chip muffins have become a staple in my kitchen, and I have a feeling they’ll become one in yours too. They’re quick enough for a weekday morning, special enough for a holiday brunch, and freezer-friendly enough to always have on hand when the craving strikes. The browned butter gives them a depth of flavor that feels fancy without any extra effort, and the mini size makes them dangerously easy to eat—you’ve been warned.
I love that this recipe is forgiving enough for beginners but rewarding enough for experienced bakers. It’s the kind of recipe that makes you look forward to fall, to cozy mornings, and to sharing something homemade with the people you love. Whether you’re packing them in lunchboxes, serving them at a party, or just keeping a stash in the freezer for yourself (no judgment here), these muffins deliver every single time.
I’d love to hear how they turn out for you. Did you try any variations? Did your toddler eat four in one sitting? Drop a comment below and let me know. And if you’re looking for more fall inspiration, don’t miss my brown butter pumpkin bread with maple glaze—it’s another freezer-friendly favorite that disappears fast. Happy baking, friends!
Pin This Recipe!
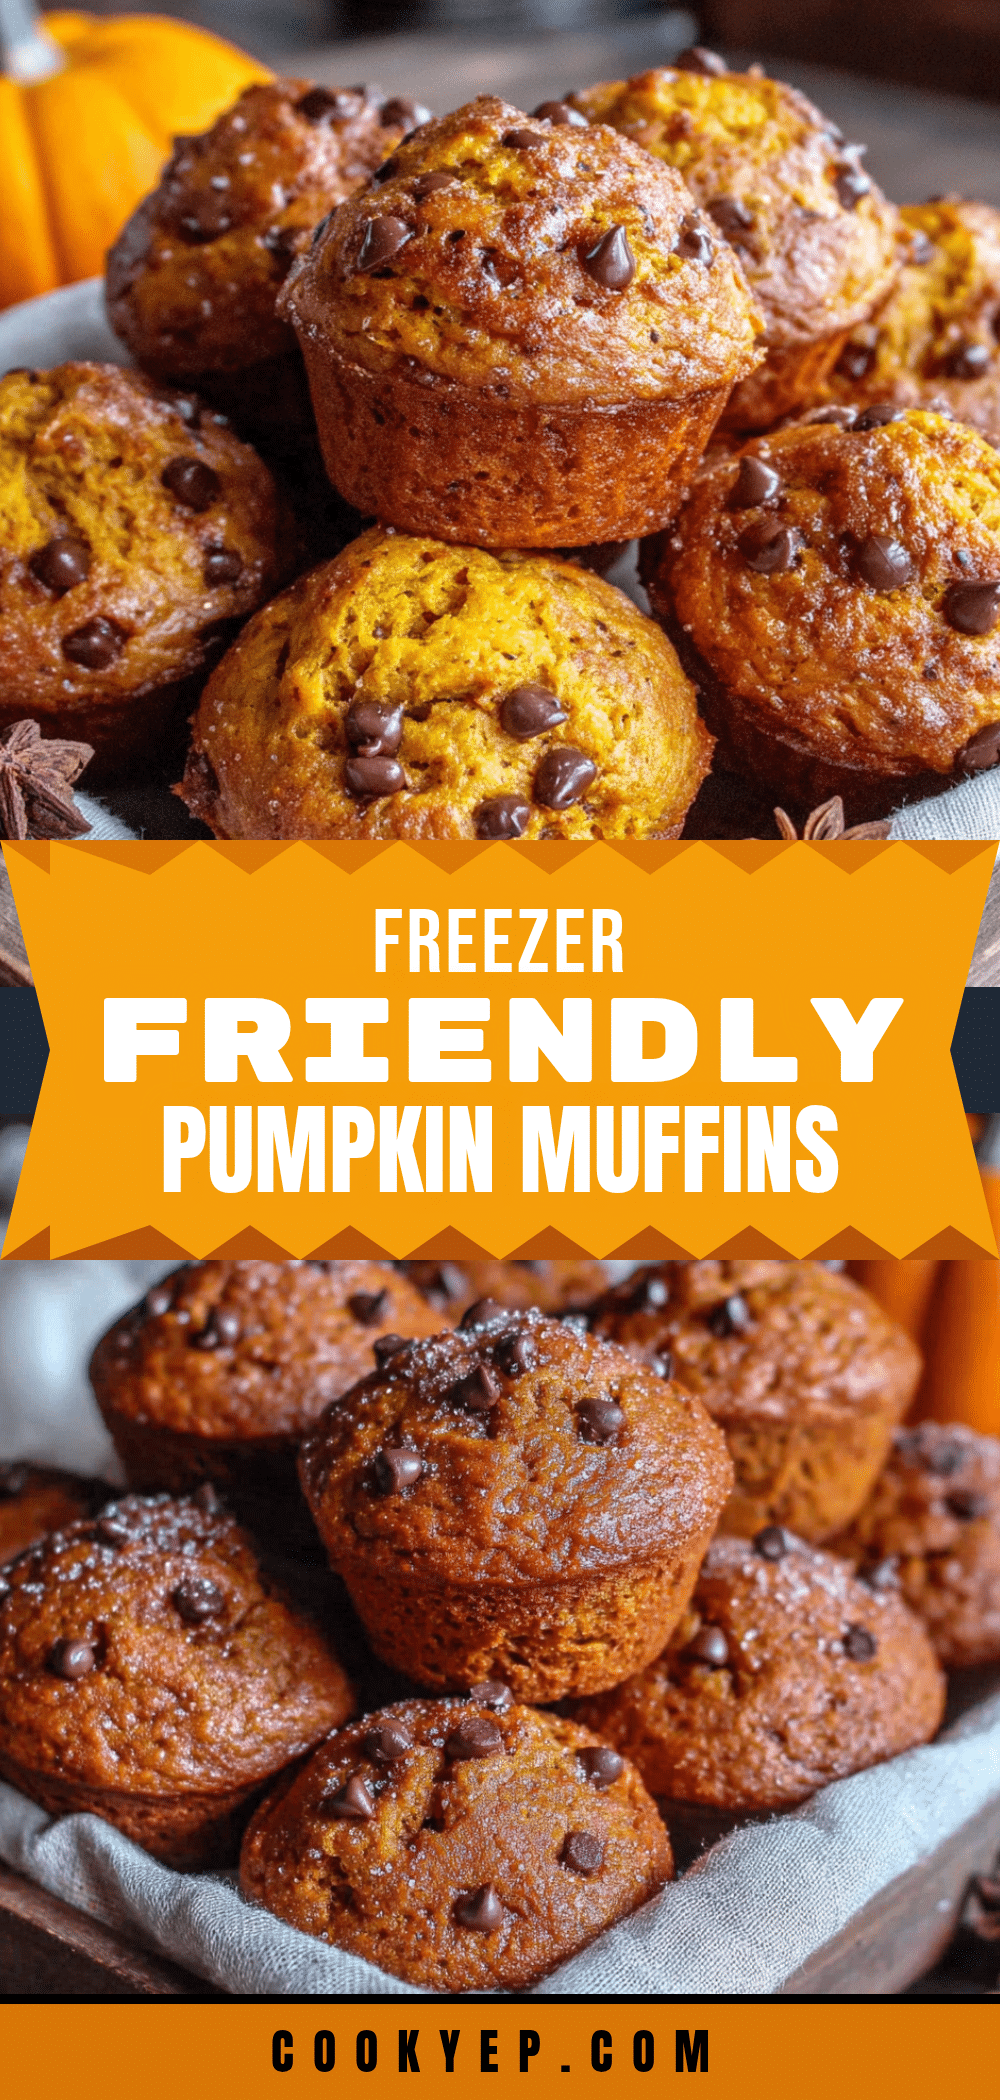
Perfect Mini Pumpkin Chocolate Chip Muffins – Easy Freezer Recipe
These mini pumpkin chocolate chip muffins are moist, tender, and packed with warm fall spices and melty chocolate chips. Made with browned butter for extra depth, they come together in just 25 minutes and freeze beautifully for up to 3 months.
- Prep Time: 10 minutes
- Cook Time: 10-12 minutes
- Total Time: 25 minutes
- Yield: 24 mini muffins 1x
- Category: Dessert, Breakfast
- Cuisine: American
Ingredients
- 1 cup (240g) pumpkin puree (100% pure, not pumpkin pie filling)
- 1/2 cup (113g) unsalted butter
- 1/2 cup (100g) packed brown sugar (light or dark)
- 1/4 cup (50g) granulated sugar
- 1 large egg, room temperature
- 1 teaspoon vanilla extract
- 3/4 cup (90g) all-purpose flour
- 1/4 cup (30g) whole wheat pastry flour
- 1/2 teaspoon baking soda
- 1/2 teaspoon baking powder
- 1/4 teaspoon fine sea salt
- 1 1/2 teaspoons pumpkin pie spice
- 1/2 teaspoon cinnamon
- 1/2 cup (85g) semi-sweet chocolate chips
Instructions
- Preheat oven to 350°F (175°C). Line a 24-cup mini muffin pan with paper liners or grease each cup.
- Brown the butter: Place butter in a small saucepan over medium heat. Stir frequently as it melts. The butter will foam, then the milk solids will turn golden brown (about 5-7 minutes). Once you see brown specks and smell a nutty aroma, remove from heat immediately. Pour into a heatproof bowl and let cool for 5 minutes.
- In a medium bowl, whisk together the browned butter, brown sugar, and granulated sugar until well combined (like wet sand). Add the egg and vanilla extract, whisk vigorously for 30 seconds until smooth and slightly thickened. Add pumpkin puree and whisk until fully incorporated.
- In a separate bowl, whisk together all-purpose flour, whole wheat pastry flour, baking soda, baking powder, salt, pumpkin pie spice, and cinnamon.
- Add dry ingredients to wet ingredients. Fold gently with a rubber spatula just until no streaks of flour remain. A few small lumps are okay. Gently fold in chocolate chips, reserving a few to sprinkle on top if desired.
- Using a cookie scoop or tablespoon, fill each mini muffin cup about three-quarters full. If reserved, press a few chocolate chips into the tops.
- Bake for 10-12 minutes. At 10 minutes, insert a toothpick into the center of a muffin; if it comes out clean or with a few moist crumbs, they’re done. Tops should be golden and spring back when lightly touched.
- Let muffins cool in the pan for 5 minutes, then transfer to a wire cooling rack to cool completely.
Notes
For best results, use room temperature ingredients. Don’t overmix the batter. Browned butter adds deep flavor—don’t skip it. For regular-sized muffins, bake 15-18 minutes. To freeze, cool completely, then store in a freezer-safe bag for up to 3 months. Reheat in microwave for 10-15 seconds.
Nutrition
- Serving Size: 1 mini muffin
- Calories: 98
- Sugar: 8
- Sodium: 85
- Fat: 5
- Saturated Fat: 3
- Carbohydrates: 13
- Fiber: 1
- Protein: 1.5
Keywords: mini pumpkin muffins, pumpkin chocolate chip muffins, easy fall recipe, freezer muffins, mini muffins, pumpkin recipe, browned butter muffins