My husband took one bite, stopped chewing, and just looked at me. That look. The one that says, “Okay, this is going into the regular rotation.” And honestly, that’s the highest compliment I can get from a guy who’s eaten more than his fair share of my experimental weeknight dinners. He didn’t even say anything at first—just pointed his fork at the quick garlic butter chicken thighs on his plate and nodded. That nod said it all.
I’d been testing one-pan meals for weeks, trying to find something that hit that sweet spot between “feels like a real dinner” and “doesn’t require a sink full of dishes.” This was it. The chicken came out golden on the outside, impossibly juicy on the inside, and that garlic butter sauce pooled around everything like it knew exactly what it was doing. I actually caught myself scraping the pan with a piece of bread after we finished. No shame.
What I love most about this recipe—and what keeps me coming back to it on busy weeknights—is how something this simple can taste this good. You’re not spending hours at the stove. You’re not hunting down specialty ingredients. You’re just letting good technique and a handful of pantry staples do the heavy lifting. And honestly, that’s the kind of cooking I want more of in my life.
Why You’ll Love This Recipe
Let me tell you why this one-pan meal has earned a permanent spot in my weekly lineup. I’ve tested this recipe more times than I can count, tweaking the timing and the garlic-to-butter ratio until it was absolutely right. This isn’t just another chicken thigh recipe—it’s the one I actually make when I’m tired, hungry, and out of patience.
Here’s what makes it stand out:
- Ready in 20 minutes flat — From fridge to table in the time it takes to watch half an episode of your favorite show. That’s not a boast, that’s a promise I’ve tested repeatedly.
- One pan, minimal cleanup — You’ll use exactly one skillet. That’s it. No baking sheets, no separate bowls, no colander. Just one pan and a spatula.
- Pantry-friendly ingredients — Chicken thighs, butter, garlic, salt, pepper, and maybe some herbs if you’re feeling fancy. You probably have everything right now.
- Restaurant-quality results — That golden-brown crust and silky garlic butter sauce? It tastes like something from a bistro menu, not a Tuesday night kitchen.
- Family-approved every time — Even my pickiest eater cleaned his plate. Twice. The sauce alone is enough to convert anyone.
What really sets this recipe apart is the technique. Most quick chicken recipes end up dry or bland because people rush the searing process. But I’ve figured out the exact timing and heat level that gives you that gorgeous crust without drying out the meat. The garlic butter sauce comes together in the same pan, picking up all those delicious browned bits from the bottom. It’s efficiency meets flavor, and honestly, it works every single time.
This is the kind of dinner that makes you feel like you’ve got your life together, even on days when you definitely don’t. And that’s worth something.
What Ingredients You Will Need
This recipe keeps things simple. You really don’t need much to make something incredible, and that’s the beauty of quick garlic butter chicken thighs. Here’s what you’ll need:
For the Chicken
- 4 bone-in, skin-on chicken thighs (about 1.5 pounds total) — I prefer bone-in for maximum flavor and juiciness. The bone acts as an insulator, keeping the meat tender while the skin gets crispy. If you only have boneless, that works too—just reduce cooking time by about 4 minutes.
- 1 teaspoon kosher salt — Diamond Crystal is my go-to. If you’re using table salt, cut the amount in half. Salt isn’t just for flavor—it helps draw moisture to the surface, which creates that golden crust.
- ½ teaspoon black pepper — Freshly ground, please. Pre-ground pepper works in a pinch, but freshly cracked adds a subtle heat that complements the butter beautifully.
- ½ teaspoon garlic powder — This is different from the fresh garlic we’ll use later. Garlic powder adds a gentle, savory depth that fresh garlic alone can’t match.
For the Garlic Butter Sauce
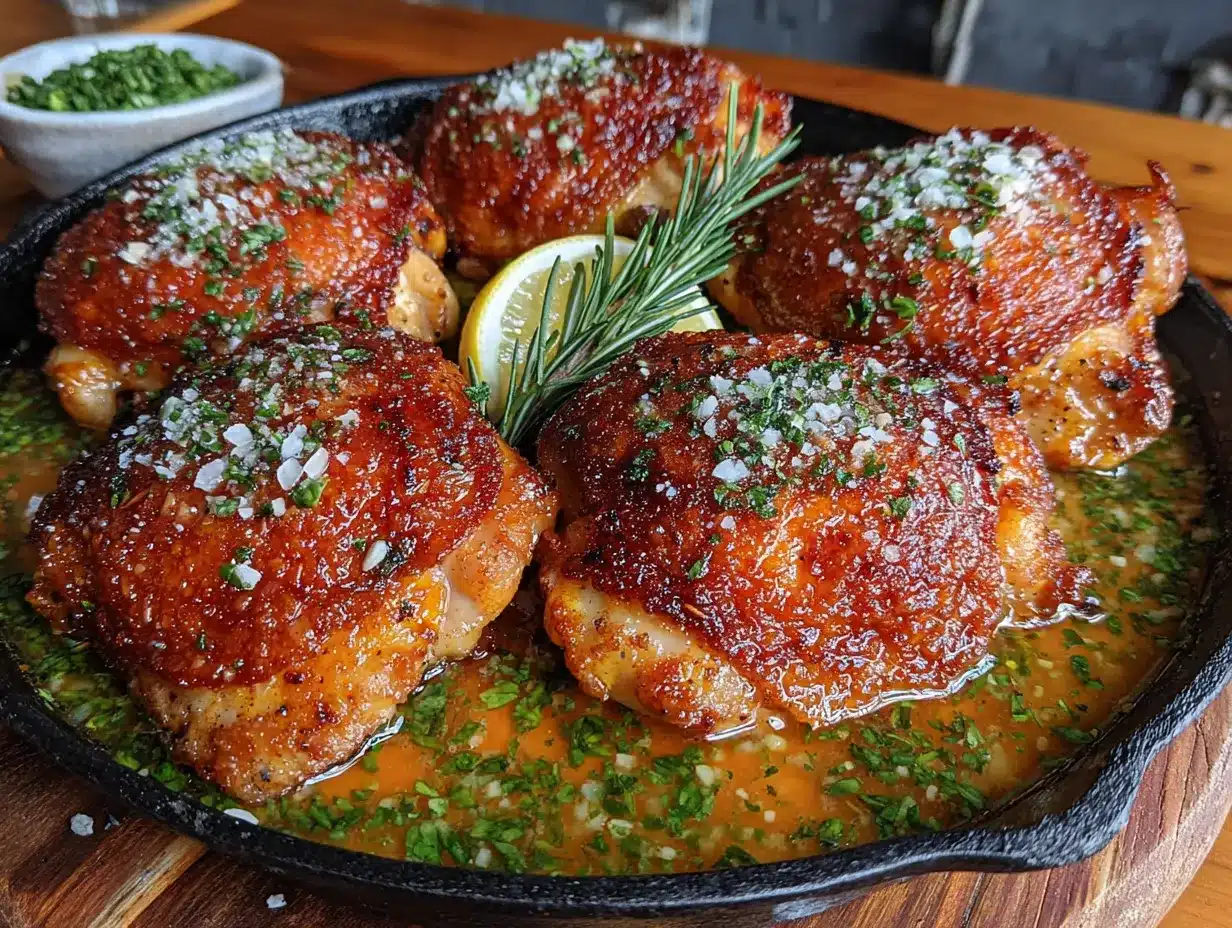
- 3 tablespoons unsalted butter — Use the good stuff. Unsalted gives you control over the salt level, and European-style butter (like Kerrygold) has a higher fat content that makes the sauce richer. I’ve tested this with salted butter too—just reduce the added salt by a pinch.
- 5 cloves garlic, minced — Fresh garlic is non-negotiable here. Pre-minced jarred garlic will burn too quickly and taste bitter. Take the 30 seconds to mince fresh cloves—your taste buds will thank you.
- 1 tablespoon olive oil — This raises the smoke point of the butter, preventing it from burning while still giving you that buttery flavor. Regular olive oil is fine—save your fancy extra virgin for salads.
- 2 tablespoons chicken broth — This deglazes the pan and helps create a silky sauce. Homemade broth is lovely, but store-bought works perfectly. Use low-sodium if you’re watching your salt intake.
- 1 tablespoon fresh lemon juice — About half a lemon. The acid cuts through the richness of the butter and brightens everything up. Don’t skip this—it’s the secret to a balanced sauce.
- 2 tablespoons fresh parsley, chopped — Optional but highly recommended. Parsley adds color and a fresh, slightly peppery note that contrasts with the rich sauce. Flat-leaf parsley has more flavor than curly.
Optional Add-Ins
- ¼ teaspoon red pepper flakes — For a touch of heat. I add these when I’m cooking just for myself.
- ½ teaspoon dried thyme or rosemary — Earthy herbs that pair beautifully with chicken and garlic. Rub them into the skin before searing.
- 1 tablespoon capers — If you want a piccata-style twist. The briny pops of flavor are amazing against the rich sauce.
I usually grab my chicken thighs from a local butcher when I can, but honestly, the ones from the grocery store work just fine. Just look for thighs that are similar in size so they cook evenly. And please, for the love of good food, pat them dry with paper towels before seasoning. Wet skin won’t crisp up, and we want that golden crust.
Equipment Needed
One of the best things about this recipe is how little equipment it requires. Here’s what you’ll need:
- A 10- or 12-inch skillet — Cast iron is my first choice because it holds heat beautifully and gives you that perfect sear. But a stainless steel or heavy-bottomed nonstick pan works great too. Just avoid thin pans—they heat unevenly and won’t give you that golden crust.
- Tongs — For flipping the chicken without piercing the skin. Piercing releases juices, and we want to keep every drop inside. A silicone-tipped pair won’t scratch your pan.
- A sharp knife and cutting board — For mincing garlic and chopping parsley. A dull knife is actually more dangerous than a sharp one—it slips. Take 30 seconds to hone your blade first.
- A meat thermometer — This isn’t optional if you want perfectly cooked chicken every time. The instant-read digital ones are affordable and accurate. Chicken thighs are done at 165°F, but I pull them at 160°F because they’ll continue cooking while resting.
- A small bowl — For holding your minced garlic and chopped parsley before you need them. Mise en place, baby. It makes everything smoother.
If you don’t have a cast iron skillet, don’t stress. I’ve made this recipe in a stainless steel pan and even a well-seasoned nonstick, and it works beautifully. The key is letting the pan get hot enough before adding the chicken. A drop of water should sizzle and evaporate immediately when the pan is ready.
Also, a quick tip: keep your butter in the fridge until you’re ready to use it. Cold butter melts more slowly and evenly, which helps prevent it from browning too quickly when you add the garlic. Little things like that make a real difference.
Preparation Method
Alright, let’s get cooking. This whole process takes about 20 minutes from start to finish, and I promise you can handle it. Here’s exactly how to make the best quick garlic butter chicken thighs of your life:
- Pat the chicken dry — Take those chicken thighs out of the package and pat them thoroughly dry with paper towels. This is the most important step for crispy skin. Don’t skip it. I mean it. Wet skin will steam instead of sear, and you’ll end up with pale, rubbery skin. Nobody wants that.
- Season generously — Sprinkle both sides of the chicken with kosher salt, black pepper, and garlic powder. Don’t be shy with the salt—it’s the main source of flavor. Let the seasoned chicken sit on the counter for 5 minutes while your pan heats up. This gives the salt time to penetrate the meat.
- Heat your pan — Place your skillet over medium-high heat and add the olive oil. Swirl it around to coat the bottom. You want the oil to shimmer but not smoke. If it starts smoking, the heat is too high—turn it down slightly. This takes about 2 minutes.
- Sear the chicken, skin-side down — Place the chicken thighs in the pan, skin-side down. Listen for that satisfying sizzle. If it doesn’t sizzle loudly, the pan isn’t hot enough. Let them cook undisturbed for 5-6 minutes. I know it’s tempting to peek, but don’t move them. The skin needs uninterrupted contact with the hot pan to develop that golden crust.
- Flip and cook the other side — Using your tongs, flip each thigh over. The skin should be deep golden brown and crispy. Cook for another 4-5 minutes on the second side. The chicken should be cooked through at this point, but we’ll verify with a thermometer. If you’re using boneless thighs, reduce this to 3 minutes per side.
- Check the temperature — Insert your meat thermometer into the thickest part of a thigh, avoiding the bone. You’re looking for 165°F. If it’s not there yet, reduce the heat to medium and cook for another minute or two. I usually pull mine at 160°F because carryover cooking will bring it up the rest of the way.
- Remove chicken and rest — Transfer the chicken to a plate and tent loosely with foil. Don’t skip this resting step—it lets the juices redistribute throughout the meat. If you cut into it immediately, all those juices will run out onto the cutting board instead of staying in the meat.
- Make the garlic butter sauce — Reduce the heat to medium-low. Add the butter to the pan and let it melt, scraping up all those browned bits from the bottom with a wooden spoon or spatula. Those bits are pure flavor. Once the butter is melted and foamy, add the minced garlic. Cook for 30-45 seconds, stirring constantly, until fragrant. Garlic burns fast, so keep it moving.
- Deglaze with broth and lemon — Pour in the chicken broth and lemon juice. Stir everything together, scraping up any remaining browned bits. Let the sauce simmer for about 1 minute until it thickens slightly. You’re looking for a consistency that coats the back of a spoon—not too thin, not too thick.
- Return chicken to the pan — Place the chicken thighs back in the skillet, spooning some of that gorgeous garlic butter sauce over the top. Let everything warm through together for about 1 minute. Sprinkle with fresh parsley and any optional red pepper flakes or herbs.
- Serve immediately — Transfer the chicken to plates or a serving platter, making sure to spoon extra sauce over each piece. The sauce is the best part—don’t leave any behind in the pan.
One thing I’ve learned the hard way: don’t crowd the pan. If you’re cooking more than 4 thighs, do it in batches. Overcrowding lowers the pan temperature and steams the chicken instead of searing it. Trust me, I’ve made that mistake more times than I care to admit. The difference between a batch of 4 and a batch of 6 is night and day.
Also, about that garlic—keep an eye on it. Burnt garlic is bitter and ruins the whole sauce. The moment it becomes fragrant and starts to soften, you need to add the liquid. That 30-45 second window is your sweet spot. I’ve definitely zoned out and let it go too long, and the result was a sauce that tasted like regret. Learn from my mistakes.
Cooking Tips & Techniques
After making this recipe more times than I can count, I’ve picked up some tricks that make a real difference. Here’s what I wish someone had told me earlier:
Let the chicken come to room temperature. Cold chicken straight from the fridge will lower the pan temperature and cook unevenly. Let it sit on the counter for 15-20 minutes before cooking. This is especially important for bone-in thighs, which take longer to cook through. I’ve tested this side by side, and room-temperature chicken consistently produces a better crust and more even cooking.
Don’t flip too early. The number one mistake people make is flipping the chicken before the skin is properly seared. If you try to flip and the skin sticks to the pan, it’s not ready. Give it another minute. The skin will release naturally once it’s golden and crispy. Forcing it will tear the skin and leave half of it stuck to the pan.
Use a thermometer, not a timer. I can’t stress this enough. Chicken thighs can vary in thickness, and cooking times are just estimates. A $10 instant-read thermometer will save you from dry, overcooked chicken. I’ve been using the same Thermapen for years, and it’s paid for itself a hundred times over. Chicken thighs are safe at 165°F, but they actually taste best at around 170-175°F because the additional time allows the connective tissue to break down.
Reserve some parsley for garnish. Stir most of the parsley into the sauce, but save a pinch to sprinkle on top at the end. That pop of fresh green color makes the dish look restaurant-quality. We eat with our eyes first, and a little garnish goes a long way.
Make extra sauce. Seriously, double the butter and garlic if you’re a sauce person. This is one of those recipes where the sauce is the star. You’ll want extra for sopping up with crusty bread or drizzling over rice. I’ve started making a double batch every time, and I’ve never regretted it.
One of my biggest failures with this recipe happened early on when I tried to rush the searing process. I cranked the heat too high, thinking it would cook faster. Instead, I ended up with burnt skin and raw meat near the bone. The smoke alarm went off, the kitchen smelled like a campfire, and dinner was ruined. That’s when I learned that medium-high heat is plenty. Patience is the secret ingredient here.
If you’re looking to pair this with something starchy, I love serving it over a bed of creamy mashed potatoes or alongside some crusty bread to soak up every drop of that garlic butter sauce. It also pairs beautifully with a simple side salad dressed with lemon vinaigrette. The acidity cuts through the richness of the chicken.
Variations & Adaptations
This recipe is wonderfully adaptable. Here are some variations I’ve tried and loved:
Lemon Herb Version — Add 1 tablespoon of fresh thyme leaves and the zest of one lemon to the sauce along with the garlic. The lemon zest adds an extra layer of citrus brightness that’s absolutely gorgeous. I make this version in the spring when I’m craving something fresh and bright.
Spicy Cajun Twist — Before searing, rub the chicken thighs with 1 teaspoon of Cajun seasoning (in addition to the salt and pepper). Add a pinch of cayenne to the butter sauce at the end. The smoky, spicy flavors are incredible against the rich butter. This is my go-to when I want something with a kick.
Creamy Garlic Version — After making the sauce, stir in ¼ cup of heavy cream and let it simmer for 2 minutes until thickened. You’ll end up with a luscious, creamy sauce that’s pure comfort food. This version is perfect for cold winter nights when you need something extra cozy.
Dairy-Free Adaptation — Substitute the butter with a high-quality vegan butter or ghee (which is lactose-free). Use olive oil instead of butter if you prefer. The sauce will be slightly different in texture but still delicious. I’ve tested this with Miyoko’s European-style cultured vegan butter, and it worked beautifully.
Sheet Pan Method — If you want to feed a crowd, arrange the seasoned chicken thighs on a baking sheet and roast at 425°F for 25-30 minutes. While they roast, make the garlic butter sauce on the stovetop and drizzle it over the finished chicken. This method frees up your stovetop for side dishes.
I personally love the lemon herb version the most. There’s something about that combination of garlic, butter, and fresh thyme that feels both elegant and comforting. I’ve served it to dinner guests who asked for the recipe before they finished eating. It’s that good.
Serving & Storage Suggestions
These quick garlic butter chicken thighs are best served hot, straight from the pan. Here’s how to make the most of them:
Serving temperature and presentation — Serve the chicken immediately after spooning the sauce over the top. Arrange the thighs on a warm platter (warm plates keep food hot longer) and drizzle with extra sauce. Garnish with fresh parsley and a sprinkle of flaky sea salt for a professional finish. I like to serve them family-style in the skillet—it keeps everything warm and looks beautiful on the table.
What to serve alongside — This dish pairs beautifully with so many sides. Mashed potatoes are my first choice because they soak up the sauce perfectly. Rice, egg noodles, or crusty bread are excellent alternatives. For vegetables, try roasted asparagus, steamed green beans, or a simple arugula salad with lemon vinaigrette. The bright, acidic salad cuts through the richness of the chicken beautifully.
Storage instructions — Leftover chicken will keep in an airtight container in the refrigerator for up to 4 days. Store the chicken and sauce together so the meat stays moist. I’ve found that the flavors actually deepen overnight—the garlic mellows and the herbs infuse more deeply into the meat.
Reheating methods — The best way to reheat is in a skillet over medium-low heat. Add a splash of chicken broth or water to refresh the sauce, cover the pan, and warm for 5-7 minutes. The microwave works in a pinch, but it will dry out the chicken and make the skin soggy. If you must use the microwave, cover the plate with a damp paper towel to trap steam.
Freezing instructions — You can freeze the cooked chicken and sauce together in a freezer-safe container for up to 3 months. Thaw overnight in the refrigerator before reheating. The texture of the sauce might change slightly upon thawing, but a vigorous whisk while reheating usually brings it back together.
One thing I’ve noticed: these chicken thighs are almost better the next day. The garlic butter sauce seeps into the meat overnight, and every bite is packed with flavor. I’ve been known to make a double batch just so I can have leftovers for lunch the next day. Don’t judge.
Nutritional Information & Benefits
Here’s the nutritional breakdown for one serving (one chicken thigh with sauce):
| Nutrient | Amount Per Serving |
|---|---|
| Calories | 320 |
| Protein | 28g |
| Fat | 22g |
| Saturated Fat | 9g |
| Carbohydrates | 2g |
| Fiber | 0g |
| Sugar | 0g |
| Sodium | 680mg |
| Vitamin A | 10% DV |
| Vitamin C | 6% DV |
| Iron | 8% DV |
Note: Nutritional values are estimates and may vary based on specific ingredients used.
Chicken thighs are an excellent source of high-quality protein, which supports muscle health and keeps you feeling full and satisfied. They’re also rich in B vitamins, particularly B6 and B12, which are essential for energy metabolism and brain function. The skin contains healthy fats that help your body absorb fat-soluble vitamins.
Garlic isn’t just for flavor—it’s packed with allicin, a compound known for its immune-boosting and anti-inflammatory properties. Regular consumption of garlic has been linked to improved heart health and lower blood pressure. And the butter? Well, butter is a source of vitamin A and butyrate, a fatty acid that supports gut health. Everything in moderation, right?
This recipe is naturally low-carb and gluten-free, making it suitable for keto and paleo diets. If you’re watching your sodium, use low-sodium broth and reduce the added salt. For a lighter version, remove the skin before eating—you’ll save about 100 calories and 8 grams of fat per serving.
Conclusion
Look, I know there are a million chicken thigh recipes out there. I’ve tried more than my fair share of them. But this one is different. It’s the one I come back to week after week, the one I make when I’m tired and hungry and need something that actually works. It’s not fancy. It’s not complicated. It’s just really, really good food that comes together in 20 minutes with one pan and a handful of ingredients you already have.
What I love most about this recipe is how forgiving it is. Mess up the timing? The chicken will still be juicy. Forget to buy fresh herbs? The sauce is still incredible. This recipe doesn’t demand perfection—it just delivers delicious results, every single time. And honestly, that’s the kind of cooking I want in my life.
I’d love to hear how this turns out for you. Did you add your own twist? Serve it with something unexpected? Burn the garlic and start over? (I’ve been there.) Drop a comment below and let me know. And if you’re looking for more one-pan dinners, you might enjoy this easy one-pan lemon garlic salmon with asparagus or this cozy slow cooker chicken tortilla soup with lime crema for those days when you want dinner to cook itself.
Now go make some garlic butter chicken. You deserve it.
Frequently Asked Questions
Can I use chicken breasts instead of thighs?
Yes, you can, but there are a few adjustments. Chicken breasts cook faster and dry out more easily, so reduce the cooking time by about 3-4 minutes per side. Use a meat thermometer to pull them at 160°F (they’ll carryover to 165°F). Also, consider pounding the breasts to an even thickness so they cook uniformly. The sauce will be just as delicious, but the texture won’t be quite as forgiving as thighs.
How do I know when the chicken is done without a thermometer?
If you don’t have a meat thermometer, look for visual cues. The skin should be deep golden brown and crispy. When you cut into the thickest part of the thigh, the juices should run clear, not pink. The meat should also feel firm to the touch but still have some give. That said, I really recommend getting a thermometer—it takes the guesswork out of cooking chicken and guarantees perfect results every time.
Can I make this recipe ahead of time?
Absolutely. You can cook the chicken completely, let it cool, and store it in an airtight container with the sauce for up to 4 days. To reheat, warm it gently in a skillet with a splash of broth to refresh the sauce. The flavors actually deepen overnight, so leftovers are often even better than the original meal. Just don’t reheat in the microwave if you can avoid it—it’ll make the skin soggy.
What if I don’t have a cast iron skillet?
No problem at all. A stainless steel skillet works beautifully—it actually gives you even better fond (those browned bits) for the sauce. A heavy-bottomed nonstick pan works too, though you won’t get quite as much fond. Just avoid thin pans that heat unevenly. The key is letting whatever pan you use get hot enough before adding the chicken. A drop of water should sizzle and evaporate immediately.
Can I double this recipe for a crowd?
Yes, but don’t crowd the pan. Cook the chicken in batches if you’re making more than 4 thighs. Overcrowding lowers the pan temperature and steams the chicken instead of searing it. After all the chicken is cooked, make a double batch of the sauce in the same pan. You can keep the cooked chicken warm in a 200°F oven while you finish the rest. This is actually my go-to method for feeding a crowd—it works like a charm.
Pin This Recipe!
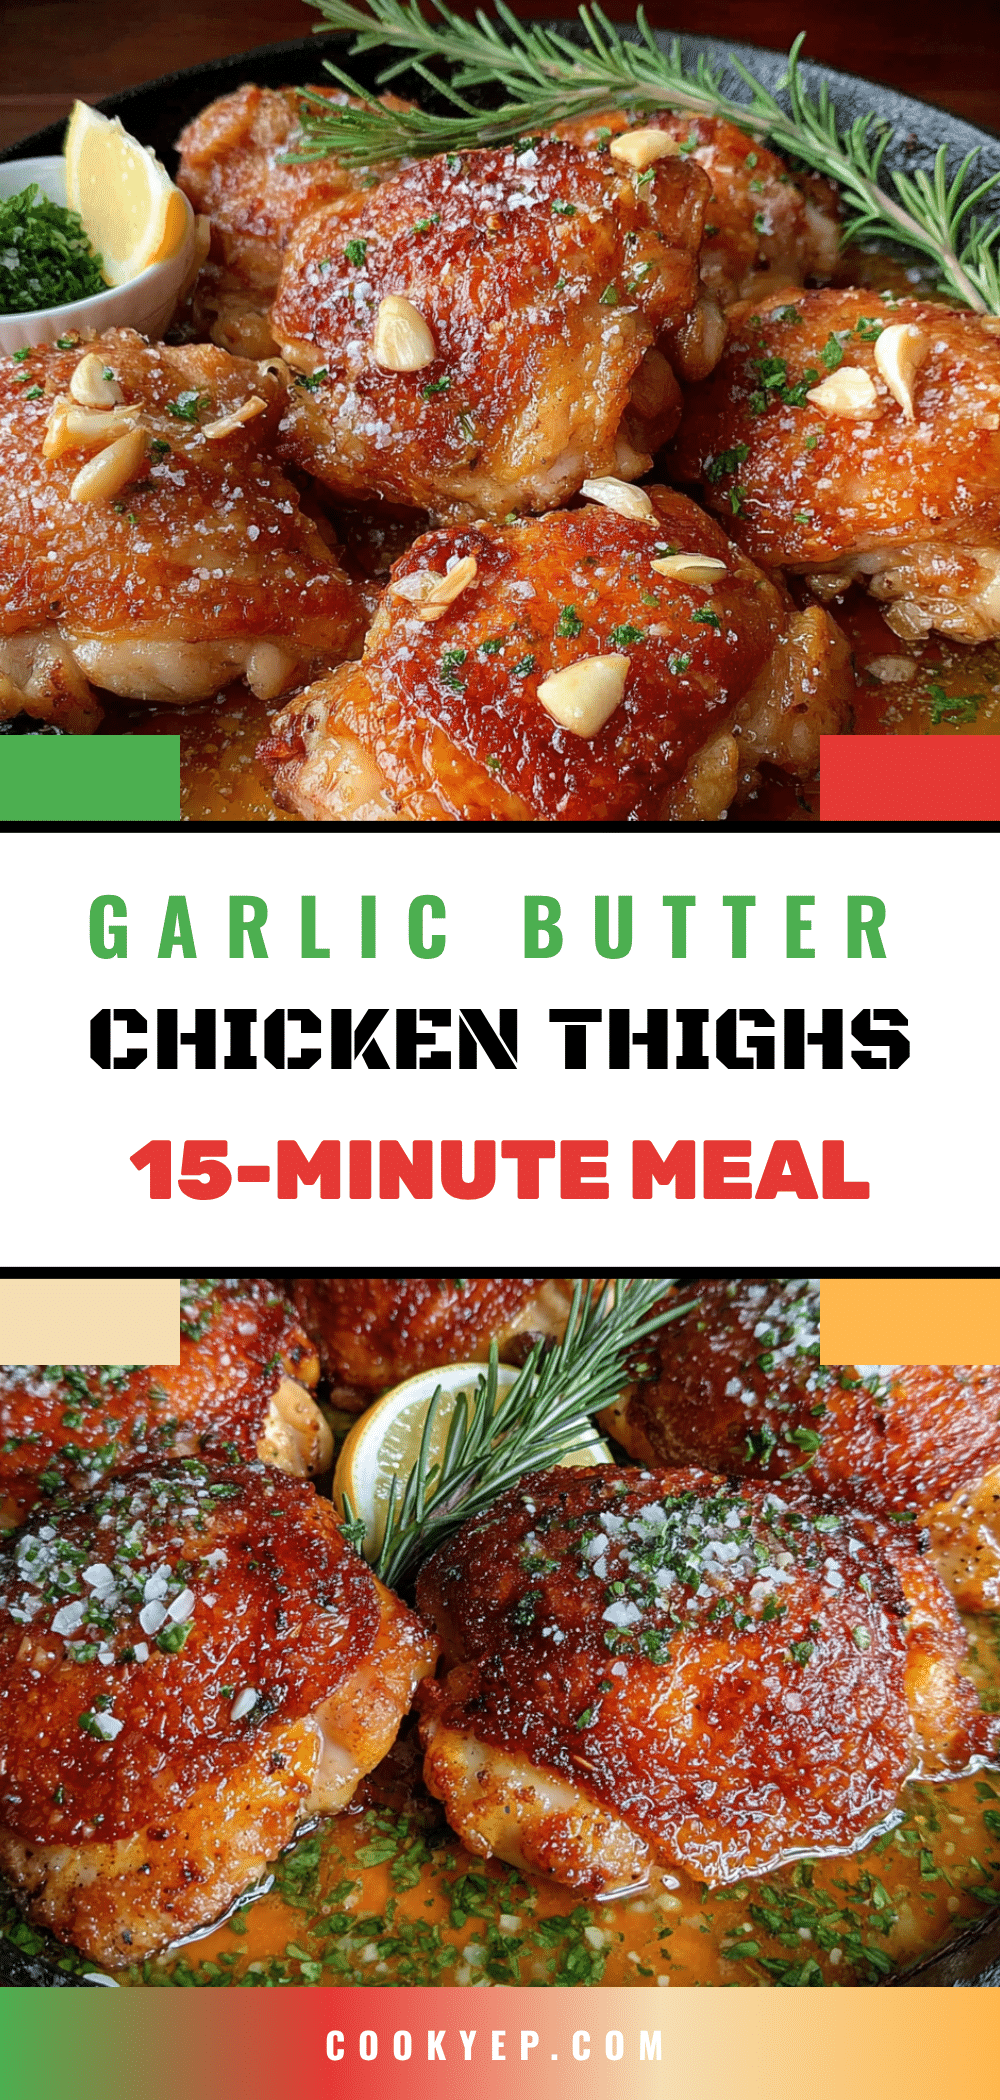
Quick Garlic Butter Chicken Thighs in 20 Minutes

Golden, juicy chicken thighs with a rich garlic butter sauce, ready in just 20 minutes with one pan and minimal cleanup. A family-friendly weeknight dinner that tastes like restaurant-quality comfort food.
- Prep Time: 5 minutes
- Cook Time: 15 minutes
- Total Time: 20 minutes
- Yield: 4 servings 1x
- Category: Main Course
- Cuisine: American
Ingredients
- 4 bone-in, skin-on chicken thighs (about 1.5 pounds total)
- 1 teaspoon kosher salt
- ½ teaspoon black pepper, freshly ground
- ½ teaspoon garlic powder
- 3 tablespoons unsalted butter
- 5 cloves garlic, minced
- 1 tablespoon olive oil
- 2 tablespoons chicken broth
- 1 tablespoon fresh lemon juice (about half a lemon)
- 2 tablespoons fresh parsley, chopped
- ¼ teaspoon red pepper flakes (optional)
- ½ teaspoon dried thyme or rosemary (optional)
- 1 tablespoon capers (optional)
Instructions
- Pat the chicken thighs dry with paper towels. This is essential for crispy skin.
- Season both sides of the chicken with kosher salt, black pepper, and garlic powder. Let sit for 5 minutes while the pan heats.
- Heat a 10- or 12-inch skillet over medium-high heat and add olive oil. Swirl to coat. Heat until oil shimmers but does not smoke.
- Place chicken thighs skin-side down in the hot pan. Cook undisturbed for 5-6 minutes until skin is deep golden brown and crispy.
- Flip the chicken using tongs. Cook for another 4-5 minutes on the second side. For boneless thighs, reduce to 3 minutes per side.
- Check internal temperature with a meat thermometer; it should read 165°F in the thickest part. Remove chicken to a plate and tent loosely with foil. Rest for 5 minutes.
- Reduce heat to medium-low. Add butter to the pan and melt, scraping up browned bits from the bottom.
- Add minced garlic and cook for 30-45 seconds, stirring constantly, until fragrant.
- Pour in chicken broth and lemon juice. Stir and simmer for about 1 minute until sauce thickens slightly.
- Return chicken to the pan, spooning sauce over the top. Warm together for 1 minute.
- Sprinkle with fresh parsley and optional red pepper flakes or herbs. Serve immediately.
Notes
Pat chicken dry for crispy skin. Don’t crowd the pan; cook in batches if needed. Use a meat thermometer for perfect doneness. Let chicken rest before serving. Double the sauce if desired. Leftovers keep up to 4 days in the refrigerator.
Nutrition
- Serving Size: 1 chicken thigh with
- Calories: 320
- Sodium: 680
- Fat: 22
- Saturated Fat: 9
- Carbohydrates: 2
- Protein: 28
Keywords: garlic butter chicken, quick chicken thighs, one-pan chicken, easy weeknight dinner, crispy chicken thighs, garlic butter sauce


