Third time in six days and I finally stopped overmixing the batter. The first cake came out dense—respectable, sure, but not what I was after. The second one? Slightly better, but the top sank just a little in the middle, that telltale sign of a batter that got worked too hard. By attempt number three, I let myself be lazy with the whisk. I stopped caring about every last lump and just poured. And that cake? That was the one where the fork slid through like it was cutting soft butter, where the honey flavor hung around long after the last bite.
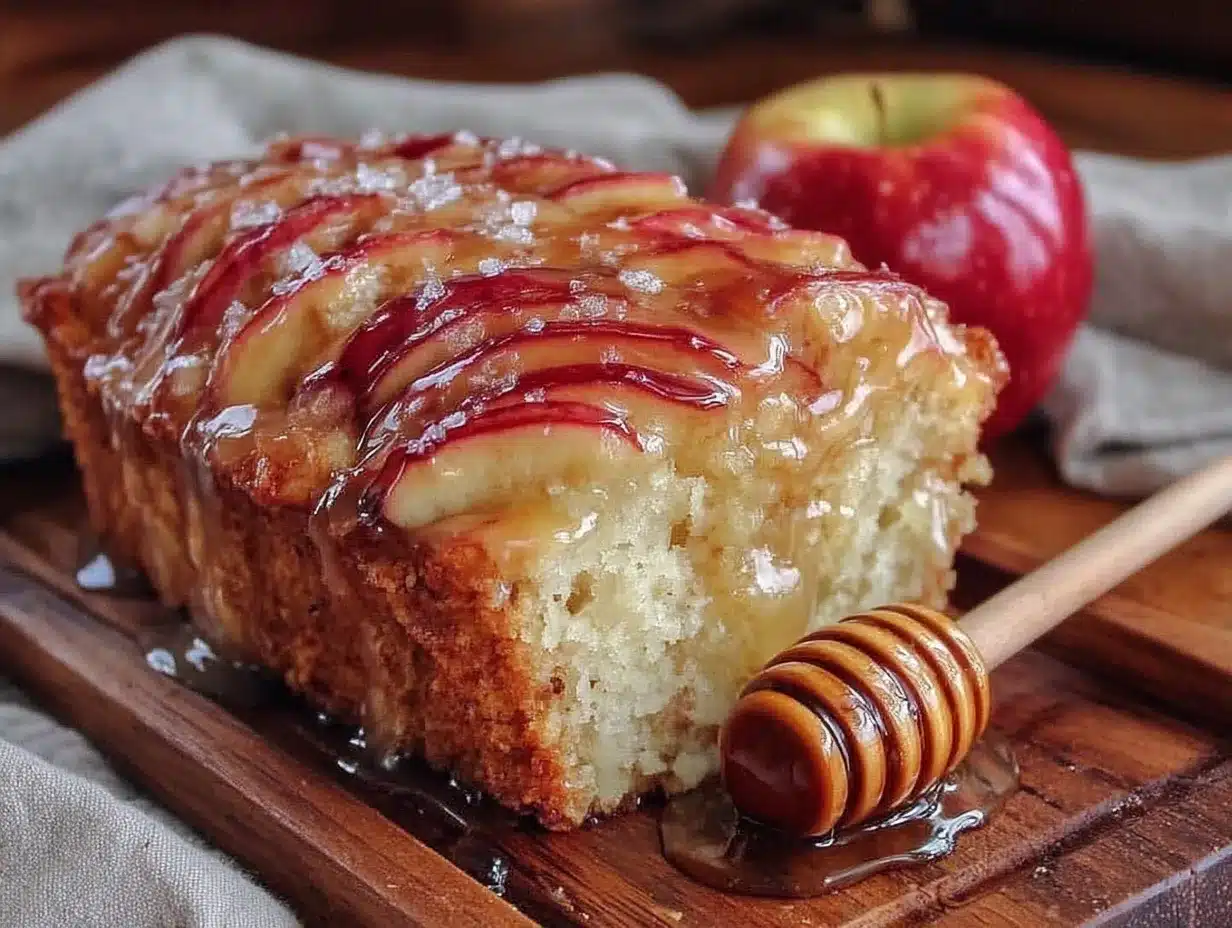
This is that cake. The one I couldn’t stop tweaking, not because it was bad, but because I knew it could be that good. Honeycrisp apples are the whole reason this works—they hold their shape when baked, they don’t turn into mush, and they bring a sweetness that lets you use a little less sugar. The honey does the rest, soaking into every crumb like it belongs there.
Look, I’ve made a lot of apple cakes over the years. Some were fine. Some were forgettable. This one? It’s the recipe I kept coming back to until I got it exactly right. No fussy techniques, no weird ingredients. Just a honest cake that tastes like fall should.
Why You’ll Love This Recipe
I tested this cake six times before I felt good about sharing it. Not because I’m a perfectionist—okay, maybe a little—but because I wanted every single bite to feel worth the effort. Here’s what makes this one different from the other apple cakes out there.
- Uses fresh Honeycrisp apples: No canned filling, no dried fruit. Just crisp, juicy apples that add texture and natural sweetness.
- Honey-forward flavor: The honey isn’t just a sweetener here—it’s the star. You taste it in every bite, especially the next day.
- Simple pantry ingredients: Butter, flour, eggs, honey, apples. Nothing you need to hunt down at a specialty store.
- Comes together in one bowl: No separate mixing of dry and wet ingredients. Less dishes, more cake.
- Stays moist for days: This cake actually gets better on day two. The honey and apples keep it from drying out.
- Works for breakfast or dessert: Slice it thick with coffee in the morning or add a scoop of vanilla ice cream after dinner. Both work.
I’ve made so many apple recipes over the years, from a simple creamy apple cinnamon overnight oats for busy mornings to perfect apple cider donut bites for weekend treats. But this cake? It’s the one I keep coming back to. The texture is tender without being fragile, the apple chunks stay soft but not mushy, and the honey glaze on top adds just enough extra sweetness without making it cloying.
Honestly, this is the kind of cake that makes people close their eyes when they take the first bite. And that’s not something I say lightly.
What Ingredients You Will Need
This recipe uses simple, honest ingredients that work together to create something genuinely special. No weird additives, no obscure extracts—just real food that tastes like it.
- Honeycrisp apples (2 medium, about 300g total): Peeled, cored, and chopped into ½-inch cubes. Honeycrisp holds its shape beautifully during baking. If you can’t find them, Gala or Fuji work well too—just avoid Red Delicious, they get mealy.
- Honey (¾ cup, 255g): Use a mild honey like clover or orange blossom. Strong honey like buckwheat will overpower the apples. I like local wildflower honey for the best flavor.
- Unsalted butter (½ cup, 113g), melted and slightly cooled: Melting the butter instead of creaming it gives the cake a denser, more tender crumb. Salted butter works too, just reduce the added salt by ¼ teaspoon.
- Granulated sugar (¼ cup, 50g): Just enough to help the cake brown and add structure. The honey does most of the sweetening work.
- Large eggs (2, room temperature): Room temperature eggs emulsify better into the batter, giving you a smoother, more even crumb. Let them sit out for 30 minutes before starting.
- Vanilla extract (1 teaspoon): Use real vanilla, not imitation. It rounds out the honey flavor without competing with it.
- All-purpose flour (1½ cups, 190g): Spoon and level your flour—don’t scoop straight from the bag or you’ll end up with a dry cake. A kitchen scale is your best friend here.
- Baking powder (1½ teaspoons): Make sure it’s fresh. Old baking powder won’t give you the rise you want.
- Baking soda (½ teaspoon): Helps balance the acidity of the honey and apples.
- Salt (½ teaspoon): Fine sea salt or table salt. Salt makes the sweet flavors pop.
- Ground cinnamon (1 teaspoon): The classic partner for apples and honey. Fresh cinnamon makes a noticeable difference.
- Ground nutmeg (¼ teaspoon): Just a hint—nutmeg can get overwhelming fast.
- Ground ginger (¼ teaspoon): Adds warmth without being spicy. Optional but highly recommended.
- For the honey glaze (optional but amazing):
- Powdered sugar (½ cup, 60g)
- Honey (2 tablespoons, 42g)
- Milk or cream (1-2 tablespoons): Start with less and add more until you get the consistency you like.
A quick note on honey—I recommend buying from a local beekeeper if you can. The flavor is so much more complex than the stuff in the squeeze bottles at the grocery store. Plus, it’s a nice excuse to support someone doing good work.
Equipment Needed
You don’t need a fancy kitchen to make this cake. Here’s what you’ll actually use:
- 9-inch round cake pan: A dark metal pan will give you a darker crust. Glass or ceramic works too, but you might need to add 5-7 minutes to the baking time.
- Parchment paper: Cut a circle for the bottom of the pan. This is non-negotiable if you want the cake to come out clean.
- Large mixing bowl: Any bowl big enough to hold all the ingredients without splashing.
- Whisk: A balloon whisk works best for mixing the wet ingredients and folding in the flour.
- Rubber spatula: For scraping the bowl clean and folding the apples into the batter gently.
- Chef’s knife and cutting board: For prepping the apples. A sharp knife makes a huge difference—dull knives bruise the fruit.
- Measuring cups and spoons: For accurate measurements. I prefer using a kitchen scale for flour, but cups work fine if you spoon and level.
- Cooling rack: Lets air circulate around the cake so it cools evenly and doesn’t get soggy on the bottom.
- Small saucepan (optional): For warming the honey glaze ingredients together if you want a smoother finish.
If you don’t have a round cake pan, an 8×8 square pan works too—just check for doneness a few minutes early since the batter will be slightly deeper. I’ve made this in a loaf pan before and it worked, but the baking time jumps to about 55-60 minutes.
Preparation Method
Let me walk you through this step by step. I’ve made this cake enough times to know exactly where things can go wrong—and how to fix them.
- Preheat your oven to 350°F (175°C). Position the rack in the center of the oven. Grease a 9-inch round cake pan and line the bottom with a circle of parchment paper. Set aside.
- Prep the apples: Peel, core, and chop your Honeycrisp apples into ½-inch cubes. You should have about 2 cups. Toss them with 1 tablespoon of the flour from your measured amount—this helps prevent them from sinking to the bottom of the cake during baking. Set aside.
- Melt the butter: In a small saucepan or microwave-safe bowl, melt ½ cup unsalted butter. Let it cool for 5 minutes—you don’t want it hot enough to cook the eggs when you add them.
- Mix the wet ingredients: In a large bowl, whisk together the melted butter, ¾ cup honey, ¼ cup granulated sugar, 2 room-temperature eggs, and 1 teaspoon vanilla extract. Whisk until smooth and slightly lighter in color, about 30 seconds. Don’t overthink this step—just get it combined.
- Combine the dry ingredients: In a separate small bowl, whisk together 1½ cups all-purpose flour, 1½ teaspoons baking powder, ½ teaspoon baking soda, ½ teaspoon salt, 1 teaspoon cinnamon, ¼ teaspoon nutmeg, and ¼ teaspoon ginger. This ensures the leavening agents and spices are evenly distributed.
- Fold the dry into the wet: Add the dry ingredients to the wet mixture. Use a rubber spatula to fold gently—just until you can’t see any more flour streaks. A few small lumps are totally fine. Overmixing at this stage develops gluten and makes the cake tough. Trust me, I learned this the hard way.
- Add the apples: Gently fold the floured apple cubes into the batter. The batter will be thick—that’s normal. Make sure the apples are evenly distributed but don’t stir more than necessary.
- Transfer to the pan: Scrape the batter into the prepared pan and spread it evenly with your spatula. The batter won’t self-level, so take a second to smooth the top.
- Bake for 40-45 minutes: Place the pan in the preheated oven. Bake until a toothpick inserted into the center comes out clean or with just a few moist crumbs. If the top is browning too quickly around the 30-minute mark, tent loosely with foil.
- Cool in the pan: Let the cake cool in the pan on a wire rack for 15 minutes. Then run a knife around the edge, invert onto the rack, peel off the parchment, and flip right-side up to cool completely. Don’t skip the cooling time in the pan—the cake needs those 15 minutes to set properly.
- Make the glaze (optional): While the cake cools, whisk together ½ cup powdered sugar, 2 tablespoons honey, and 1-2 tablespoons milk or cream until smooth. Drizzle over the completely cooled cake. If you glaze while it’s still warm, it’ll soak right in—which isn’t bad, but you lose that pretty drizzle effect.
The hardest part? Waiting for it to cool. But trust me, it’s worth it.
Cooking Tips & Techniques
After six rounds of testing, here’s what I learned that the recipe card won’t tell you:
Don’t overmix the batter. I cannot stress this enough. Mix just until the flour disappears. A few streaks are fine. Overmixing develops gluten, and too much gluten makes your cake dense and rubbery instead of tender and soft. My second attempt was a textbook example of what happens when you keep stirring “just to be safe.”
Use room temperature eggs. Cold eggs seize up the melted butter and create a lumpy batter. If you forgot to take them out ahead of time, place them in a bowl of warm water for 5 minutes. Works every time.
Check for doneness early. Ovens run differently. Start checking at 38 minutes. Insert a toothpick into the center—if it comes out clean or with just a few moist crumbs, it’s done. If there’s wet batter on it, give it 3-4 more minutes and check again.
Let the cake cool completely before glazing. I know it’s tempting. But a warm cake will absorb the glaze like a sponge, leaving you with a sticky mess instead of a beautiful drizzle. Patience pays off here.
Toast your spices for deeper flavor. This is optional but amazing. Before mixing, warm the cinnamon, nutmeg, and ginger in a dry skillet over medium heat for about 30 seconds until fragrant. It wakes up the essential oils and makes the spices taste like they just came from a spice market.
Use a kitchen scale for flour. If you’ve ever had a dry cake, it’s probably because you scooped flour straight from the bag. Spoon it into your measuring cup and level it off, or better yet, weigh it. 190 grams is the sweet spot.
I once forgot the baking powder entirely. The cake was flat and dense—edible, but not something I’d serve to company. Double-check your ingredients before you start mixing. It sounds obvious, but when you’re in a rhythm, it’s easy to miss something.
Variations & Adaptations
One of the things I love about this recipe is how flexible it is. Here are a few ways to make it your own:
Gluten-free version: Swap the all-purpose flour for a 1:1 gluten-free baking flour blend. I’ve used King Arthur Measure for Measure and Cup4Cup with great results. Add an extra tablespoon of flour to the mix since gluten-free batters tend to be slightly looser.
Dairy-free option: Use melted coconut oil or a plant-based butter in place of the regular butter. For the glaze, swap the milk for oat milk or almond milk. Coconut oil adds a subtle coconut flavor that actually pairs nicely with the honey and apples.
Add nuts or dried fruit: Fold in ½ cup of toasted walnuts or pecans along with the apples for extra crunch. Dried cranberries or chopped dried figs are also lovely here—just rehydrate them in warm water for 10 minutes first so they don’t steal moisture from the cake.
Spice it up: Add ¼ teaspoon of cardamom or allspice for a more complex flavor profile. I made a version with cardamom and orange zest once, and it was honestly one of the best cakes I’ve ever baked.
Make it a layer cake: Double the recipe and bake in two 9-inch pans. Fill and frost with a honey cream cheese frosting (8 oz cream cheese, ¼ cup butter, 2 cups powdered sugar, 2 tablespoons honey). Perfect for birthdays or special occasions.
Apple variety swap: No Honeycrisp? Use Gala, Fuji, or Braeburn. Each brings a slightly different sweetness and texture. Avoid McIntosh—they break down too much during baking and leave you with apple sauce pockets instead of chunks.
I tried a version with pear and honey once, substituting Bosc pears for the apples. It was good, but the pears released more liquid and the cake took longer to bake. If you go that route, reduce the honey by 2 tablespoons to compensate for the extra moisture.
Serving & Storage Suggestions
This cake is versatile enough to fit almost any occasion. Here’s how I like to serve it:
For breakfast: Slice it thick and serve with a hot cup of coffee or a cozy pumpkin chai latte. The cake isn’t overly sweet, so it works surprisingly well as a morning treat.
For dessert: Warm a slice for 10 seconds in the microwave and top with vanilla ice cream or a dollop of lightly sweetened whipped cream. A drizzle of warm honey on top takes it over the edge.
For a fall gathering: Arrange slices on a wooden board with apple slices, a small bowl of honey, and maybe some sharp cheddar cheese. Yes, cheese and apple cake work together—try it before you judge.
Storage: Keep the cake covered at room temperature for up to 3 days. The honey and apples keep it remarkably moist. If you live in a humid climate, store it in the fridge to prevent mold—just bring slices to room temperature before serving for the best texture.
Freezing: Wrap the unglazed cake tightly in plastic wrap, then foil, and freeze for up to 3 months. Thaw overnight in the fridge, then bring to room temperature before glazing and serving. I’ve frozen this cake twice now and it comes out just as good as fresh.
Reheating: Microwave individual slices for 10-15 seconds. For a whole cake, warm it in a 300°F oven for 10 minutes. The flavors actually deepen after a day or two, so don’t be surprised if day-old cake tastes even better.
One thing I love about this recipe is that it’s perfect for making ahead. Bake it the day before your gathering, let it cool completely, wrap it up, and glaze it just before serving. One less thing to worry about on the day of.
Nutritional Information & Benefits
Per slice (based on 10 servings, without glaze):
- Calories: 285
- Fat: 11g
- Saturated Fat: 6g
- Carbohydrates: 44g
- Fiber: 2g
- Sugar: 30g
- Protein: 4g
This cake isn’t health food, but it’s made with real ingredients that offer some benefits. Honey contains antioxidants and has antibacterial properties—plus it’s easier on blood sugar than refined sugar. Honeycrisp apples are packed with fiber and vitamin C, and the cinnamon helps regulate blood sugar levels.
If you’re watching your sugar intake, you can reduce the honey to ½ cup and add an extra apple for natural sweetness. The texture will be slightly different, but it still works. For a lower-fat version, substitute half the butter with unsweetened applesauce—just know the cake will be a bit denser.
This recipe contains gluten, dairy, and eggs. For a gluten-free option, see the variations section above. For a dairy-free version, use plant-based butter and milk.
I like to think of this cake as a “sometimes food”—something you make when you want to celebrate fall, share with friends, or just treat yourself after a long week. And honestly, that’s exactly what dessert should be.
Conclusion
This Honeycrisp Apple Honey Cake is the kind of recipe that earns a permanent spot in your fall baking rotation. It’s simple enough for a Tuesday night, special enough for Thanksgiving, and forgiving enough that even a beginner baker can pull it off with confidence.
What I love most about this cake is how honest it is. No fancy techniques, no obscure ingredients, no pretense. Just good butter, good honey, good apples, and a little bit of patience. It tastes like the season in the best possible way—warm, sweet, and just a little bit spiced.
I’d love to hear how yours turns out. Did you add walnuts? Swap the apples for pears? Forget the glaze and eat it warm out of the pan? (No judgment there—I’ve done it.) Drop a comment below and let me know how you made this recipe your own. And if you’re looking for more fall inspiration, try my cozy crockpot pumpkin chili for a savory counterpart to this sweet treat.
Happy baking, friends. May your kitchen smell like honey and apples, and may your cake come out perfectly every time.
Frequently Asked Questions
Can I use a different type of apple?
Absolutely. Gala, Fuji, Braeburn, and Pink Lady all work well. Just avoid Red Delicious (too mealy) and Granny Smith (too tart for this particular recipe). The key is using apples that hold their shape during baking.
Can I make this cake ahead of time?
Yes, and it actually gets better after a day. Bake the cake, let it cool completely, wrap it tightly, and store at room temperature. Glaze it just before serving for the best presentation.
Why did my apple cake sink in the middle?
This usually happens for one of three reasons: the oven wasn’t hot enough (invest in an oven thermometer), the batter was overmixed (develops too much gluten), or the cake was underbaked. Make sure your oven is fully preheated and test for doneness with a toothpick before pulling it out.
Can I freeze this cake?
Yes, and it freezes beautifully. Wrap the unglazed cake in plastic wrap, then a layer of foil, and freeze for up to 3 months. Thaw in the fridge overnight, bring to room temperature, then glaze and serve.
What can I use instead of honey?
Maple syrup or agave nectar both work, though the flavor will change. Maple syrup adds a woodsy note that pairs well with the apples. If using maple syrup, reduce the amount by 2 tablespoons since it’s thinner than honey.
Pin This Recipe!
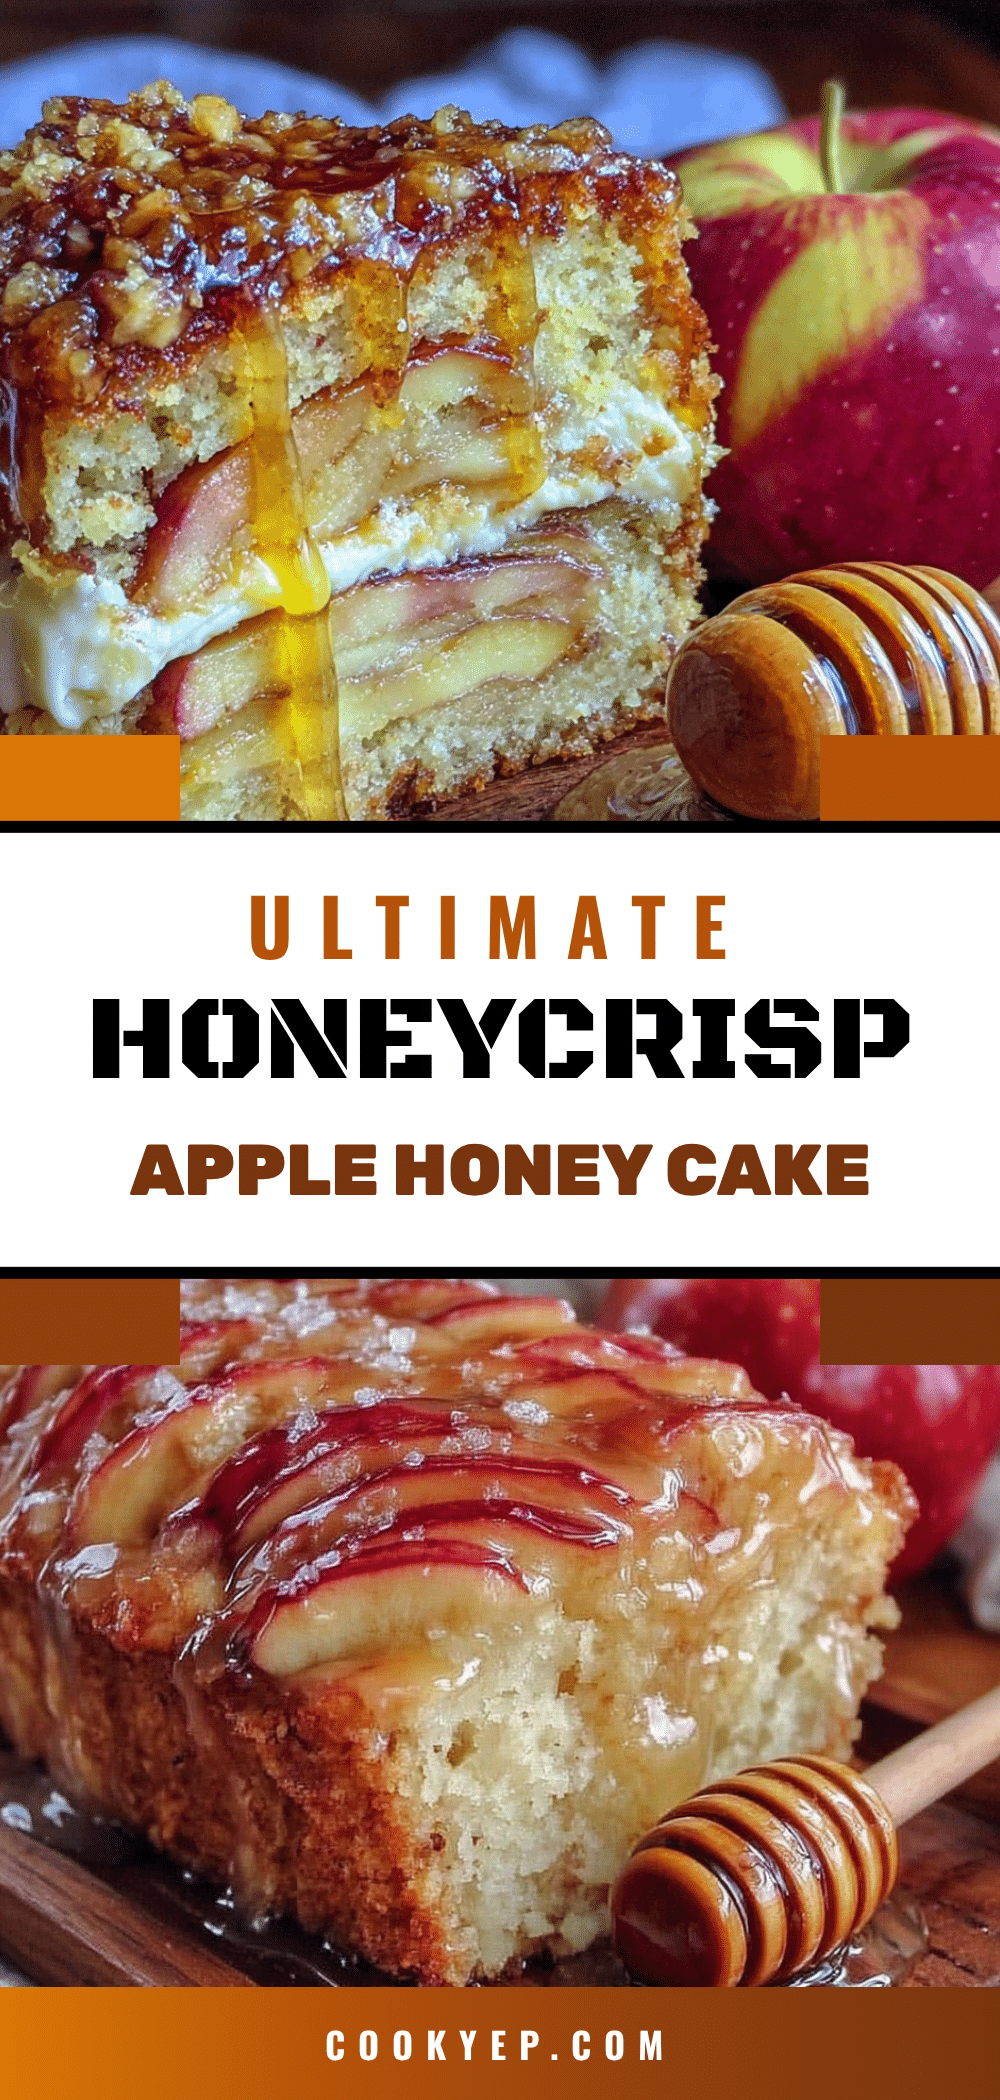
Best Honeycrisp Apple Honey Cake: Easy Homemade Recipe
A tender, honey-sweetened cake loaded with fresh Honeycrisp apples. This simple one-bowl recipe creates a moist, flavorful cake that tastes like fall, perfect for breakfast or dessert.
- Prep Time: 20 minutes
- Cook Time: 40-45 minutes
- Total Time: 1 hour 5 minutes
- Yield: 10 servings 1x
- Category: Dessert
- Cuisine: American
Ingredients
- 2 medium Honeycrisp apples (about 300g total), peeled, cored, and chopped into ½-inch cubes
- ¾ cup (255g) mild honey (such as clover or orange blossom)
- ½ cup (113g) unsalted butter, melted and slightly cooled
- ¼ cup (50g) granulated sugar
- 2 large eggs, room temperature
- 1 teaspoon vanilla extract
- 1½ cups (190g) all-purpose flour, spooned and leveled
- 1½ teaspoons baking powder
- ½ teaspoon baking soda
- ½ teaspoon fine sea salt
- 1 teaspoon ground cinnamon
- ¼ teaspoon ground nutmeg
- ¼ teaspoon ground ginger (optional)
- For the honey glaze (optional):
- ½ cup (60g) powdered sugar
- 2 tablespoons (42g) honey
- 1–2 tablespoons milk or cream
Instructions
- Preheat oven to 350°F (175°C). Grease a 9-inch round cake pan and line the bottom with parchment paper.
- Prep the apples: Peel, core, and chop apples into ½-inch cubes (about 2 cups). Toss with 1 tablespoon of the measured flour to prevent sinking.
- Melt the butter and let cool for 5 minutes.
- In a large bowl, whisk together melted butter, honey, granulated sugar, eggs, and vanilla extract until smooth and slightly lighter in color, about 30 seconds.
- In a separate small bowl, whisk together flour, baking powder, baking soda, salt, cinnamon, nutmeg, and ginger.
- Add dry ingredients to wet mixture. Fold gently with a rubber spatula until just combined—a few lumps are fine. Do not overmix.
- Gently fold in the floured apple cubes until evenly distributed.
- Scrape batter into prepared pan and spread evenly.
- Bake for 40-45 minutes, until a toothpick inserted in the center comes out clean or with a few moist crumbs. Tent with foil if browning too quickly.
- Cool in pan on a wire rack for 15 minutes. Run a knife around the edge, invert onto rack, remove parchment, and flip right-side up to cool completely.
- For the glaze: Whisk together powdered sugar, honey, and 1-2 tablespoons milk/cream until smooth. Drizzle over completely cooled cake.
Notes
Don’t overmix the batter—mix just until flour disappears. Use room temperature eggs. Check for doneness early (at 38 minutes). Let cake cool completely before glazing. Toast spices for deeper flavor. Use a kitchen scale for flour for best results. Cake keeps at room temperature for up to 3 days or freezes for up to 3 months (unglazed).
Nutrition
- Serving Size: 1 slice (1/10 of cak
- Calories: 285
- Sugar: 30
- Sodium: 240
- Fat: 11
- Saturated Fat: 6
- Carbohydrates: 44
- Fiber: 2
- Protein: 4
Keywords: honey cake, apple cake, honeycrisp apple cake, fall dessert, easy cake recipe, one bowl cake, honey glaze